
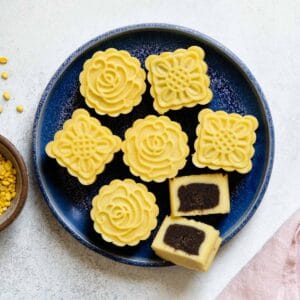
Several years ago, Mama Lin visited my aunt in Oregon, who made delicious mung bean cakes (綠豆糕). In Chinese, 綠豆糕 means “green bean cake” and is pronounced look dau go in Cantonese and lü dou gao in Mandarin. My mom enjoyed the mung bean cakes so much that she asked my aunt for a recipe, which she then passed on to me. I’ve made the mung bean cakes quite a few times and recently discovered that I like the cakes even more when I add coconut oil to the recipe.
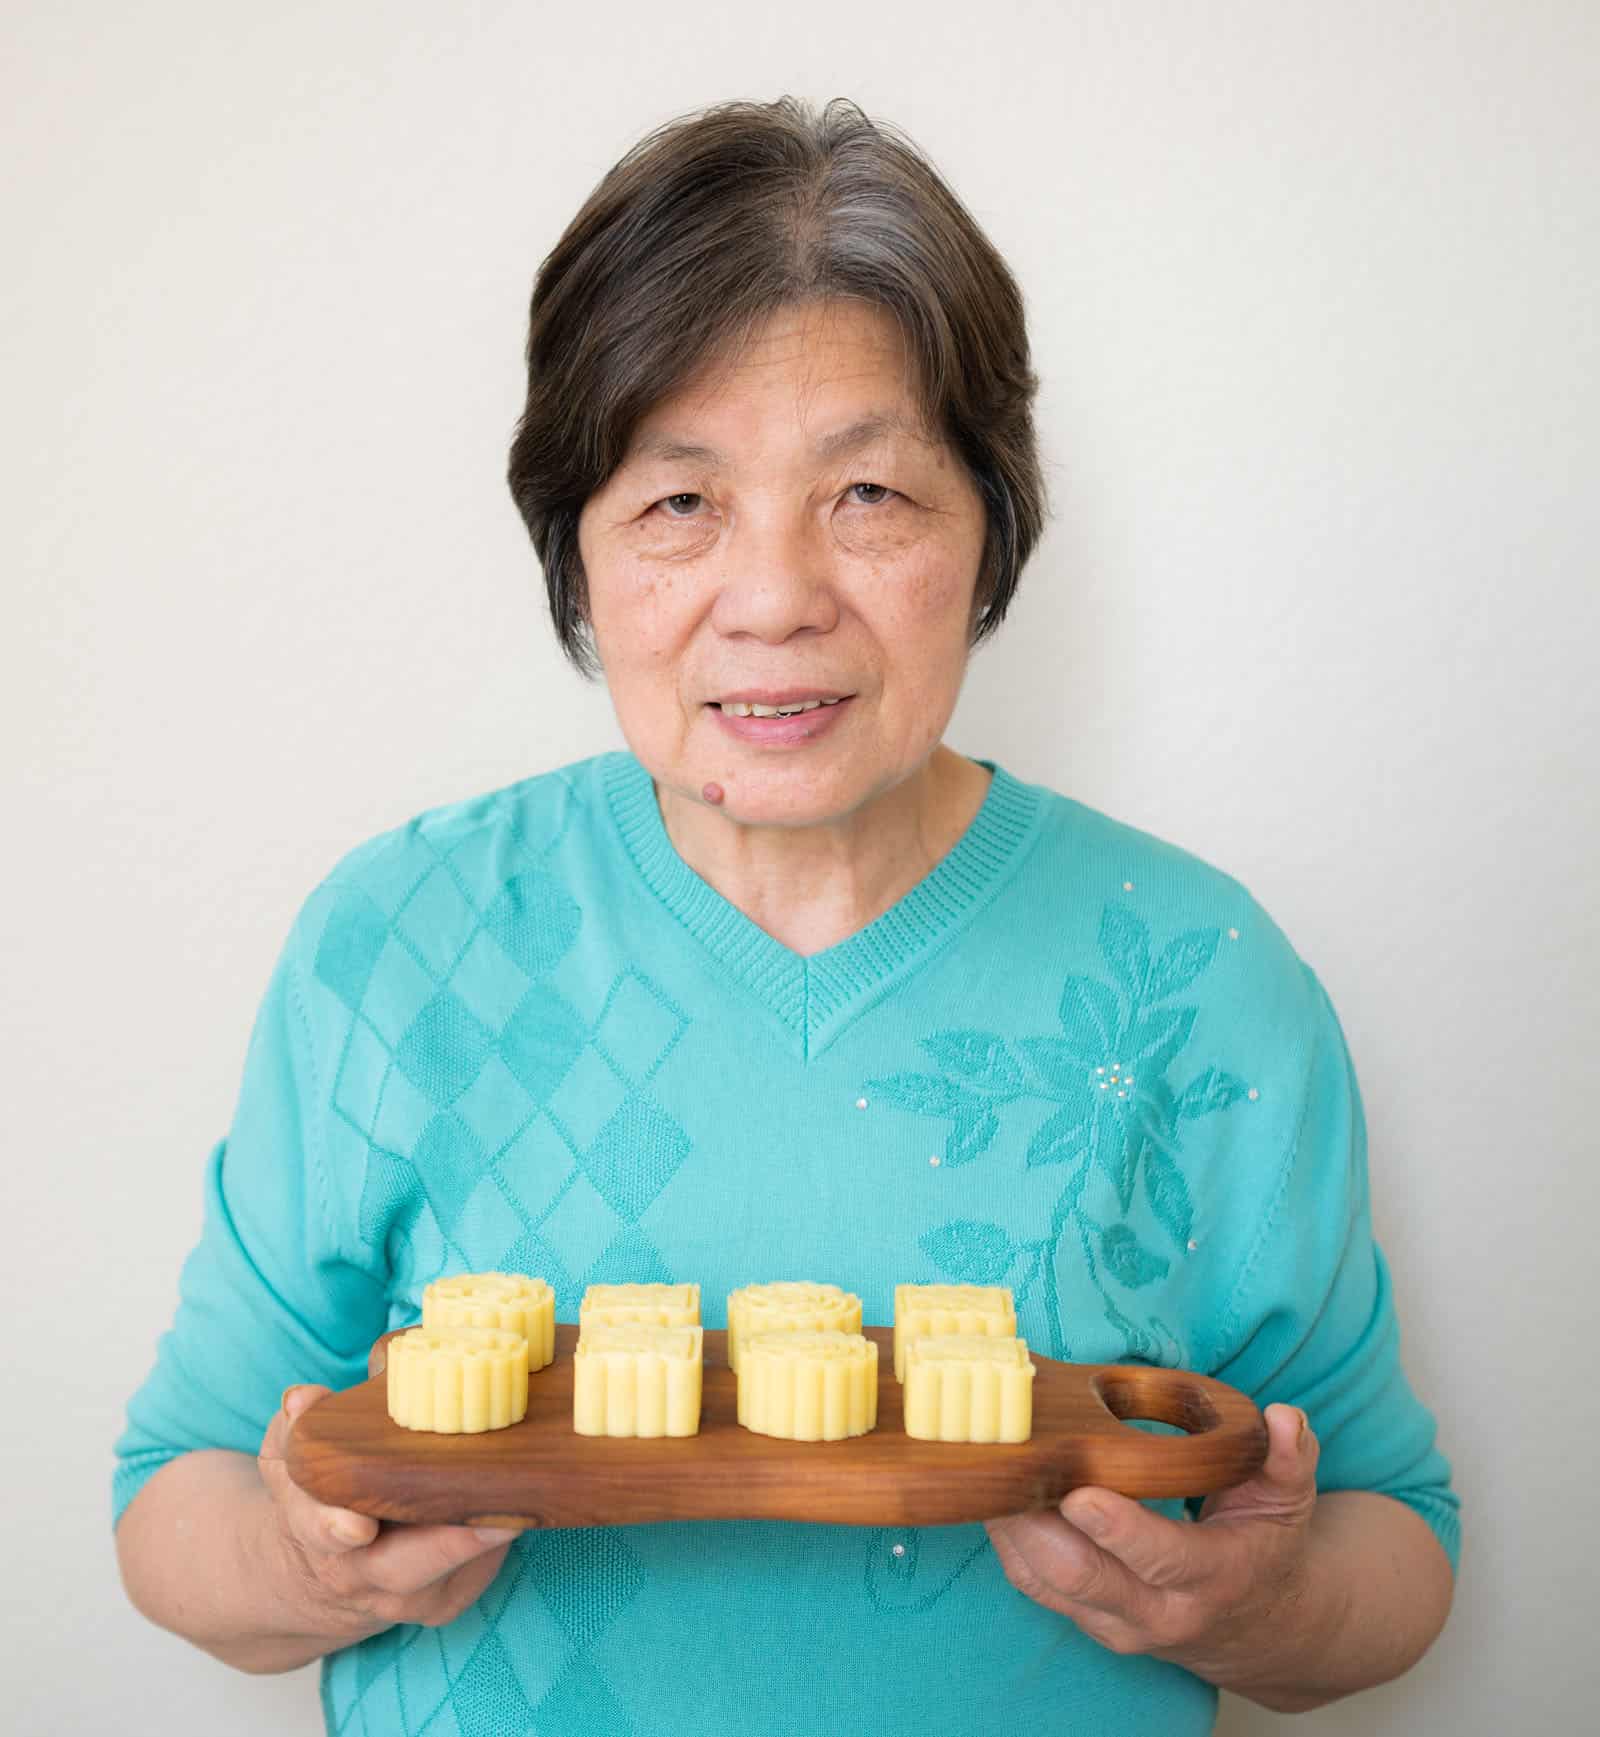
Although the mung bean cakes look like mooncakes (particularly because they’re shaped with a mooncake press), they are not traditional mooncakes. Traditional southern Chinese mooncakes are baked pastries with a thin layer of dough on the outside, encasing a bean paste and one or two salted egg yolks.
I still haven’t mustered the willpower to develop a traditional mooncake recipe from scratch because there are so many steps involved. Therefore, these mung bean cakes are going to be the closest thing to a mooncake that I’ll be making to celebrate the Mid-Autumn Festival (中秋節/中秋节) this year.
HOW TO MAKE MUNG BEAN CAKES
PREPARE BEANS

For this recipe, you’ll need split mung beans (also known as moong dal or mung dal in Hindi). Rinse the beans with 2 to 3 changes of water to wash away some of the yellow color.

Transfer the beans to a bowl and fill the bowl with enough water so that the water line is about 2 inches above the beans. Soak the beans overnight.
STEAM BEANS
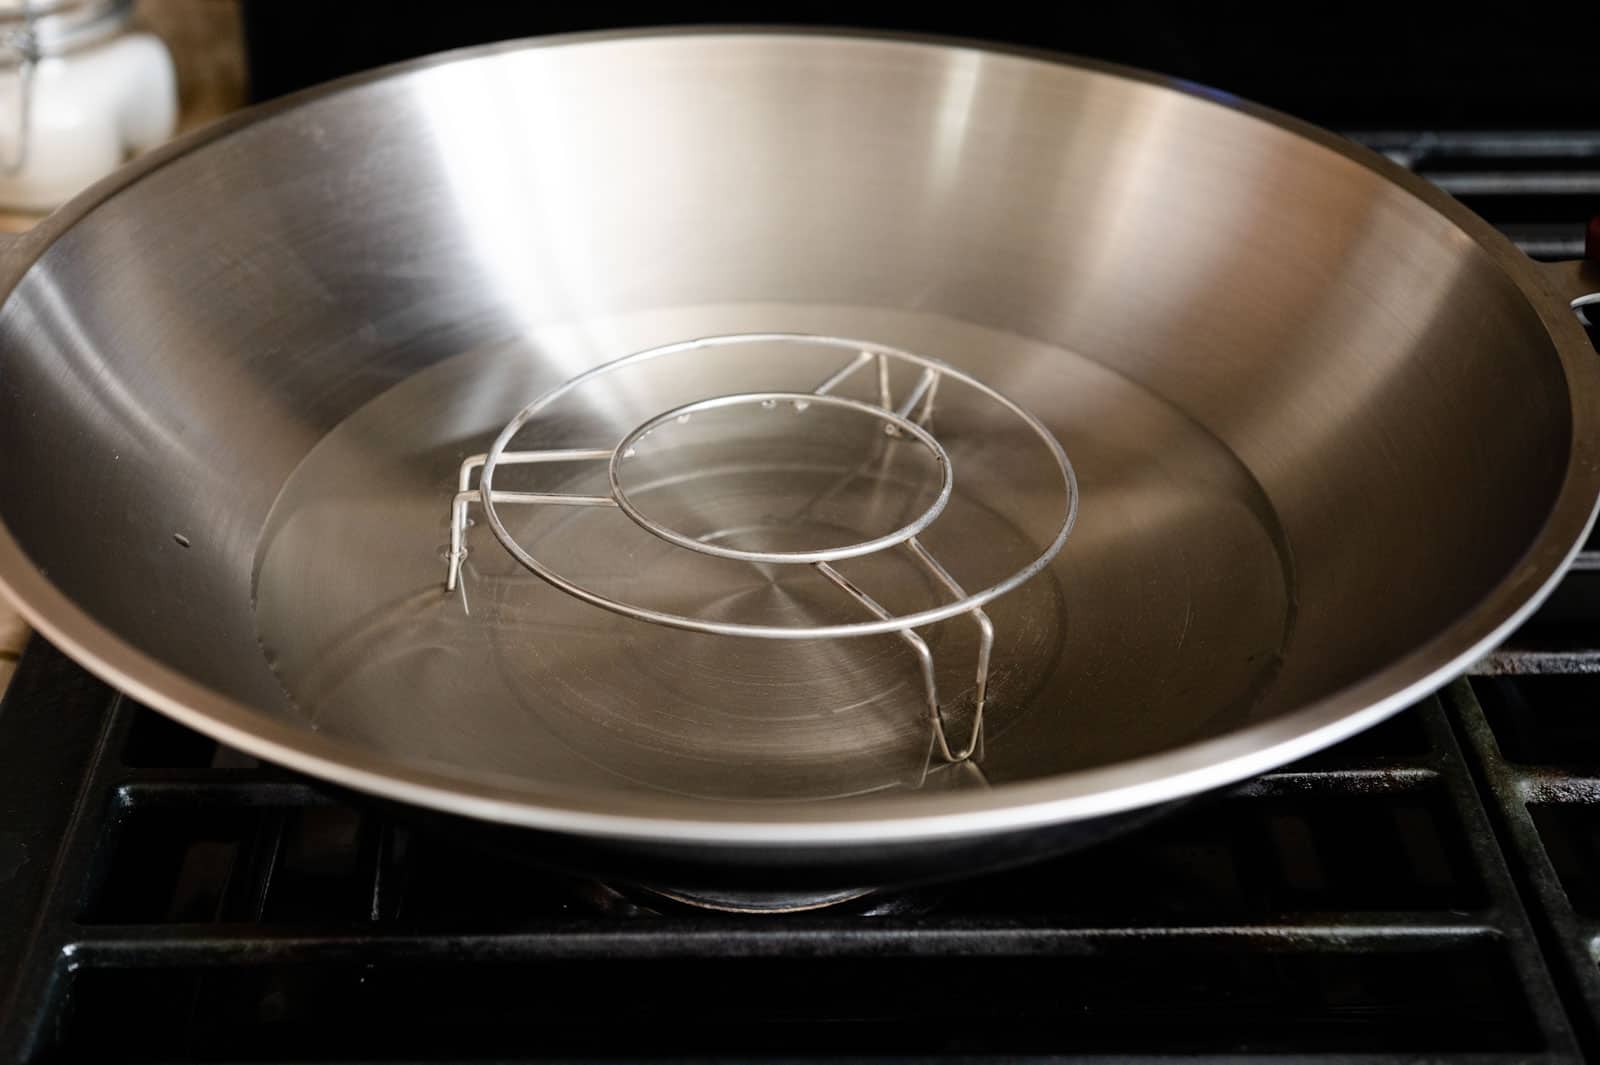
Add a steaming rack to a large wok. Fill the wok with water, until there’s about a 1/2-inch gap between the water level and the top of the steaming rack. Cover the wok and bring the water to boil.

Drain the beans and spread them over a large plate or pan that you can use for steaming. Carefully place the plate or pan of beans over the steaming rack, cover the wok, and steam the beans on medium-high heat for 25 minutes.
After 25 minutes of steaming, a lot of the water inside the wok will have evaporated. Fill a measuring cup with a spout (like a Pyrex) with about 3/4 cup of water. Carefully pour the water into the bottom of the wok.
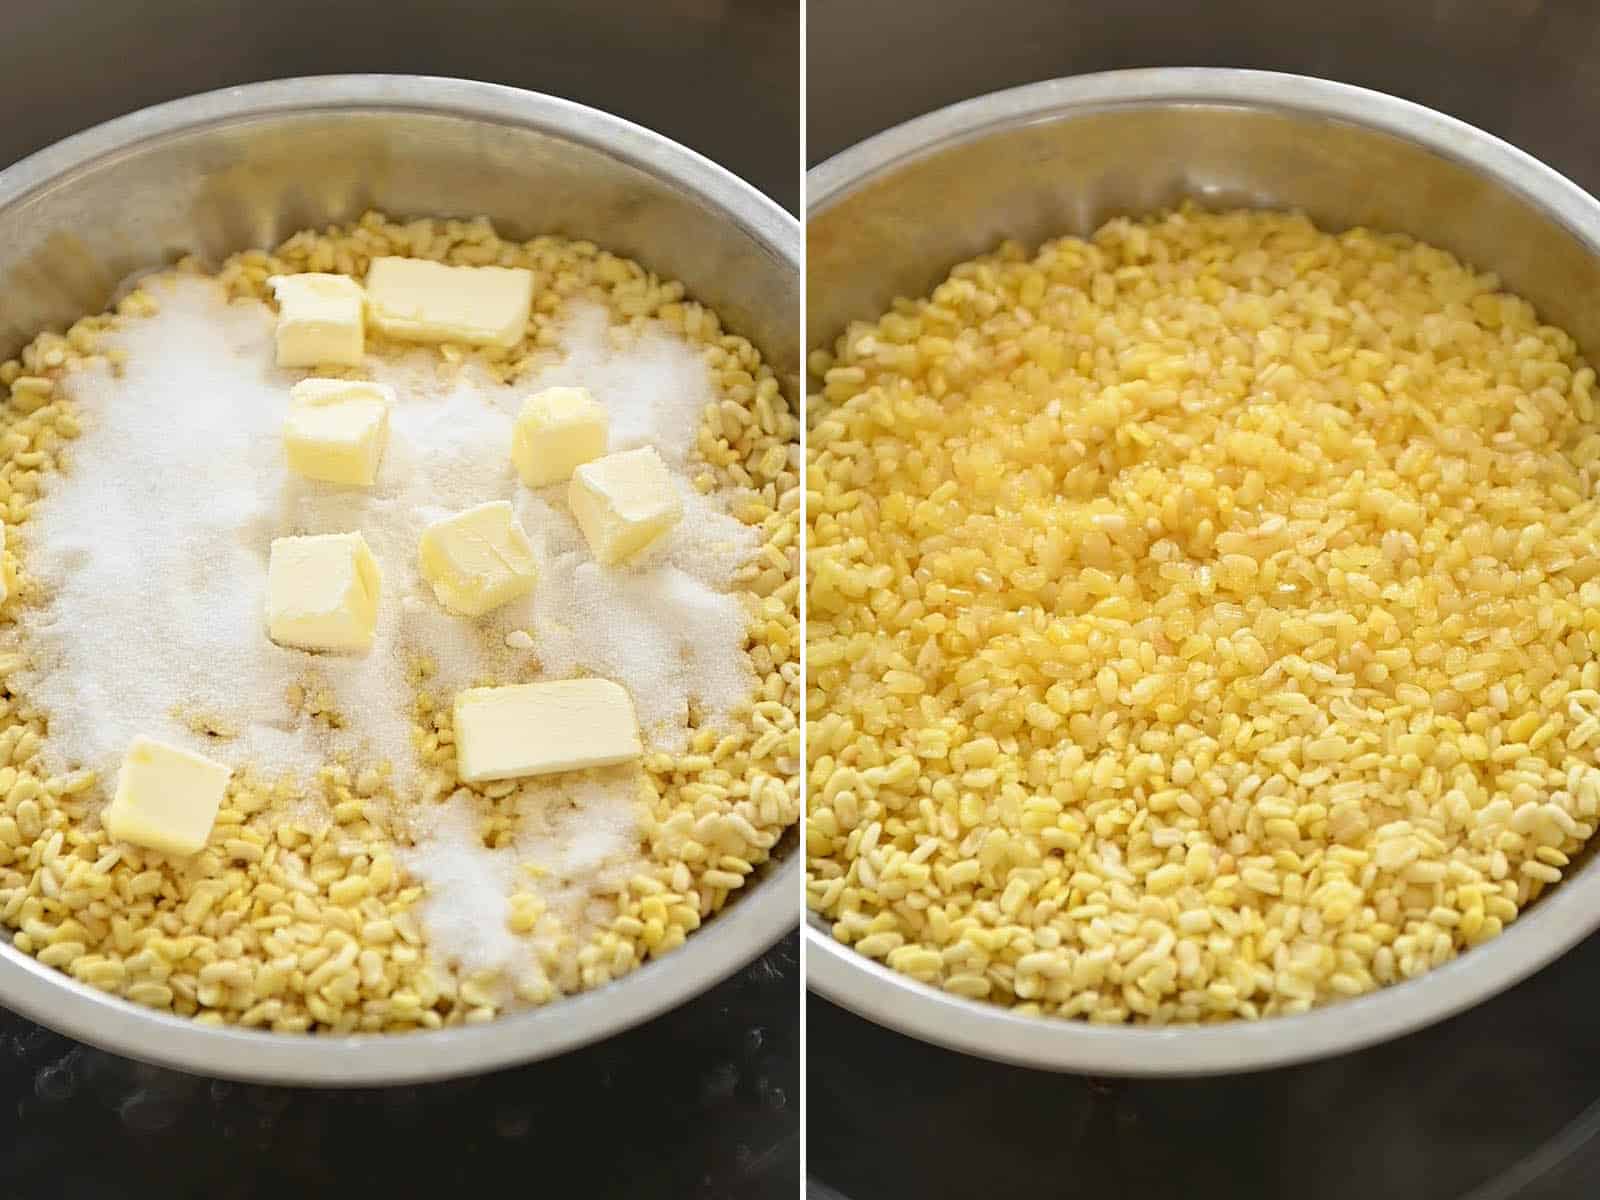
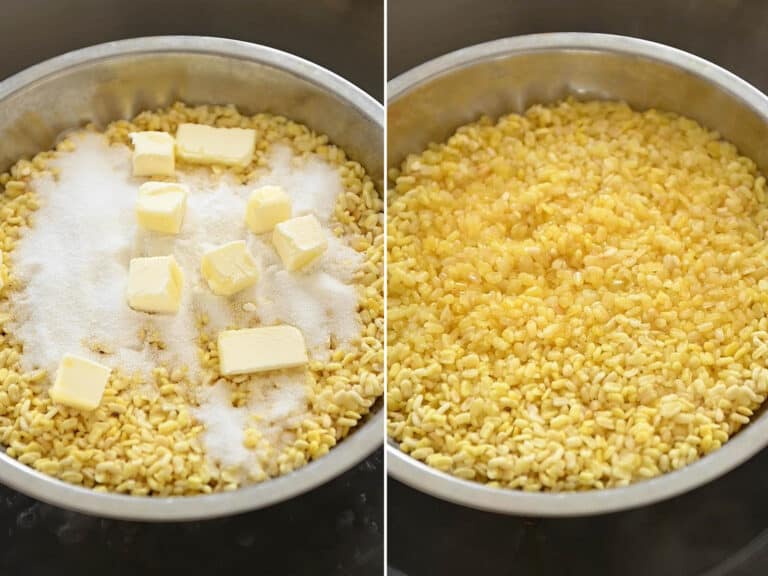
Sprinkle the sugar all over the beans. Then, spread out small cubes of butter over the sugar. Cover the wok, and steam for another 5 to 7 minutes. Turn off the heat. The butter and sugar should have melted already. Check to make sure the beans are done cooking by crushing a bean with your fingers. It should break down very easily.
SHAPE RED BEAN PASTE FILLING
The mung bean cake recipe that my aunt shared with Mama Lin used red bean paste as a filling. You can use my red bean paste recipe here to cook the bean paste or purchase red bean paste. If you’re buying the paste, make sure the paste is firm enough to roll into balls. If not, pan fry the paste to reduce the liquid, until the paste is firm.
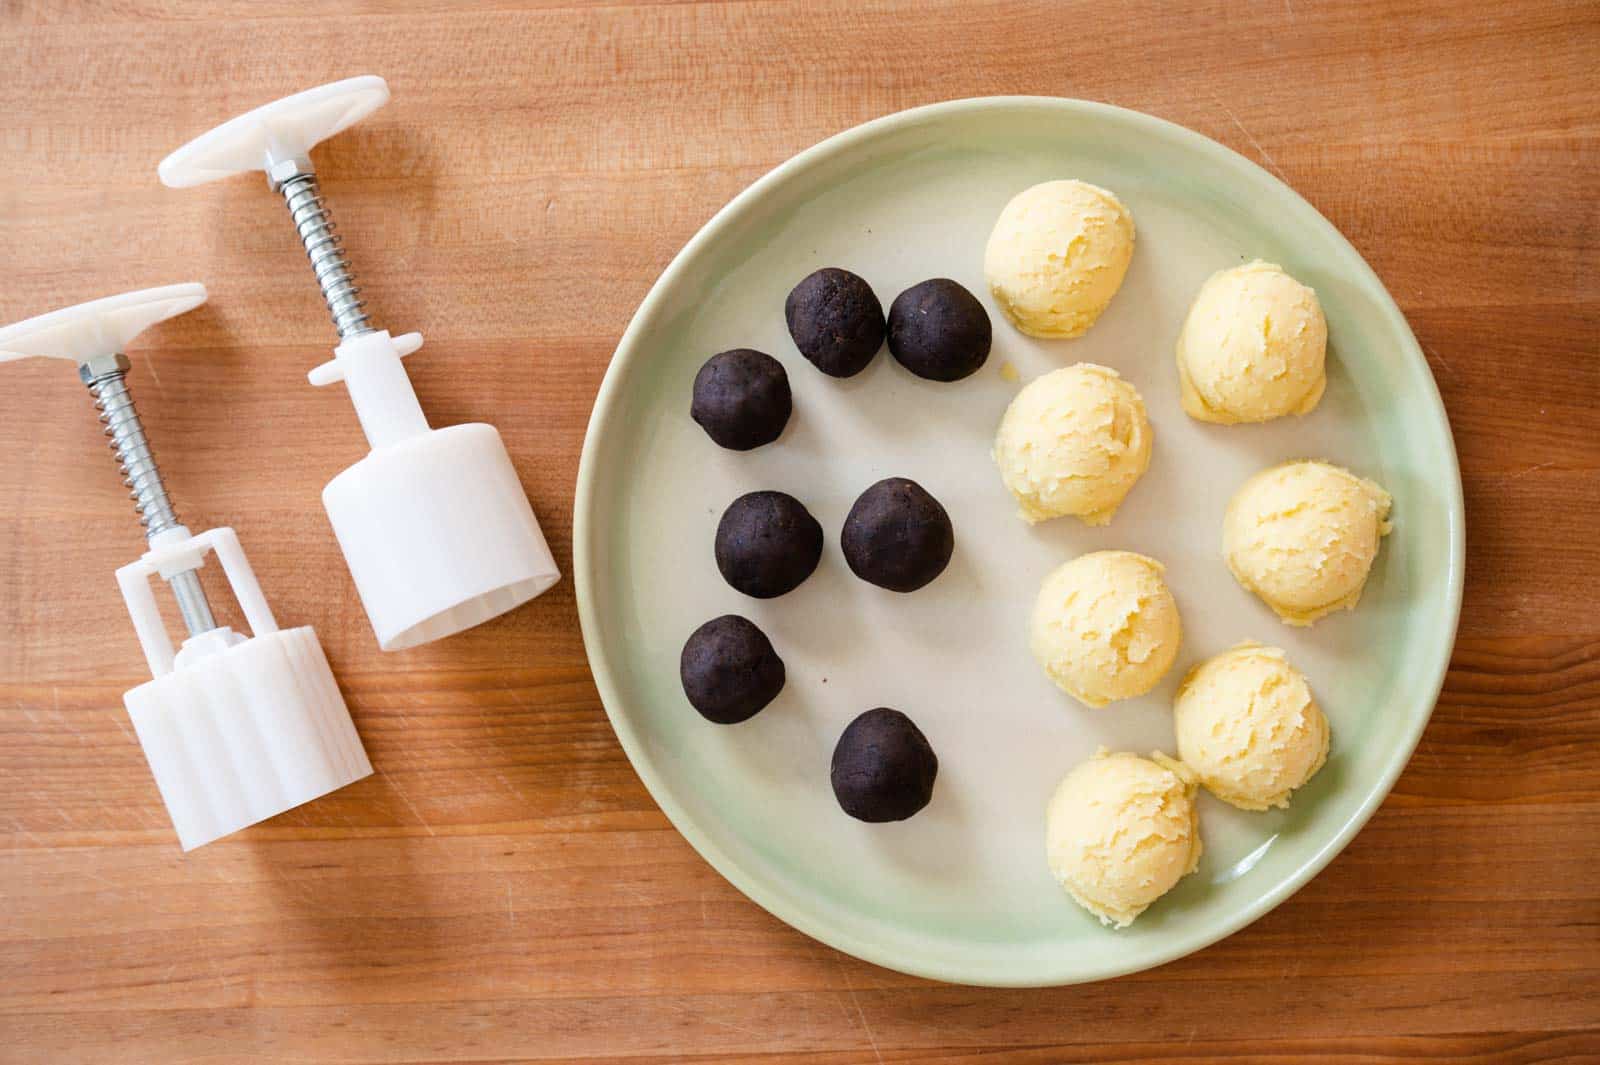
While the beans are steaming, shape the red bean paste into small balls. You’ll need 14 to 15 pieces of red bean paste, each weighing 15 grams, about 1 flat tablespoon of bean paste. I like using a small cookie scoop (affiliate link) for measuring this amount. You’ll likely have red bean paste leftover, which you can snack on or refrigerate/freeze for later use.
FINISH MAKING MUNG BEAN PASTE
Right after you finish steaming the beans, transfer the cooked beans mixture and the coconut oil into the bowl of a food processor. You may want to use an oven mitt or a tea towel to hold onto the hot plate or pan. Blend everything until smooth.
Some recipes suggest straining the mung bean paste through a fine mesh strainer to make it smoother. I don’t find it necessary; I don’t mind chewing on a few beans here and there. Moreover, the mung bean paste cracks easily once it cools, so it’s better to move on to the next step quickly rather than strain the bean paste. However, if you decide to strain this paste, reheat it in a nonstick pan for a minute or two.
Scoop out seven (7) 30-gram pieces of mung bean paste straight from the bowl of the food processor. Don’t even bother transferring the paste to a bowl, as this will cool it down. I like using a medium cookie scoop (affiliate link) to measure this amount. Because of the mung bean paste’s tendency to crack, shape and press 7 mung bean cakes at a time.
Cover the rest of the mung bean paste with the lid of the food processor to keep it warm.
FORM MUNG BEAN BALLS

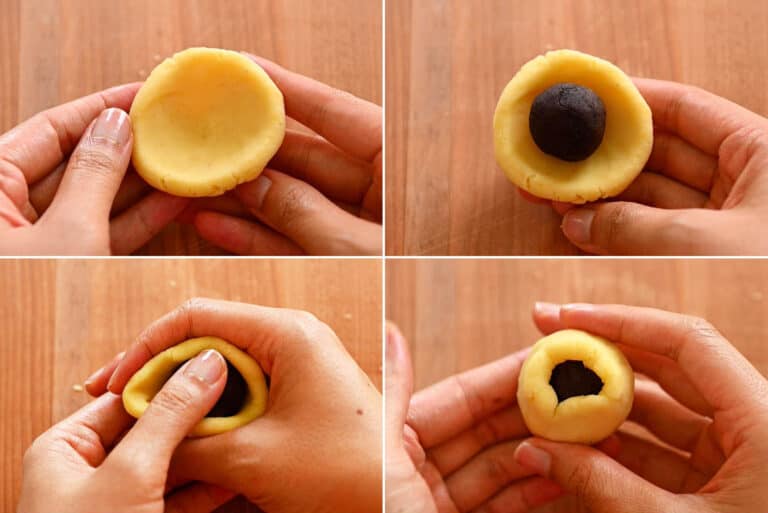
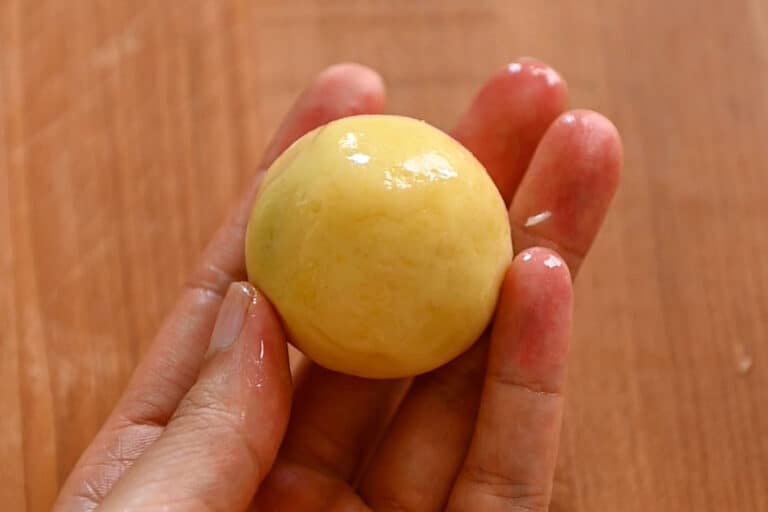
Take one piece of mung bean paste and roll it into a ball. Using your fingers, shape the paste into a shallow bowl, about 2 to 2 1/2 inches wide (see photo above). If you find it difficult to shape the paste into a bowl, just shape it into a flat disc, about 2 1/2 inches wide.
Take a piece of the red bean paste and place it onto the center of the mung bean bowl/disc. Wrap the mung bean paste around the ball of red bean paste. I like to use the crook of my right hand to mold the mung bean layer around the red bean paste.

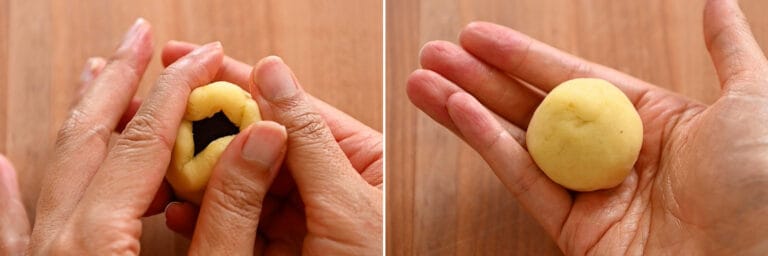
Pinch the mung bean layer together so that the red bean paste is fully encased. Roll the ball of dough in your hands until the surface is smooth. Set the ball of dough aside. Continue wrapping the remaining 6 pieces of mung bean paste around the red bean paste balls.
SHAPE MUNG BEAN CAKES IN MOONCAKE PRESS
You’ll need a 50-gram circular or square mooncake press to shape the mung bean cakes. The spring-release mooncake press is the easiest to use. I got my mooncake presses on Amazon (affiliate link), but you can find more designs on Etsy as well.

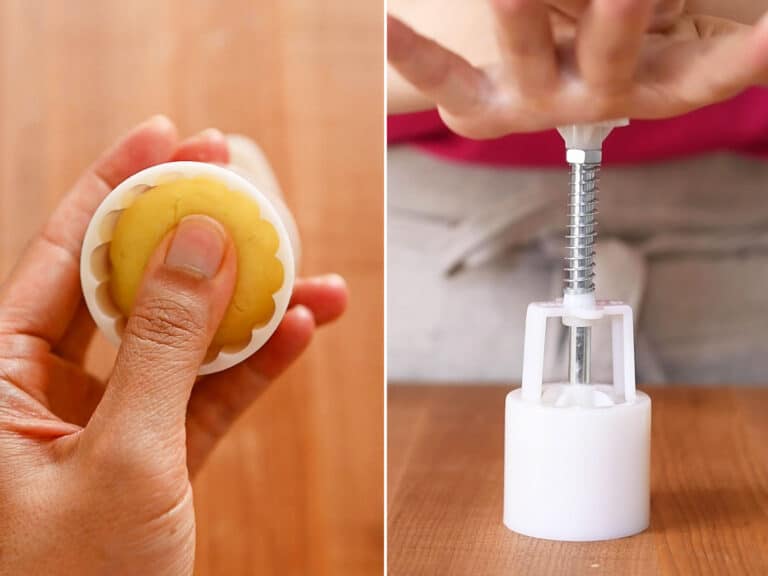
Take one of the large balls of dough and place it into the mooncake press. Use your fingers to gently press the dough into the mold so it doesn’t slip out when you flip the mooncake press over onto your work surface.
Press down on the mooncake press with medium pressure and then release the cake. Transfer the mung bean cake to a plate. Continue shaping the remaining large balls of dough with the mooncake press.
FINISH SHAPING REMAINING PASTE TO MUNG BEAN CAKES
Uncover the remaining mung bean paste, divide into 30-gram pieces, wrap around the balls of red bean paste, and shape into cakes with the mooncake press.
TROUBLESHOOTING TIPS

Mung Bean Dough Keeps Cracking: It is very important that you shape the mung bean layer while it’s still very warm. Otherwise, the dough will crack. That’s why I recommend scooping the mung bean paste straight from the bowl of a food processor instead of transferring it to another container.
However, if the dough is still cracking a lot, mix in 1 or 2 teaspoons of water or oil to moisten the mung bean dough. I should also note that if you reduce the amount of sugar for the mung bean paste, this will increase the likelihood of cracking. That’s because sugar provides moisture and liquifies as it dissolves. If you reduce the amount of sugar in the mung bean paste significantly, the paste will be less moist, thereby increasing the chances for cracking.

Cake Getting Stuck to Mooncake Press: If the mung bean cake is stuck to the press as you release the cake, remove the cake completely. Then, use a toothpick to clean out the crevices of the mooncake stamp. Before you shape the next mung bean cake, rub a thin layer of oil over the large dough balls before inserting into the mooncake press. You can use any neutral-flavored oil like sunflower or vegetable oil.

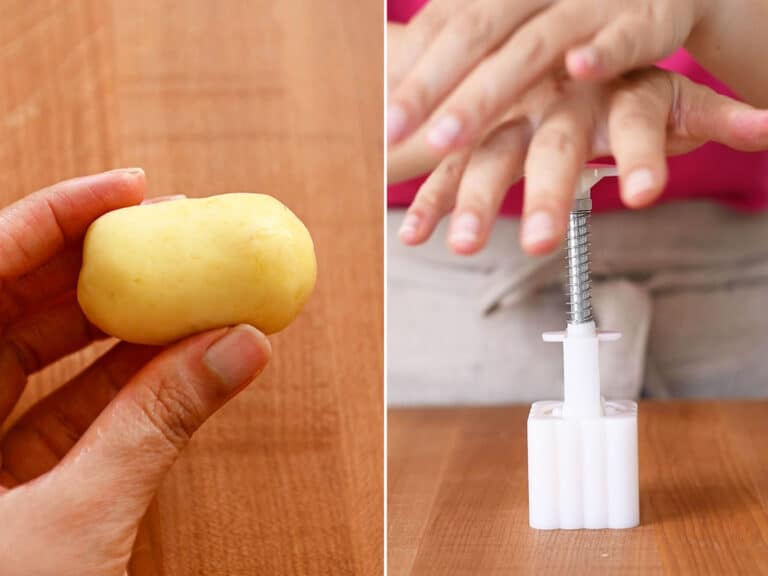
Using Square Mooncake Presses: The large dough balls might not fit easily into a square mold. Shape the large ball of dough into an oblong oval shape, like a thick log. Now, when you insert the dough into the mooncake press, the dough won’t scrape against the edges of the press.

EATING AND STORING MUNG BEAN CAKES
Enjoy the mung bean cakes right away or save for later. You can leave them out at room temperature for a few hours. Because the tops of the cake crust over easily, make sure to cover them up. If you’re not going to eat them in the next few hours, refrigerate them in a container. The cakes are also pleasant to eat when they’re chilled.
Eat the mung bean cakes within 3 to 4 days as they can develop mold over time.

MAKING CAKES WITHOUT FILLING
Although my aunt’s recipe uses red bean filling, you can make the cakes with mung bean paste only! Just measure out 30-gram pieces of the mung bean paste and shape them with the mooncake press.
Mung Bean Cakes (綠豆糕)
Equipment
- large wok
Ingredients
- 3/4 cup (155g) split mung beans (moong dal)
- 1 to 1 1/4 cups (225g) red bean paste, (see note 2)
- 7 tablespoons (84g) sugar, use 6 tablespoons (72g) if you want less sweet cakes (see note 3)
- 3 tablespoons (45g) unsalted butter, cut into small cubes
- 1 tablespoon virgin or unrefined coconut oil
Instructions
Prepare Beans
- Rinse the split mung beans with 2 to 3 changes of water to wash away some of the yellow color from the beans. Transfer the beans to a bowl and fill the bowl with enough water so that the water line is about 2 inches above the beans. Soak the beans overnight. (See note 4 for Instant Pot directions).
Steam Beans
- Add a steaming rack to a large wok. Fill the wok with water, until there’s about a 1/2-inch gap between the water level and the top of the steaming rack. Cover the wok and bring the water to boil.
- Drain the beans and spread them over a large plate or pan that you can put into the steamer. Carefully place the plate or pan over the steaming rack, cover the wok, and steam the beans on medium-high heat for 25 minutes.
Shape Red Bean Paste Filling
- While the beans are steaming, shape the red bean paste into small balls. You’ll need 14 to 15 pieces of red bean paste, each weighing 15 grams, about 1 flat tablespoon of bean paste. I like using a small cookie scoop for measuring this amount. You’ll likely have red bean paste leftover, which you can snack on or refrigerate/freeze for later use.
Finish Steaming Beans
- After 25 minutes of steaming, a lot of the water inside the wok will have evaporated. Fill a measuring cup with a spout (like a Pyrex) with about 3/4 cup of water. Carefully pour the water into the bottom of the wok.
- Sprinkle the sugar all over the beans. Then, spread out small cubes of butter over the sugar. Cover the wok, and steam for another 5 to 7 minutes. Turn off the heat. Check to make sure the beans are done cooking by crushing a bean with your fingers. It should break down very easily.
Make Bean Paste
- While the beans are still hot, transfer the bean mixture and the coconut oil into the bowl of a food processor. You may want to use an oven mitt or a tea towel for holding onto the hot plate or pan. Blend everything until smooth.
- This mung bean paste can crack easily when it’s cool, so work with this paste while it is still warm. Scoop out seven (7) 30-gram pieces of mung bean paste straight from the bowl of the food processor. Don't even bother transferring the paste to a bowl, as this will cool it down. I like using a medium cookie scoop to measure this amount. Because of the mung bean paste's tendency to crack, shape and press 7 mung bean cakes at a time. Cover the rest of the bean paste with the lid of the food processor to keep the mung bean paste warm.
Form Mung Bean Balls
- Take one piece of mung bean paste and roll it into a ball. Using your fingers, shape the paste into a shallow bowl, about 2 to 2 1/2 inches wide. If you find it difficult to shape the paste into a bowl, just shape it into a flat disc, about 2 1/2 inches wide.
- Take a piece of the red bean paste and place it onto the center of the mung bean bowl/disc. Wrap the mung bean paste around the ball of red bean paste. I like to use the crook of my right hand to mold the mung bean layer around the red bean paste.
- Pinch the mung bean layer together so that the red bean paste is fully encased. Roll the ball of dough in your hands until the surface is smooth. Set the ball of dough aside. Continue wrapping the remaining 6 pieces of mung bean paste around the red bean paste balls.
- If you are having trouble wrapping the mung bean layer around the red bean paste, see troubleshooting tips below.
Shape Mung Bean Cakes in Mooncake Press
- Take one of the large balls of dough and place it into the mooncake press. Use your fingers to gently press the dough into the mold so it doesn’t slip out when you flip the mooncake press over onto your work surface.
- Press down on the mooncake press with medium pressure and then release the cake. Transfer the mung bean cake to a plate. Continue shaping the remaining large balls of dough with the mooncake press.
- Uncover the remaining mung bean paste and finish shaping the remaining cakes.
- Enjoy the mung bean cakes right away or save for later. You can leave them out at room temperature for a few hours, but cover them up, as the tops of the cakes crust over easily. If you’re not going to eat them in the next few hours, refrigerate them in a container. The cakes are also pleasant to eat when they’re chilled. Eat the mung bean cakes within 3 to 4 days as they can develop mold over time.
Troubleshooting Tips
- If the mung bean layer keeps cracking, add 1 or 2 teaspoons of water or oil and work it into the paste. Note also that if you reduce the amount of sugar significantly, this increases the chances of cracking. See note 3 for more info.
- If the cake gets stuck to the mold, clean out the crevices of the mold with a toothpick. Then, rub a thin layer of oil (any neutral-flavored oil like sunflower or vegetable oil) over the large balls of dough before fitting it into the mooncake mold.
- If you are using a square mold, you’ll want to shape the large ball of dough into a slightly oblong, oval shape. When you insert the dough into the mooncake press, the dough won’t scrape against the sides of the press.
- If any of the bean paste is sticking to your hands, grease your hands with some oil a neutral oil or coconut oil would work.
Notes
- Dairy-Free/Vegan Version: You can substitute the butter with a neutral-flavored oil (such as sunflower, safflower, or vegetable oil) or a toasted nut oil (such as walnut, peanut, or hazelnut oil).
- Red Bean Paste: You should only need about 1 cup of red bean paste for this recipe, but have at least 1 1/4 cups ready, just in case. If you are making the red bean paste from my recipe, which yields 1 3/4 cups of paste, you’ll have plenty leftover. Snack on any leftovers or store them in the fridge or freezer.
- Using Less Sugar: Sugar liquifies as it dissolves. If you reduce the amount of sugar in the mung bean paste significantly, the paste will be less moist, thereby increasing the chances for cracking. When I was recipe testing, I noticed that the mung bean layer cracked a little when I used only 6 tablespoons of sugar. It shouldn’t be too big of a problem if you work quickly.
- Cooking Split Mung Beans in the Instant Pot: I used this tutorial from Runaway Rice as reference for cooking the mung beans. Add the rinsed mung beans and 1 1/3 cups water to the bowl of your Instant Pot. Cover it with the lid and cook on high pressure for 12 minutes. Once the cooking stops, let the beans sit for 10 minutes. Release any residual pressure by moving the pressure release to “Venting.” Transfer the beans to the bowl of a food processor, add the butter, sugar, and coconut oil, and blend until smooth. Because the bean paste is runnier when you cook the beans in the Instant Pot, you need to pan fry the bean paste in a nonstick pan. Cook the paste further over medium heat for 6 to 8 minutes, until the bean paste is firm enough that you can fold it around easily with a spatula (think soft Play-Doh texture). Truth be told, I didn’t like the texture of the resulting mung bean paste. The texture felt gluey and stuck to my teeth. I suppose you can try steaming the beans in the Instant Pot, but I have not tested that method yet.


Emily says
When I went to Taiwan, they had a similar cake to this except it had red beans inside and it was also made a similar way! I remember they made the shape with a wooden moon cake mold and they would slam it on the table! Didn’t even think they had a cute plastic mold like the one you got. Thanks for this!
drift boss says
It’s really delicious although for a dieter like me it’s a bit greasy
roller baller says
These cakes are extremely loved by Asians. I had a trip to Vietnam where it was very popular to make this type of cake and there were many different types of fillings.
usps tracking says
Many thanks for the insightful information you provided. It has been difficult for me to come up with numerous queries pertaining to this matter. I shall walk in your footsteps!
Andy (they/them) says
What a great recipe! I had a friend visiting (one with A Lot of food sensitives) and these were a huge hit with her! And so easy too, I was a little worried they’d be beyond me but they came out so cute and so good!
Lisa Lin says
Andy, thanks for trying this! So glad you enjoyed them!
dordle says
I recall that they constructed the shape with a wooden moon cake mold.