 I fell in love with paneer when I was in college and ate my first saag paneer. It was one of the dishes I ate where I thought that meat wasn’t necessary to make the meal more delicious. I loved the soft and slightly chewy texture of the cubed cheese, and it was the perfect sponge for all the spices in the saag paneer.
Paneer is a fresh cheese that is very common in Indian cuisine. I never cooked with it until last year, when I made a fried paneer recipe from Madhur Jaffrey’s Vegetarian India. Part of the battle is finding a store that carries the cheese in the first place. In Sacramento, you can find paneer at Nugget Markets, Sprouts, and Sacramento Foods Co-Op. You can also find it at Indian grocery stores.
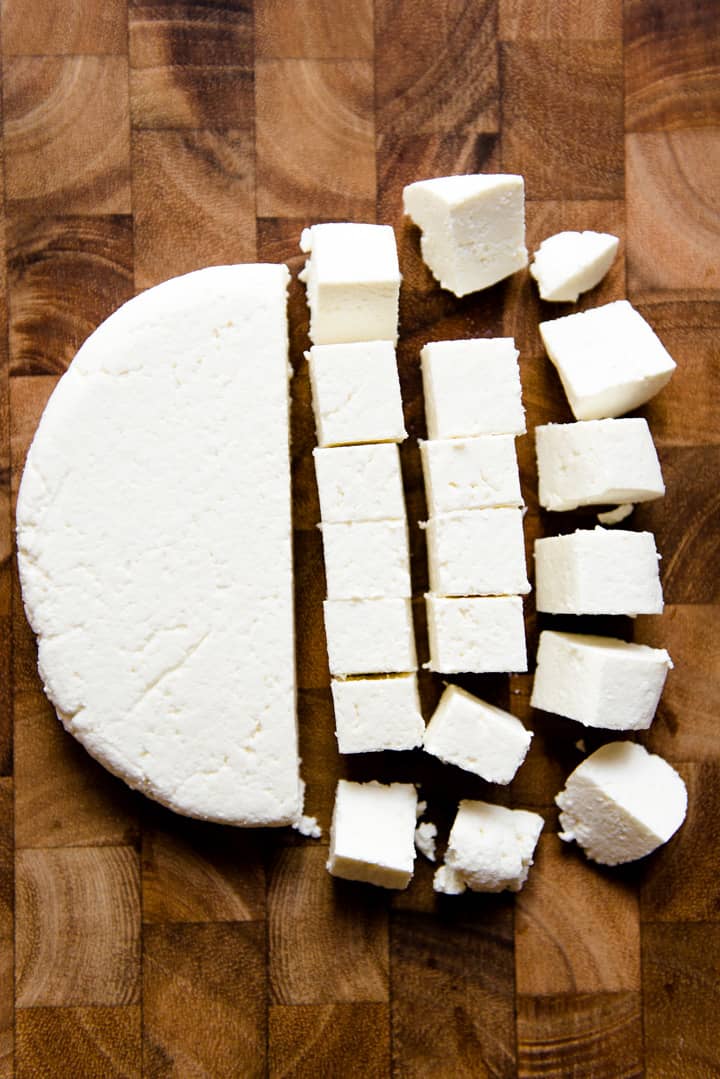
One thing that I didn’t expect from store-bought paneer was the difference in texture from fresh paneer. If you have ever eaten packaged halloumi, you’ll know what I mean. When you bite into the paneer, the cheese feels quite chewy, and it makes a little squeak against your teeth as you bite. I don’t mind that feeling at all, but not everyone enjoys it.
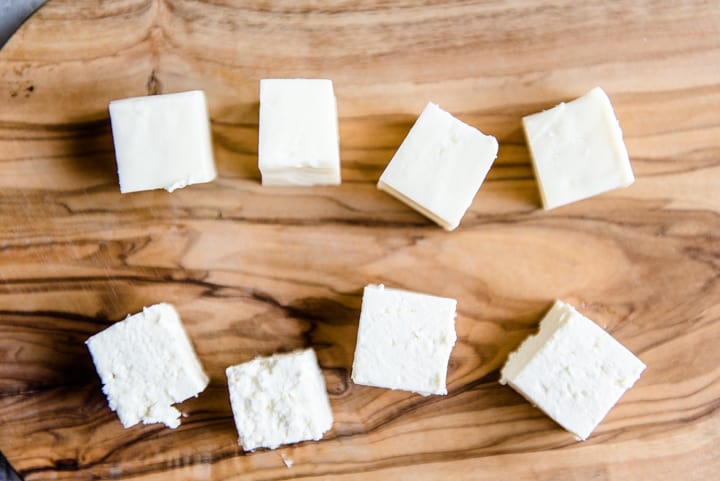
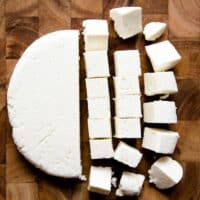
In the photo above, the top row is store-bought paneer, and the bottom row is homemade. As you can see, the store-bought cheese is smoother, and it looks like mozzarella. Conversely, you can see a lot of texture in the homemade version (from the curds), almost like tofu. It is a lot more crumbly when you slice into it, too.
Homemade paneer tends to have a softer, more crumbly texture. In comparison, the store-bought version is much more dense and firm.
HOW TO MAKE PANEER
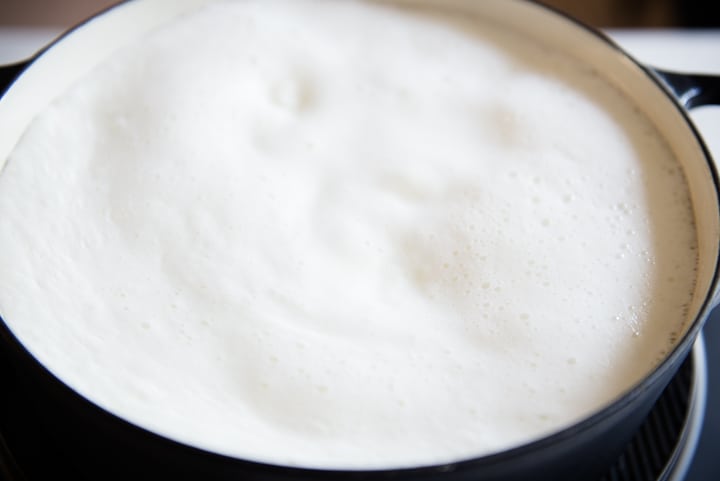
Making paneer at home is very easy. You want to start with whole milk because the texture of the cheese is creamier. Turn off the heat right when the milk boils. I usually boil the milk in a large pot with the lid on because it speeds up the boiling process. As a result, the milk tends not to burn on the bottom of the pot. The big issue with boiling milk with the lid on is that you need to pay attention to the stove. The milk can boil over quick and spill all over the stovetop.
Then, if you’re anything like me, you’ll forget about the spill and cook with the same hob soon afterwards. You’ll then start smelling something burning and then realize the area around the hob is dark brown from the burnt milk. Don’t make that same mistake.
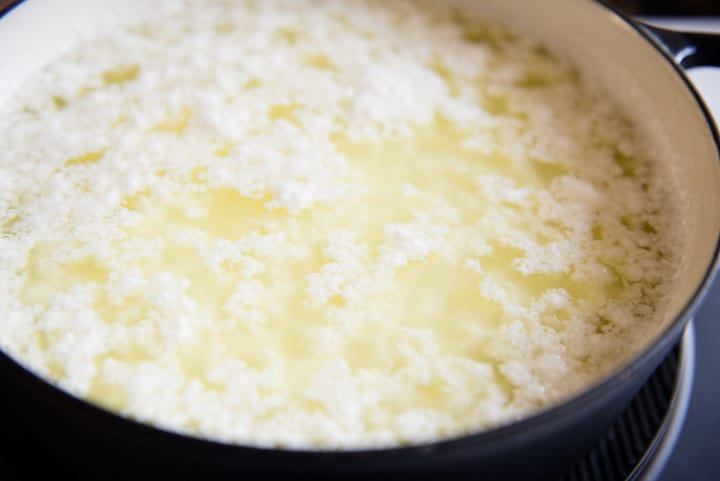
After the milk boils, pour in some lemon juice or vinegar. Give everything a stir, and the milk should start curdling immediately. The liquid will turn into a yellow/light-green color, especially if you use vinegar, but that’s completely normal. I usually let the the curds sit in the pot like this for about 5 to 10 minutes. It gives the liquid a chance to cool, too. Many recipes will say to add a few ice cubes into the pot to help cool everything, which you can certainly do as well. I haven’t noticed a significant difference one way or the other.

Next, you want to strain the curds through a cheesecloth and rinse the curds with cold water. This really helps to cool the cheese and it helps wash away the lemon juice or vinegar.
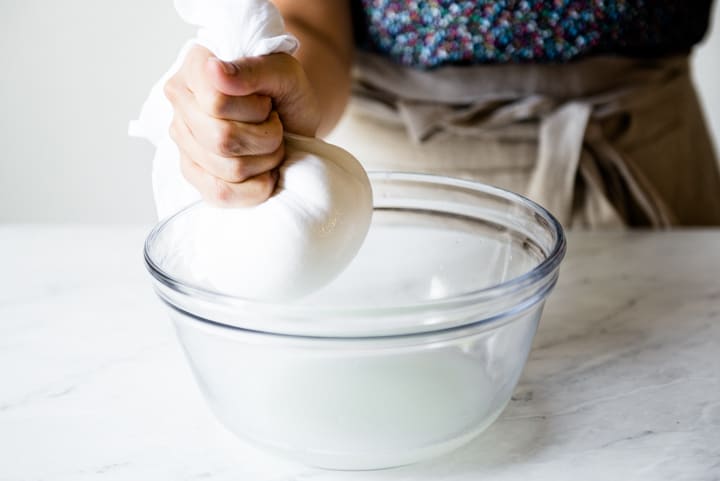
Then, gather up the corners of the cloth and squeeze out the excess liquid from the cheese. Many recipes at this point will instruct you to tie a knot on the cheesecloth and hang the cheese on your faucet to let more water drain. I have done this several times, and didn’t notice much more water dripping from the cheese, so I skip this step. However, I do press the cheese to release more liquid.
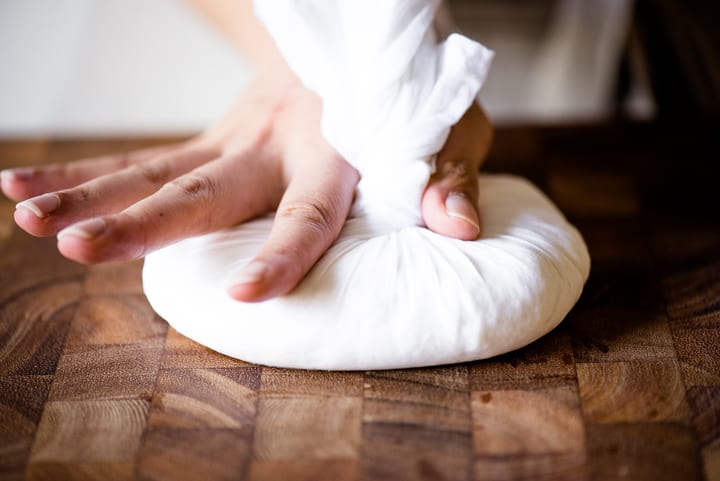
This is how my block of paneer looks like before I press it between plates. Notice how I lay the cheesecloth flat over the block of cheese. This helps create a more smooth, even surface on the exterior. Afterwards, I will place the block of cheese on a plate, place another stack of plates on top, and stick everything into the refrigerator. Some people like to place the cheese over a colander so that the water drips out from the bottom, but I don’t have one that’ll fit the cheese.
Refrigeration really helps firm up the cheese. Otherwise, the curds will crumble quite easily when you cut into the paneer or cook with it.
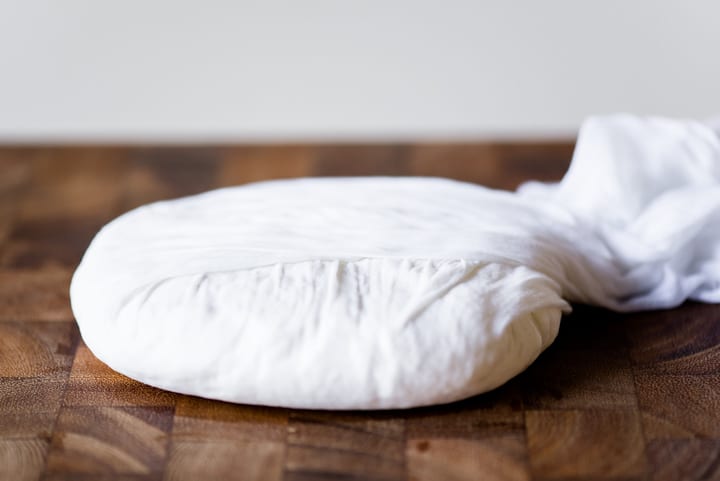
After an hour or two of pressing, your cheese should look like this!

LOOKING FOR MORE PANEER RECIPES?
If you are looking for more ways to cook with paneer, check out my spiced pan-fried paneer recipe or the tasty recipes from some of my favorite food bloggers below!
Paneer Tikka Masala
Paneer Jalfrezi (cheese and pepper stir fry) from Playful Cooking
Matar Paneer (peas and paneer) from Indian Simmer
Paneer, Mushroom, Corn Curry from The Jam Lab
How to Make Paneer
Ingredients
- 8 cups whole milk
- 6 tablespoons lemon juice or white vinegar
Equipment
- fine cheesecloth
- colander
Instructions
- Pour the milk into a large pot and bring it to boil over medium heat. I like to cover the pot to speed up the boiling process (which also lessens the likelihood of the milk burning on the bottom). However, you need to watch over that pot like a hawk. Once you start hearing bubbling in the pot, remove the lid and check to see if the milk has boiled. Don’t let the milk boil over the pot because it is a mess to clean up later. You can also check the milk periodically and give it a stir as you wait for it to boil.
- While the milk is boiling, prep the lemon juice. If you are using vinegar, I recommend mixing it with 1/4 cup water so that it is not so intense when you pour it into the milk.
- Once the milk has boiled, pour in the lemon juice (or vinegar) mixture. Give everything a stir, and you should see the milk curdle immediately. If you don’t, you can add 1 more tablespoon of lemon juice or vinegar. Let the contents of the pot cool for another 5 to 10 minutes.
- Line a colander with a cheesecloth and place the lined colander into the sink.
- Strain the milk curds through the cheesecloth. Rinse the curds under cold water to wash out the lemon juice or vinegar. This also helps cool the milk curds so that you can squeeze it immediately afterwards.
- Gather up the corners of the cloth, twist the cloth so that the soft cheese is in the shape of a ball. Squeeze out the excess water. Usually, the cheese is cool enough for me to handle at this point.
- Shape the cheese into a disc (see photos above for an illustration). Place wrapped the cheese over a plate and weigh it down with a small stack of plates on top. Press the cheese for 1 to 2 hours. I usually transfer everything to the fridge at this stage. If you don’t have enough space in your refrigerator, you can press the cheese on the counter and then transfer the cheese to the fridge when you are done. I like to refrigerate the cheese before cooking with it because it allows the cheese to firm up and decreases the likelihood of it disintegrating while I cook with it.
- Once chilled, the paneer is ready for cooking! You can refrigerate the cheese in an airtight container for up to a week. You can also freeze the cheese for up to several months.


kiran says
very easy to make paneer at home.
Satish m says
Please also remember to save the left over water for making paneer another time. This also ensures the curds bteak down better. Secondly please stir the milk whilst adding vinegar/lemon juice in only one direction clockwise or anticlock wise, this as well ensures that the curds end up as large pieces which later stick together whist compressing in a cheese cloth.
Lisa Lin says
These are fantastic tips, Satish! Thank you so much!
Janhavi says
You could try adding about 200mls or at least 4-5 tbsp of cream to milk before boiling to making it creamier and less crumbly without that extra squeak thing from the store brought paneer. It’s worth it.
Lisa Lin says
Thanks for the tip, Janhavi!
Melody says
Thanks for the tips! Trying this with my science classes tomorrow!
HE says
How do you use the left over water?
Jane says
Use it to make the best bread you’ve ever tasted
Joanne King says
Can you share the bread recipe where you used the leftover whey? Thank you!
KazH says
Hi If you keep the whey to make bread do you still add powdered milk to your bread recipe?
Jessica says
What water are u talking about? Thanks
Sondra says
I have made the paneer cheese for years.
The water from the paneer is pure whey. I recommend using the lemon juice method.
You can use whey for cooking, fruit smoothie and even diluting to use as fertilizer.
If you have chickens put it in a bowl. They will drink it.
Lisa j says
Does anyone salt the cheese for flavor
Melissa says
My milk took forever to boil ???? it only had tiny bubbles around the edge and after a long while (prob 45min) I decided to just try putting the lemon juice in. It looks like it’s suppose to but I haven’t tried it yet. Any idea why it wouldn’t boil?
Lisa Lin says
Hi, Melissa! That’s so odd! Did the milk curdle when you added the lemon juice? Also, did you use regular dairy milk?
HE says
It will boil, it just took longer than you were willing to wait. If you stir while bringing it to a boil, a good idea in itself, it takes longer. The watched pot, you know, never boils.
Unless, as someone pointed out here, you were using ultra-pasteurized milk.
Aan says
Does the paneer need to be immersed in water if we have to store in fridge for 3 or more days?
Lisa Lin says
Hi, Aan. No, it doesn’t, but make sure to either wrap it in plastic or store in an airtight container.
Janhavi says
You could also try adding a couple of tablespoons to 200mls of cream to the milk before to make it creamier and smoother without that squeaky thing from the store brought ones.
HE says
Brilliant!
Samantha brabant says
Thank you so much Janhavi! I love Shahi paneer but dislike the texture when I make it (store bought paneer) at home. I’m going to endeavor to make it entirely myself now.
Rita says
I have mixed two three spoons of vinegor but still it’s not spoiled properly
Gee says
If the milk you’re using is ultra high temperature pasteurized, it may be the reason why it’s not separating.
Afi says
Also if you use low fat milk or no fat milk the curds do not form.
Felicity says
Can this be done with lactose free milk for a member of the family that is intolerant?
Jill Harrison says
I use the same method to make Skyr (Icelandic yogurt) which is pretty much lactose free. The whey which you can either discard or use for making bread contains the lactose.
Alison Swift says
I tried this recipe the other day, and have to say I am very impressed with it, it worked brilliantly and the resulting paneer was much much nicer than the shop bought stuff.
One thing I did think I might do next time is heat the milk in the microwave, to just under boiling point, then finish off on the hob. It did take ages to boil.
Fahmeida says
What about storing the paneer in a brine…..2 cups whey and 1/4 cup salt , this will keep longer in the fridge .
Thia Ferero says
Great recipe & so quick and easy. It turned out just perfect. I used normal full cream milk and it separated straight away when I added the lemon juice.
Nadine Bradshaw says
Worked out well… until i rinsed the curds with cold water .
This made the panner very crumbly and not bind together properly.
Anyone else have that problem?
Iris says
Adding cream while you boil and also refrigerating the finished paneer before slicing will help!
Kris says
Do you think you can us goat milk as I raise goats.
Lisa Lin says
Hi, Kris. I really don’t know the answer to that question because I don’t have much experience making goat cheese. I want to say it will work, though the flavor might just be a little more intense.
Nick Davis says
yes you can use goats milk but the curds are a lot finer almost like semolina and you need more milk to make the same amount of Paneer
Laurel says
I used to raise goats as well and made paneer with the goat milk. It came out perfectly!
Carolyn Denny says
What is the cup size measurement in metric I only have 1 ltr of full fat milk – cups size measure conversion charts vary! Thank you so much – looks a great recipe!
Lisa Lin says
Hi Carolyn, I think you’ll need 2 liters of milk to make a full batch!
Carine says
What per cent of milk should be used? 3%? Should I use Cows milk? Can it be Pasteurized? Thanks!
Lisa Lin says
I used whole milk. Yes, it can be pasteurized, but I believe ultra-pasteurized milk won’t work as well.
Nick Davis says
Full cream milk is best, pasteurised is ok for a thicker curdle you might think about adding 3 to 4 tablespoons of heavy cream this gives a better consistency and a firmer cheese
Lisa Lin says
Thanks for this note, Nick!
Theresa says
I made this today and it was perfect. Due to the coronavirus I couldn’t get to the supermarket. I won’t buy shop made again because this was so much better.
Thank you.
I made matar paneer with it. Good soul food.
Nikki says
Can you use uht milk? That’s all I have at the moment due to the lockdown.
Lisa Lin says
Hi, Nikki! I read somewhere that UHT milk doesn’t curdle properly. You can test a little bit by heating maybe a half cup of milk and squeezing in lemon juice to see if it curdles.
Nikki says
Thanks Lisa, I’ll give it a try today!
Stephanie says
I followed the recipe exactly but my paneer is super crumbly. Where did I go wrong?
Iris says
I loved paneer the first time I tried it and didn’t know it was this easy to make.
Great, easy to follow instructions in this recipe, thank you!
Naina says
Turned out tasty and perfect! Followed the recipe to a T. 🙂
Kim Curtis says
This turned out beautifully. It tasted delicious. I pressed it in the fridge for 2-2.5 hours, then cubed it. As soon as I stirred into the hot liquid, it disintegrated. Fail. 🙁
Arwa says
Hey! Just wanted to know what milk you used? I used the regular whole milk from store and it made tiny curds and now the paneer won’t set . It’s rather creamy
Heloise says
Looks good, I am definetly trying this out so I don’t need to buy from the store, its expensive too.
Jamie says
I’ve never tried paneer before but I’ve had panela. is it similar in taste ?
Mikko says
I can’t believe I made cheese at home. During a Pandemic. And in about 1.5hrs. So easy and tasty. I halved the recipe since this was my first try. Didn’t want to end up with too much if it flopped. The milk boiled up pretty quickly as it was only 4 cups. I followed the suggestion left by a previous reviewer and added 3 T of heavy cream to the milk. Forgot to rinse the curdled milk with water, but it still turned out delicious. Halving the recipe yielded 5.8oz or 165 grams of cheese for me. It was enough to make saag paneer. I used the whey to boil basmati rice that accompanied my saag. Win win for a delicious and filling meatless Monday. Thanks Lisa.
Slack says
Is pasteurized milk OK ? Raw milk is hard to find iffen you don’t have a cow.
Lisa Lin says
Pasteurized is fine! There is a type of milk that’s ultra-pateurized, and I don’t believe that works as well.
Michael Patenaude says
If it crumbles afterwards, don’t be too disappointed. You’ve pretty much simply made queso fresco instead of paneer. Put it on a taco or on nachos and you’re good to go!
Sydney says
Followed the recipe with lemon juice + a splash of heavy cream. I forgot to rinse the curds. I also heated the milk in 2 cup batches in the microwave which cut my boiling time to about 10 minutes total. I pressed with 10lbs of dishes for 3 hours in the fridge and it turned out very solid and well formed. You can cut into it without it crumbling. I think the heavy pressure and refrigeration really helps. Can’t wait to use it in my palak paneer and Marsala paneer tomorrow!
Ashmita@HomeFoodSecrets says
I loved paneer the first time I tried it and didn’t know it was this easy to make. On DAY I RAN OUT OF LEMONS OR LEMON JUICE, THEN I TRIED MAKING PANEER USING VINEGAR AND OTHER 2 CURDLING AGENTS AND USING YOUR RECIPE, IT TURNED OUT AMAZING!!
THANK YOU !!!
Negar says
I tried making paneer for the first time today, and this recipe worked like a charm. So easy to follow, and paneer turned out great. I added 240ml of heavy cream, as others have suggested; and had it pressed in the fridge for four hours before I cooked with it – and it kept its form beautifully. I made Palak paneer following another recipe from this website, and fried the paneer in the airfryer – so fast and easy. I also kept the whey and used it to cook my rice, as another commenter suggested. It turned out great.
I think I am going to make this Paneer on a regular basis – it’s a very healthy and yummy option for my toddler. She gobbled a few pieces even before I could find time to fry the cheese.
Robin Mcleod says
Could you Flavour it say with fresh thyme – add while boiling the milk so it steeps and absorbs Flavour?
Lisa Lin says
I think so! You should probably tie the herbs together so that they aren’t scattered everywhere in the pot. You don’t want the herbs to get mixed in with the curds.
Frances says
Hi there can’t wait to try your recipe. What type of vinegar did you use? Is it white distilled or white wine vinegar. Thanks!
Lisa Lin says
White distilled vinegar!
Eva says
Hi, excited to try this recipe. Just wanted to confirm what should seem obvious but wanted to double check, are you turning the heat off as soon as the milk curdles? Thanks.
Lisa Lin says
Yes!
Hannah says
Hi, does anyone know how much whey this recipe makes?
Want to save it to make bread, thank you!
Hannah says
Hi,
Can anyone confirm how much paneer this make in weight? And how much whey if possible.
Thank you!
Tracy Myers says
If you strain the curds and whey over a bowl, save the whey to make soup from it. I use lemon to make my paneer, so the whey has a fresh lemon taste. Then I sauté vegetables with Indian spices , onion, garlic and ginger, and make an amazing soup.
Lisa Lin says
I definitely need to do that next time!
Zoey Havoc says
Great recipe to get started making paneer at home! I gave it a try and it worked. I will try some of the tips from the comments next time (that will be soon as I only made a half batch for the first attempt hehe)
An old clean pillowcase works as a pretty good fine cheese cloth 😅
Zacs Valley Kodaikanal says
nice sharing with us. thanks for sharing.
AS says
What can I use in place of a cheesecloth?
Lisa Lin says
Any kind of cotton cloth should be okay
Lisa J Johnson says
Can you mix with half vinegar and half lemon juice?
Lisa Lin says
Yes, white vinegar should be fine!
Cheryl S says
This turned out perfectly! I did use a tofu press and it made a beautiful block of paneer!
Lisa Lin says
Thanks, Cheryl! I should try using a tofu press for this!