
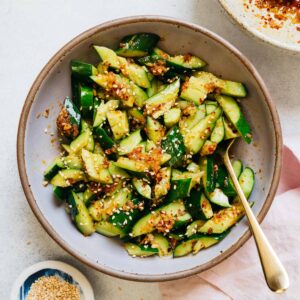
Cheung fun (腸粉, rice noodle rolls) is something that my family always orders at dim sum. Typically, we get cheung fun with shrimp or minced beef wrapped inside a thin and soft rice noodle sheet. Although I enjoy those dim sum classics, I wanted to develop a good vegetable-forward cheung fun recipe. That’s why I developed this mushroom cheung fun recipe. It takes time to make these rice noodle rolls, but the effort is worth it!
LANGUAGE NOTE ON 腸粉
In Chinese, rice noodle rolls are written as 腸粉 (traditional characters) or 肠粉 (simplified characters). “Cheung fun” comes from the Cantonese pronunciation. In Mandarin, 腸粉 is pronounced as chang fen and chyoong foon in the Toisan dialect.
COOKING NOTES FOR MUSHROOM CHEUNG FUN
MUSHROOM VARIETIES
You can use any kind of mushrooms for this recipe, but I recommend using several varieties to give the filling different textures and flavors. In my original recipe, I used a combination of king trumpet, oyster, and shimeji mushrooms. Recently, I made a version with shiitake, maitake, and oyster mushrooms. Both of them were delicious!

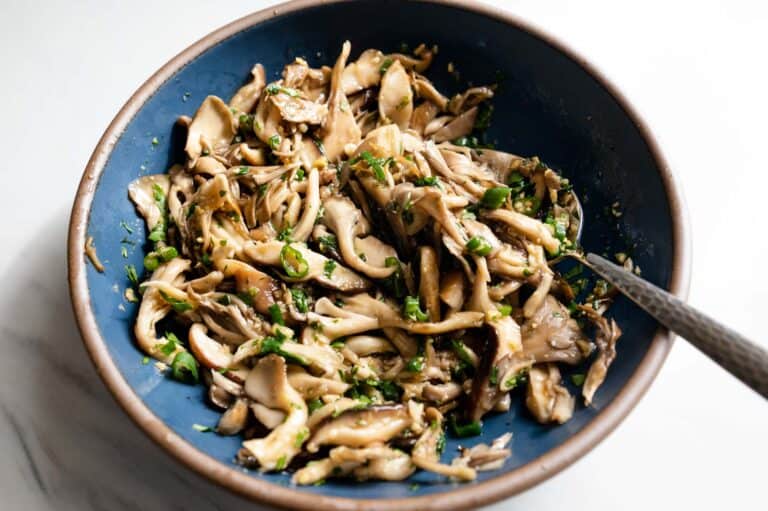
Make sure to sauté the mushrooms for a few minutes. This deepens their flavor and it cooks down the mushrooms so that they don’t shrink too much as you steam the rice noodles. Once cooked, toss them with teriyaki sauce, garlic, ginger, scallions, and cilantro. You don’t want to skip the teriyaki sauce because the cheung fun will be too bland otherwise. Then, let the mushrooms cool while you prepare the batter.

FLOURS FOR BATTER
The batter for the rice noodle sheets is very similar to the one I used for my basic cheung fun recipe. In that recipe, I used a mixture of rice flour, potato starch, cornstarch, and tapioca starch. Here, I only use 3 types of flour: rice flour, potato starch, and tapioca starch. I typically use rice flour made by the Erawan brand, which comes in the red package (see photo below). Do not use glutinous rice flour or mochiko; it will make the cheung fun gooey.

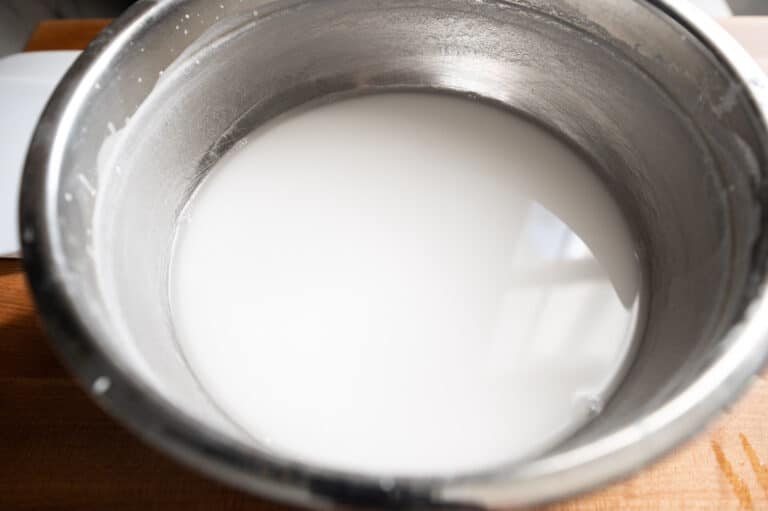
To make the batter, whisk the flours together and add 2 cups of room temperature water. Then, add 2 cups of boiling hot water. When adding hot water, pour a steady stream of it into the batter with one hand while stirring the batter with the other hand. You don’t want to add all the hot water at once as it may cause the flour to clump up.
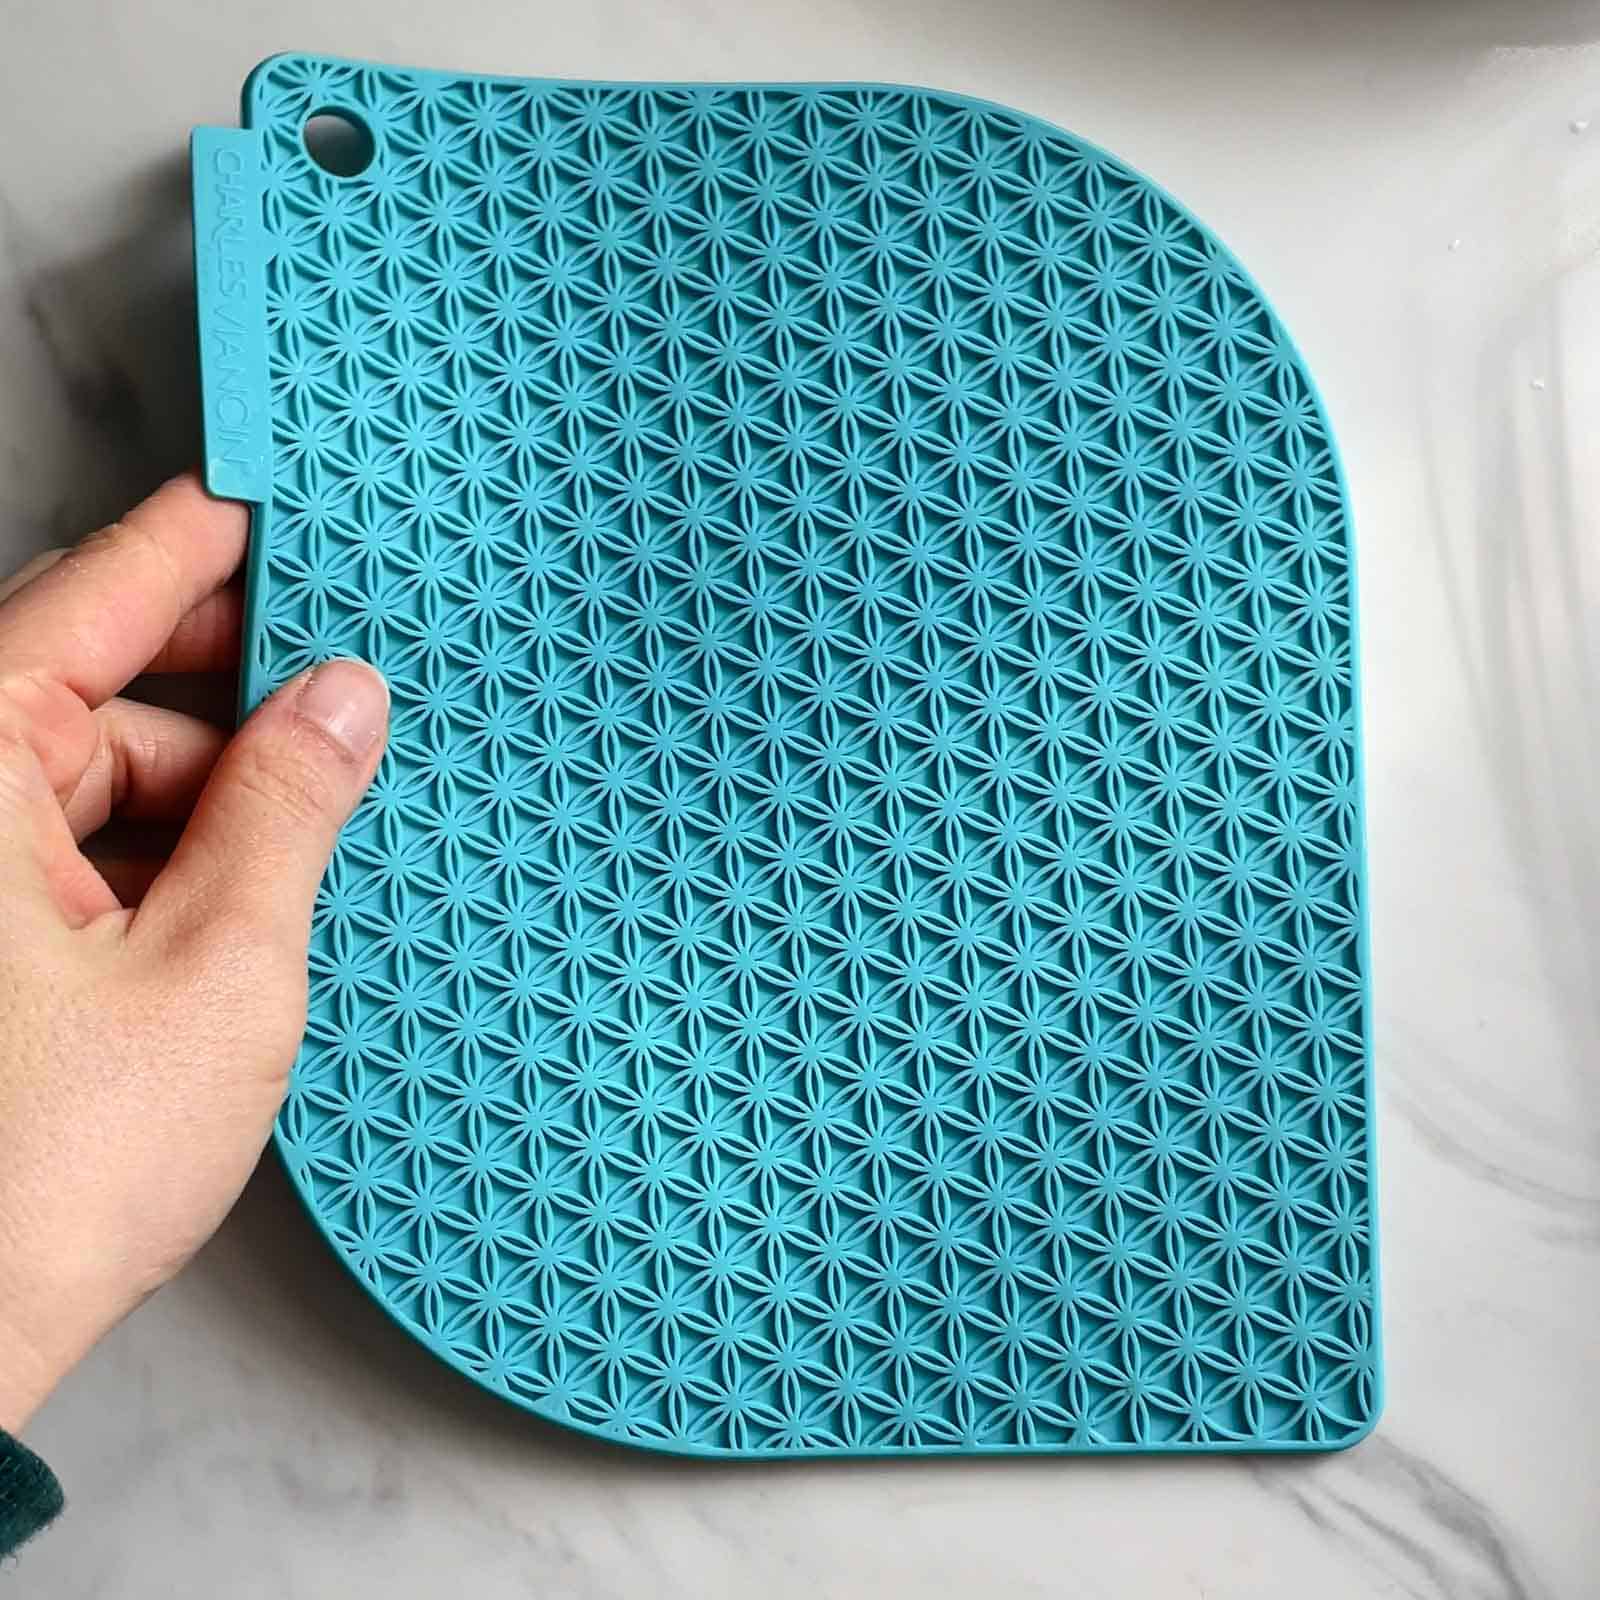
By the way, I like to place a silicone mat underneath the bowl to keep the bowl in place while I mix the batter. The photo above shows the mat I like to use.
PRE-MADE CHEUNG FUN BLENDS

If you don’t want to buy all the different flours for the recipe, you can often find cheung fun flour mixes at Asian supermarkets, like the one photographed above. Look for bags labeled “腸粉,” “肠粉,” or “bánh cuốn.”
One important thing to note: I have found the flour to water ratios in the package directions to be a little off. In the cheung fun mix photographed above, the recipe calls for one part flour to two parts water. Mama Lin and I found the rice noodles were too stiff when following that recipe. Instead, we prefer a ratio of one part flour to three parts water. The flour-to-water ratio can vary across different brands.
CHEUNG FUN STEAMER BOX
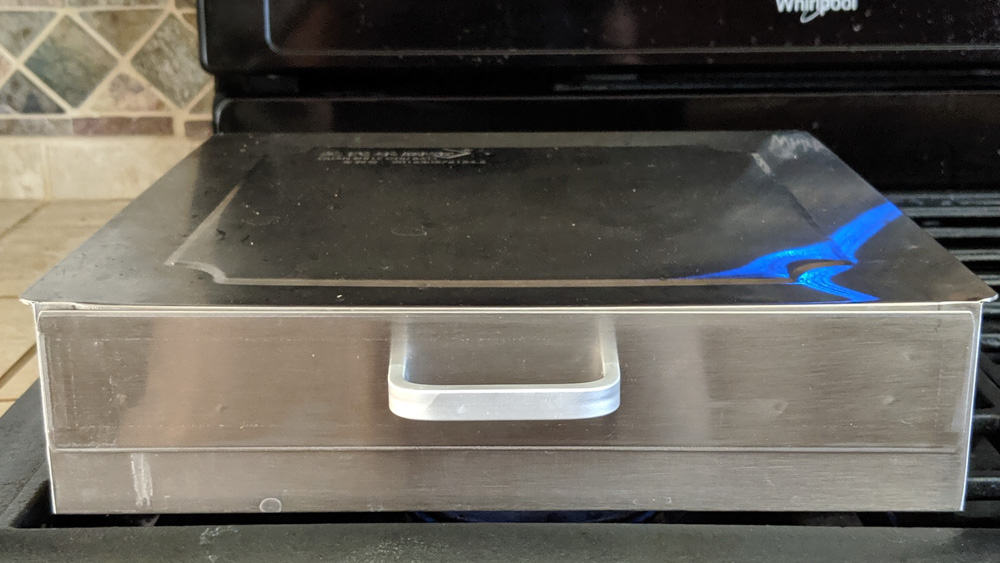
I use a single-tier cheung fun steamer to steam these rice noodle rolls. The steamer is a stainless steel box with one or two slots for sliding in the steamer tray. My single-tiered steamer came with two trays.
My mom purchased mine for me in San Francisco’s Chinatown for about $35 to $40. This steamer was available on Amazon a few years ago, but that’s no longer the case. Instead, you can find the 2-tier version of the steamer (affiliate link), which allows you to steam 2 noodle sheets at a time. The box is rather pricey on Amazon. If you don’t want to invest in a steamer, I explain how to create an alternative steaming setup below.
If you look at the photo of the steamer box above, you’ll notice that the steamer tray has a metal handle. This handle turns very hot during the steaming process. Make sure to use oven mitts or a thick towel when handling the tray. I accidentally touched a handle with my bare fingertips and it was a painful learning experience (I’m fine now).
SETTING UP STEAMER
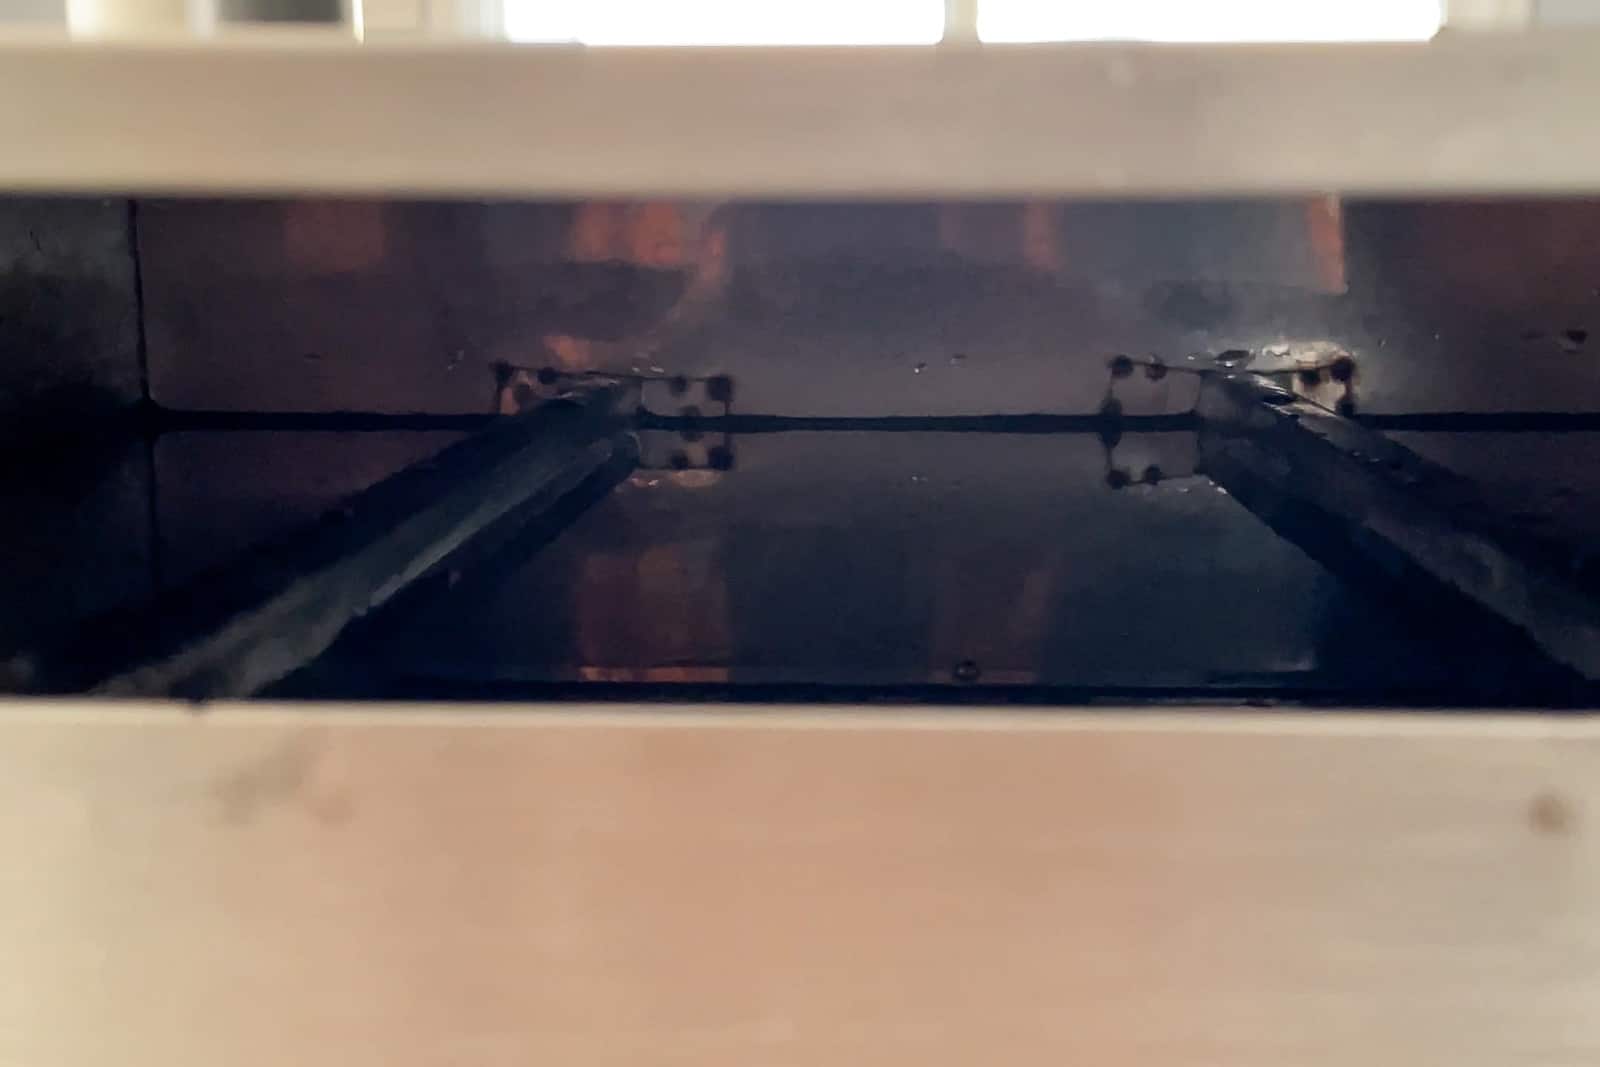
Fill the box with about 1 to 1 ½ inches of water. My steamer box (photographed above) has 2 steel rods that run across the box to support the steamer tray. I try to fill the box with enough water so that the water line is just below those rods.
Slide one of the steamer drawers into the slot and carefully transfer the steamer box to the stove. Set the steamer box directly above the grate on your stove and bring the water to boil on high heat. Once this water boils, reduce the heat slightly to medium high. There will be enough steam inside the box to cook the rice noodle batter on the steamer drawer.

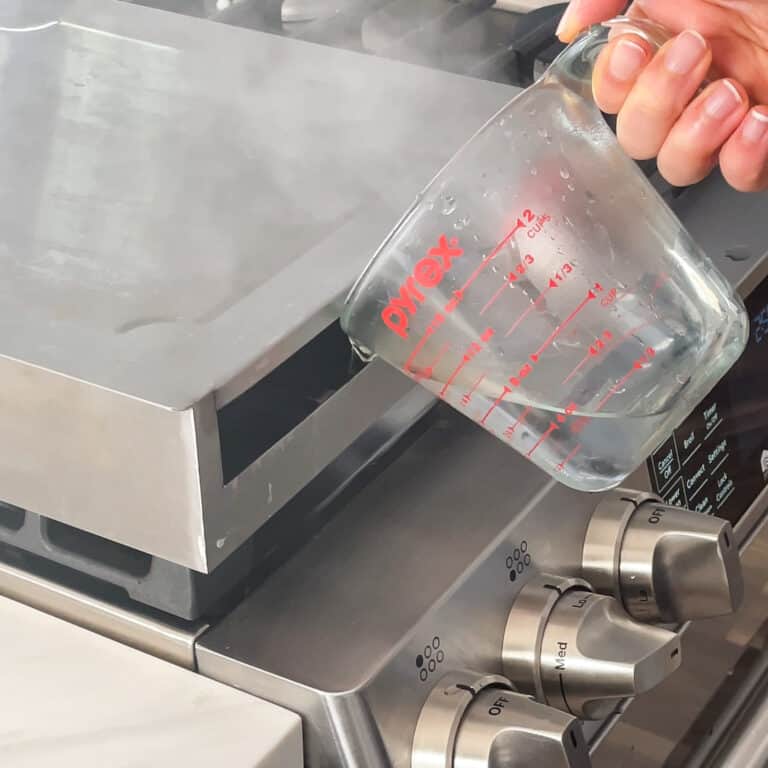
Make sure you always have a lot of boiling water inside the steamer box. Using a measuring cup with a spout (like a Pyrex cup), refill the box with water halfway through the cheung fun making process. I’ve burned the bottom of my box because I didn’t have enough water inside.
PREPARING THE CHEUNG FUN
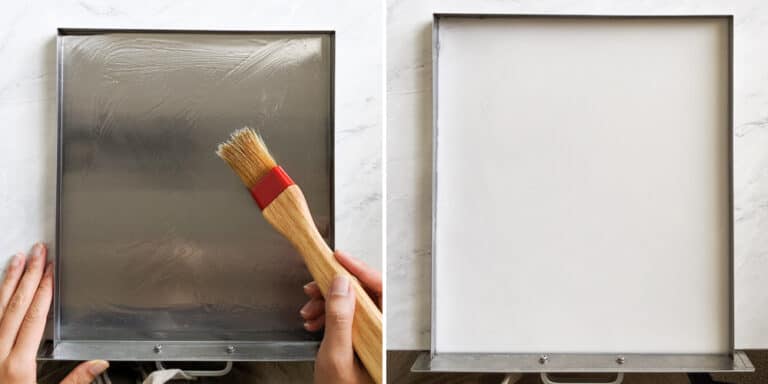
To make the rice noodle sheet, you need to grease the cheung fun tray and pour batter over the tray. You should only add the batter to the tray right before you steam the noodle sheet. In other words, don’t prepare a tray with batter and let it sit for a long time. The flours will sink to the bottom of the tray over time, resulting in unevenly cooked rice noodle sheets.
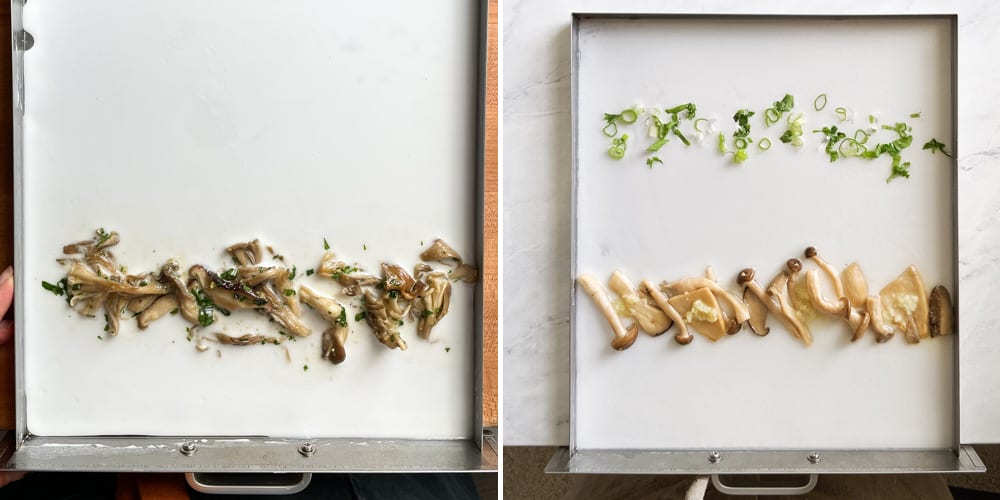
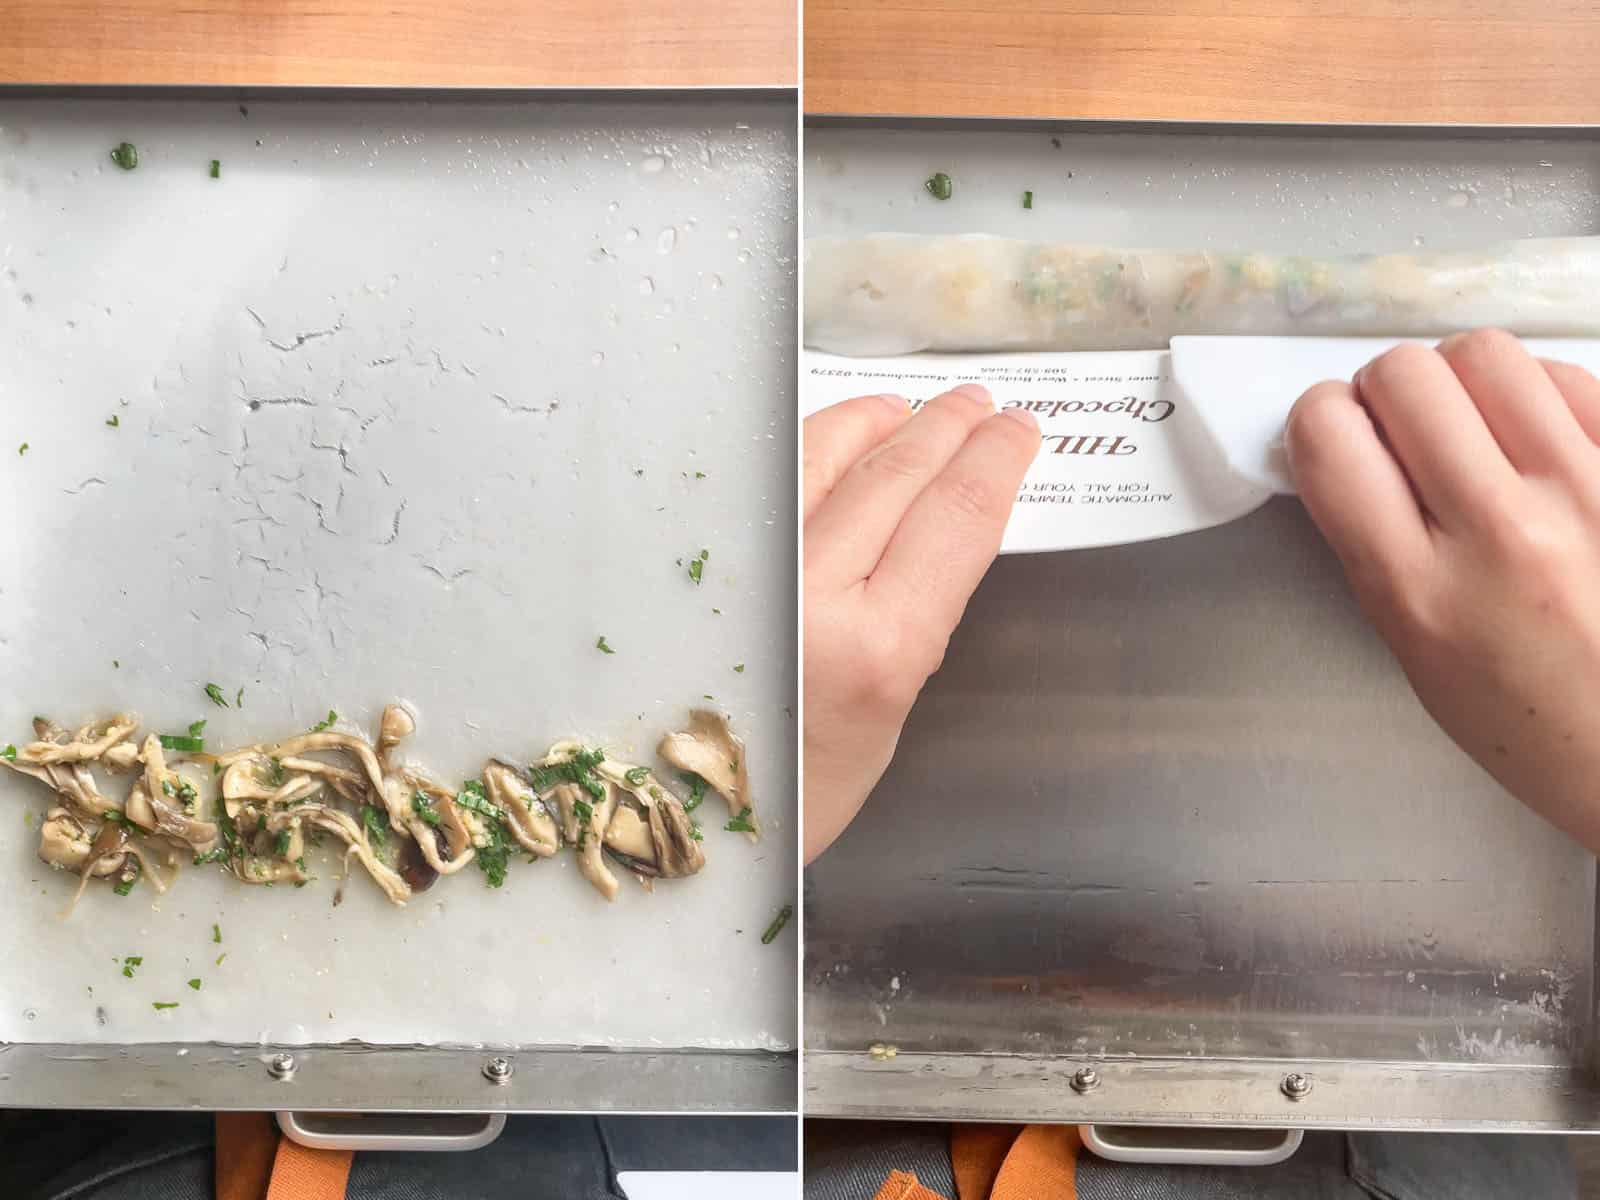
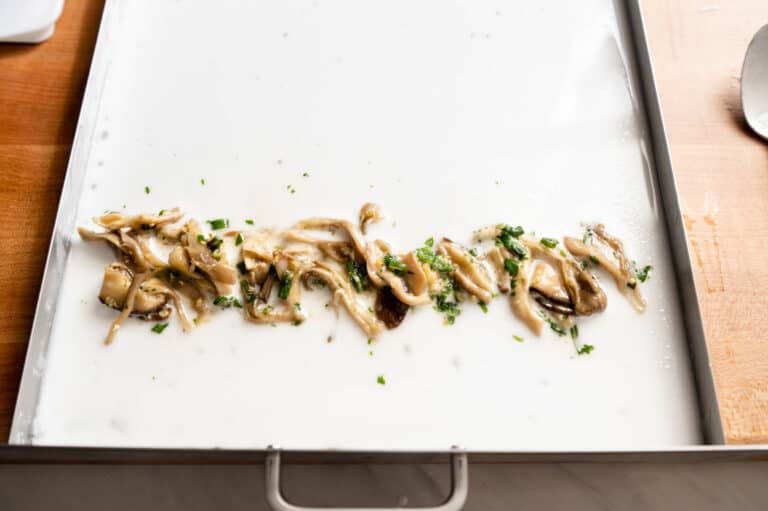
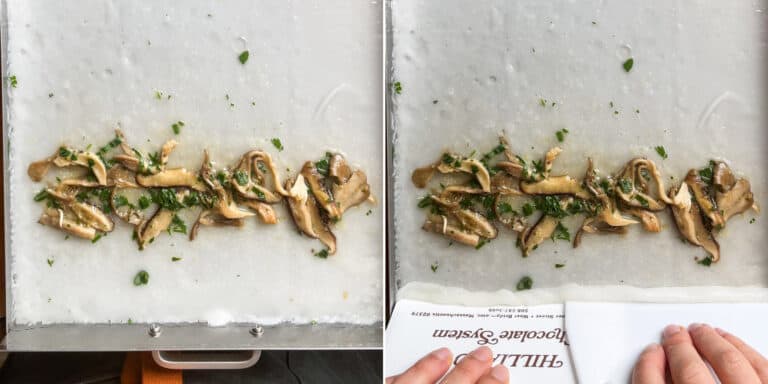
After you pour the batter into the tray, lay the mushroom mixture about 1/3 of the way up from the bottom edge. In a previous version of the recipe, I kept the mushrooms separate from the scallions and cilantro. I decided to simplify the process by mixing the scallions and cilantro with the mushrooms beforehand.
STEAM THE CHEUNG FUN
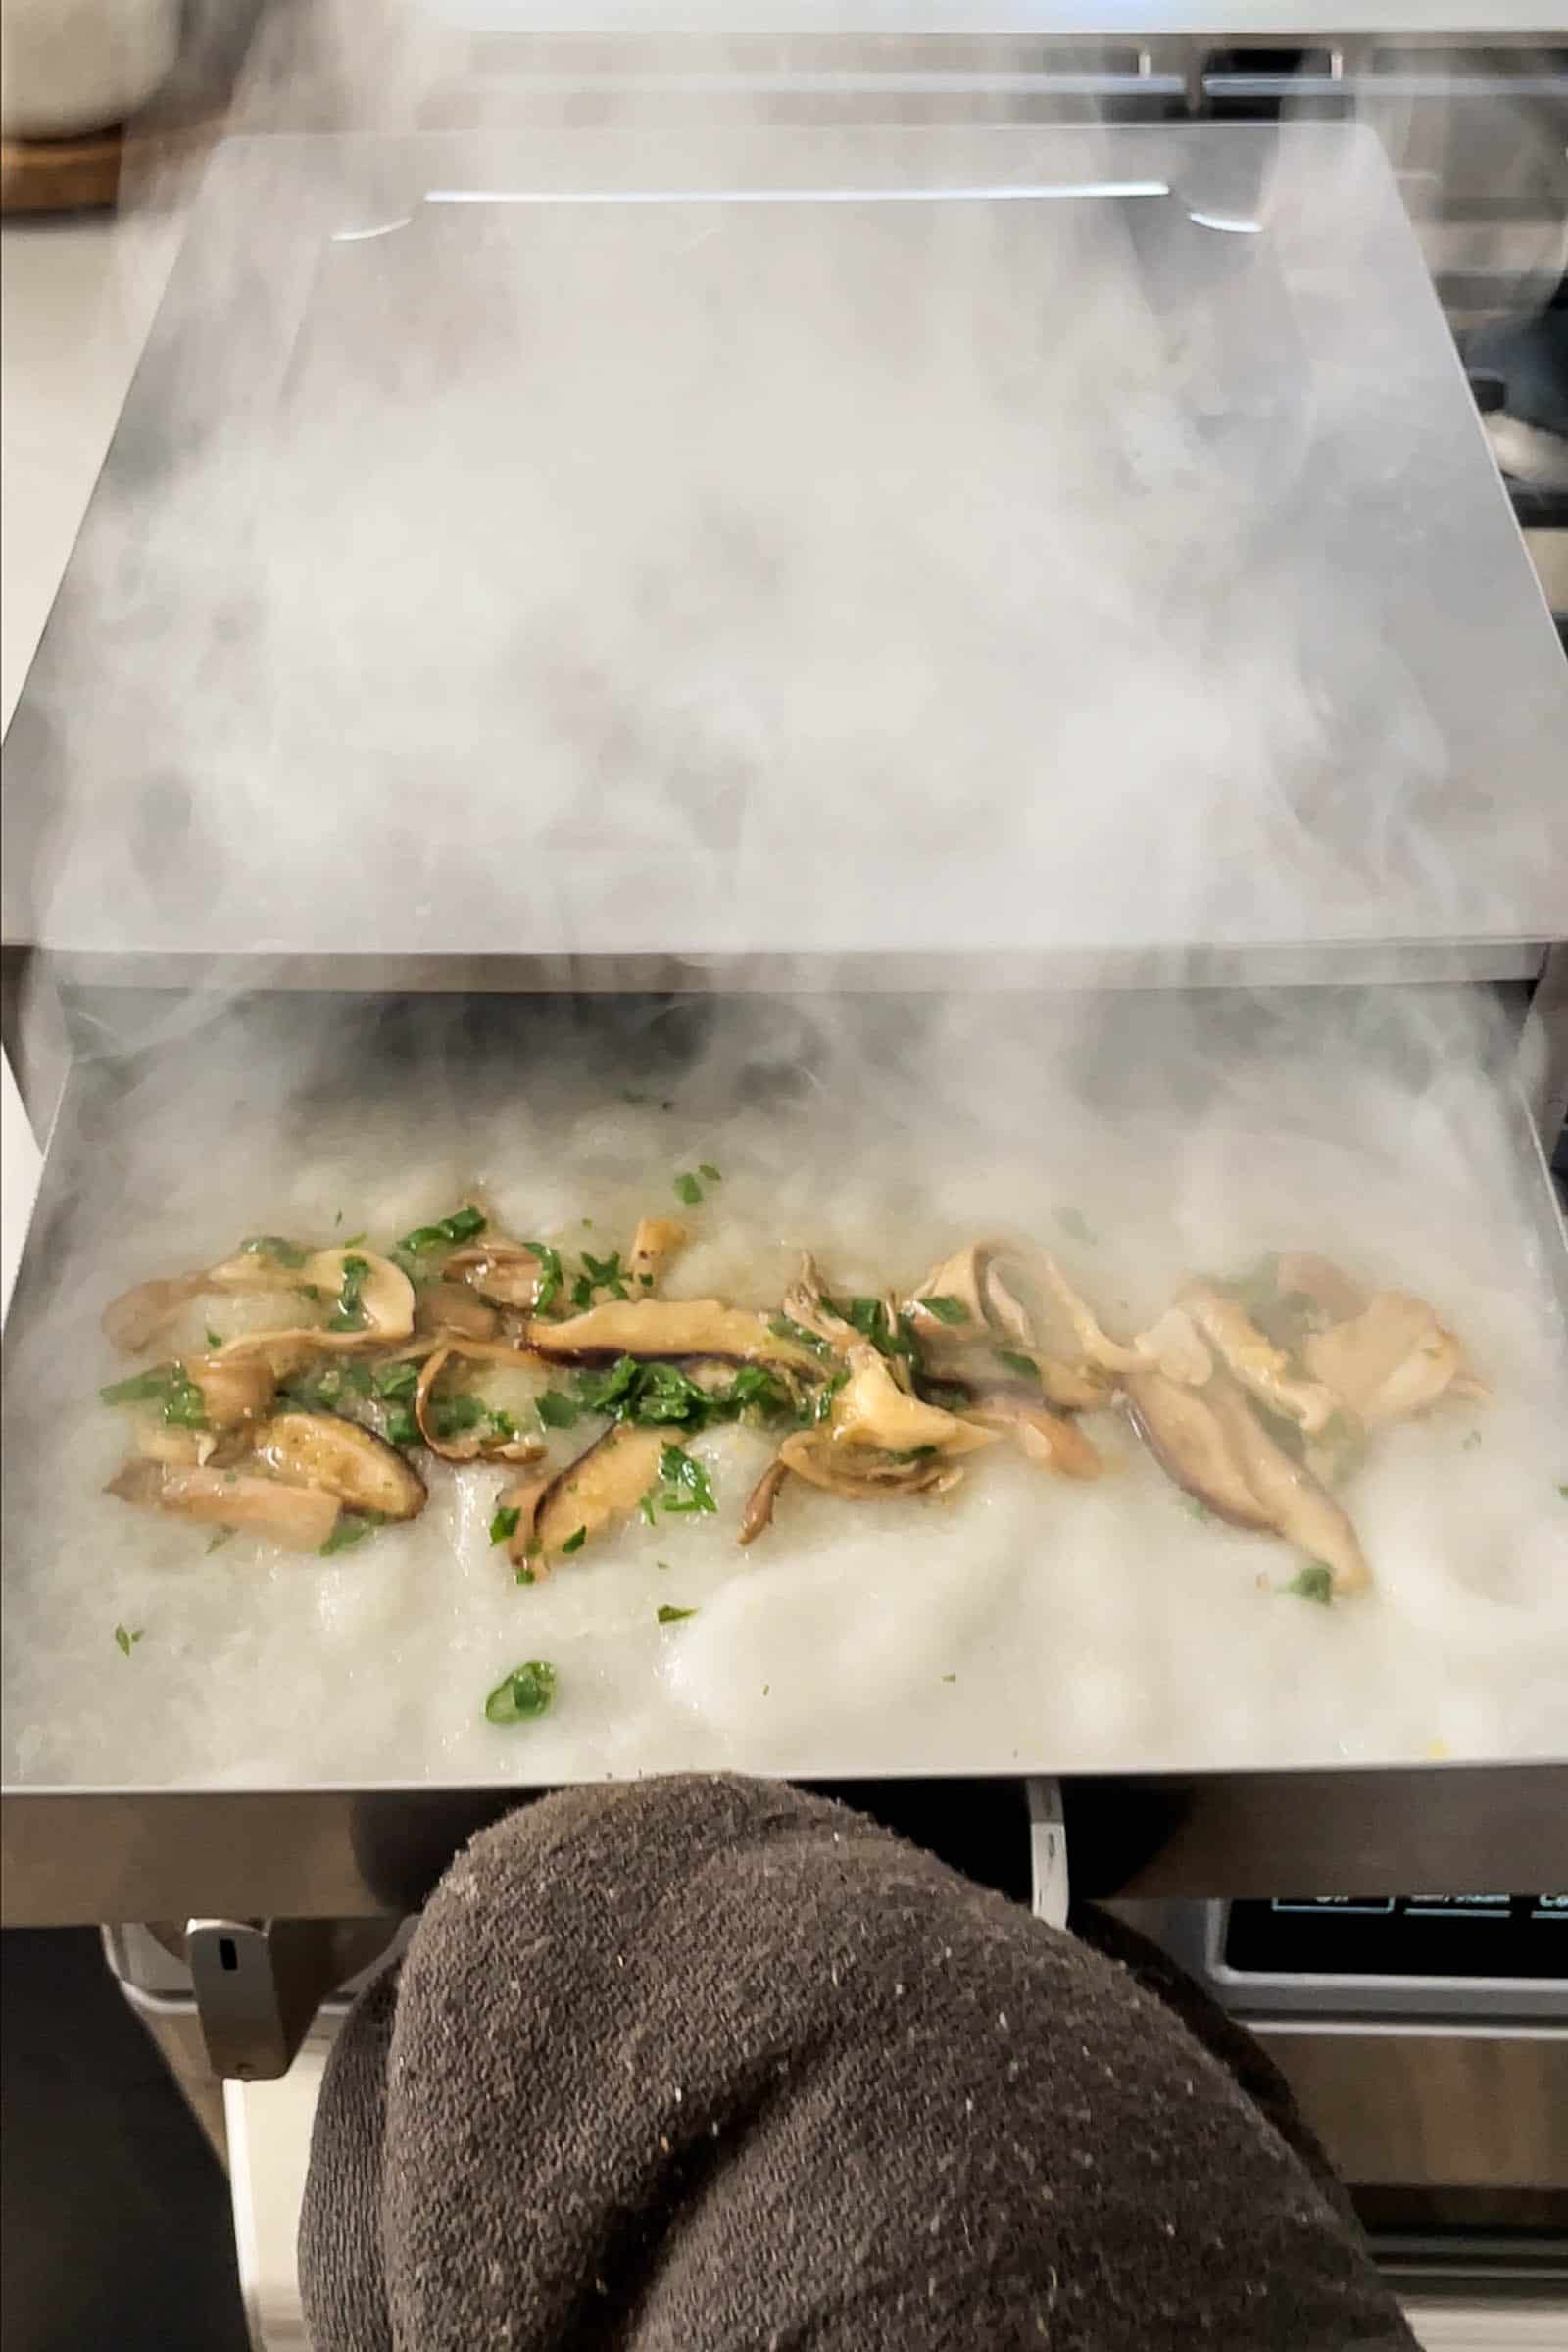
The cheung fun needs only 2 minutes of steaming. When you slide out the steaming tray, you’ll see a lot of air pockets on the rice noodle sheet that deflate quickly (see photo above). That’s an indication that the noodles are done.
ROLL THE CHEUNG FUN
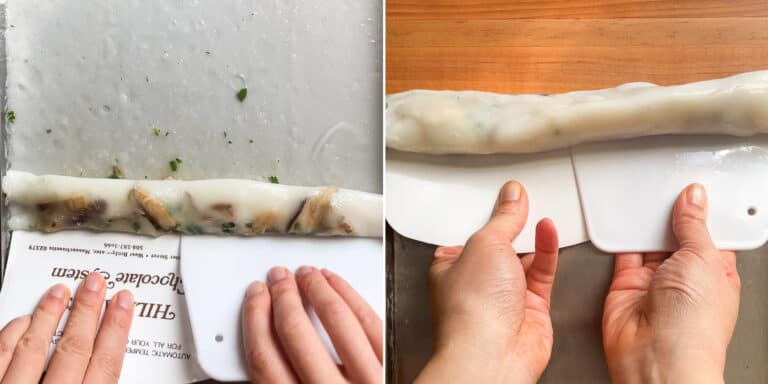
Let the rice noodle sheet cool for a few minutes before you start rolling. The cooling process is important because it allows the noodle sheet to set before you roll it. If the noodle sheet is piping hot when you roll it, the texture will be very gooey and difficult to roll.

The steamer set usually comes with a firm plastic bench scraper for rolling. Because of the large surface area of the trays, I usually use two scrapers. Carefully separate the rice noodle sheet from the bottom edge to start rolling.
As you roll up the cheung fun, the noodle sheet under the mushrooms may tear easily. Don’t worry because when you roll the cheung fun all the way to the end, all the tears will be covered up.

I typically roll the noodle sheets from the bottom up, which is why the mushrooms are placed 1/3 of the way above the bottom edge. Mama Lin, however, does the exact opposite. She prefers rolling the cheung fun from top to bottom, so she lays the filling 1/3 of the way down from the top edge. Either method works–it’s just a matter of working out what is more natural for you.
ALTERNATIVE CHEUNG FUN STEAMING METHOD
You do not need a cheung fun steamer to make this recipe. You can use several square baking pans. I made the mushroom cheung fun successfully with a 8×8-inch square baking pan, though a 9×9-inch pan will work as well. Grease the pan, fill it with 1/3 cup of batter (possibly more for a 9×9 pan), and add the filling.

The steaming setup requires a wok and a steaming rack with 2 to 2.5-inch legs similar to these (affiliate link). I purchased mine from Asian grocery stores.
Place a steaming rack in the center of a large wok. Fill the wok with water, enough so that the water level is just below the steamer rack. Bring the water to boil. Then, place the 8×8 pan with batter over the steaming rack and cover the wok with a lid. The cheung fun will cook in about 2 minutes.
I prefer using a wide wok like this 14-inch stainless steel one (affiliate link) because it is easier to insert and remove the 8×8 pan without burning my hand. Buffalo brand woks are pricey but sturdy. Here’s a less expensive stainless steel wok (affiliate link).
CLEANING STEAMER TRAYS
Clean the steamer trays carefully. Because the trays are made of a thin layer of stainless steel, you can bend and warp the bottom of it if you apply too much pressure as you clean it.
Mama Lin suggests setting the steamer tray over the counter with the lip hanging over the edge. That way, when you press down on the tray to scrub it, you won’t run the risk of bending it. There are always stubborn bits of rice noodle that get stuck in the corners of the steaming trays. I recommend using looped bottle brush cleaners (like the one in this set) to clean the corners (affiliate link).
TROUBLESHOOTING: WHY DID MY NOODLE SHEET CRACK?
If you see cracks in the noodle sheet, it’s usually an indication that there wasn’t enough steam in the steamer box to cool the rice noodle. There can be several reasons why there wasn’t enough steam:
- There wasn’t enough water in the steamer box
- The heat wasn’t high enough to keep the water at a high simmer, which means less steam in the box
- You let the batter sit on the tray for too long before transferring to the steamer box to steam
Make sure to replenish the water after you make several cheung fun. Note that cracking is not the end of the world. The noodle sheet can be pliable enough to roll into a cheung fun. If it isn’t pliable, try steaming it again on high heat for another minute or 2. If the noodle sheet is still very cracked, toss the noodle sheet and make a new one.
Mixed Mushroom Cheung Fun
Ingredients
Mushroom Filling
- 8 to 9 ounces (225 to 255 grams) mixed mushrooms , (such as shiitake, oyster, etc., see note 1)
- 1 tablespoon sunflower, canola, or vegetable oil
- 1/4 teaspoon Diamond Crystal kosher salt, or 1/8 teaspoon fine sea salt
- 1 tablespoon grated ginger
- 3 cloves garlic, minced
- 1 1/2 tablespoons teriyaki sauce
- 3 tablespoons thinly sliced scallions
- 3 tablespoons chopped cilantro
Batter
- 140 grams rice flour, (see note 2)
- 90 grams potato starch
- 70 grams tapioca starch
- 1 tablespoon sugar
- 1/2 teaspoon Diamond Crystal kosher salt, or 1/4 teaspoon fine sea salt
- 1 tablespoon sunflower, canola, or vegetable oil, plus more for brushing pan
- 2 cups (475ml) room temperature water
- 2 cups (475ml) just boiled water
Equipment
- cheung fun steamer
- measuring cup with spout
- brush
- cooling rack
Instructions
Stir Fry Mushrooms
- Rinse the mushrooms and pat them dry with a towel. Slice the mushrooms thinly (if you’re using shiitake, oyster, or king trumpet mushrooms) or tear them apart with your fingers (if you’re using maitake or shimeji mushrooms).
- Heat a pan with 1 tablespoon of oil over medium-high heat. Add the mushrooms and sauté them for 2 minutes. Season with the salt. Transfer the mushrooms to a bowl and toss with teriyaki sauce, ginger, garlic, scallions, and cilantro. Let the mushrooms cool for 10 minutes.
Make Batter
- In a mixing bowl, whisk together all the flours, sugar, and salt in a mixing bowl. Add 1 tablespoon of oil and 2 cups of room temperature water to the batter and stir to combine. Some of the flour will clump up at the bottom of the bowl. Don’t worry–keep stirring and the flour will loosen eventually. Place a silicone mat or a folded up towel under the bowl.
- Boil some water with an electric kettle or on the stove top. Measure 2 cups of water and gradually add the boiled water to the batter with one hand while stirring the batter with the other. The silicone mat/towel should steady the bowl while you stir the batter.
- Set the batter aside. Note that the flour sinks to the bottom in just a few minutes. Make sure to stir the flour right before you pour the batter into the steamer tray.
Prepare Steamer Box
- Set the steamer box directly over the stove. Use a measuring cup with a spout to pour 5 to 6 cups of water to the bottom of the cheung fun steamer. There should be about 1 to 1 1/2 inches of water in the box. Slide one of the steaming trays into the steamer. Turn the heat to high heat and bring the water to boil. (See note 3) Then, reduce the heat slightly to medium-high.

Steam and Roll Cheung Fun
- Set up your cheung fun making station. Have a small bowl of oil (about 3 tablespoons) ready and grab a brush to grease the bottom of a steaming tray. Stir the batter and pour about 1/2 to 2/3 cup of batter over the tray. With the first few cheung fun, you’ll notice that the batter is very slippery on the greased surface and it might be difficult to fill the bottom of the tray with batter. That is normal. It gets easier after several batches. Use the back of a spoon to spread the batter over the empty spaces.
- Add some of the mushroom mixture about 1/3 of the way up from the bottom edge.
- Use oven mitts or a kitchen towel to hold onto the handle of the steaming tray and insert it into the steamer box. Cook the noodle sheet for 2 minutes. You should notice a lot of air pockets on the noodle, which will deflate very quickly.

- Prepare the next cheung fun as the first one cooks.
- Use an oven mitt or kitchen towel to pull the cooked cheung fun out of the box. Let the tray cool on a cooling rack for a few minutes. If possible, place the cooling rack next to an open window. The cooling process is important because it allows the noodle sheet to set before you roll it.
- Use one or two bench scrapers to lift the edge of the noodle sheet from the bottom of the pan.
- Then, start rolling up the cheung fun. Use the scrapers to help you transfer the rolled up cheung fun to a plate.
- Continue cooking the remaining batter, making sure to grease the steaming tray and stirring the batter before each batch.
- Make sure there’s always a good amount of steam coming out of the steamer box. Replenish the water with a measuring cup at least once. Also, make sure the water in the box is bubbling pretty vigorously at all times.
Alternative Cooking Method
- Place a steaming rack in the center of a wok. You want to use a large stainless steel wok that (ideally 14 inches wide) so that it is easy for you to place and remove an 8×8-inch or 9×9-inch pan from the wok. Fill the wok with water, enough so that the water level is just below the steamer rack. Cover the wok with a domed lid and bring the water to boil. You can leave the steaming rack in the wok as the water boils.

- Lightly brush an 8×8-inch or 9×9-inch square baking pan with oil. Pour just over 1/3 cup of batter to cover the bottom of the pan. You may need a little more batter to cover a 9×9 pan. Scatter some of the mushroom filling an inch above the bottom edge. You can also scatter scallions and cilantro a few inches above the mushrooms to give the rolls more flavor.
- Uncover the wok and carefully lay the square pan over the steaming rack. The steam can be scalding hot, so using oven mitts is helpful here. Cover the wok and steam the noodle for 2 minutes. Use oven mitts or a towel to remove the pan. Let the cheung fun cool on a cooling rack for a few minutes before using a scraper to roll it up.

Serving Cheung Fun
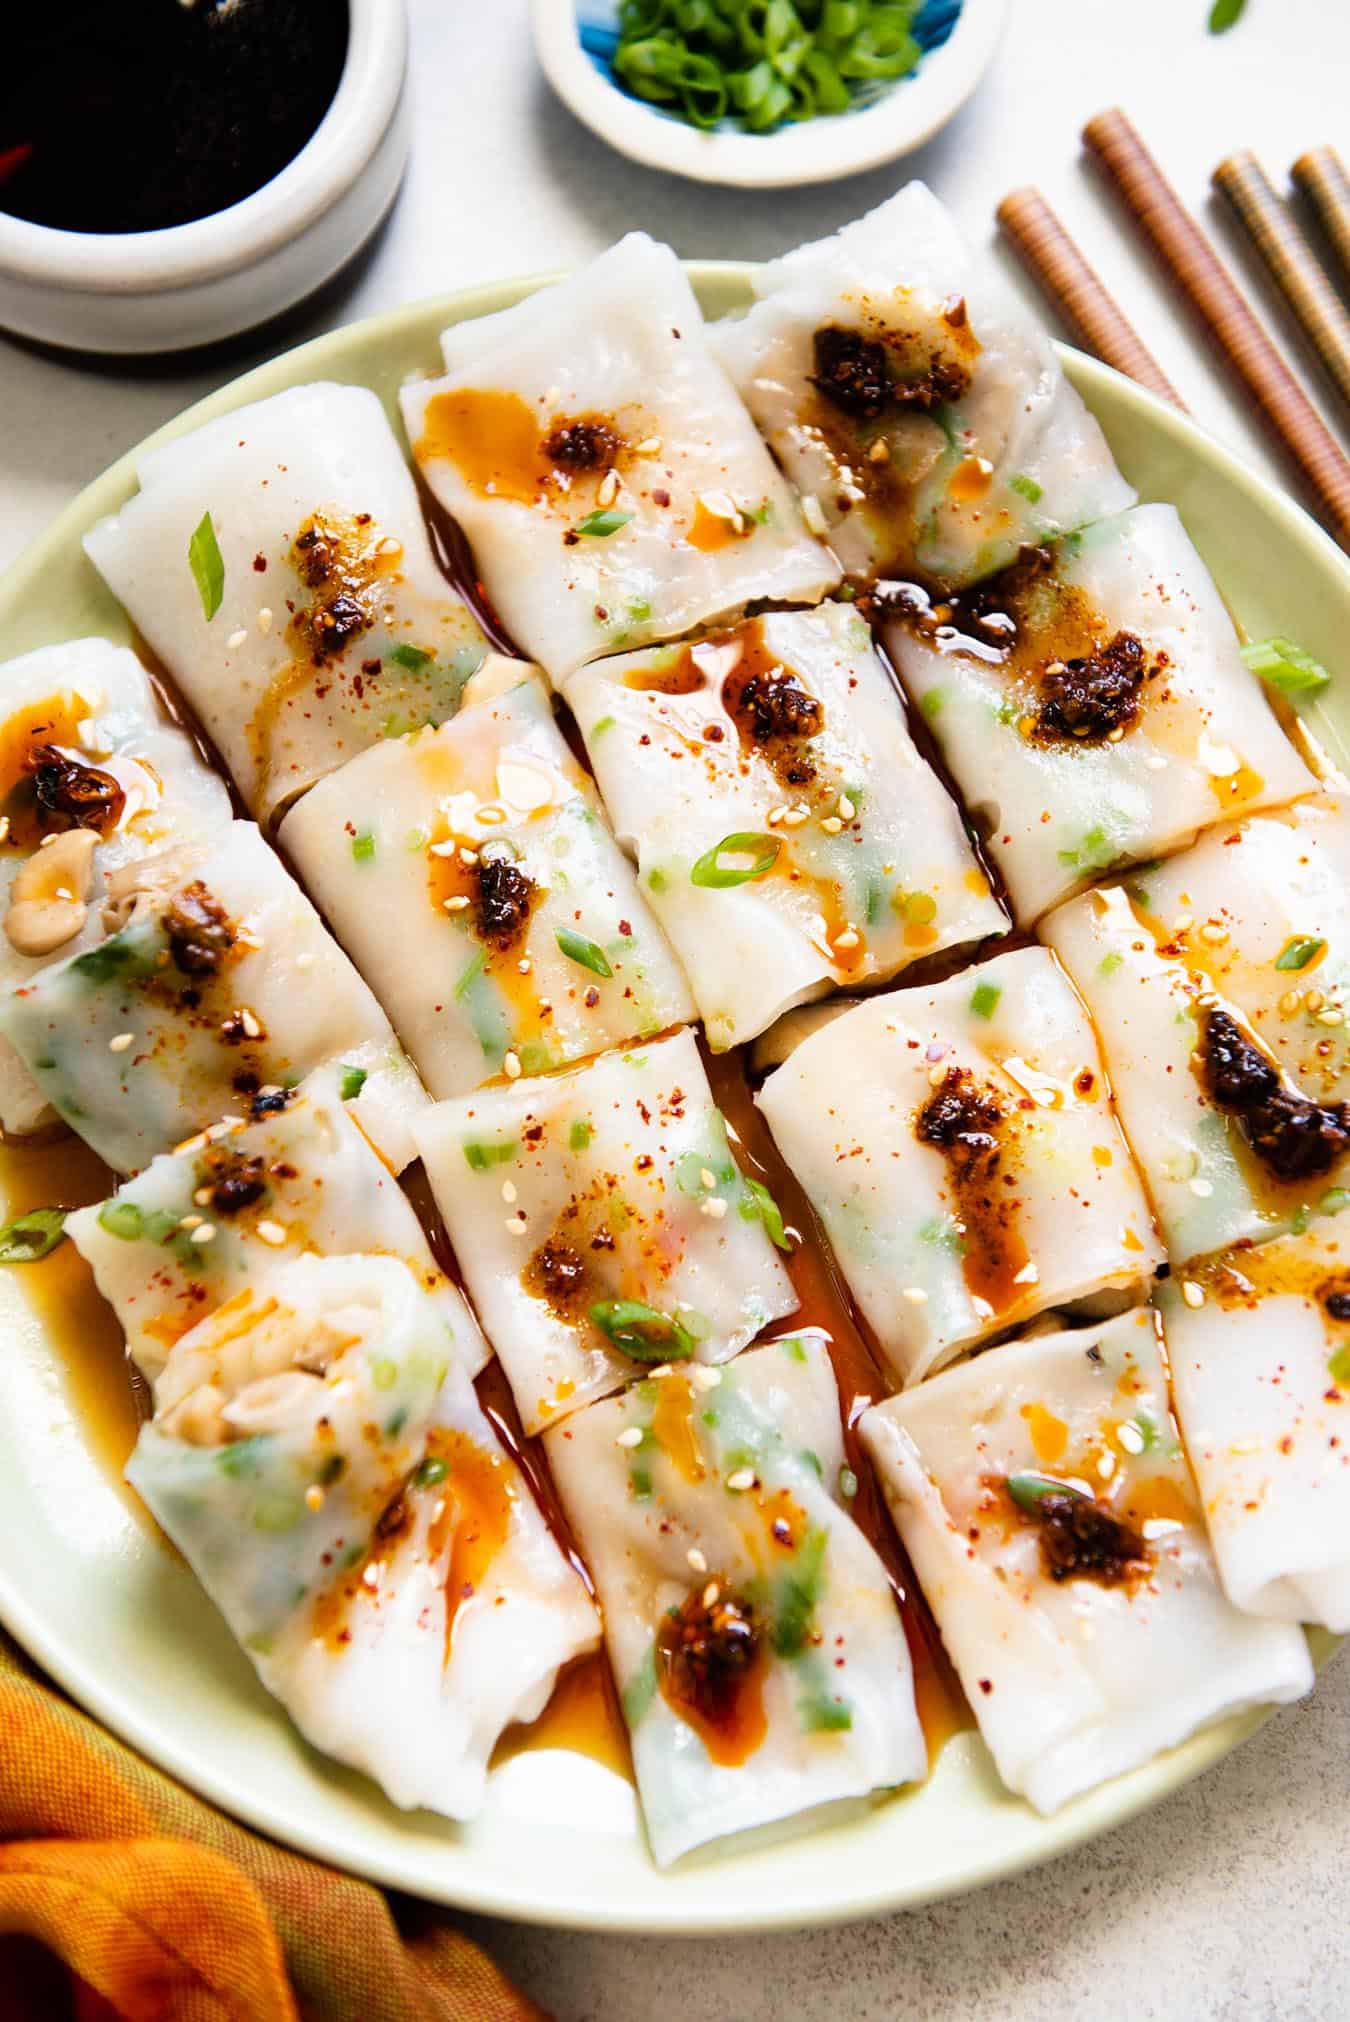
- You can serve the cheung fun with sweetened soy sauce (see note 4 for recipe), like they do at dim sum restaurants. I like serving the cheung fun with a drizzle of my teriyaki sauce, soy sauce, and chili oil. You can also garnish with toasted sesame seeds and more sliced scallions.

Notes
- You can use any mixture of mushrooms that you like: shiitake, maitake, oyster, king trumpet, shimeji, and enoki. Some dim sum restaurants serve mushroom cheung fun with wood ear (木耳, a type of fungus) for added texture.
- Volume Measurements: Rice Flour: 1 1/4 cups; Potato Starch: 2/3 cup; Tapioca Starch: 2/3 cup. Previously, I listed the volume measurements for the rice flour as 1 cup, and the potato and tapioca starches as 1/2 cup. Those measurements were based on the dip-and-sweep method, which is less precise than the spoon-and-sweep method.
- You can also fill the box with water in your sink by running water from the faucet directly into the box. However, be careful when transferring the box to the stove because you can accidentally spill water everywhere like I did during my test batch.
- Sweetened soy sauce recipe: Mix 1/2 cup hot water, 2 tablespoons sugar, 3 tablespoons soy sauce, and 1/2 teaspoon sesame oil. Taste and add another half or full tablespoon of soy sauce, if necessary.
- Don’t pour the batter onto a steaming tray or square pan until you are just about ready to steam the rice noodle sheet. You’ll notice that if you leave the raw batter on the steaming tray for too long, the flour starts sinking to the bottom.
- Using a carbon steel wok: I don’t recommend steaming the cheung fun in a carbon steel wok because the boiling water in the wok can ruin the seasoning, especially if you live somewhere that has hard water.
Nutrition
Editor’s Note: This post was originally published in September 2019. I’ve updated the post with more photos and simplified the process for the filling.


Michelle says
This looks delicious! Another one to add to my vegan Chinese food roster!
Lisa Lin says
Thanks, Michelle!
lilly says
growing up cantonese in a different country, mom and I made these from scratch by grounding raw rice in a blender for the rice flour. then we add shrimp, ground beef, scallions, etc. it was a labor of love on saturday mornings! thank you for bring back those memories. now, off to make these and create new memories with my daughter, her favorite dim sum! thank you lisa!
Lisa Lin says
So many people have told me that their parents made this from raw rice! I really need to try that myself. Thanks for the lovely message, Lilly!
Sare says
Hi Lisa!
Thanks for the helpful tips!
I didn’t have tapioca starch so I used wheat starch and corn starch along with the rice flour… the texture was a bit off compared to dim sum cheung fun.
Is the only fix to buy tapioca starch, or can I adjust the proportions of the flours I already have?
Thank you!
Aqua says
@SARE – the tapioca flour is a must if you want a chew to these rice rolls. With it, you’re just using the other flours and they do not give the chewy texture that makes this dish great. They sell tapioca flour in American grocery stores now. You can use arrowroot flour as well.
Sare says
Hi Lisa!
Thanks for the helpful tips!
I didn’t have tapioca starch so I used wheat starch and corn starch along with the rice flour… the texture was a bit off compared to dim sum cheung fun. Is the only fix to buy tapioca starch, or can I adjust the proportions of the flours I already have?
Thank you!
Allison says
I absolutely love this recipe and have been following this account for ages. Cheung fun/banh cuon/jah leung are some of my favorite foods at dim sum and at Vietnamese restaurants, and it’s been so rewarding to get to recreate it at home.
I appreciate the step-by-step instructions of how to make the rice noodle itself, as this has always been the most challenging part for me. I’ve made the recipe twice now, and both times it’s been perfect. 🙂
betty lee krihara says
This was a really good recipe, I loved the consistency and taste of the batter. It was soft and not too stiff. It was a bit tricky to get the batter an even and thin layer into the pan so that requires some practice. Will definitely be adding this to my rotation.
Vonnie says
These turned out beautifully. The step by step instructions were spot on and I really appreciated being able to reference the video demonstrations you put on your instagram!
I had a very cobbled together set up as I’m trying to stop adding pieces to my small apartment kitchen – I bought an inexpensive wok without a lid hoping one of my other pot lids would fit. They did not, but I inverted another saute pan over the top instead. I also used the steaming grate from my instant pot and a glass 8×8 pan. They were delicious with the sweetened soy sauce!
Darlyne says
Love this recipe Lisa.
Did you use Bob’s Red Mill rice flour?
Lisa Lin says
Hi Darlyne. I did not. I used the Thai-style rice flour that comes in the red bag. I have tried it with BRM rice flour, and it works.
Pym says
This looks so fun and tasty and I’m going to buy steamer tray. But to follow your recipe if I buy store made cheung fun flour. And follow your recipe how many cupß for how many servings? Thanks
Lisa Lin says
Those premade packages will have directions. I don’t want to make a general recommendation because the ingredients in the mixes vary.
Leena says
Can I make the batter a day ahead and keep in fridge? I want to make fro breakfast and thinking to keep batter overnight then whisk before using.
Lisa Lin says
Yes, just make sure to give it a stir before you use it!
suzane says
Question- is the sugar in the batter necessary for cooking/steaming, or is this an ingredient based upon preferred taste? Wondering if it can be omitted with similar success in the steaming process.
Lisa Lin says
Yes, you can omit the sugar. The sugar is merely there to neutralize the flavor of the rice flour (there’s a slight taste there that can be unpleasant). But yes, your cheung fun will steam fine without the sugar.
Victoria Haneveer says
What a lovely dish for Chinese New Year! My mouth is watering and I must try this asap. I actually have some mushrooms that are looking suspiciously beyond their prime and I was looking for something to use them in!
I actually like these served with Indonesian ketjap manis, the sweet and thick soy sauce. I just find it goes perfectly, but I think regular would also work.
Anyway, happy Chinese New Year and thank you for sharing your delicious recipes!
ester says
Don’t hate me but I used rice paper wraps because I couldn’t wait to make a version I could have immedietely. It works for me but I am also very glad to know how to make them from scratch, so thank you!