Thank you to Bob’s Red Mill for sponsoring this post!
One of the biggest joys about blogging is being able to cook with Mama Lin. I helped her in the kitchen when I was young, and we have now come full circle with her helping me cook for my blog.
Occasionally, Mama Lin sends a message to me about a new dish that she wants to try. These Chinese chive boxes were one of her suggestions.
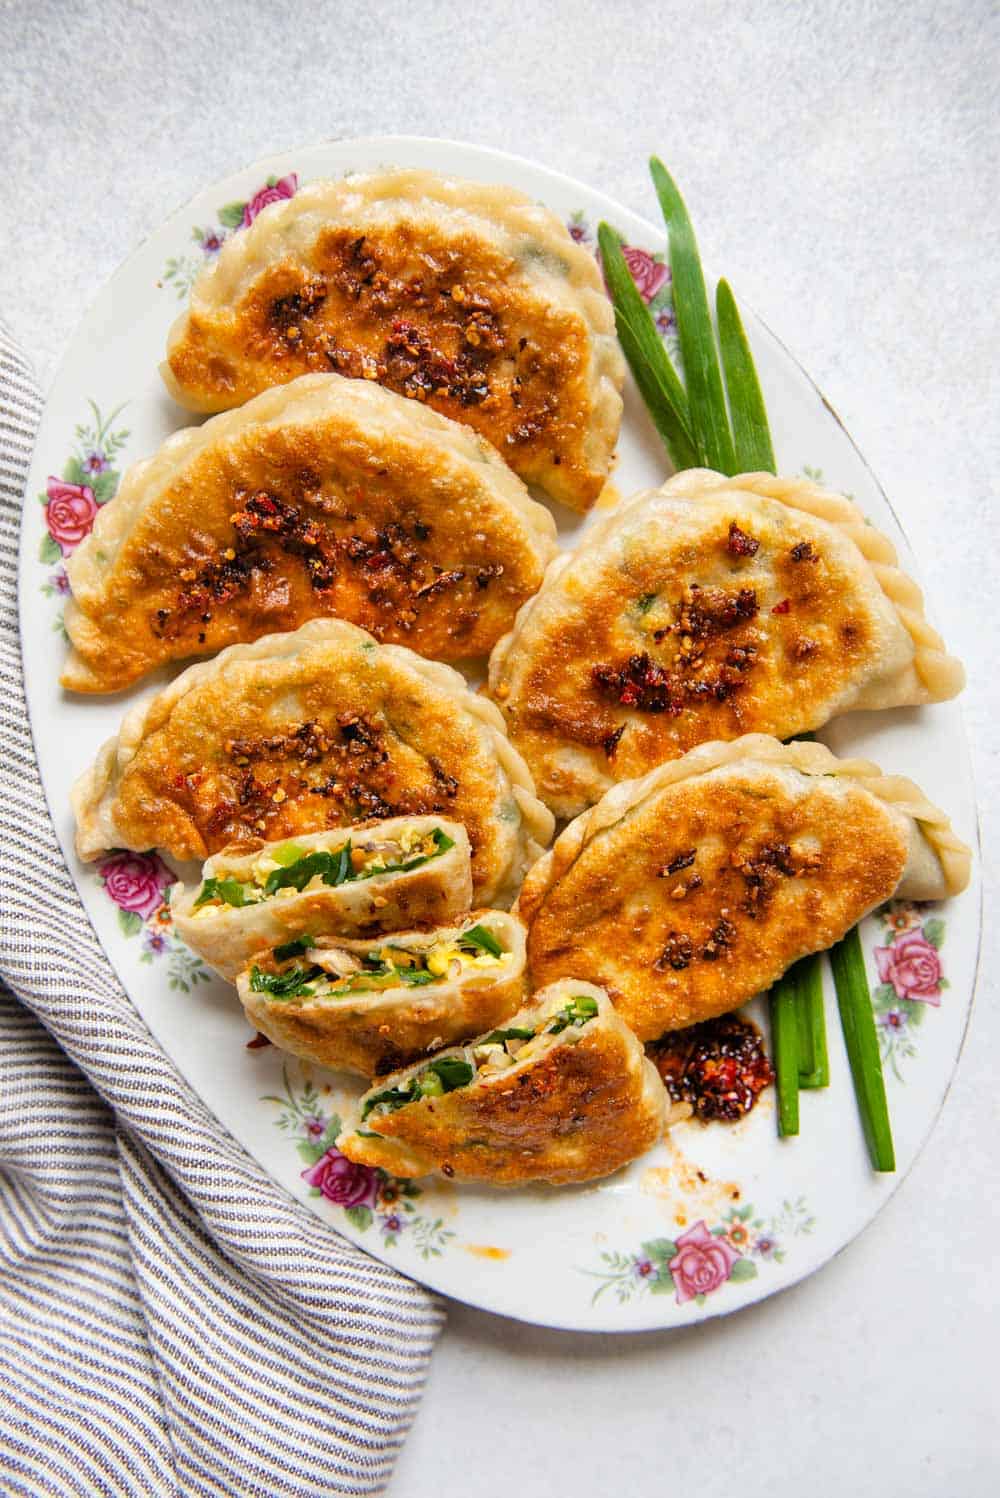
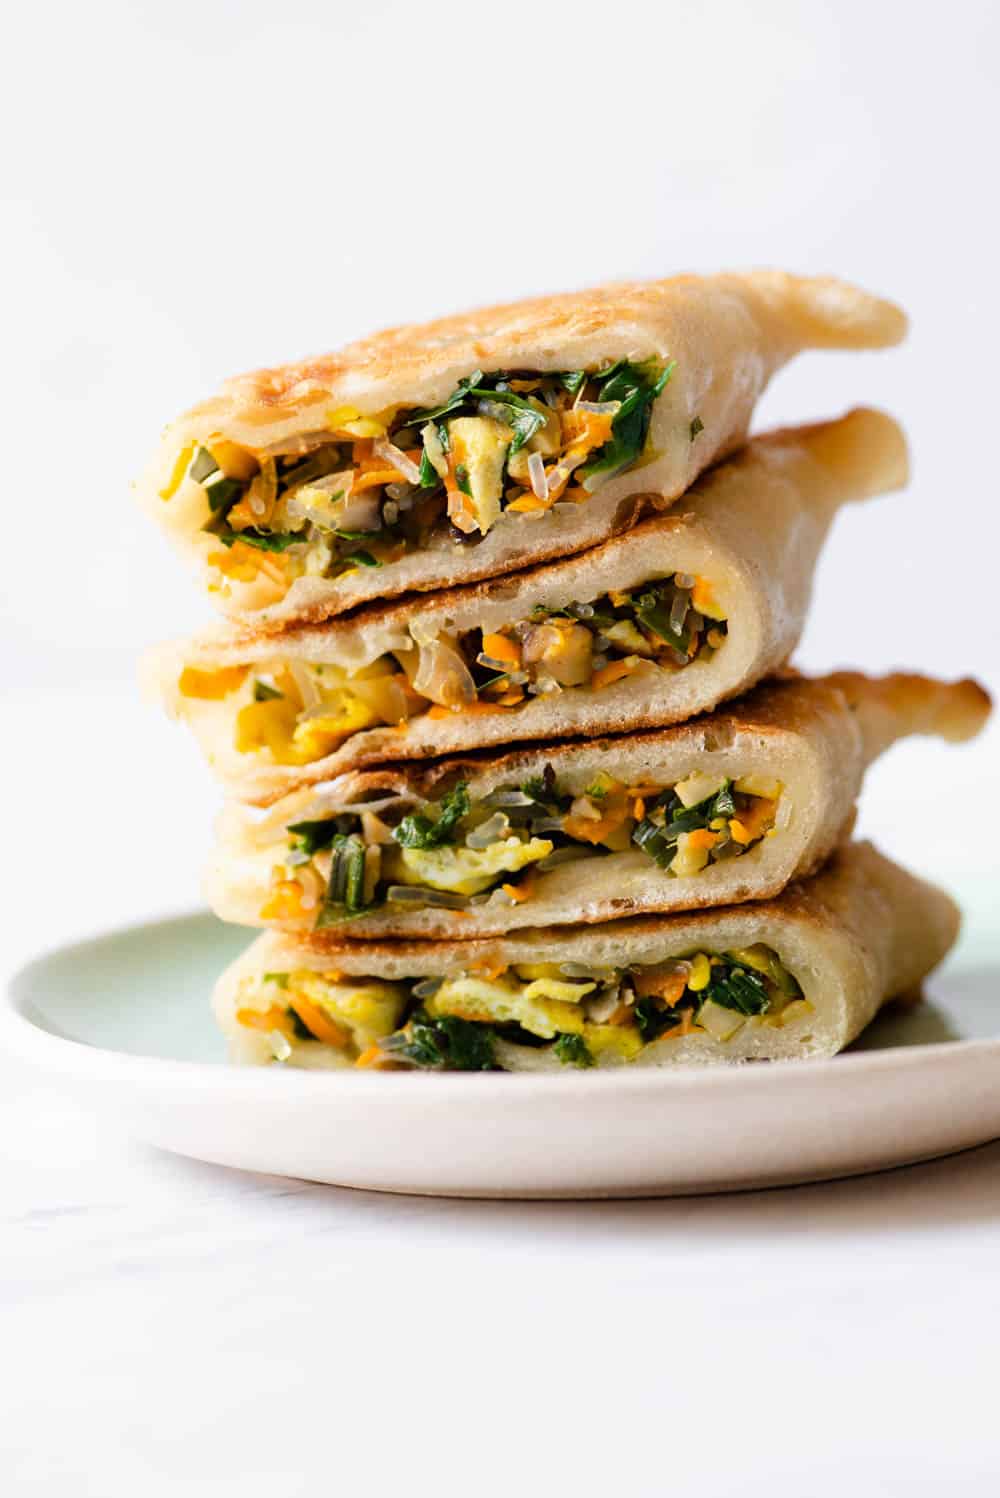
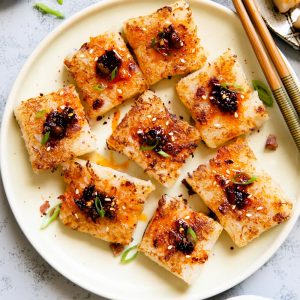
 Chinese chive boxes (韭菜盒子, also called chive pockets) come from northern Chinese cuisine. They are a popular street food, and they’re often prepared for new year’s celebrations. Typically, the filling includes Chinese chives (or garlic chives), eggs, vermicelli, minced meat, and dried shrimp. I wanted to make a vegetarian version, so I substituted the meat and shrimp with shiitake mushrooms and shredded carrots.
Because chive boxes are usually larger than regular dumplings, you’ll need to make the dough from scratch. Don’t worry, it’s incredibly easy to make.
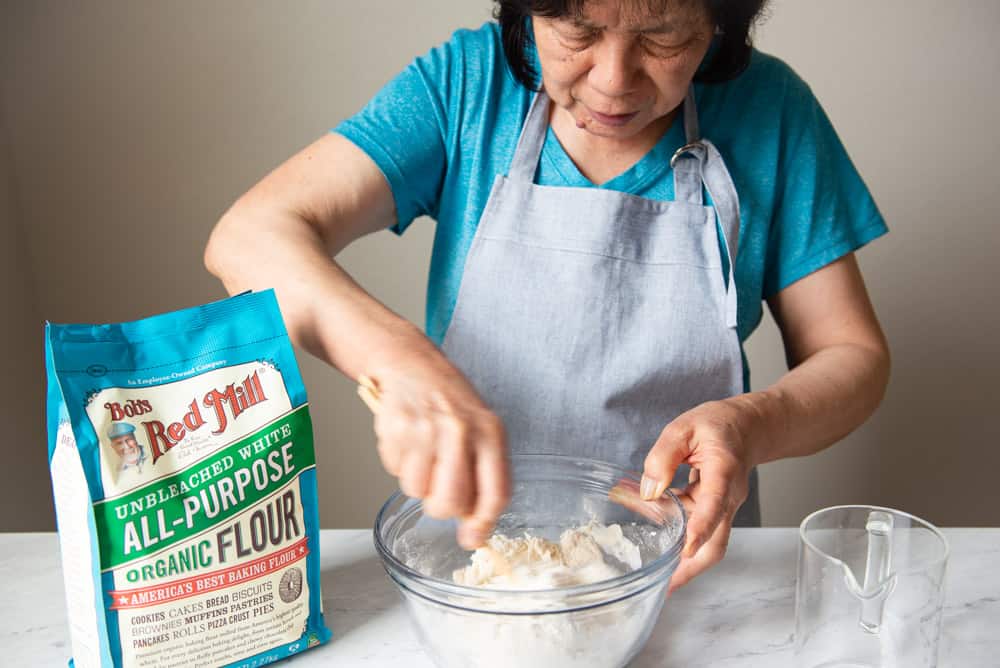
For the dough, I am using Bob’s Red Mill’s Organic Unbleached White All-Purpose Flour. The flour is freshly milled from certified organic, hard red wheat. I love how the flour is finely ground because it helps make the dumpling dough soft and smooth. Even Mama Lin commented on how nicely the dough felt when we used Bob’s Red Mill’s flour!
WHY USE WARM WATER FOR THE DOUGH
Many recipes for Chinese chive boxes recommend using just boiled water to make the dough. I don’t like the consistency of the hot water dough. The dough is sticky and it loses a lot of elasticity due to the heat of the water. I find the texture of hot water dough to be a little sticky when I bite into it. That’s why I prefer making the dough with warm water at about 110ºF.
You also don’t want to use cold water to make the dough. The dough will stretch back significantly every time you roll it out. It’s very frustrating.
HOW TO MAKE THE CHINESE CHIVE BOXES AHEAD
If you want to make these ahead, place the pleated chive boxes to plates or a baking sheet lined with parchment paper. Freeze them for a few hours, until they are hard on the outside. Then, transfer them to zip top bags.
When you are ready to cook the chive boxes, place the frozen boxes directly to a heated pan with oil. There is no need to thaw the chive boxes. You’ll just need to add a few more minutes to the cooking time.
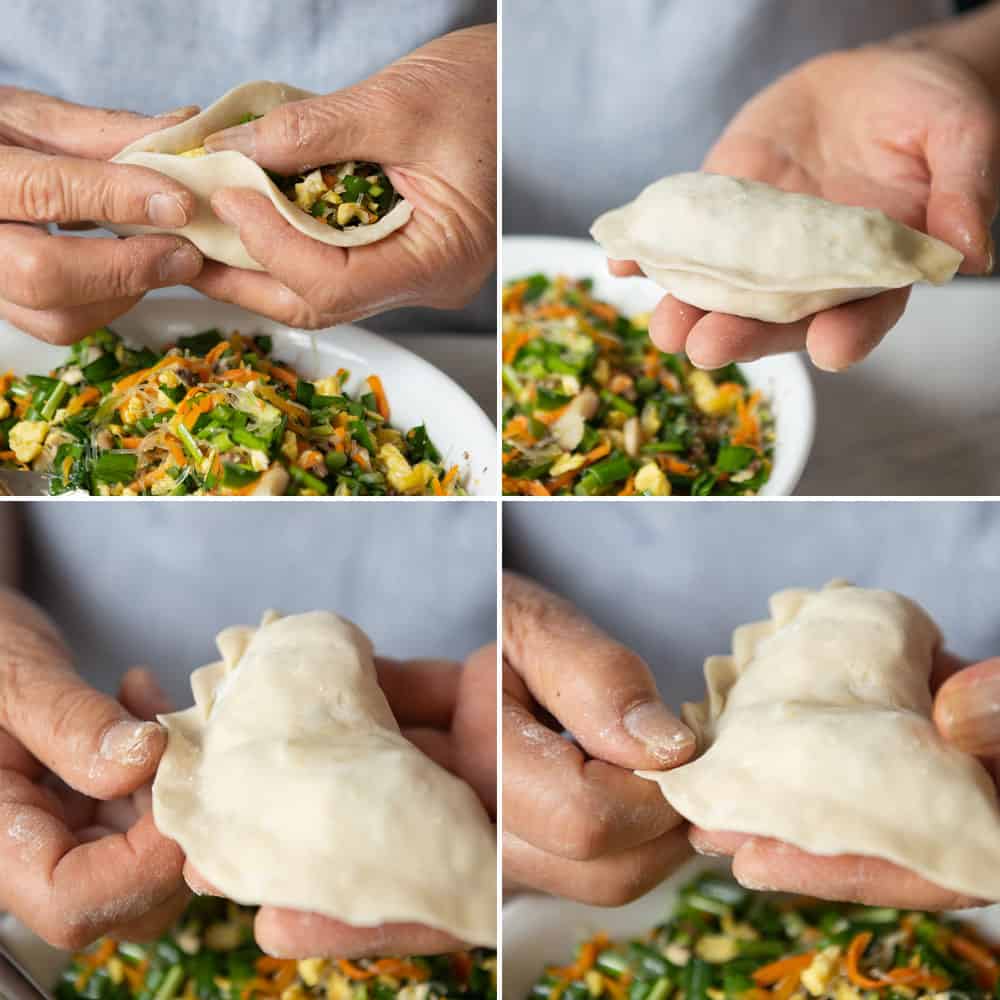
FOLDING TECHNIQUE

Chinese Chive Boxes (韭菜盒子)
Ingredients
Dough
- 3/4 cups (170g) water
- 2 cups (285g) all-purpose flour, plus more for dusting
- 1 teaspoon safflower or other neutral oil
Filling
- 2 cups (140g) chopped Chinese chives (1/4-inch pieces)
- 5 teaspoons safflower or other neutral oil, divided
- 3 large eggs, lightly beaten
- 1 tablespoon minced ginger
- 1/3 cup chopped shiitake mushrooms (see note 1)
- 1/2 cup chopped hydrated mung bean vermicelli (see note 2)
- 2/3 cup grated carrots
- 1 1/4 teaspoons kosher salt
- 1 teaspoon sugar
- 1 teaspoon ground coriander
- 1/4 teaspoon ground white pepper
- 2 teaspoons sesame oil
For Frying
- 3 tablespoons safflower or other neutral oil
- 1/2 cup water
For Serving
Instructions
Prepare the Dough
- Add the 2 cups of flour into a mixing bowl. Create a well in the center of the bowl.
- In a microwave-safe jar or bowl, microwave the water on high for 30 seconds. The temperature of the water should be around 110ºF. It is very warm to touch but should not be scalding. Carefully pour the water into the bowl with the flour.
- Use chopsticks or a wooden spoon to mix the flour and dough. Once the dough starts coming together, drizzle in 1 teaspoon of safflower oil. Use your hands to gather all the bits of dough and knead together for several minutes. The dough may be a little tacky but it shouldn’t be sticky. If the dough is feeling dry, add a tiny splash of water.
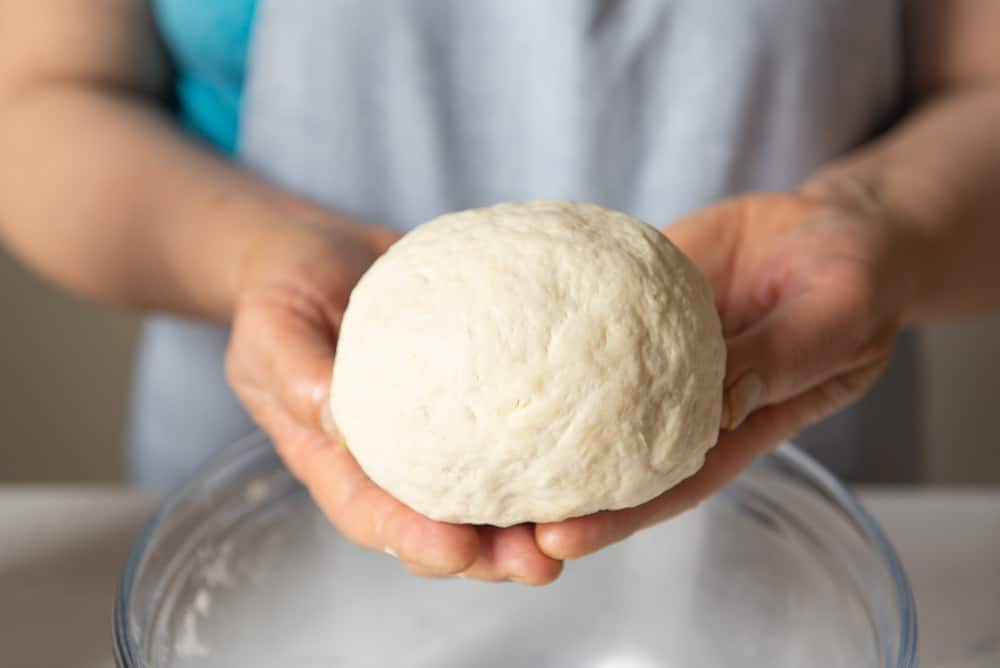
- Shape the dough into a ball. The surface should be relatively smooth. Place the dough in the bowl and cover the bowl with a wet towel, silicone cover, or plastic wrap. Let the dough rest for 30 minutes.
Prepare the Filling
- Transfer the chopped chives to a mixing bowl. Add 2 teaspoons of safflower oil and toss with the chives. Set the bowl aside.
- Drizzle 1 teaspoon of safflower oil into a nonstick skillet over medium-high heat and swirl it around. Once the pan is hot, add the beaten eggs. Cook them for about 1 minute, scrambling the eggs with a spatula. Turn of the heat, and use the spatula to break up any large chunks of egg into small pieces (no larger than 1/2-inch pieces). Transfer the scrambled eggs to a plate and wipe down the skillet.
- Drizzle the remaining 2 teaspoons of safflower oil into the skillet over medium-high heat. Add the ginger and mushrooms and sauté for a minute. Mix the carrots and chopped vermicelli and stir for another minute. Turn off the heat. Season with the salt, sugar, ground coriander, and white pepper. Stir to combine. Transfer everything to the plate with the eggs and let cool for 10 minutes.
- Pour the egg and vegetable filling to the bowl with the chives. Drizzle in the sesame oil and toss to combine.
Make the Chive Boxes
- Flour your work surface and a large baking sheet. You will transfer your filled chive boxes to the baking sheet.
- Take the dough out of the bowl and knead it for a few seconds.
- Divide the dough into 12 pieces, about 38g per piece. Roll each piece of dough into a ball. Roll out the dough into circles, about 4 ½ to 4 ¾ inches in diameter. Use a dry cloth to cover the rolled out dough to prevent them from drying out.
- Take a rolled out piece of dough and place about 3 to 4 tablespoons of filling into the center. Fold the dough in half and seal so that you end up with chive boxes that are a half-moon shape. Make sure that the boxes are properly sealed. Using your thumb to pinch small pleats into the dough. You can use the step-by-step photos in this post for reference.
- Once you have pleated a chive box, transfer it the floured baking sheet. Cover the baking sheet with another dry cloth to keep them from drying out.
- Repeat with the remaining dough.
Cook the Chive Boxes
- Fill a measuring cup with about 1/2 cup of water. Set it next to the stove.
- Drizzle 1 1/2 tablespoons of safflower oil to a large skillet over medium-high heat. Place 6 chive boxes onto the pan. Fry them for about 2 minutes, until they’re lightly golden on the bottom. Flip them over and fry for another 1 to 2 minutes, until lightly golden.
- Hold the lid of the skillet in one hand and use it as a shield as you pour 1/4 cup of water into the pan. Cover the skillet with the lid and cook for about 3 to 4 minutes.
- Uncover the pan and flip the chive boxes over. Keep cooking and flipping the boxes until all the water has evaporated and there is a nice crust on both sides of the chive boxes. Transfer the cooked boxes to a serving plate. Repeat for the remaining chive boxes.
- Serve the chive boxes immediately. I like serving them with chili oil along with the sediment (chili flakes, fried ginger and garlic).
Notes
- You can also use dried shiitake mushrooms for this. Soak the dried mushrooms in warm water for about 30 minutes so that the mushrooms plump up. You’ll need about 4 medium-sized mushrooms.
- I used dried mung bean vermicelli and soaked them in warm water for about 20 minutes. Mung bean vermicelli usually come in small or larger bundles. I started out with 20g dried vermicelli and soaked it in water.
Nutrition
Disclosure: This post was sponsored by Bob’s Red Mill! To learn more about their products and to get more recipe inspiration, follow them on Instagram or Facebook.


Somia Aluwalia says
Hi – great recipe and I can’t wait to try it! Quick Question – do you seal the chive boxes the same way as a dumpling – run a finger dipped in water along the edge before folding over and sealing?
Lisa Lin says
Hi Somia, great question! For this recipe, because I’m using freshly made dough, I don’t need to run water over the edge. However, if you are making smaller chive boxes with store bought wrappers, you’ll need to run water along the edge. Hope this helps!
Colleen says
I tried this recipe for the first time tonight and they came out really nicely! I was a little nervous because I’m a folding newbie and the dough is very forgiving. Great recipe!
Rebekah says
This one has been on my list to attempt for a while, and now that I’m getting into more dumpling making, I decided to give it a shot. It was super fun to make the wrappers, and I relied heavily on Lisa’s video on Instagram, which showed some masterful folding and pleating work. I used a KitchenAid mixer to do most of the heavy kneading (a bit of a cheat?).
There are quite a few steps involved, and it really comes together. I didn’t have vermicelli noodles so I used some pad thai noodles (it was the closest I had?), but I think I got the desired effect. I love that this had eggs in it. The seasoning was just right.
I followed the cooking instructions and timing to a T because I wanted to get that lovely crisp in the pan.
I didn’t ration the filling quite right for the 12 pockets so I ended up with leftover filling, which we just put on rice because it was THAT good! And now we have 10 more of these chive boxes waiting for us in the freezer!
I’m wondering: do you recommend frying the chili flakes, ginger and garlic as you cook the chive boxes, to get that sediment?
Lisa Lin says
You certainly can fry some chili flakes, ginger, and garlic with the chive boxes! My only concern is that the ginger and garlic will burn before the chive boxes are fully cooked, so you might want to add the herbs after you’ve flipped the boxes over to the other side.
Rebekah says
Oooh, thanks for this tip! BTW, we just cooked some of these out of the freezer again this week. WOWOWOW. Just as amazing as the day we made them! :)-
Jessica says
Ended up really well–seasoning and taste was perfect! Also, the amount of filling was just enough which is always good. I hate making too much/little filling for the amount of dough I’ve prepared. Thanks 🙂
Malaka says
What a fantastic recipe! Thank you Lisa and Mama Lin. I didn’t have the noodles so I used 2 eggs and added leeks to the mix. The instructions for the dough were so clear. I’ll definitely make a double batch next time so I can keep some on hand in the freezer
Lisa Lin says
Malaka, thank you so much for trying the recipe!! Glad you enjoyed it!
Alex says
I made this and they came out SO GOOD. I thought making the dough would be the hard part. But it was the easiest dough to make and handle ever, and very forgiving when it came time to pinch the boxes shut. This is going in my regular rotation.
-I didn’t have shiitake so I used dried porcini. Still delicious.
-I couldn’t find mung noodles so I used vermicelli rice noodles.
-The coriander with white pepper really makes it special
-I ended up with quite a bit too much filling. So then I made more dough…and now I have some dough left over.
-some of my chive boxes stuck to the wax paper I wrapped them in, then they tore when I tried to take them out 🙁 How can I store them better?
-definitely fry these on a non-stick pan.
Lisa Lin says
Thank you for your tips, Alex!! So glad you enjoyed them!!!
beatrice says
can we make this dish without egg?
thank you 🙂
Lisa Lin says
Sure. You might want to sub with something else to make up for the lost volume in the filling.
Amber Adams says
It is great chinese dish. will you please tell me the recipe of dragon chilli.
gacha life says
Great. This article is wonderful in every way. I am grateful to you for your efforts.
Lo says
Hi Lisa, would the recipe work with Bob’s red mill gluten free flour? 🙂
Lisa Lin says
Hi Lo! So their blend uses a lot of rice flour, which means the texture will be different. I think it can work, but the flavor and texture will be different. Hi hope this provides some guidance!
drift boss says
The instructions for the dough were so clear.
Ewan Porter says
Chinese chive boxes, a savory delight! These crispy dumplings filled with fragrant chives and vermicelli offer a delicious taste of traditional Chinese cuisine. A must-try for food enthusiasts seeking authentic flavors.
URL says
Thanks for sharing this valuable knowledge.
Kin says
Nice!