
Thank you to Bob’s Red Mill for sponsoring this post!
Over the years, I’ve received many inquiries about tofu substitutions for people who are allergic to soy. In the back of mind, I’ve thought about Shan tofu, something that I first discovered while eating at Burma Superstar in San Francisco. However, it’s taken me a few years to actually develop a recipe for this chickpea tofu, which originates from Shan cuisine.
The Shan State is located in the eastern part of Myanmar (Burma) and borders China, Laos, and Thailand. Largely a rural area, the Shan State lies within a hilly plateau with fertile soils that support local agriculture. The Shan people are part of the Tai ethnic group (they refer to themselves as “Tai” and “Shan” is the Burmese name). There are many notable dishes from Shan cuisine, including Shan noodles, sticky rice, and their chickpea tofu! (Note: I will be using “Shan tofu” and “chickpea tofu” interchangeably throughout the post.)

WHAT IS SHAN TOFU (CHICKPEA TOFU)?
If you’ve ever eaten at a Burmese restaurant, you’ve probably seen Shan tofu or chickpea tofu on the menu. This Shan-style chickpea tofu is often made with chickpea flour, water, and salt and is pale yellow in color. Often, you’ll see versions of Shan tofu with turmeric added, which deepens the yellow color of the tofu and adds a hint of earthy flavor.
In the recipe below, I added turmeric along with sugar and granulated garlic, which neutralizes the beany flavor of the chickpea flour. If you’re looking for something that’s more authentic, feel free to leave out the sugar and granulated garlic.
The texture of Shan tofu is quite different from soy-based tofu. Because the process of making chickpea tofu is very similar to making polenta, I think the texture of chickpea tofu is more similar to polenta than soy tofu. Compared to polenta, chickpea tofu has a smoother texture, as chickpea flour is generally more finely ground than cornmeal.

USING CHICKPEA FLOUR TO MAKE BATTER
A common way to make chickpea tofu is to make a batter with chickpea flour and water. Another way of making chickpea tofu is to soak dried chickpeas in water and blending everything into a batter. Here, I am using Bob’s Red Mill Chickpea Flour, which is readily available in the baking aisle at my local grocery stores. I love the fine grind for the chickpea flour and did not have any issues with lumps in the batter as I tested this recipe.
By the way, Bob’s Red Mill Chickpea Flour is great for making gluten-free doughs. If you are looking for ideas, check out my friend Sarah’s recipes for gluten-free chickpea pasta or gluten-free dumpling wrappers over at Snixy Kitchen!
Bob’s Red Mill also makes a Garbanzo Fava Flour that’s made with chickpeas and fava beans. I haven’t tried using it to make this tofu yet, but I think it could work well in place of the chickpea flour!

ADJUSTING THE FIRMNESS OF THE TOFU
You can adjust the firmness of the chickpea tofu by using more or less water. Many recipes I’ve seen use a 1:3 flour-to-water ratio (by volume). In other words, for every cup of chickpea flour, use 3 cups of water. This will yield a tofu that’s pretty soft.
I like to pan fry the chickpea tofu, so I like making firmer tofu, which uses less water. Using 2 3/4 cups of water works quite well for me, though you can also reduce the water to 2 1/2 cups for an even firmer tofu. If you plan on deep frying the chickpea tofu, you probably want to use 2 1/2 cups of water for the batter.
CHOOSING THE RIGHT PAN
You can make the tofu in a loaf pan, square pan, or a round pan. If you want to make Shan tofu that’s at least an inch thick, I recommend using a loaf pan. I used a 9×5-inch loaf pan, but you can use something slightly smaller, such as an 8.5×4.5-inch loaf pan.
You can also also use an 8×8-inch square pan or an 8-inch round pan to make the tofu, but it will come out much thinner, especially if you use less water for the batter.
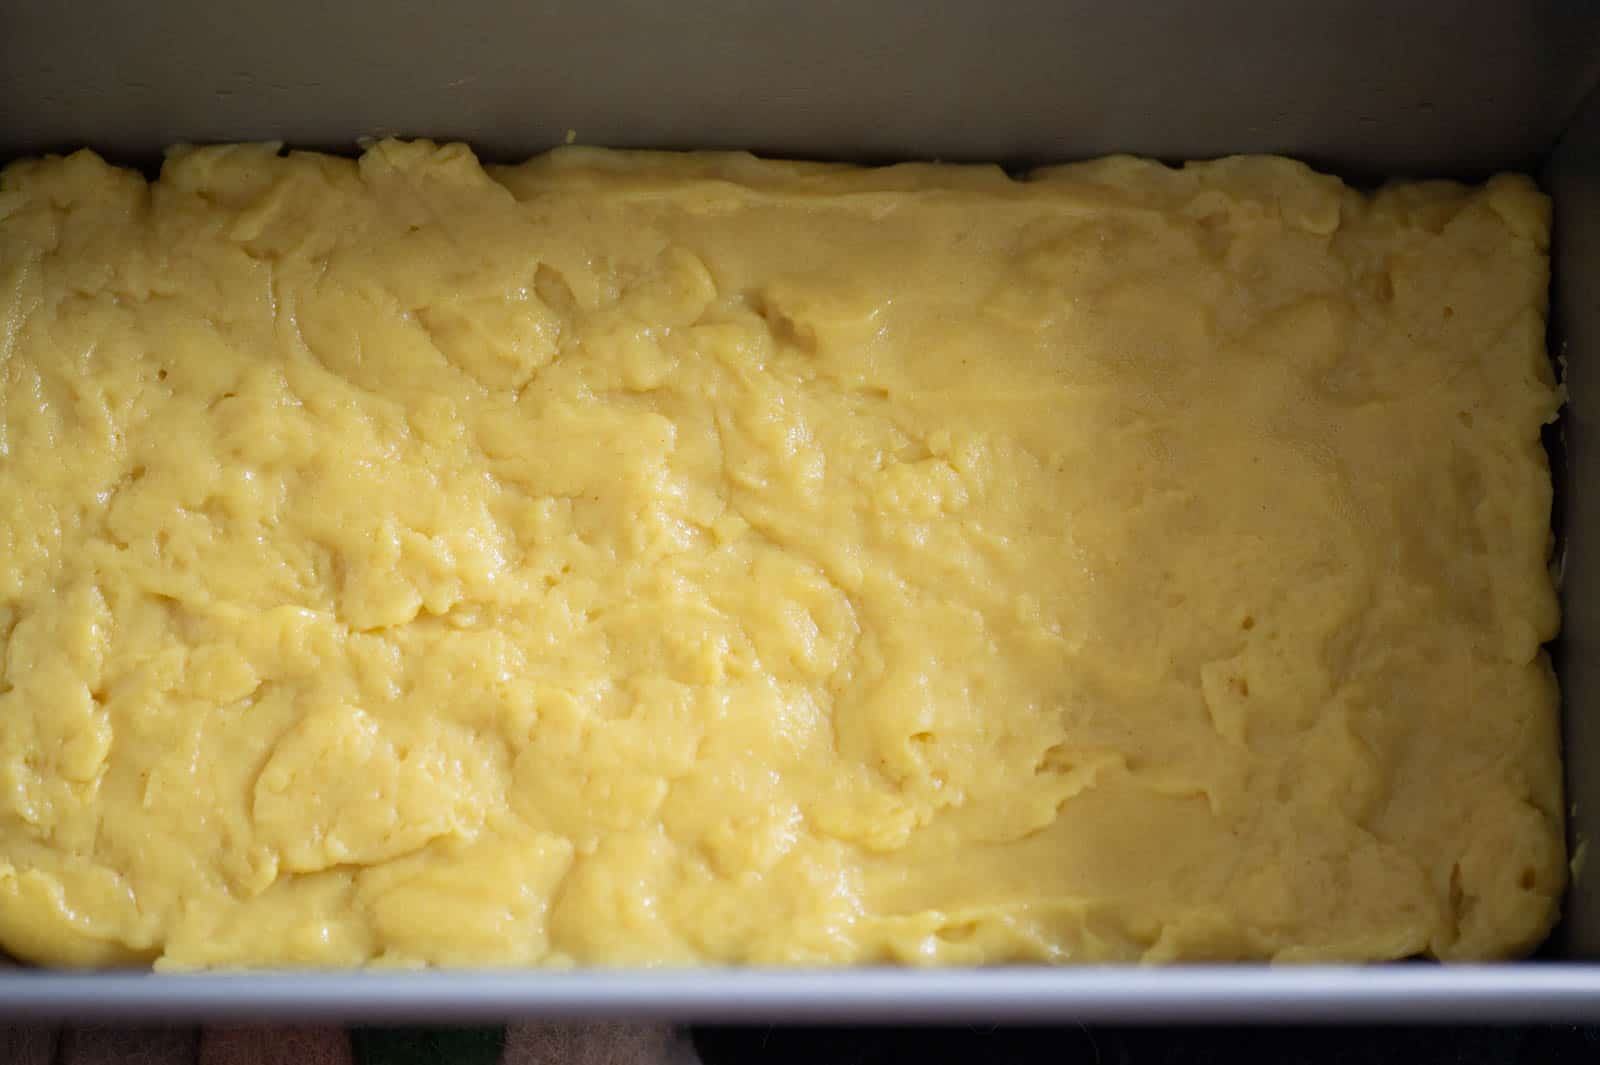
WHY DOES MY CHICKPEA TOFU LOOK LUMPY?
When you are ready to pour the chickpea tofu batter into a pan for molding, you must work quickly in order to get a smooth top. The batter forms a crust at the top very quickly, so if you spend more than a few minutes transferring the batter into the pan, the tofu likely will look very lumpy at the top (see photo above).

Whenever I make this tofu, I try to make sure I already have a greased pan and a silicone spatula ready to transfer the batter. After you’ve emptied the batter into the pan, quickly use the silicone spatula to smooth out the top.
If you end up with a lumpy batter, don’t worry too much. The bottom of the tofu will be smooth no matter what. Moreover, you can always slice off a thin layer from the top to smooth out the block of tofu.
SERVING SUGGESTIONS

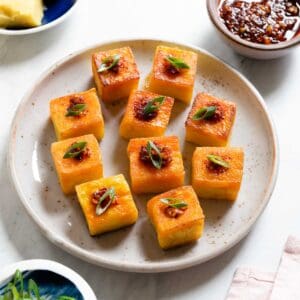
In Burmese restaurants, you often find Shan tofu deep fried or pan fried and served in salads. My favorite way of serving Shan tofu is to pan fry it in oil and drizzle it with homemade chili oil. I typically use the same chili oil that I make for my Chinese Smashed Cucumber Salad. Essentially, you pour heated oil over chili flakes, ginger, garlic, and salt for a very aromatic, lightly spicy oil. After you pan fry the tofu, drizzle chili oil and the solids over the tofu. It is such a treat!

Another way I like to eat chickpea tofu is to pan fry it and then drizzle teriyaki sauce over the tofu, until everything is coated with sauce. Then, let the sauce reduce slightly and serve.
MORE RECIPES WITH BOB’S RED MILL
- Pumpkin Millet Porridge
- How to Make Tapioca Pearls (Boba)
- Mango Tapioca Pudding (Mango Sago)
- Milk Bread Cinnamon Rolls
How to Make Shan Tofu (Chickpea Tofu)
Ingredients
- 1 cup (100g) Bob’s Red Mill chickpea flour, flour measured with spoon-and-sweep method
- 1 teaspoon (4g) kosher salt, or sub with 1/2 teaspoon sea salt
- 1/2 teaspoon granulated sugar
- 1/4 teaspoon granulated garlic, can sub with garlic powder
- 1/16 teaspoon turmeric, can use more if you want more turmeric flavor
- 2 1/2 to 3 cups water, divided (see headnote about amount of water to use)
- neutral oil for greasing pan and pan frying
Equipment
- 9×5-inch loaf pan (what I used), 8×4-inch loaf pan, 8×8-inch square pan, or an 8-inch round pan
Instructions
- Grease the pan lightly with oil (any oil), making sure to grease the sides as well. Set the pan aside.
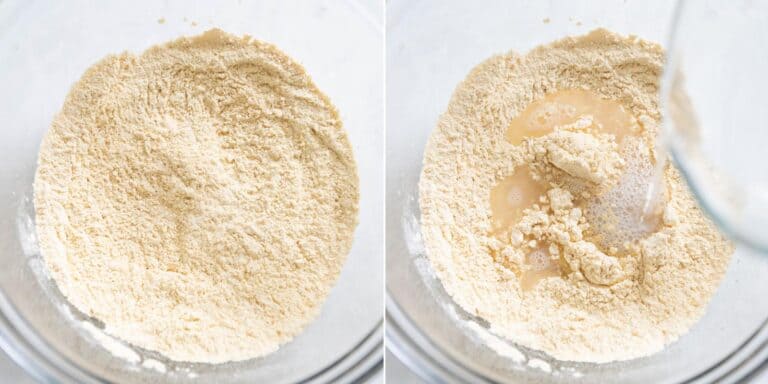
- In a bowl, whisk together the chickpea flour, salt, sugar, granulated garlic, and turmeric. Pour in 1 cup (230g) of water into the bowl and whisk everything until you get a smooth batter. Set aside.
- Pour the remaining water into a large stainless steel saucepan. I poured 1 3/4 cups (403g) water into the saucepan for a firmer tofu. Bring the water to boil and reduce the heat to medium. Give the chickpea batter a quick whisk. Then, pour the batter into the boiling water, making sure to whisk the contents in the saucepan as you pour the batter.
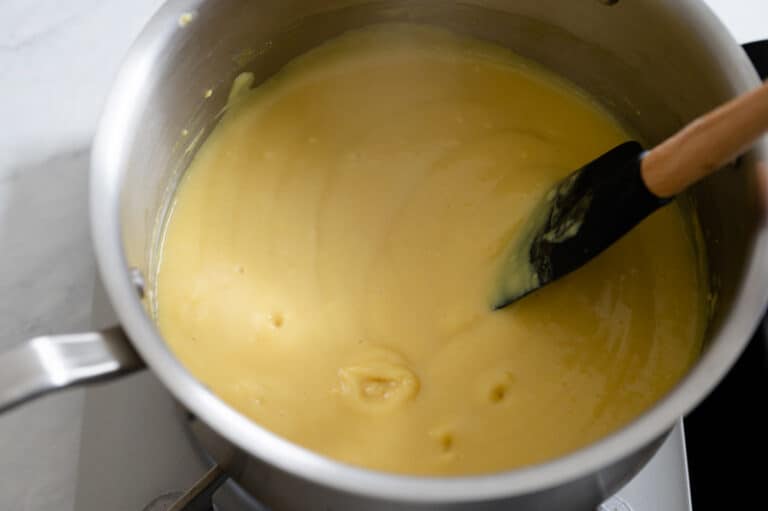
- Continue cooking the batter for 6 to 7 minutes, stirring constantly to ensure that the batter doesn’t congeal at the bottom of the pan. I like to use a whisk for the first few minutes before switching to a silicone spatula. Make sure to scrape the sides and bottom of the saucepan with a spatula as you cook the batter. The batter should look like the texture of pudding.
- Turn off the heat and pour the batter into the greased pan. Work as quickly as possible because the batter crusts over very easily, making it difficult to smooth out the top. Use your spatula to scrape all the batter into the pan. Then, use the spatula to smooth out the top as much as possible.
- Let the chickpea tofu cool by an open window for 15 to 20 minutes before transferring to the refrigerator to chill for another hour, until the tofu sets.
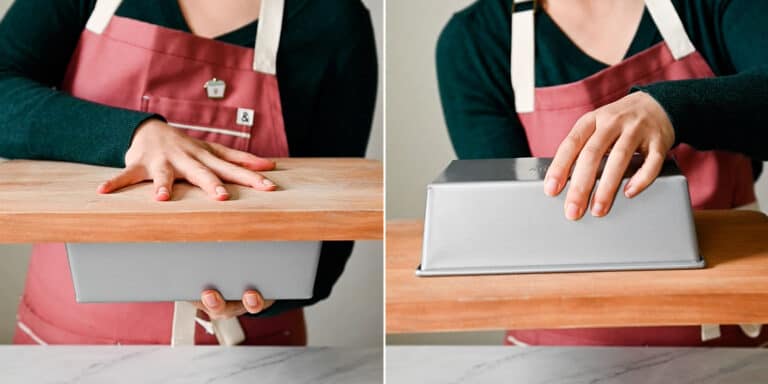
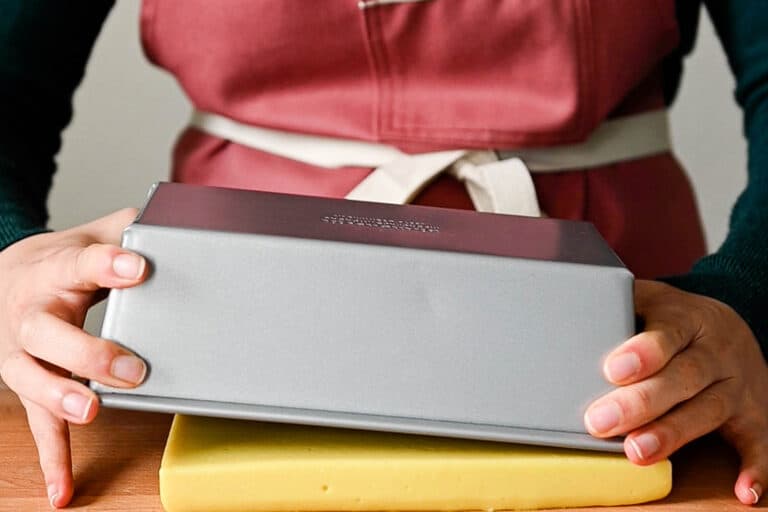
- To unmold the tofu, place a chopping board over the pan. Then, invert the pan and chopping board, so that the pan with the tofu is on top of the board.
- Give the pan a shake or tap to unmold the chickpea tofu completely.
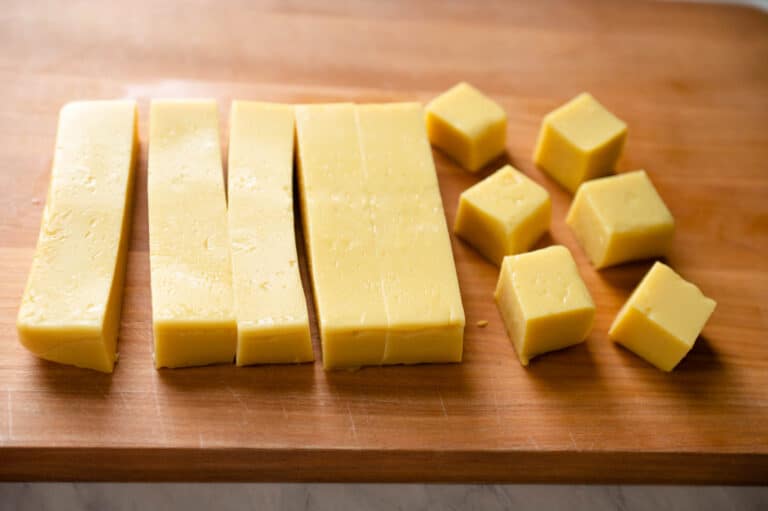
- Cut into cubes or slices. Pan fry tofu in oil on a nonstick pan over medium-high heat. Make sure you use a good amount of oil, as the cubes can stick to the pan easily. Let the tofu pan fry for a few minutes so that a crust forms and turns golden before flipping them over. The crusty layer can get stuck to the pan easily if the tofu is not ready to be flipped. I like serving the pan-fried chickpea tofu with chili oil drizzled on top (see note 1 for directions) or seasoning it with teriyaki sauce.
- Storing Chickpea Tofu: If you’re not planning on using the tofu right away, leave the tofu in the pan and cover it with plastic wrap, foil, or a lid. Try to use it within 1 or 2 days because the tofu can release quite a bit of water over time, causing the tofu to fall apart easily. Alternatively, you can freeze the tofu. Because of the high water content of the tofu, wrap the tofu in plastic wrap first before placing it into a freezer bag or container. Otherwise, a lot of ice crystals will form easily around the tofu. The tofu can be kept for a few months. Simply defrost the tofu when you want to cook it.
Notes
- Serving chickpea tofu with chili oil: I typically use the chili oil that I prepare for my Chinese Smashed Cucumber Salad recipe. Essentially, pour heated oil over chili flakes, ginger, garlic, and salt for a very aromatic oil. After you pan fry the tofu, drizzle the chili oil and solids over the tofu. Use any leftover oil to season noodles or make my cucumber salad!
- Seasoning chickpea tofu with teriyaki sauce: Pan fry the chickpea tofu first. Once you’ve pan fried a few sides, reduce the heat to low and drizzle teriyaki sauce over all the tofu pieces, enough to coat the tofu with the sauce. Let the sauce sizzle and flip the tofu around to coat them with the sauce. Once it looks like the sauce has reduced significantly, turn off the heat and transfer the tofu to a plate.
- Cleaning the saucepan: A thin layer of batter will inevitably stick to the bottom of the pan when you heat it over the stove. That’s why I like heating the batter in a stainless steel saucepan so that it’s easy to soak and scrub during the cleaning process. Once you soak the saucepan in cold water for 30 minutes to an hour, the thin layer of chickpea batter should come off pretty easily.
Nutrition
Disclosure: This post was sponsored by Bob’s Red Mill! To learn more about their products and to get more recipe inspiration, follow them on Instagram or Facebook.




Sara says
Love the flavor, but I had difficulty getting it to set. Followed the instructions for firm tofu closely, but the next day it still hadn’t set. I then cooked it another 7 minutes on high and that set enough to slice and serve, but it was still pretty soft. Any ideas? I’m wondering if using a different brand of flour than you could be the culprit. Thanks!
word wipe says
Spend some time playing. I’m interested in finding out more because I have strong views about it. Would you please provide more details to your blog post? We will all actually gain from it.
globle says
Very helpful, thank you. Wow, I really enjoy reading your site posts. Your article is both informative and engaging.
andrea says
I’ve tried to make this twice now and it will not get firm enough to pan fry. I tried making it with 1 cup flour, 2.5 cups water, and I boiled it for a full 15 minutes, but when I went to fry it in the pan it just turned into a goopy, soupy mess. Wasn’t really that firm in the container either. Why is this not working?????
Lisa Lin says
Hi Andrea, how long are you chilling the tofu for?
Maura says
This was delicious and exactly what I was looking for! I had an order of Shan tofu at a local Burmese restaurant and really wanted to make it at home and this made it so easy and cheap. Definitely will be making again.
Lisa Lin says
Thank you, Maura!