Thank you to Bob’s Red Mill for sponsoring this post!
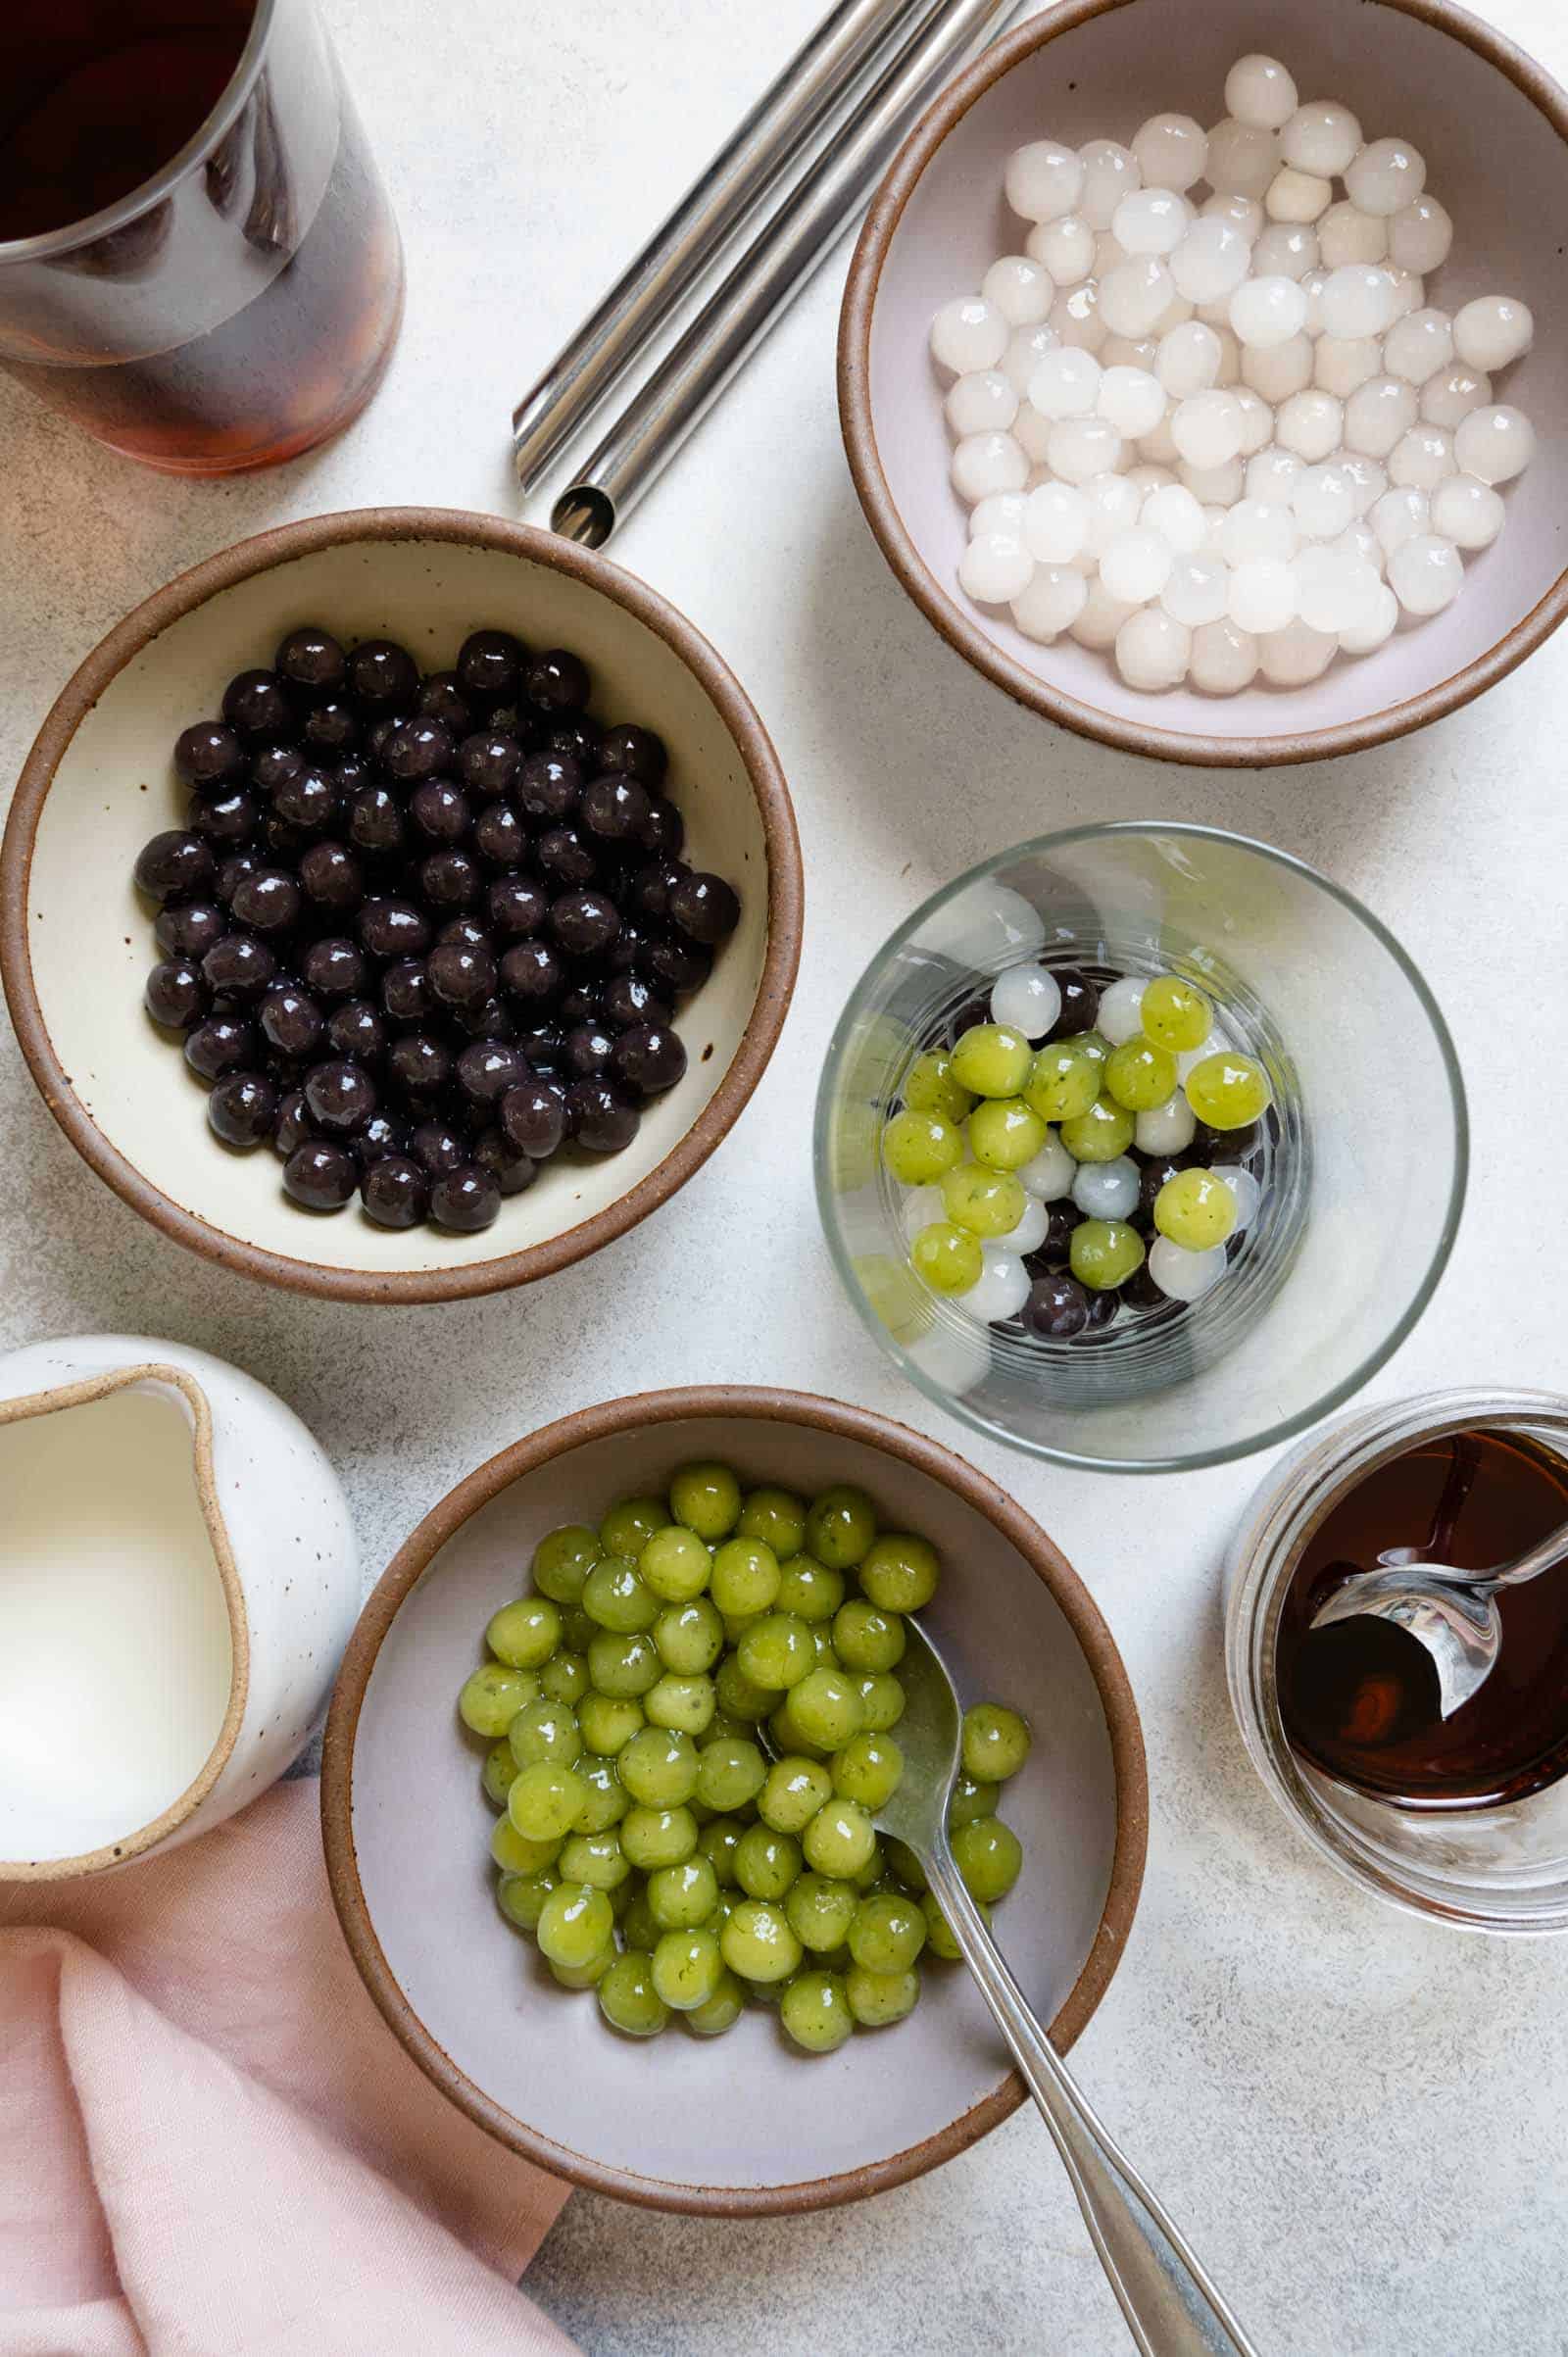
Bubble tea (波霸奶茶, bo ba nai cha) is one of my favorite beverages. I love the experience of sipping chilled sweetened milk tea and munching on chewy tapioca pearls (boba). I tend to make bubble tea at home because I find the drinks from boba shops can be too sweet. However, sourcing the right kind of tapioca pearls has been a journey for me.
When I first started making bubble tea, I tried cooking traditional boba pearls, which take quite a while to cook and come in vacuum-sealed bags that are too big for a two-person household like mine. A few years ago, I switched over to the “quick-cooking” variety of boba that are supposed to be ready in 5 minutes. Although these quick-cooking boba have a shorter cooking time, the pearls harden as soon as they come in contact with cold liquid. As a result, the pearls lose the desirable springy texture within minutes.
Last year, I decided to try making tapioca pearls at home. After a lot of experimentation, I’ve developed several tapioca pearl recipes so that you can make boba in a variety of colors. The ingredients for each color of boba vary slightly, but the cooking method is basically the same for all of them.
HOW TO MAKE TAPIOCA PEARLS
INGREDIENTS OVERVIEW
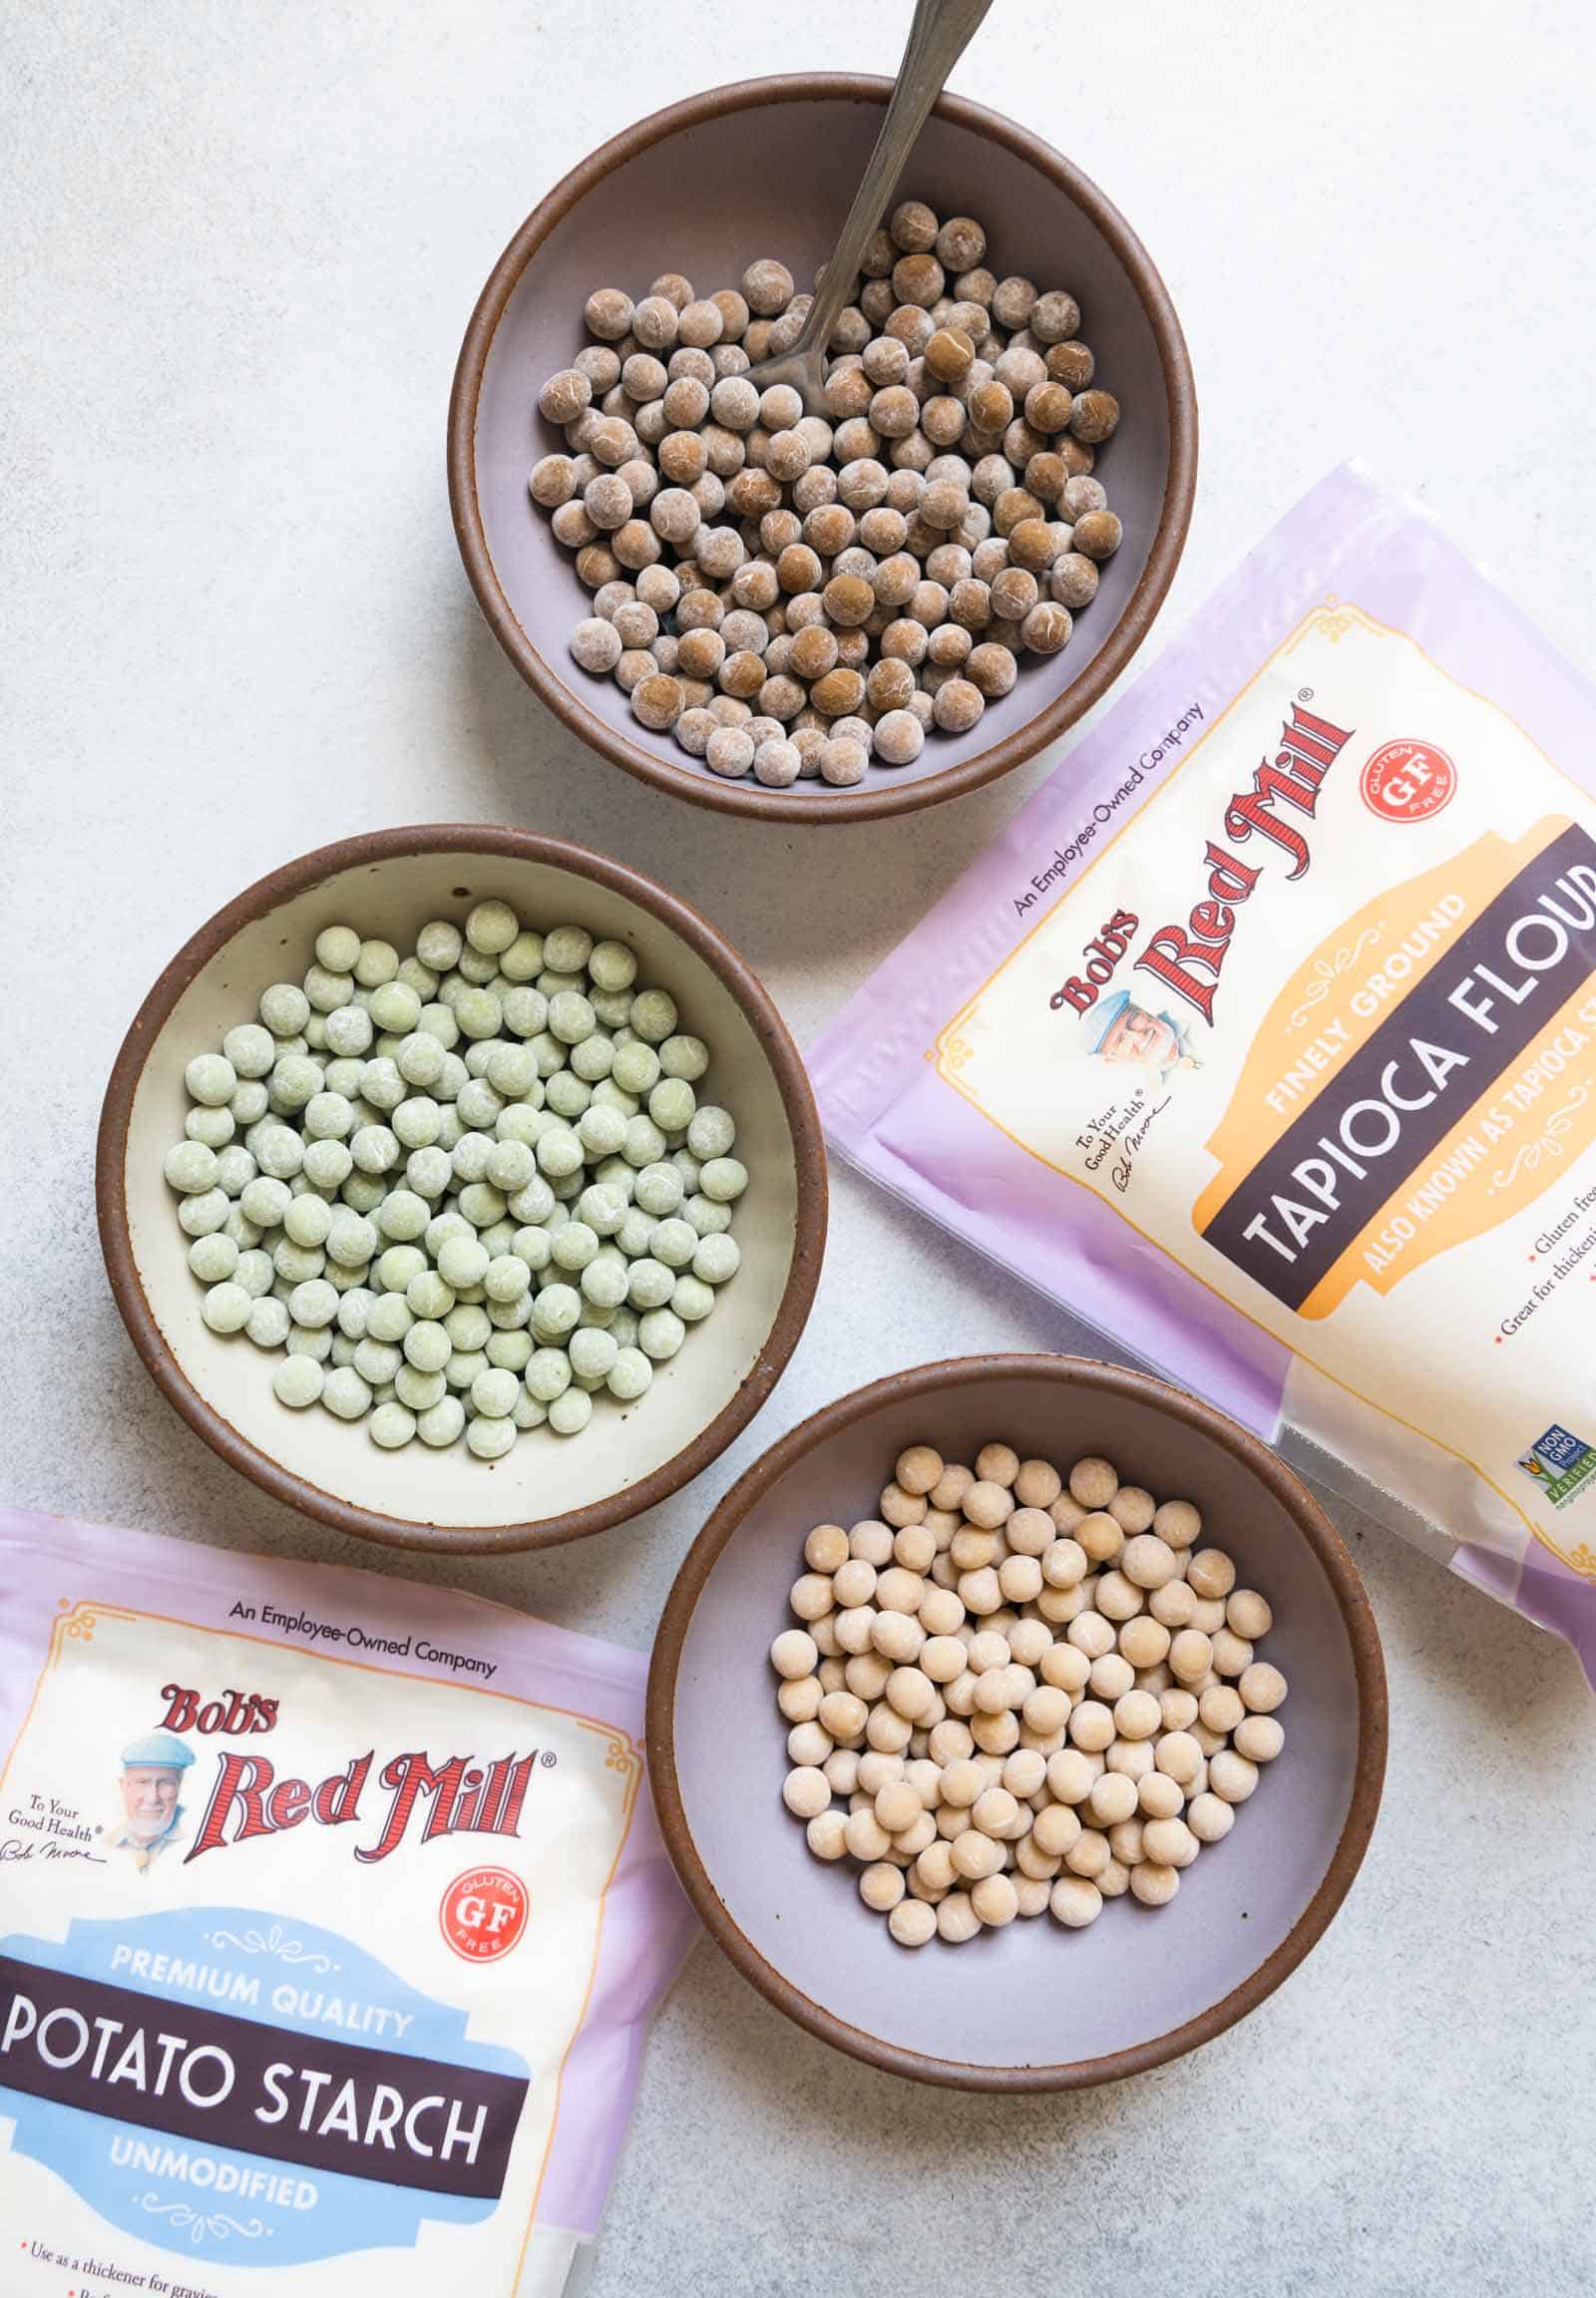
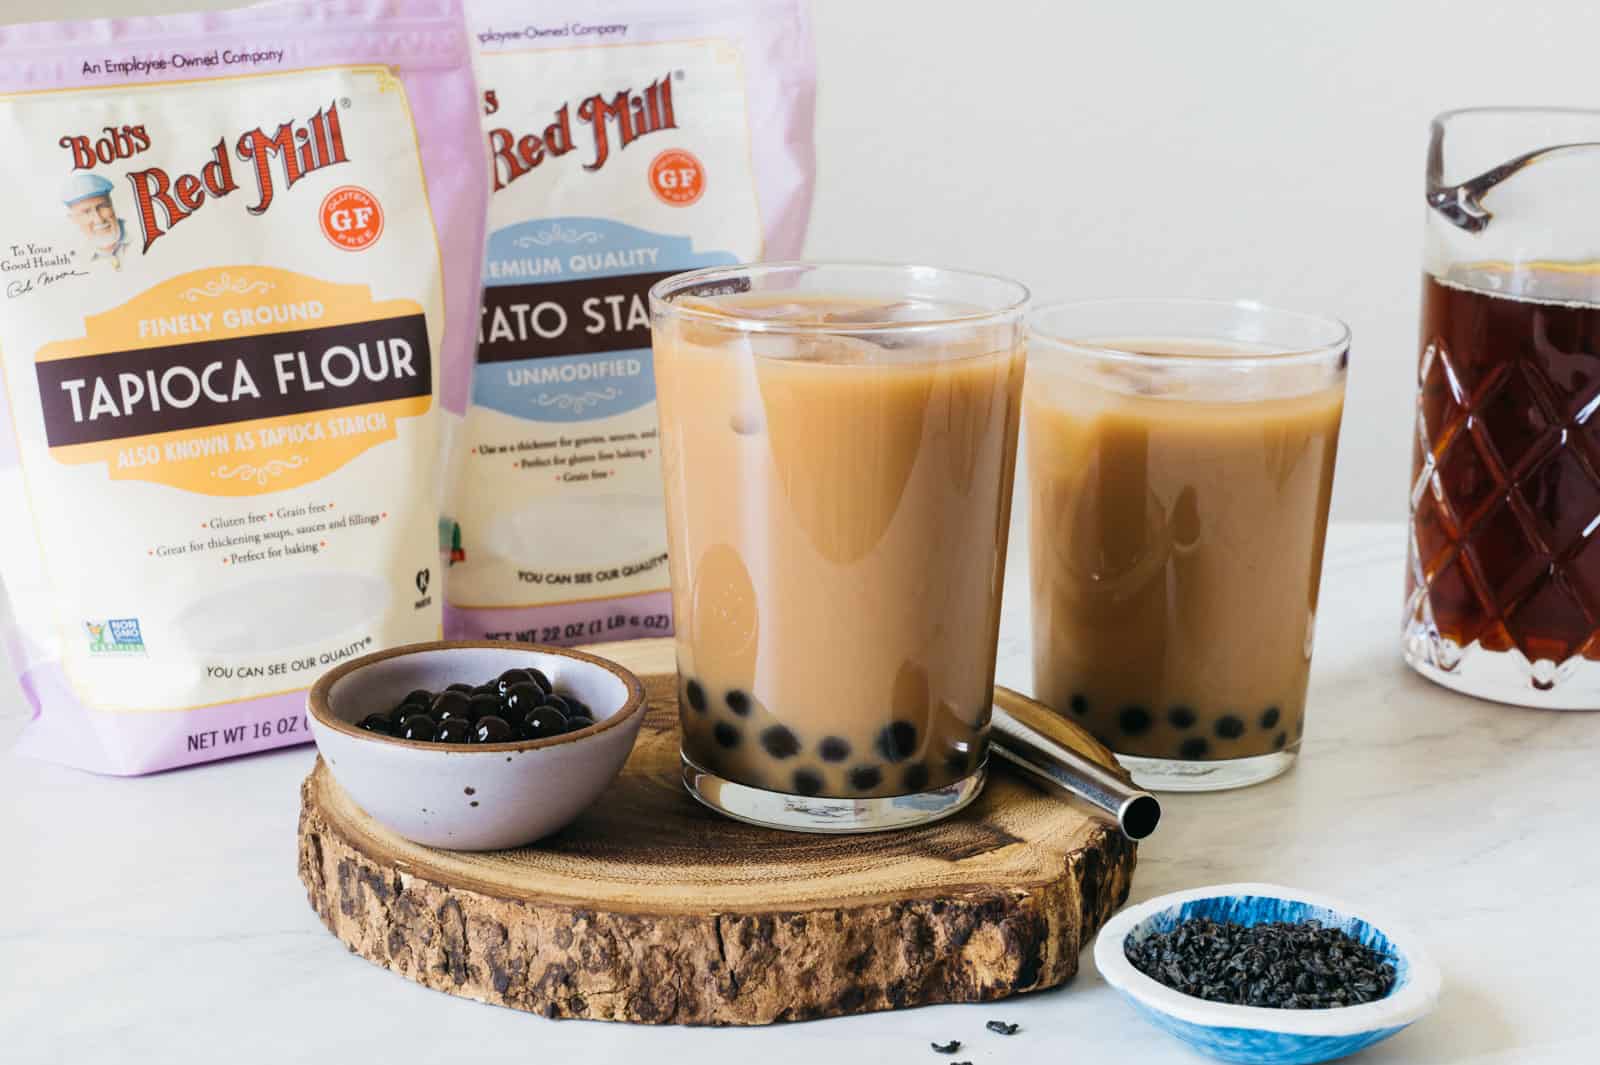
It should come as no surprise that the key ingredient in tapioca pearls is tapioca starch. In this recipe, I use Bob’s Red Mill’s Tapioca Flour (Tapioca Starch), which is made from the starch of cassava root. This flour is very versatile; use it to thicken sauces or to tenderize meat filling in potstickers. You can even use it to make some of my dim sum recipes, such as my tapioca thousand layer cake or gluten-free crystal skin dumplings. Bob’s Red Mill Tapioca Flour is widely available, and you can use their store finder to locate the stores that carry this product.
Most tapioca pearl recipes use tapioca starch as the only flour for the dough. During my recipe testing, I found that tapioca pearls made only with tapioca starch were too gummy and stuck to my teeth when I bit into them.
So I started experimenting with adding Bob’s Red Mill Potato Starch to the dough, which seems to solve the problem. You’ll still get toothsome tapioca pearls but they won’t cling to your teeth as you chew.
I also like to add sugar to the dough because the pearls taste bland and chalky otherwise. The type of sugar you use will depend on what color you want for the boba.
INGREDIENTS FOR DIFFERENT COLORED BOBA
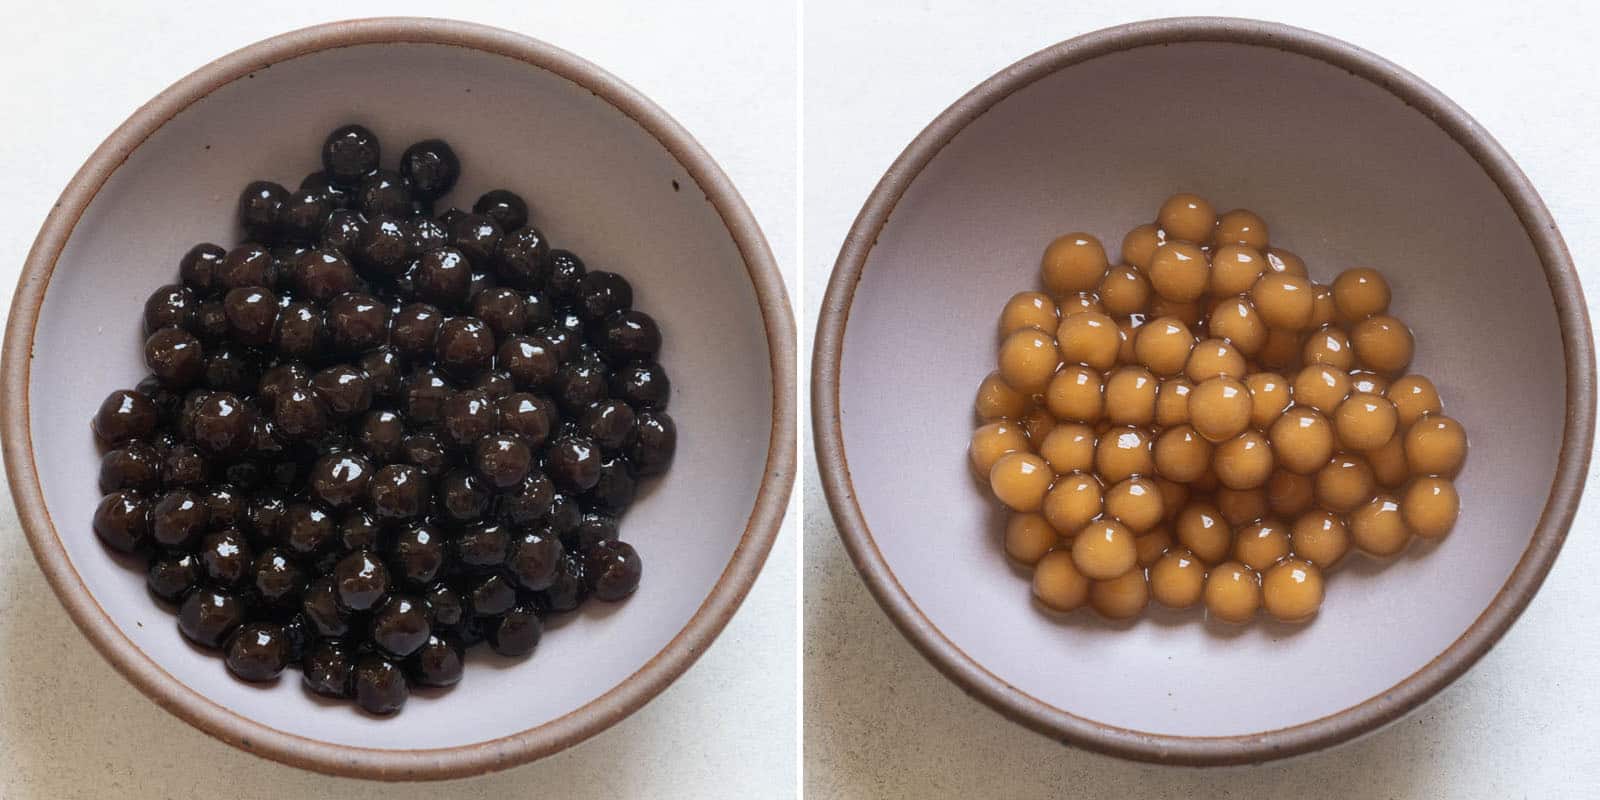
Dark Brown Boba: Traditional tapioca pearls in bubble tea are very dark brown, so dark that it almost looks black. Usually, this dark brown color comes from food coloring, but I found a way to mimic the color using molasses! To make the dark brown boba, mix together tapioca starch, potato starch, and molasses in a bowl. (Note: the molasses won’t look look very dark until they’re cooked and you cool them in cold water.)
Light Brown Boba: If you don’t have molasses but you still want the pearls to look brown, whisk the starches with dark brown sugar. The pearls will look light brown once cooked, like the color of milk tea.
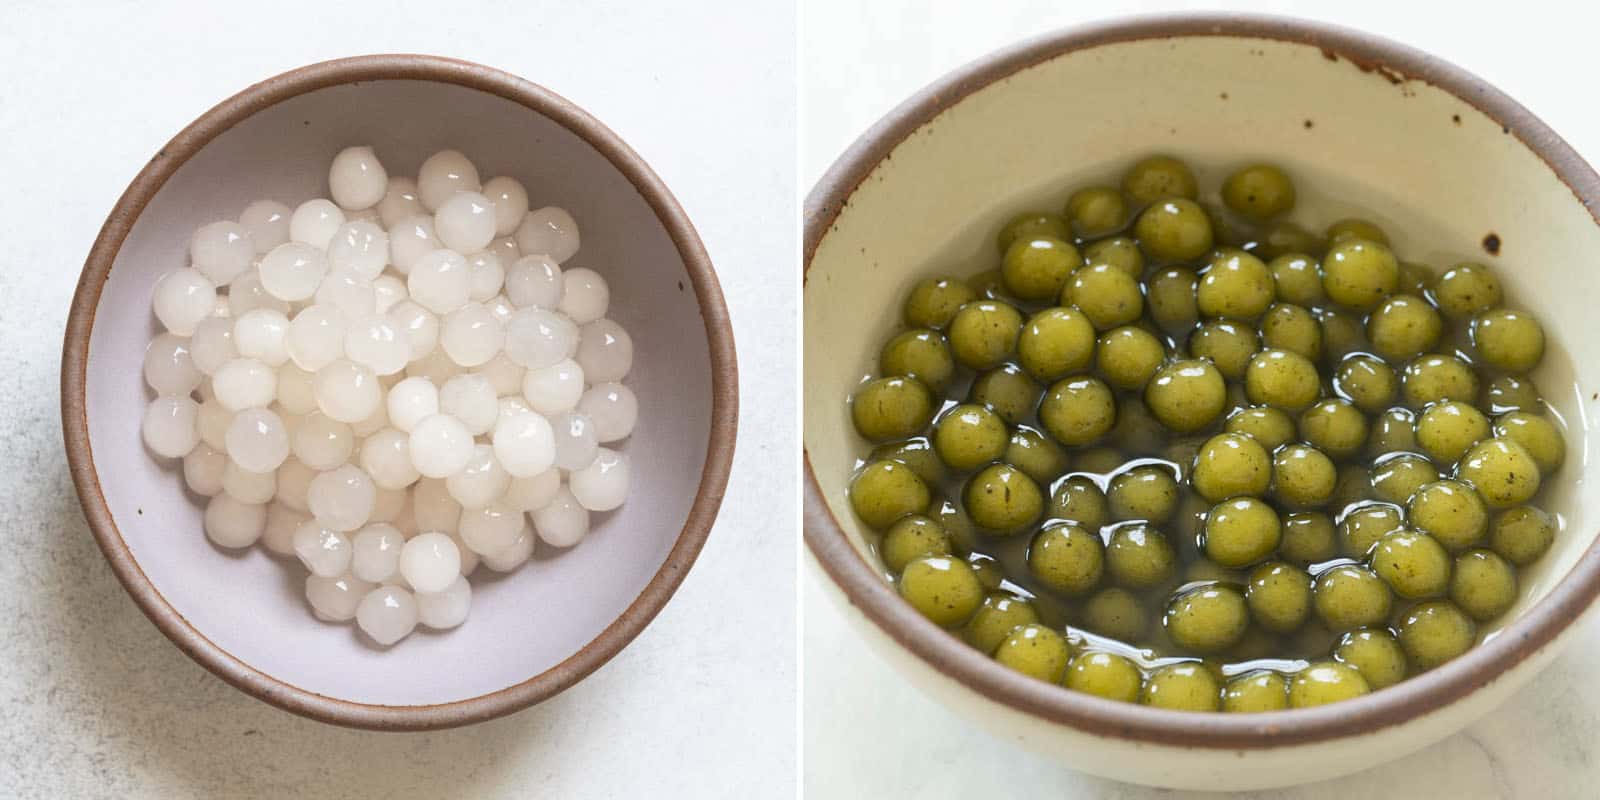
White Boba: If you want the boba to look white, you’ll use white granulated sugar instead of brown sugar.
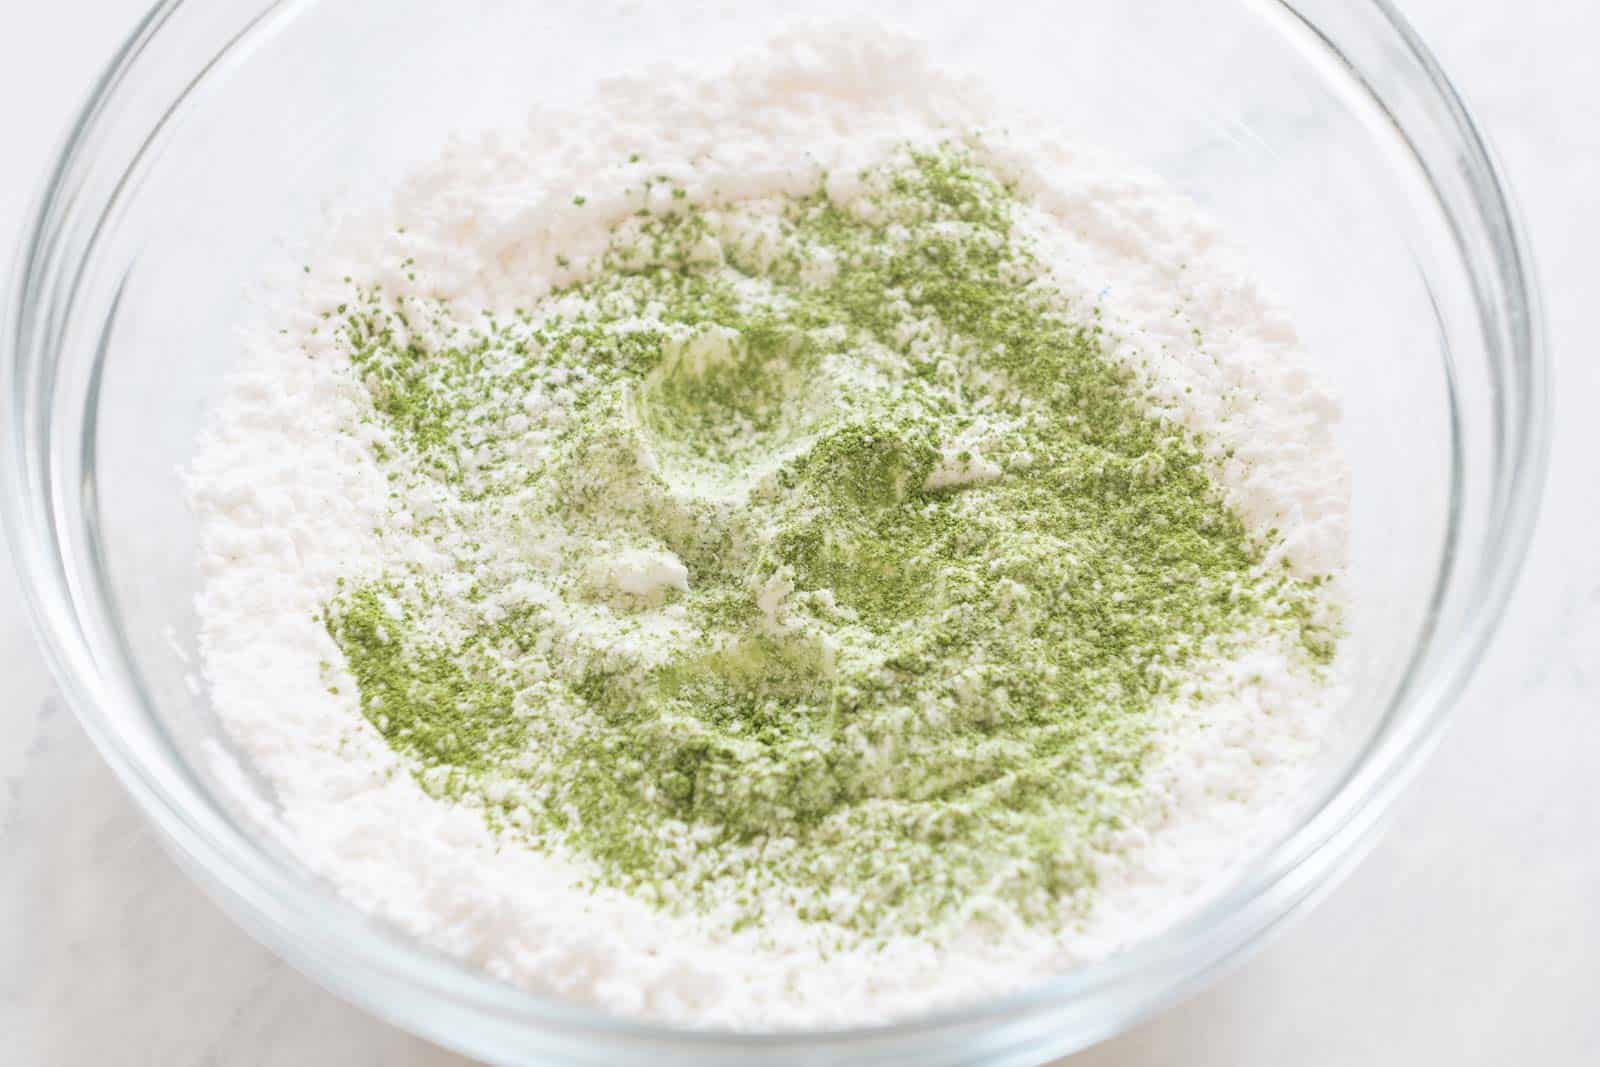
Green Boba: For green boba, you’ll also use white granulated sugar for the dough. After you whisk the sugar with the starches, sift some matcha over the whisked flours. Don’t mix the matcha any further, as it can clump up. I recommend using higher quality matcha if you want the pearls to be more vibrant green.
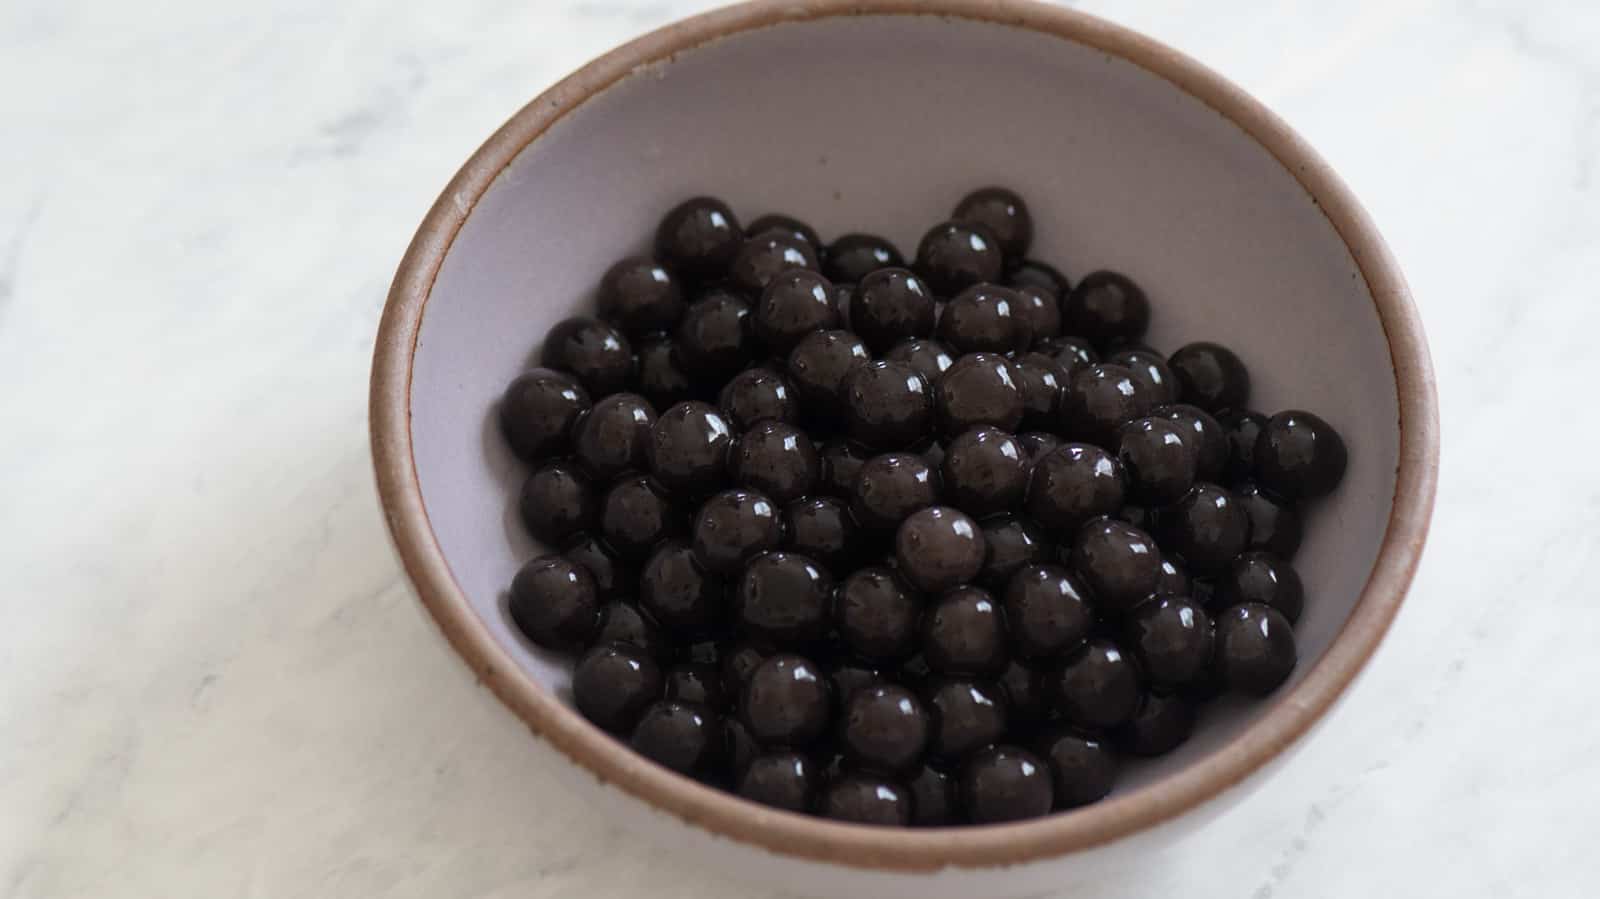
Black Boba: Before I started experimenting with molasses, I used gel food coloring to make the boba look black. The pearls look slightly purple with black food coloring alone, which is why I recommend adding chocolate brown food coloring as well. Add the food coloring only after you add the hot water to the dry ingredients. I discovered during recipe testing that black gel food coloring can turn blue when it comes in direct contact with hot water.
Note: between the dark brown boba made with molasses and the black boba made with food coloring, I prefer the molasses version because it’s all-natural. However, I’m adding the version with food coloring to my recipe for those of you who are curious.
MAKE THE DOUGH
Boil at least 1 cup of water in an electric kettle or saucepan. You won’t use all of it, but it’s better to have extra hot water on hand.
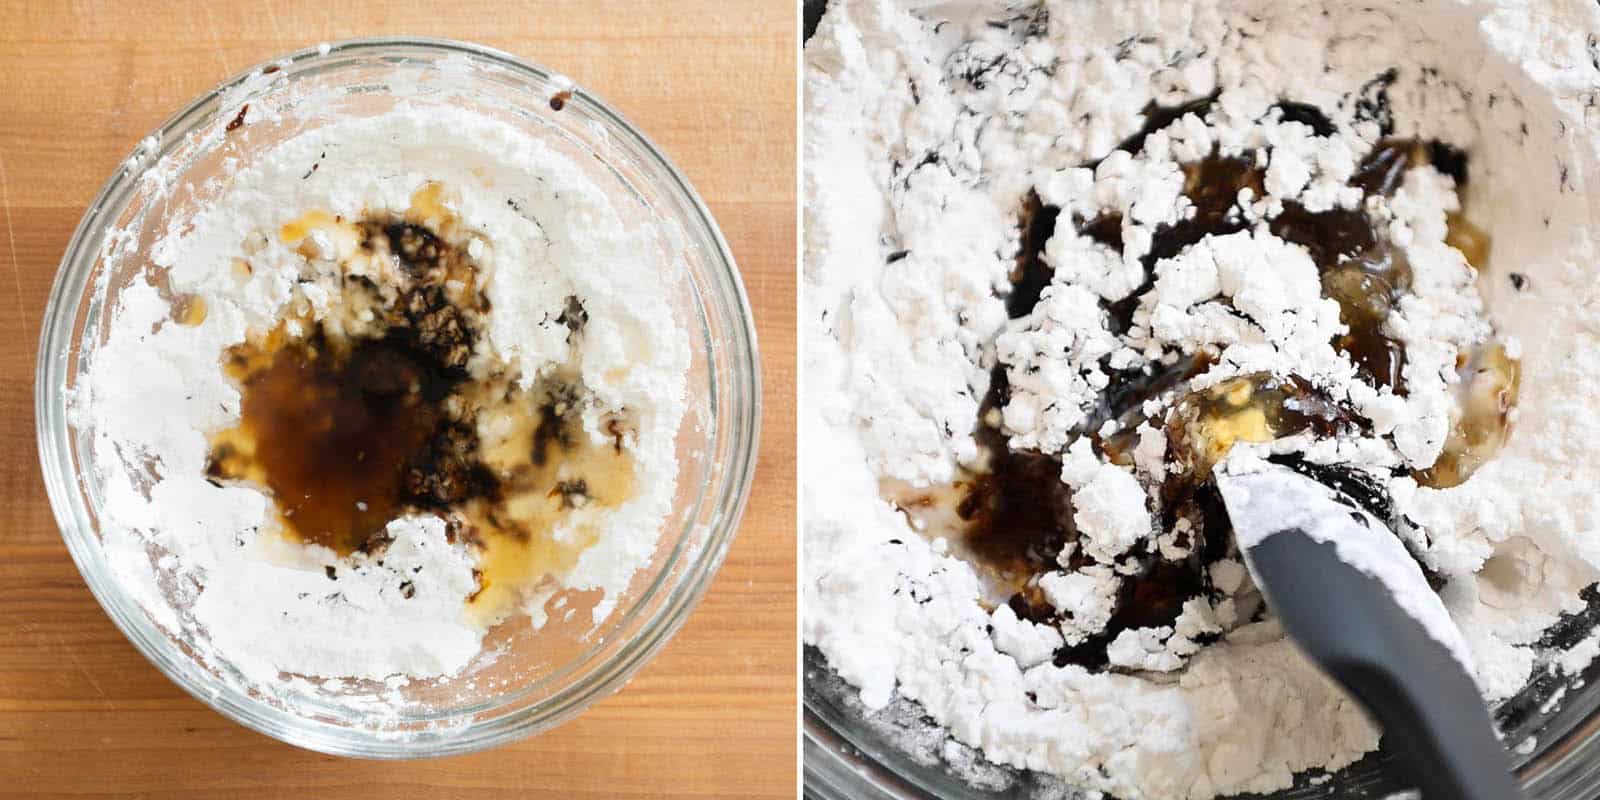
Pour 45 grams (3 tablespoons) of hot water directly into the flours (for the molasses version, use only 40 grams of water). The starches that come in direct contact with the hot water gelatinize immediately and turn translucent. This is critical in order for the dough to form properly.
Do not measure the hot boiling water in a separate bowl before adding to the flours. This significantly reduces the temperature of the water. As a result, the flours will not gelatinize properly and you’ll be left with a crumbly and chalky dough.
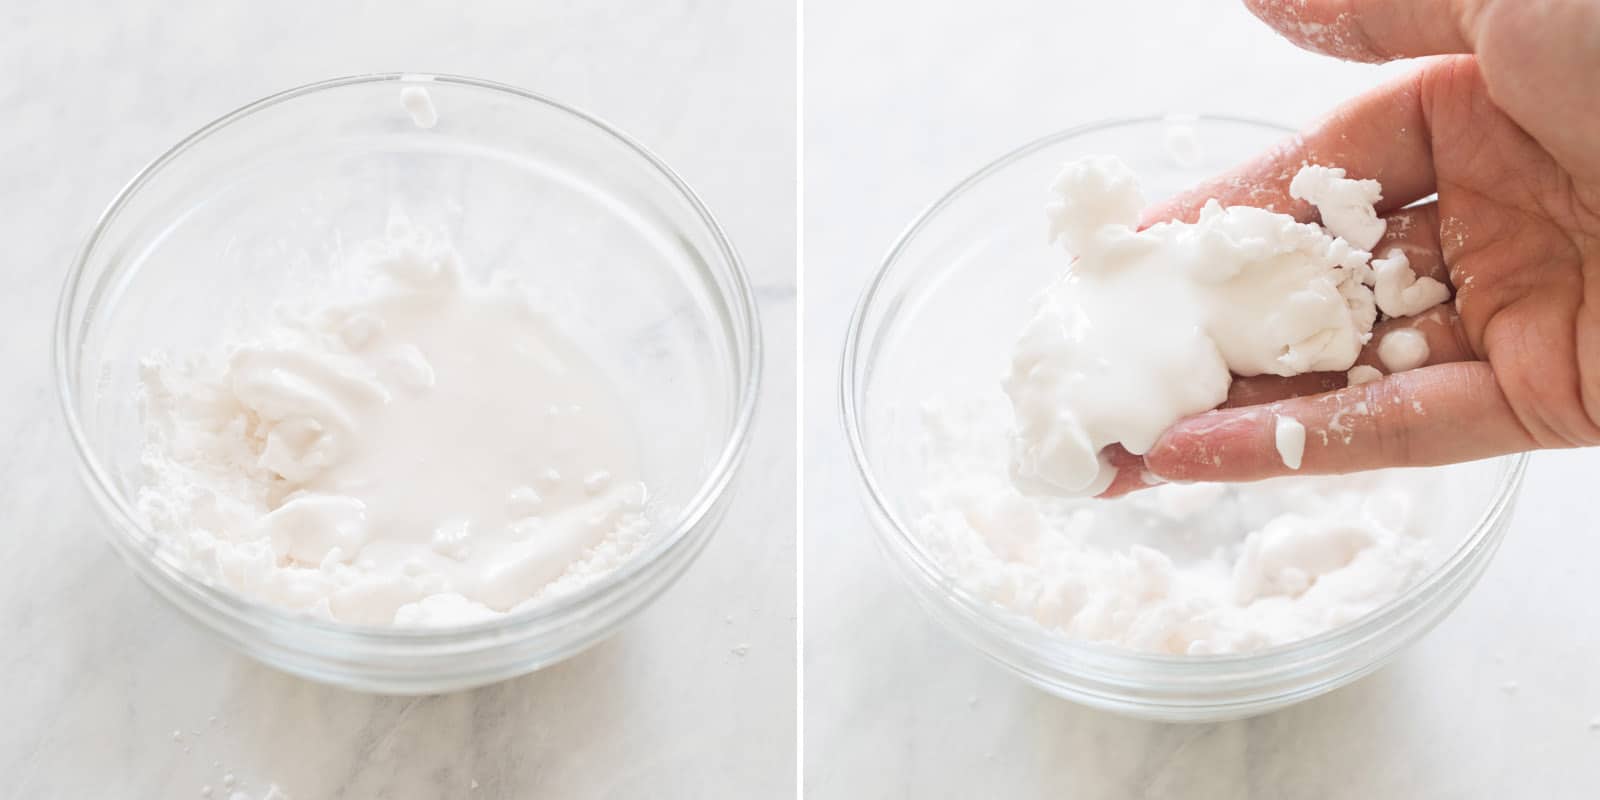
The photo above illustrates what the dough looks like if you mix the starches with cold or room temperature water. You’ll end up with a stiff, chalky mass that crumbles easily when you pinch it. This is why you must use boiling hot water to make the dough.
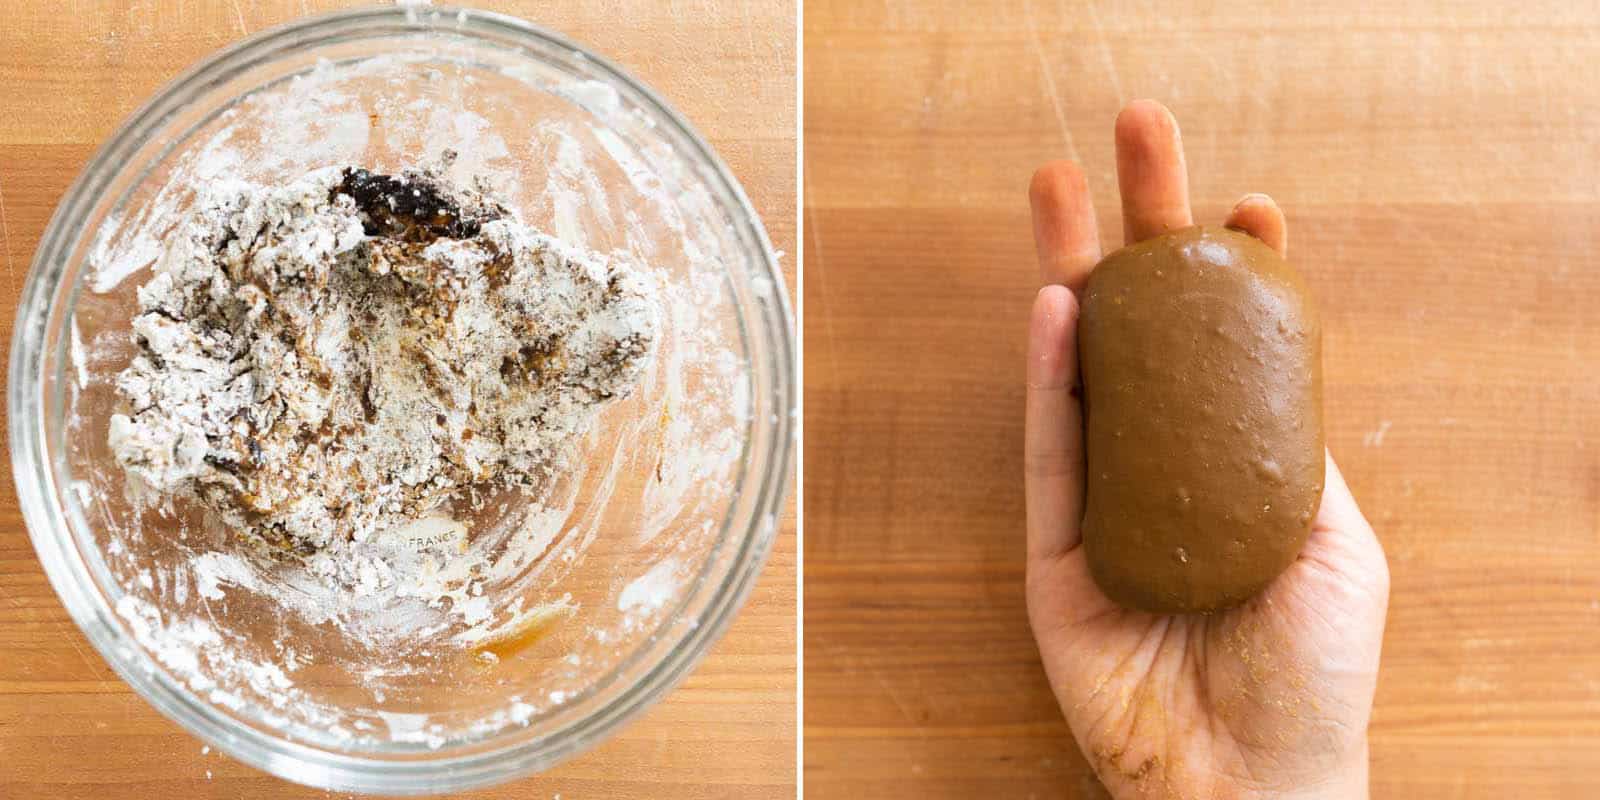
Use a flexible spatula to fold and press the dry flour into the gelatinized starch, until a dough starts to form. Most of the moisture is in the center of the dough, so keep gathering and pressing dry flour into the center of the dough mass. Continue folding dry flour into the dough for another 1 to 2 minutes, until it looks like 80-90% of the flour has been incorporated into the dough.
Next, transfer the dough and any loose flour to a work surface to finish kneading the dough. Work the dry flour into the dough by pressing it into the dough and then kneading it a few times. After a few minutes of kneading, you should get one cohesive piece of dough that’s not too sticky.
TROUBLESHOOTING
If the dough is very dry and crumbly, gather all the dry flour together. Drizzle a teaspoon of hot water over the loose flour and work it into the dough. Add more water if necessary. The dough can turn sticky pretty quickly, so try not to add too much water at once.
Conversely, if the dough is very sticky (this can be the case when you’re making the boba with molasses), sprinkle a pinch of tapioca starch over the dough and work it into the dough. Add more starch if the dough is still feeling incredibly sticky.
SHAPE DOUGH INTO PEARLS
This is the part of the recipe that requires a lot of time and patience. If you can get someone to help you with this step, grab them! Otherwise, put on a good TV show in the background as you shape the boba. I watched many episodes of Murder, She Wrote and Diagnosis Murder while shaping batches of pearls during recipe development.
Tear out a small ball of dough, about 1 inch in diameter. Place the remaining dough back into the mixing bowl and cover it with a damp towel or a lid so the dough doesn’t dry out.
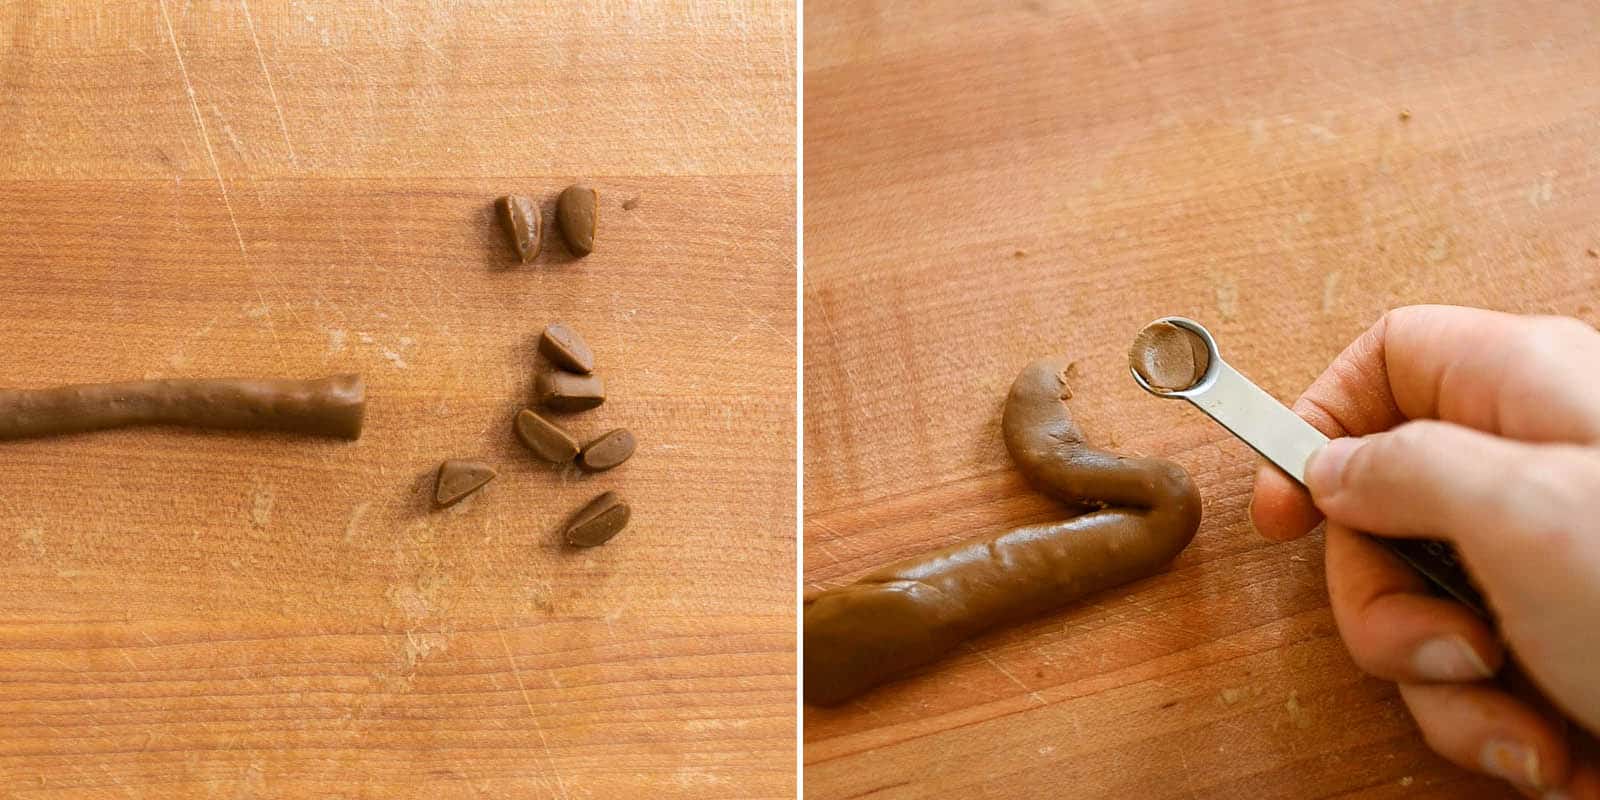
Shape and roll out the 1-inch ball of dough into a log that’s about 1/4-inch wide. Divide the dough log into smaller pieces. You can use a knife to slice the log into smaller pieces that are about 1/8-inch wide. Alternatively, use a 1/8 teaspoon measuring spoon to divide the dough log into smaller pieces. You want a scant or level 1/8 teaspoon of dough per piece.
You don’t want the dough to be too big here or else the cooked pearls might not fit through the boba straw. I prefer the measuring spoon method because it’s a more precise gauge of how big each pearl should be. After shaping about 30 pearls with my fingers, I usually get a sense of how big each pearl should be. Instead of using the measuring spoon, I’ll start ripping out pieces of dough with my fingers.
If you are making the pearls on your own, slice or rip out no more than 16 small pieces of dough at a time. The dough dries out easily, making them difficult to shape.
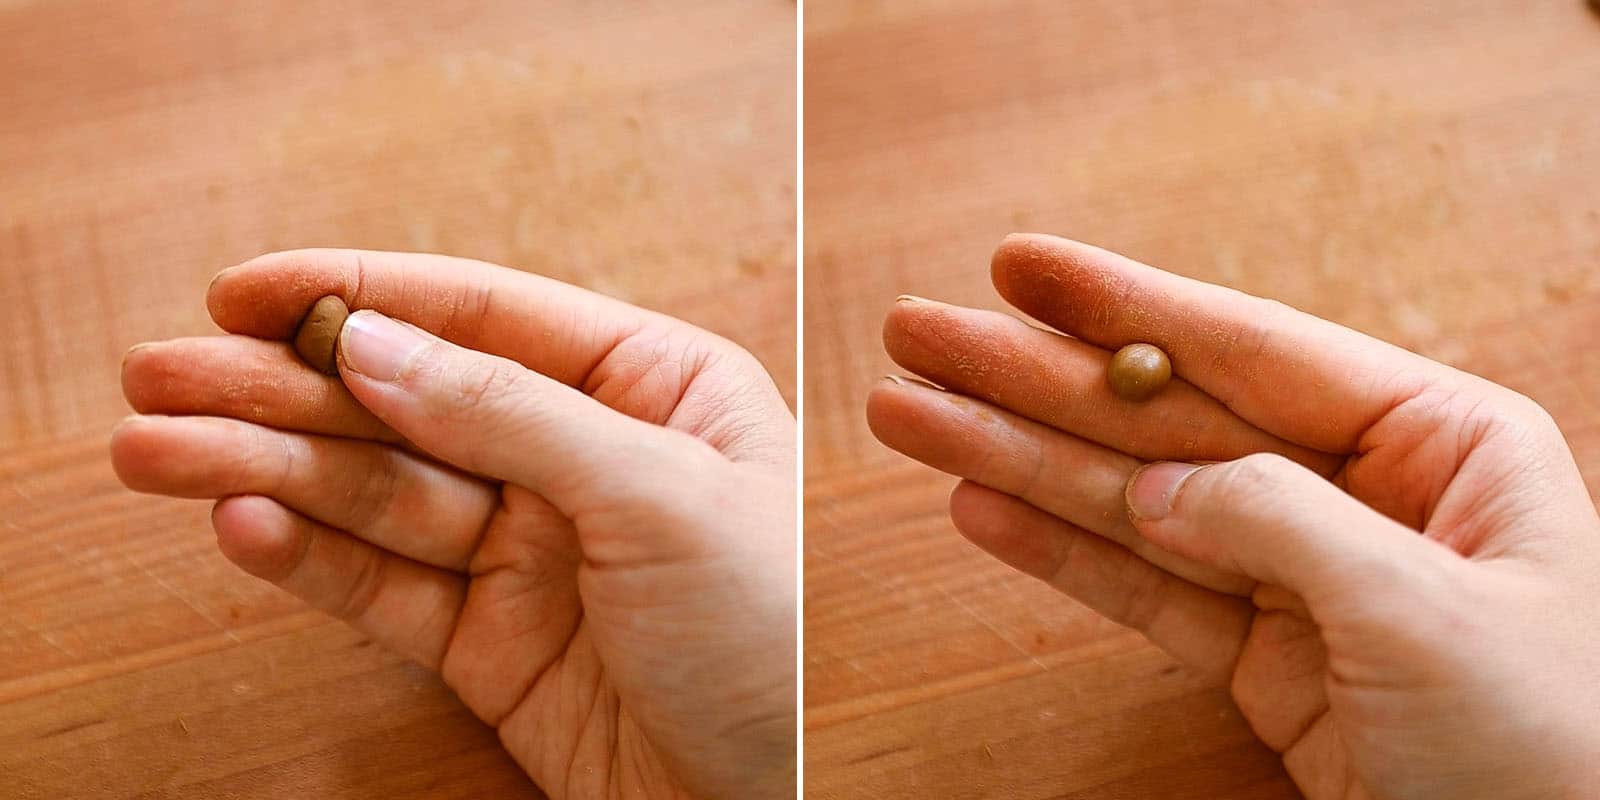
Take 1 piece of small dough in each hand and rub them a few times with the tips of your fingers. This will moisten the dough in case a crust starts forming on the outside. You can also smooth out any tiny clumps of flour here. Then, use the tips of your fingers to roll the dough into pearls. You can also roll the pearls with the palms of your hands. Transfer the pearls to a surface that’s well dusted with tapioca starch.

Continue shaping the remaining small pieces of dough into pearls. Roll the pearls in the tapioca starch so that they’re completely covered in starch. Transfer the tapioca pearls to a mesh strainer and shake the strainer a few times to remove any excess starch from the pearls. Finally, transfer the pearls to a parchment-lined plate and continue shaping the remaining dough into pearls.
COOK TAPIOCA PEARLS
You only want to cook as many pearls as you need in a few hours’ time because cooked pearls don’t keep well for extended periods. A good rule of thumb to follow is to cook 3 to 4 tablespoons of raw boba per person.
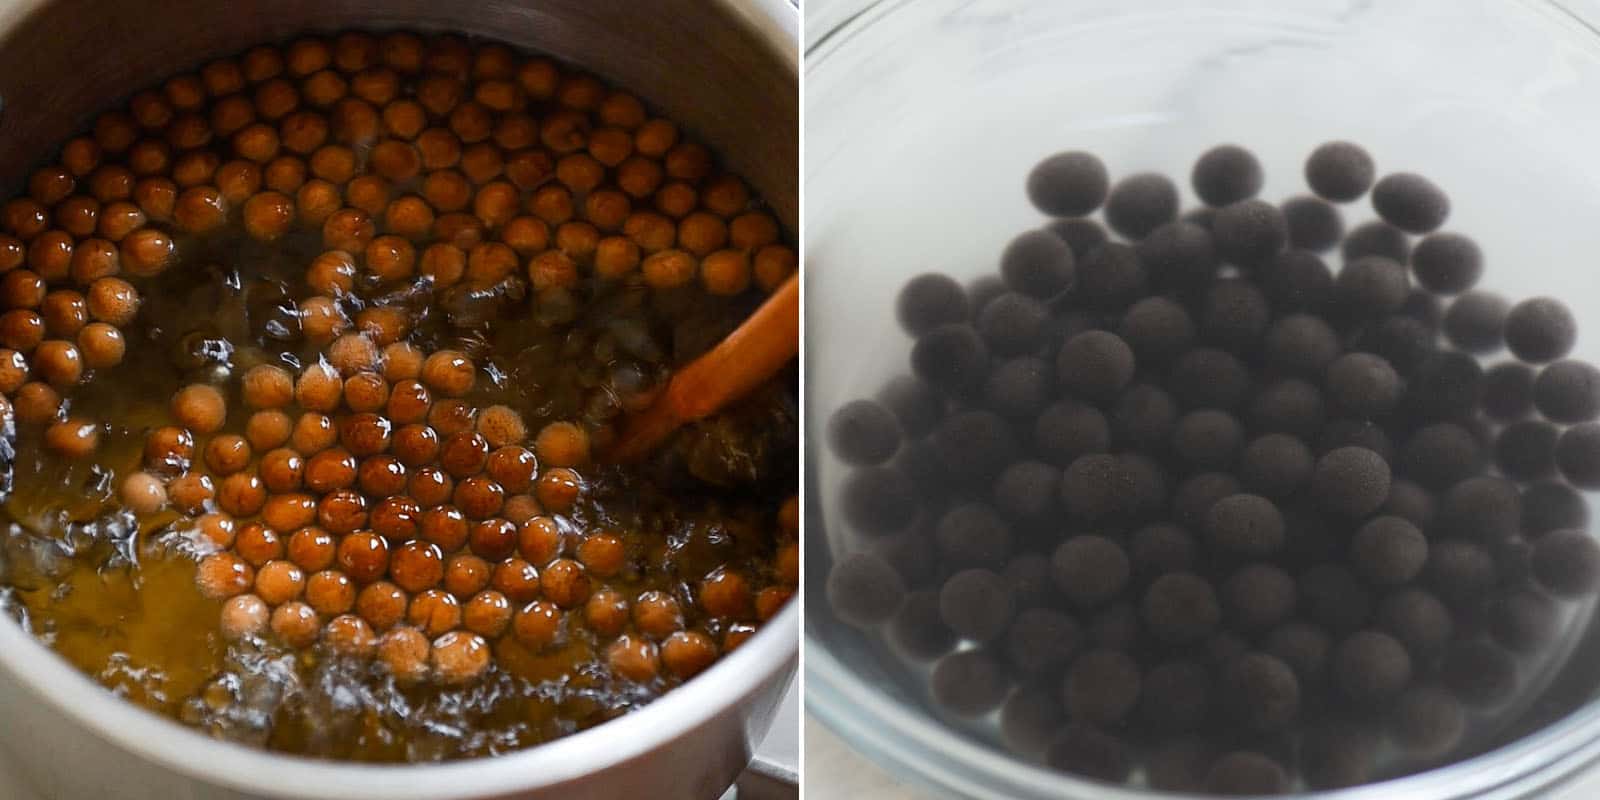
Fill a medium-sized pot (or large saucepan) halfway with water and bring to boil. Add the pearls to the water and stir until the pearls float to the top of the water. This should take about 1 minute. Reduce the heat to medium-high and continue cooking the pearls for 20 minutes. Turn off the heat, cover the pot, and let the pearls sit in the hot water for another 15 minutes. If you are not ready to use the pearls immediately, you can leave them in the warm water for up to an hour to an hour and a half.
Drain the pearls and submerge them in a bowl of cold water for 1 to 2 minutes. This cools the pearls and gets them to be the perfect chewy texture. Drain the pearls again and transfer them to a bowl.
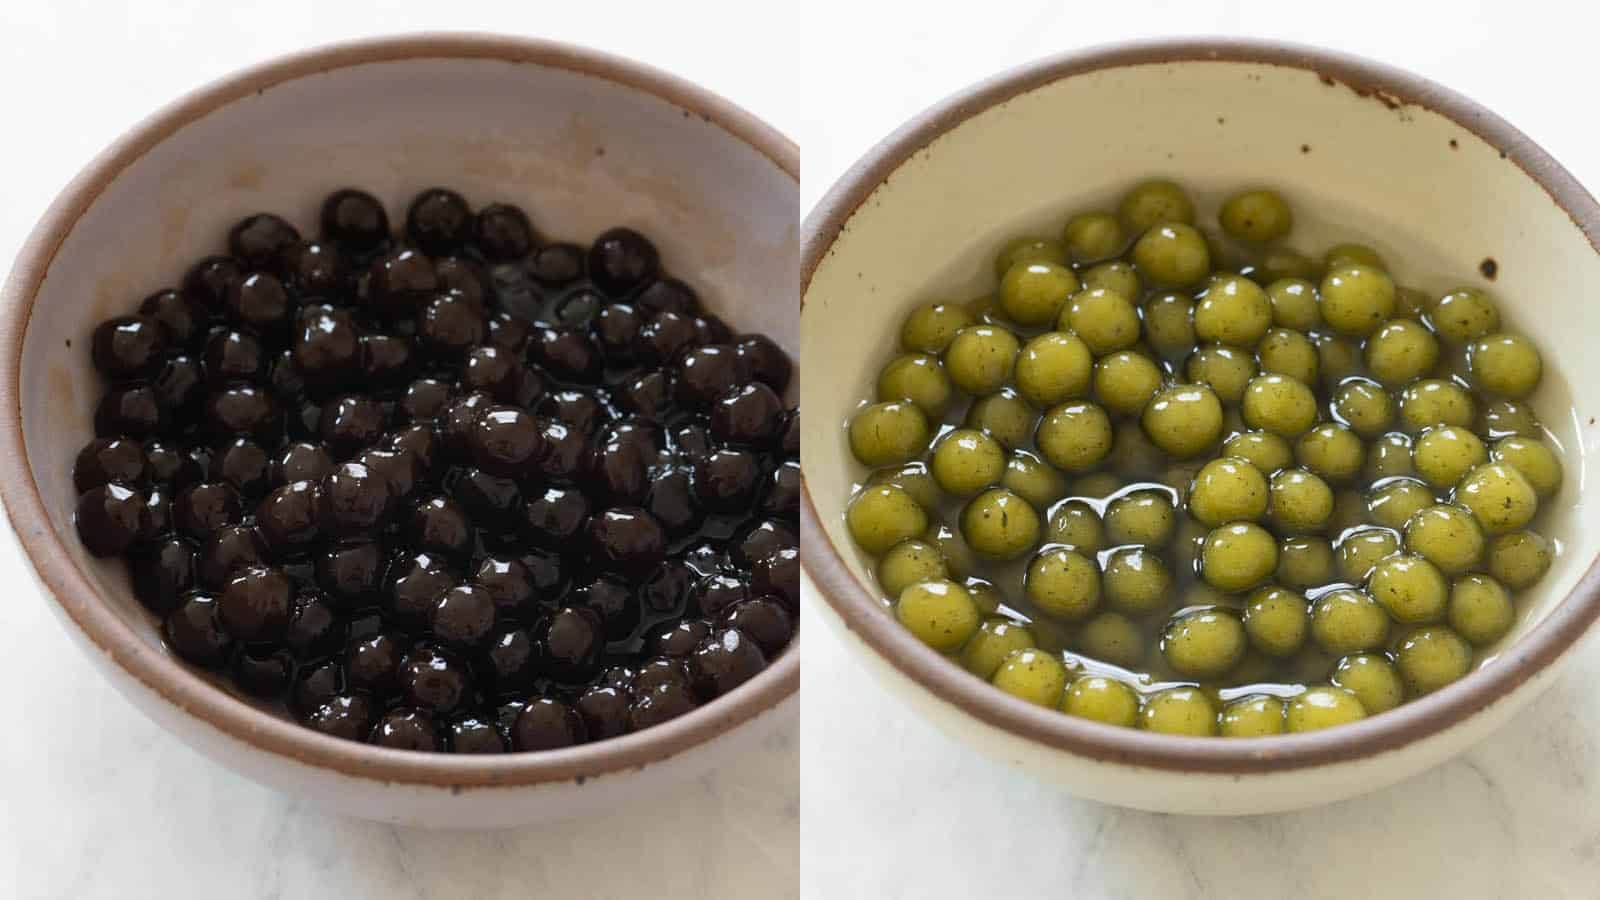
Toss the pearls in simple syrup (see recipe notes section). You want to make sure the pearls are well coated in the sugary syrup. Let the pearls sit for 20 to 30 minutes so the sugar can absorb into the pearls. You’ll want to use these pearls to make bubble tea within 1 hour.
ASSEMBLE BUBBLE TEA
I like making the sugar syrup and brewing the tea long before I cook the pearls. I usually make the syrup overnight and refrigerate for later use. In terms of the tea, I’ll either brew it at least an hour ahead or refrigerate a batch overnight. I have more details about this process in the recipe notes and my blog post about about how to make bubble tea here.
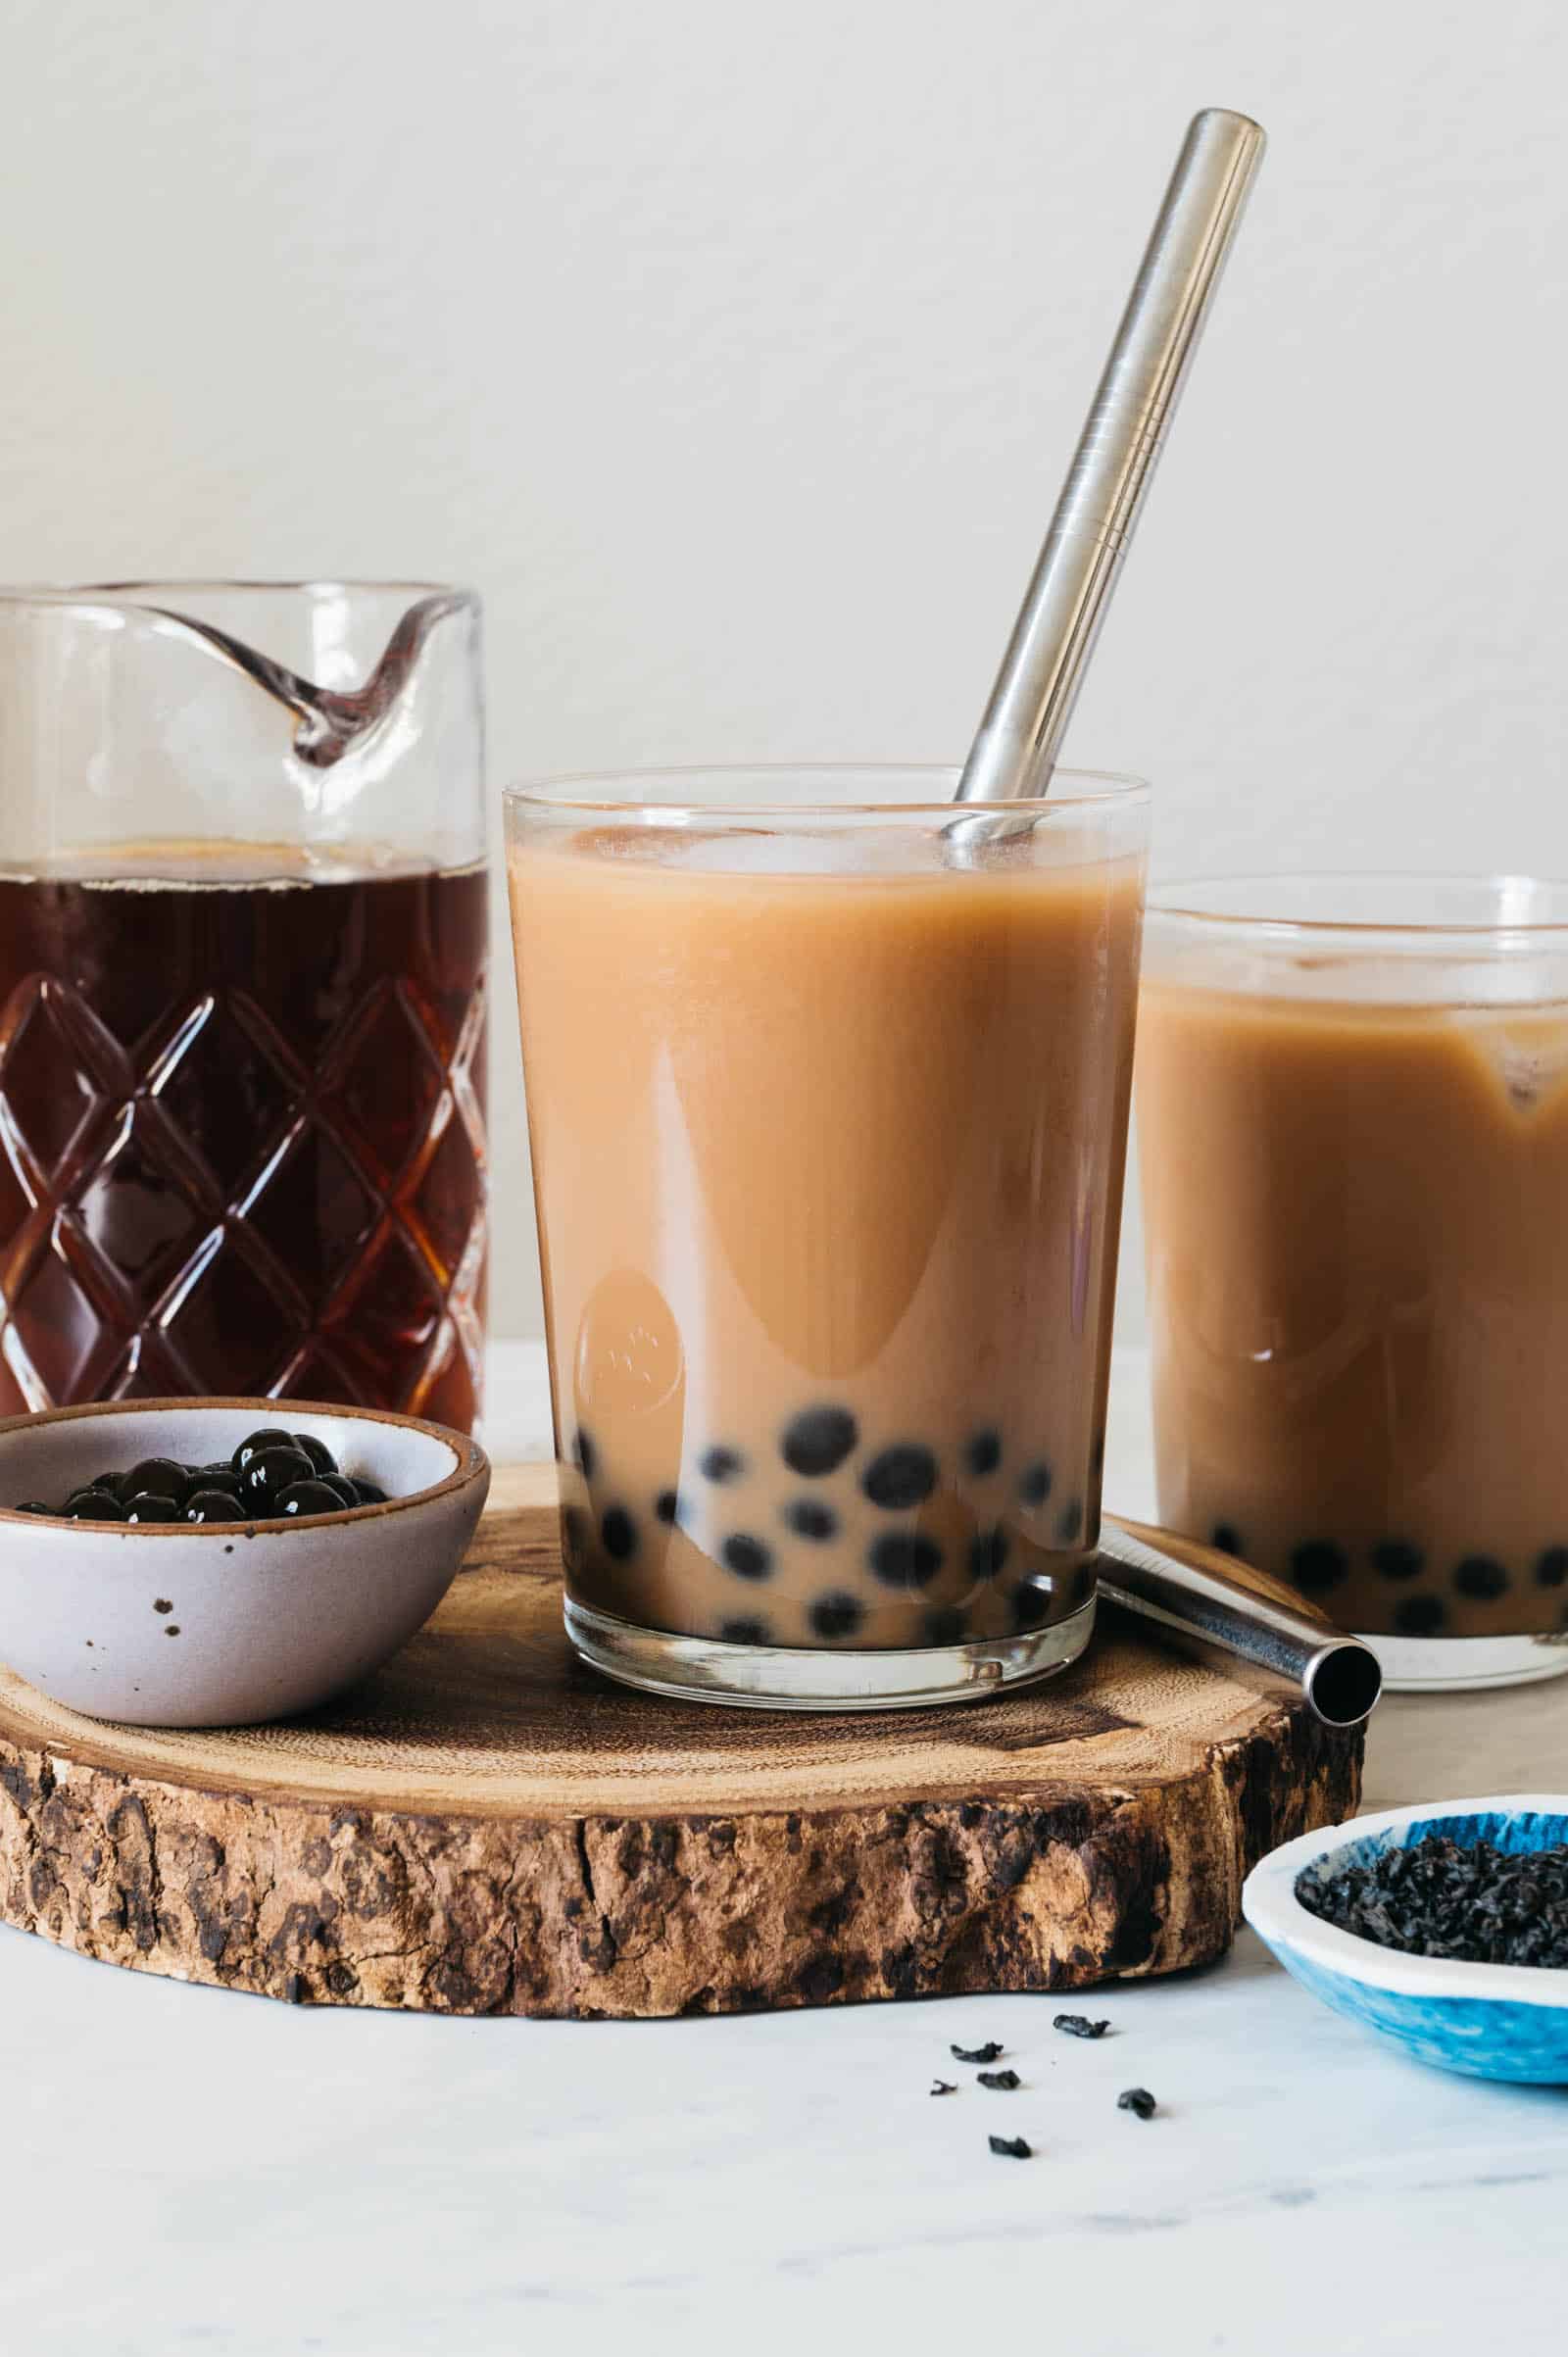
Transfer some of the cooked boba with sugar syrup into a glass. You may want a little more sugar syrup in the glass. Pour the tea into the glass and then add some milk. I prefer using whole milk for more flavor. You can use any kind of milk or cream you like. Give everything a stir and taste the milk tea, adding more milk or sugar syrup as needed. Top the beverage with ice cubes and enjoy!
Note: If the tapioca pearls are getting stuck in the straw, don’t try sucking up the pearls with all your might. That can be a choking hazard! Just use a spoon to scoop up the pearls.
CAN YOU MAKE THE DOUGH AHEAD?
Yes, but the dough will be stiffer the next day, making it a little more difficult to work with. Wrap the dough tightly in plastic wrap and then transfer to a container to refrigerate. Make sure to use the dough within a day.
HOW TO STORE TAPIOCA PEARLS
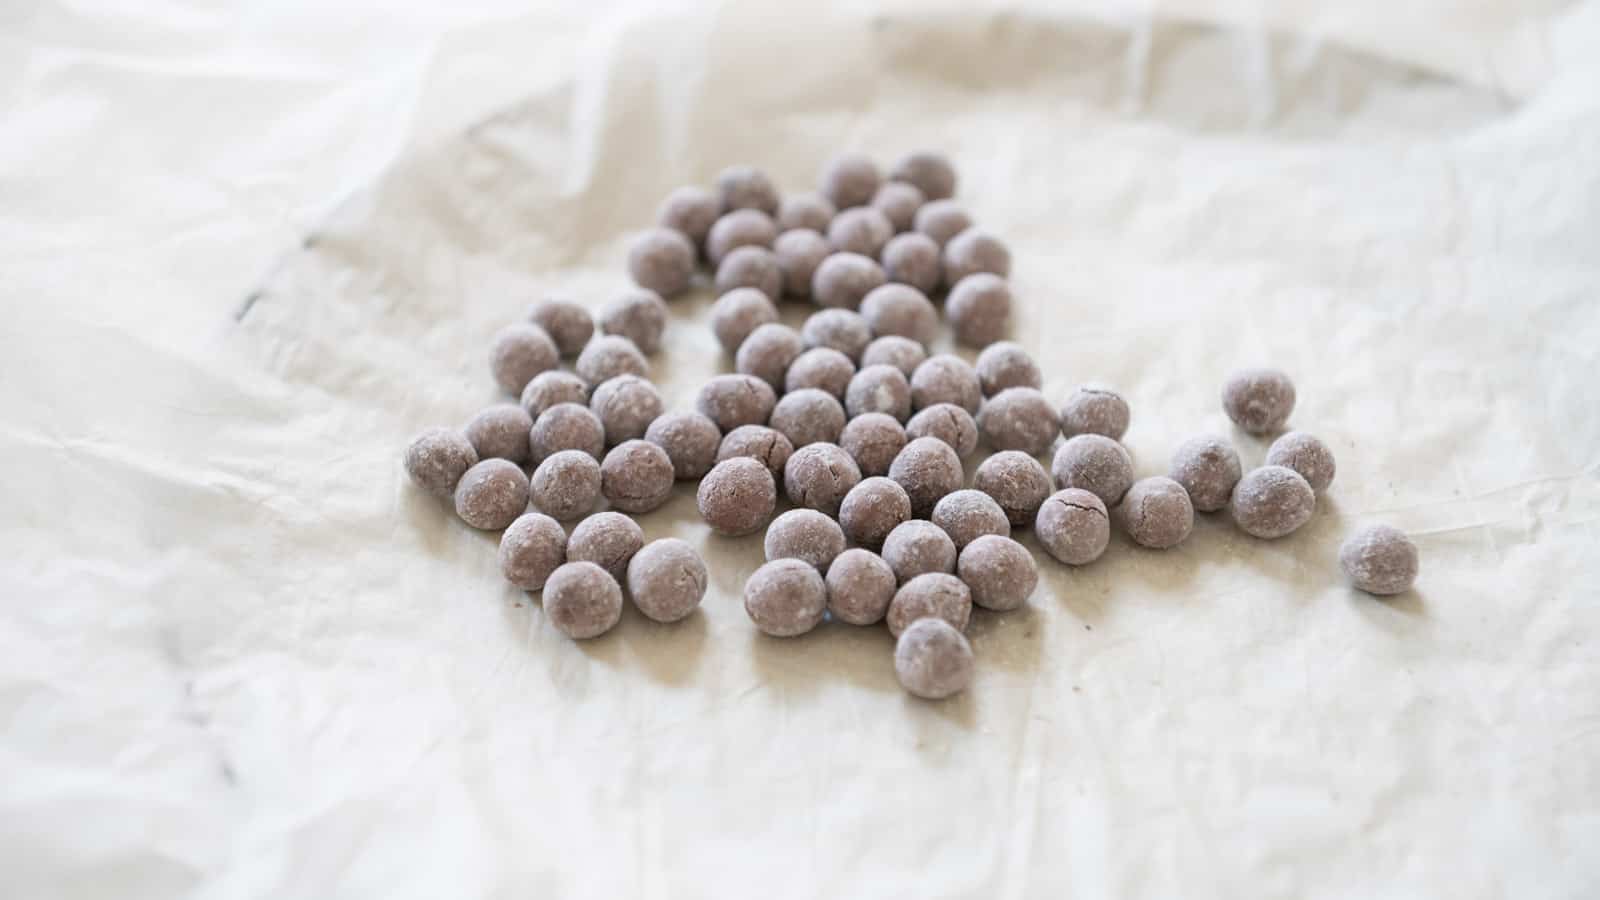
The best way to store the pearls is to freeze them. Make sure the pearls have been dusted with tapioca flour. Freeze them in a single layer on a parchment-lined plate for an hour before transferring to a freezer bag. They’ll keep for 6 months. Don’t worry if the tapioca pearls crack when they freeze; the crack will seal up once you cook the pearls. When you are ready to consume the boba, boil some water and follow the same directions you would for cooking fresh boba.
CAN YOU COOK A BIG BATCH OF PEARLS AND SAVE FOR LATER?
The tapioca pearls are best consumed the day they’re made, ideally within a few hours after they’ve been cooked. If you’re not ready to use them immediately, leave the pearls in the saucepan filled with hot water. The warmth of the water will keep the pearls soft.
If you have excess cooked pearls that you can’t use within the same day, refrigerate them. They’ll harden overnight. To reheat them, bring some water to boil and add the refrigerated pearls. Cook them for 5 to 8 minutes, until heated through.
MORE RECIPES FEATURING BOB’S RED MILL PRODUCTS
- Steamed Tapioca Thousand Layer Cake
- Gluten-Free Crystal Skin Dumplings
- Mango Tapioca Pudding
- Japanese Milk Bread
How to Make Tapioca Pearls (Boba)
Ingredients
Dark Brown Boba
- 2/3 cup (72g) tapioca flour/starch, plus more for dusting pearls (see note 3)
- 1 1/2 tablespoons (18g) potato starch (see note 4)
- 1 1/2 tablespoons (27g) molasses, use blackstrap molasses for darker pearls
- 2 tablespoons + 2 teaspoons (40g) boiling hot water
Light Brown Boba
- 2/3 cup (72g) tapioca starch, plus more for dusting pearls
- 1 1/2 tablespoons (18g) potato starch
- 1 1/2 tablespoons (20g) dark brown sugar
- 3 tablespoons (45g) boiling hot water
White Boba
- 2/3 cup (72g) tapioca starch, plus more for dusting pearls
- 1 1/2 tablespoons (18g) potato starch
- 1 1/2 tablespoons (20g) white granulated sugar
- 3 tablespoons (45g) boiling hot water
Green Boba
- 2/3 cup (72g) tapioca starch, plus more for dusting pearls
- 1 1/2 tablespoons (18g) potato starch
- 1 1/2 tablespoons (20g) white granulated sugar
- 1/4 teaspoon matcha powder, (see note 5)
- 3 tablespoons (45g) boiling hot water
Black Boba (See Note 6)
- 2/3 cup (72g) tapioca starch, plus more for dusting pearls
- 1 1/2 tablespoons (18g) potato starch
- 1 1/2 tablespoons (20g) white granulated sugar
- 3 tablespoons (45g) boiling hot water
- 1 drop black gel coloring
- 1 drop chocolate brown gel coloring
Instructions
Whisk Ingredients
- Dark Brown Boba: In a medium bowl, whisk together the tapioca starch, potato starch, and molasses.
- Light Brown Boba: Whisk together the tapioca and potato starches, along with the brown sugar.
- White Boba: In a medium bowl, whisk together the tapioca starch, potato starch, and granulated sugar.
- Green Boba: In a medium bowl, whisk together the tapioca starch, potato starch, and granulated sugar. Then, sift the matcha over the whisked flours, making sure to distribute the matcha evenly. Do not whisk the ingredients again because the matcha can clump up.
- Black Boba: In a medium bowl, whisk together the tapioca starch, potato starch, and granulated sugar. You’ll add the food coloring after you add the hot water.
Finish Making Dough
- Boil at least 1 cup of water in an electric kettle or saucepan. You won’t use all of it, but have extra hot water on hand in case the dough is dry.
- If you are making dark brown pearls with molasses, pour 40 grams (2 tablespoons + 2 teaspoons) of hot water directly into the bowl with the starches. For all other types of boba, pour 45 grams (3 tablespoons) of hot water directly into the bowl with the flours. Once the hot water touches the starches, it will gelatinize some of the starch immediately, turning it into a translucent, gooey mass. This is very important for the dough to form properly. DO NOT pour and measure the hot water into a separate bowl before adding to the flours, as this significantly reduces the heat of the water. I generally place the bowl of flours on a scale and pour hot water from my kettle into the bowl, using the scale to measure the water. (See note 7) If you’re making the black boba, add the food coloring now.
- Use a flexible spatula to fold and press the dry flour into the gelatinized starch, until a dough starts to form. Most of the moisture is in the center of the dough, so keep gathering and pressing dry flour into the center of the dough mass. Continue folding dry flour into the dough for another 1 to 2 minutes, until it looks like 80-90% of the flours have been incorporated into the dough.
- Transfer the dough and any loose flour to a work surface and use your hands to finish kneading the dough. Work the dry flour into the dough by pressing and squeezing it into the dough. After a few minutes of kneading, you should get one cohesive piece of dough that’s moist but not sticky. The dough should be relatively smooth, but don’t worry if there are tiny clumps of flour in the dough.
- If the dough is very dry and crumbly, gather all the dry flour. Drizzle a teaspoon of hot water over the loose flour and work the flour into the dough. Conversely, if the dough is feeling sticky (this can be the case when you’re making the boba with molasses), sprinkle a pinch of tapioca starch over the dough and work it into the dough. Add more starch if the dough is still feeling very sticky.
Shape Dough Into Pearls
- This is the part of the recipe that can take a while. Tear out a small ball of dough, about 1 inch in diameter. Place the remaining dough into a bowl and cover it with a damp towel or a lid so the dough doesn’t dry out.
- Shape the 1-inch ball of dough into a log of about 1/4-inch wide. Divide the log into smaller pieces. You can use a knife to slice the log into small pieces about 1/8-inch wide. My preferred method is to use a 1/8 teaspoon measuring spoon to divide the dough. Each piece of dough should be a level or scant 1/8 teaspoon to ensure that the pearls will fit through a boba straw once cooked. If you are making the pearls on your own, slice or rip out no more than 16 small pieces of dough at a time. The dough dries out easily, making them difficult to shape.
- Take 1 piece of small dough in each hand and rub them a few times with the tips of your fingers. This will moisten the dough in case a crust starts forming on the outside. You can also smooth out any tiny clumps of flour here. Then, use the tips of your fingers to roll the dough into pearls. You can also roll out the pearls with the palms of your hands. Transfer the pearls to a surface that’s well dusted with tapioca starch.
- Continue shaping the remaining small pieces of dough into pearls. Roll the pearls in the tapioca starch so that they’re completely covered. Transfer the tapioca pearls to a mesh strainer and give the strainer a few shakes to remove any excess starch from the pearls. Transfer the pearls to a plate lined with parchment paper. Continue shaping the remaining dough into pearls.
Cook Tapioca Pearls
- You only want to cook as many pearls as you need in a few hours’ time because cooked pearls don’t keep well for extended periods. A good rule of thumb to follow is to cook 3 to 4 tablespoons of raw boba per beverage.
- Fill a medium-sized pot or large saucepan halfway with water and bring to boil. Add the pearls to the water and stir until the pearls float to the top. This should take about 1 minute. Reduce the heat to medium-high and continue cooking the pearls for 20 minutes. Turn off the heat, cover the pot, and let the pearls sit in the hot water for another 15 minutes. If you are not ready to use the pearls immediately, you can leave them in the warm water for 60 to 90 minutes.
- Drain the pearls and submerge them in a bowl of cold water for 1 to 2 minutes. This cools the pearls and gets them to be the perfect chewy texture. Drain the pearls again and transfer them to a bowl.
- Toss the pearls with sugar syrup (recipe below), enough so that the pearls are well coated in syrup. Let the pearls sit for 20 to 30 minutes so the pearls can absorb the syrup. You’ll want to use these pearls to make bubble tea within an hour.
Assemble Bubble Tea
- To make the bubble tea, pour some tapioca pearls with the syrup into a glass. You’ll likely want a few more spoonfuls of syrup, too. Pour brewed tea into the glass and add as much milk or cream to suit your taste. Taste the bubble tea and add more sugar syrup or milk, if desired. Top the beverage with ice cubes and enjoy.
Notes
- Brewing tea: My general rule of thumb is the tea should be at least twice as strong as what you’d normally drink. If you make tea with tea bags, double up the tea bags when you brew the tea. For loose leaf tea, use at least 2 to 2 1/2 teaspoons of tea leaves for each cup of water. I generally like to steep the tea for about 15 minutes, to make sure it’s a very strong cup of tea (you’ll dilute the tea with milk and ice cubes). You can find more info about making bubble tea in my blog post.
- Make sugar syrup: You can make the syrup with 1/2 cup white granulated sugar and 1/2 cup water or 1/2 cup dark brown sugar and 1/2 cup water. Add the ingredients for the syrup in a saucepan and bring to boil. Reduce the heat to medium high and let it simmer for 2 to 3 minutes. Then, turn off the heat and let the syrup cool. Store the syrup in a jar and refrigerate. Use the syrup within 2 weeks.
- Tapioca flour/starch: I measured the flour using the spoon-and-sweep method.
- Potato starch: I find adding potato starch to the dough makes the pearls less sticky when you chew them. If you don’t want to buy another bag of starch just for this recipe, you can simply substitute the potato starch with more tapioca starch.
- Matcha: I recommend using higher quality matcha if you want the pearls to be more vibrant green.
- Black Boba: I developed this version before I discovered making boba with molasses. I found that using black food coloring alone will make the pearls look slightly purple once cooked. That’s why I also added a drop of chocolate brown color. I haven’t tried this, but the recipe might also work if you use brown sugar instead of white and add a drop of black food coloring. Add the food coloring only after you add the hot water. I discovered during recipe testing that black food coloring can turn blue when it comes in direct contact with boiling hot water.
- Making the dough with cold water: If you mix the flours with cold or room temperature water, you’ll end up with a mass of dough that is stiff and crumbly. You will not be able to shape it into pearls. That’s why you must make this dough with hot water.
- Freezing Directions: Place the uncooked tapioca pearls on parchment lined plate and freeze for an hour before transferring to a freezer bag. Use in 6 months.
Nutrition
Disclosure: This post was sponsored by Bob’s Red Mill! To learn more about their products and to get more recipe inspiration, follow them on Instagram or Facebook.


Azka Shadan says
The way of sharing your personal experience in beginning with bubble tea in the form of story is the part that hook me to read further.
Interesting style of writing 👍
Ian says
Made a double batch of medium brown boba (3 tbsp light brown sugar, 2 tbsp molasses) and they’re so good I’m eating the dough uncooked haha (you shouldn’t do this), author’s right, this is super time consuming but it makes good boba!
Lisa Lin says
I appreciate you trying this, Ian!
Karensa says
First time trying to make homemade boba and it turned out great! Thanks so much for the amazing recipe!
I want to try making more and freezing it. Are the instructions the same for cooking the frozen boba? Would I just increase the cooking time? Thanks!
Lisa Lin says
Hi, Karensa. Just cook them a minute or two longer. They defrost really easily in boiling water.