Thank you to Bob’s Red Mill for sponsoring this post!
This steamed tapioca thousand layer cake holds a special place in my heart because it is a regional dish that you can find in Toisan (台山, Taishan in pinyin), a rural region of southern China where my family was from. In Toisanese, this cake is known as 菱粉糍 (pronounced lan foon tay), which literally means tapioca flour cake. Sometimes, this cake is called 千層糕 (pronounced ceen ceng go in Cantonese), which translates to “thousand layer cake.” There are many different styles of 千層糕 in Cantonese cuisine that use various combinations of flours for the batter. Because the Toisan version of the cake uses tapioca flour only, I decided to translate it into “tapioca thousand layer cake.” (Note: I’ve learned that people from Hoiping (開平, Kaiping in pinyin) also make 菱粉糍. Hoiping is a county-level city just north of Toisan.)

Mama Lin always cooks a tapioca thousand layer cake for Lunar New Year, along with a 年糕 (neen go, new year’s cake). Besides Lunar New Year, my mom would steam this cake for parties. It’s a perfect palette cleanser because the cake has a mild sweet flavor and it’s moist.
It’s taken me a while, but I’ve finally gotten the hang of cooking my mom’s tapioca thousand layer cake! My mom even approved the batch that I made for her! I’m excited to partner with Bob’s Red Mill to show you how to make a treasured family recipe.

HOW TO MAKE STEAMED TAPIOCA THOUSAND LAYER CAKE
INGREDIENTS OVERVIEW
The tapioca thousand layer cake uses very few ingredients: tapioca flour (also known as tapioca starch), brown sugar, water, and kansui (which is optional).

TAPIOCA FLOUR
Tapioca flour gives the cake its characteristic chewiness. When held up against the light, the cake will look translucent! In terms of texture, this cake is similar to tapioca or boba pearls (which are also made with tapioca flour). Because of the high water content of the batter, this tapioca thousand layer cake is slightly softer than tapioca pearls.

Here, I’m using Bob’s Red Mill Tapioca Flour, which can be found in their online store or at your local grocery stores. This finely ground tapioca flour is very versatile. It’s great for gluten-free baking because the gelatinous quality of tapioca flour makes it a good binder. (See my recipe for Oat & Corn Flour Banana Chocolate Muffins). You can also use Bob’s Red Mill’s tapioca flour to make various dim sum dishes, like my gluten-free crystal dumplings or mushroom cheung fun (rice noodle rolls). The tapioca flour also helps tenderize the meat in my pork and cabbage potstickers recipe.
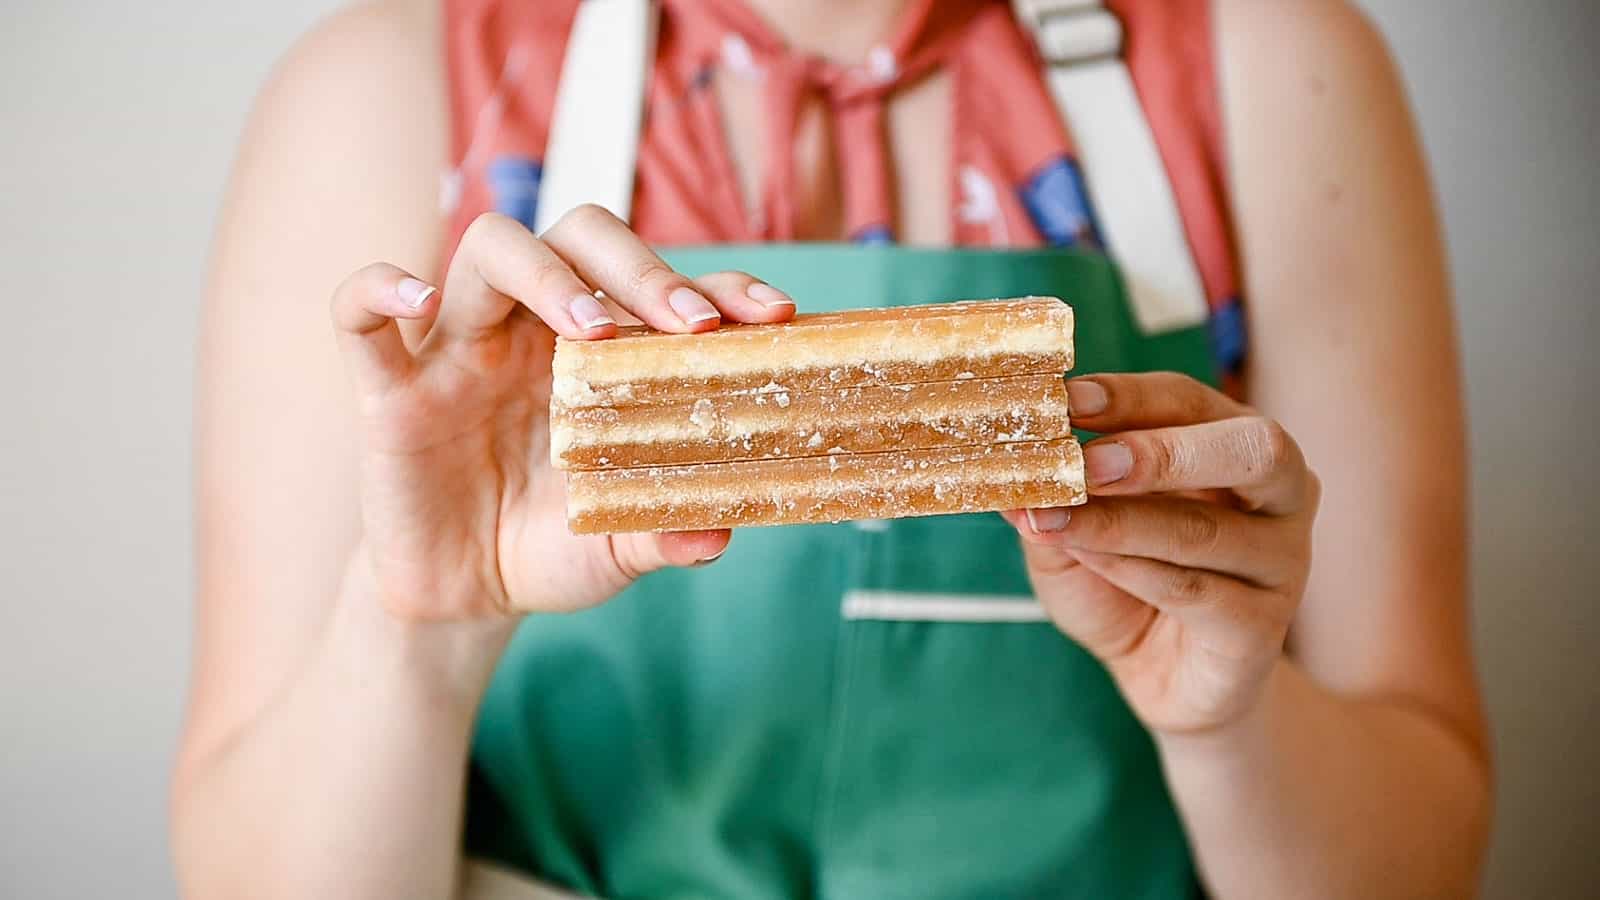
BROWN SUGAR SLABS
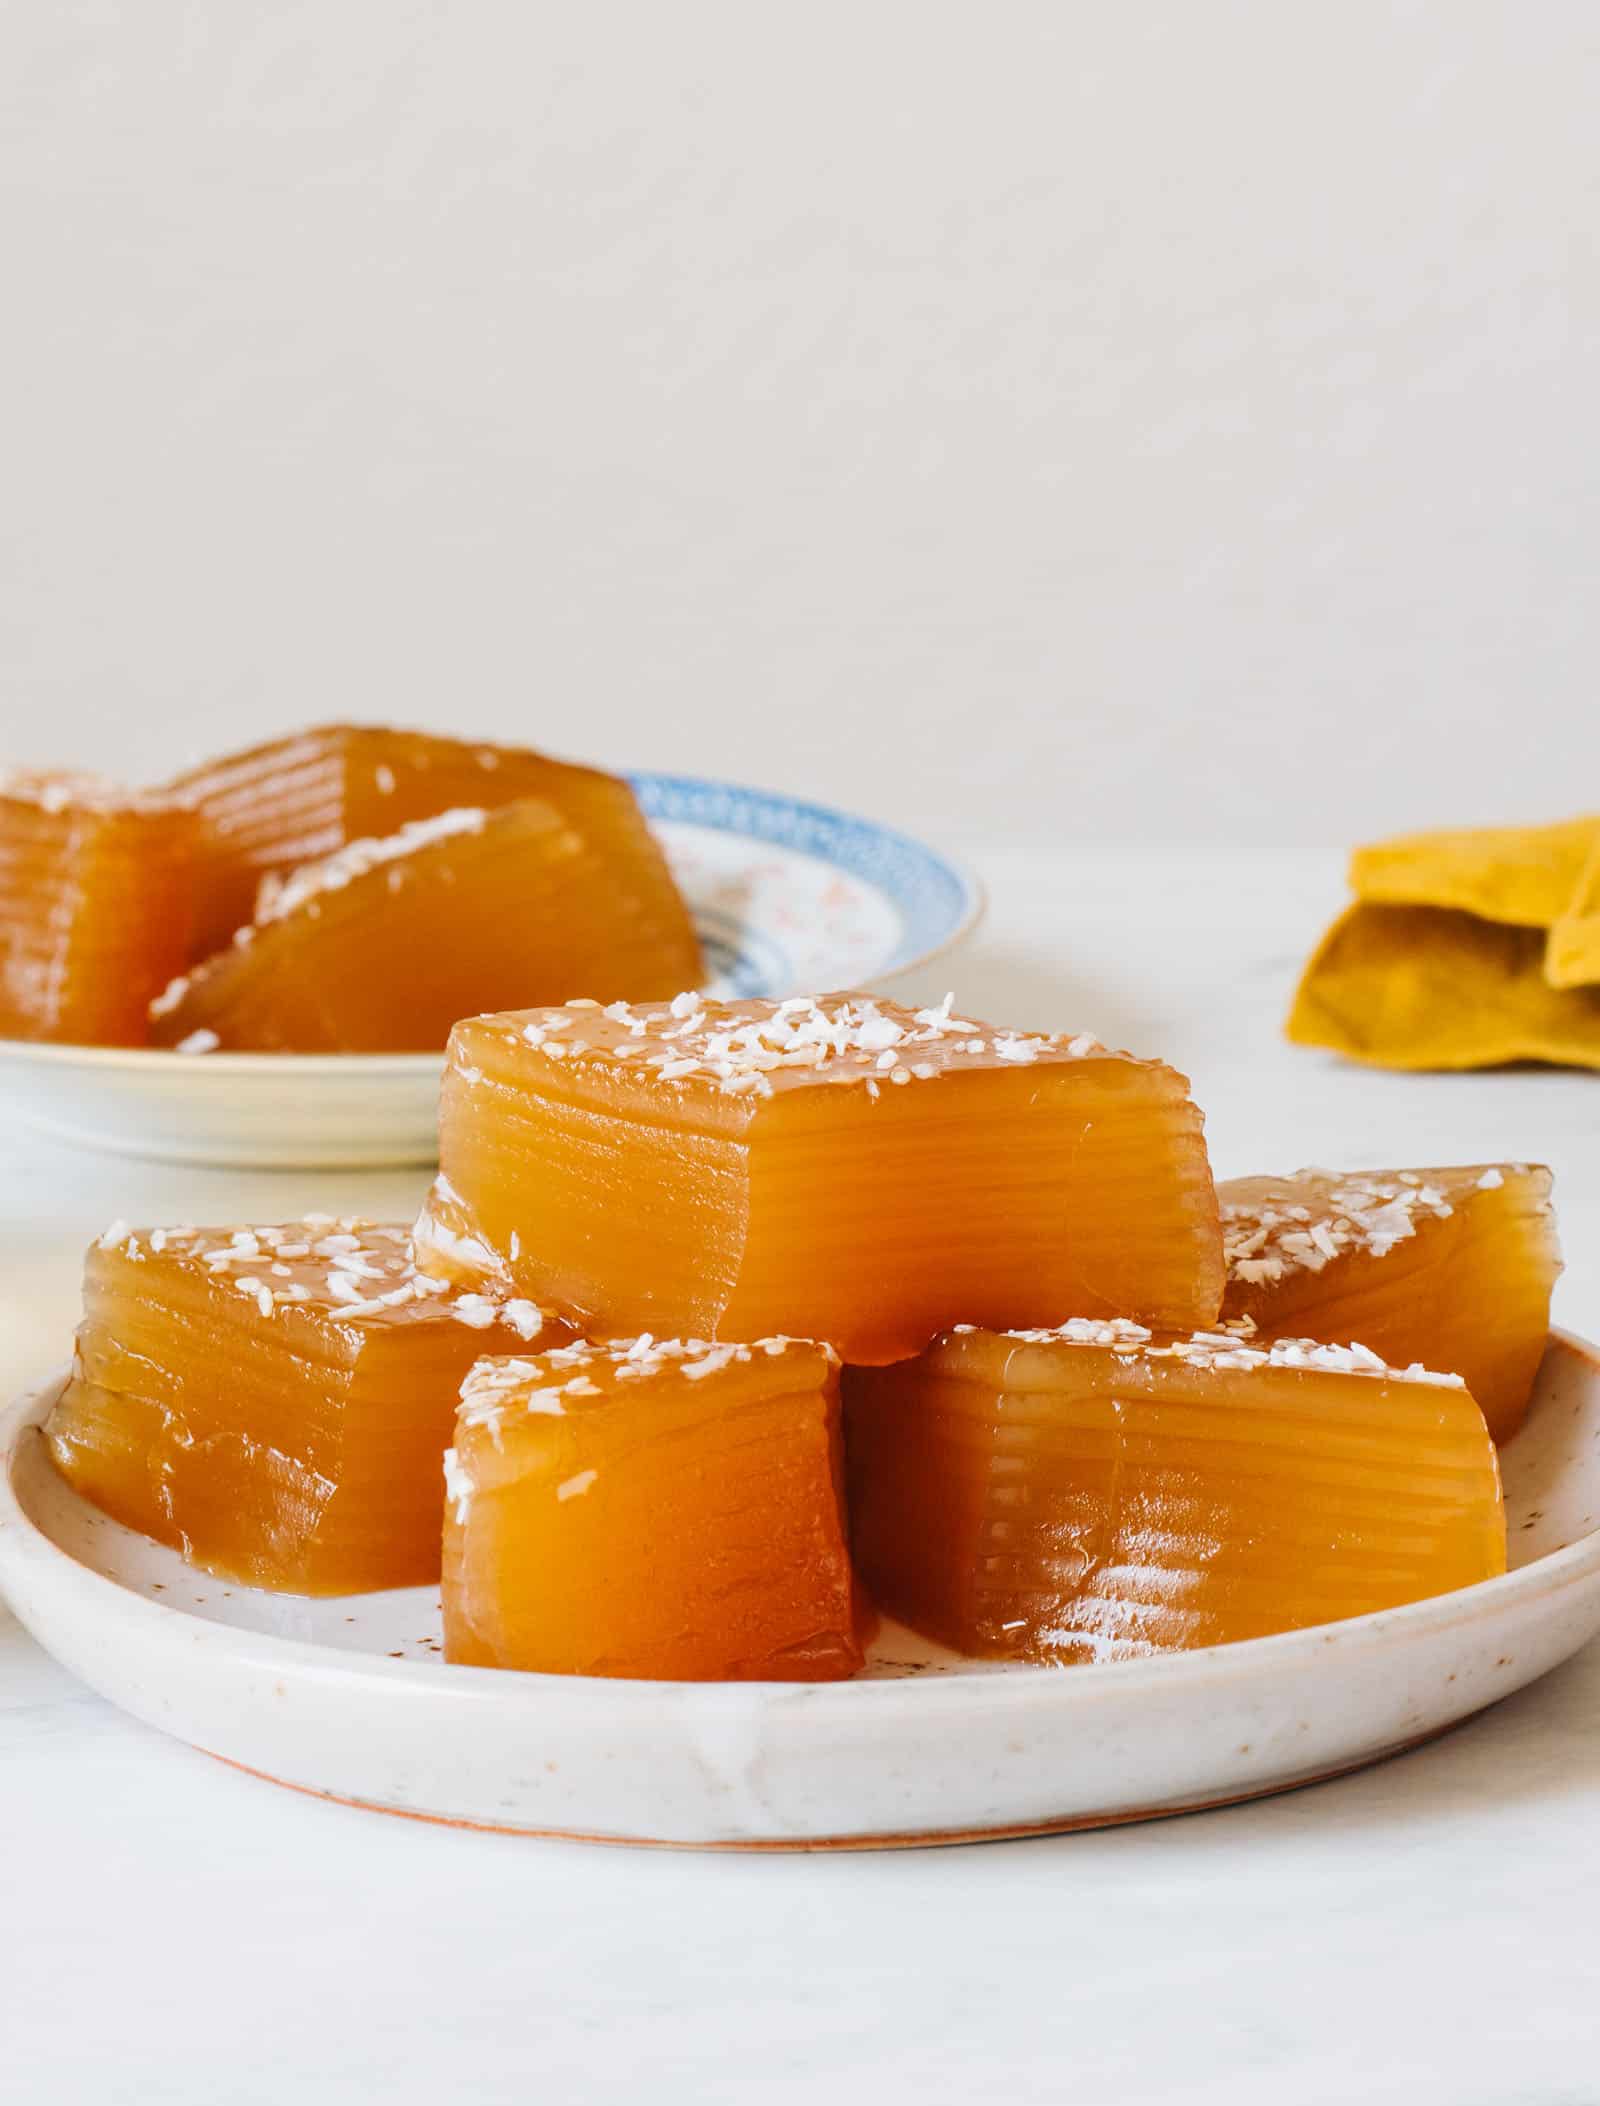
To flavor the cake, my mom generally uses light brown sugar slabs or bricks, which you can find in Asian supermarkets (typically Chinese or Southeast Asian markets). Mama Lin claims that the sweetness of the sugar slabs is more pristine (清甜) compared to conventional brown sugar that we find in grocery stores. The photos of the finished tapioca thousand layer cake you see in this post were made with brown sugar slabs. The sugar slabs tend to make the cake look more beautifully golden.
That said, you can use light brown sugar instead of the sugar slabs. As a matter of fact, one of my sisters preferred the version I made with light brown sugar. I don’t recommend using dark brown sugar for the cake though. As you see in the test batch photographed below, the cake looked too dark and I found the molasses notes in the sugar to be too strong.
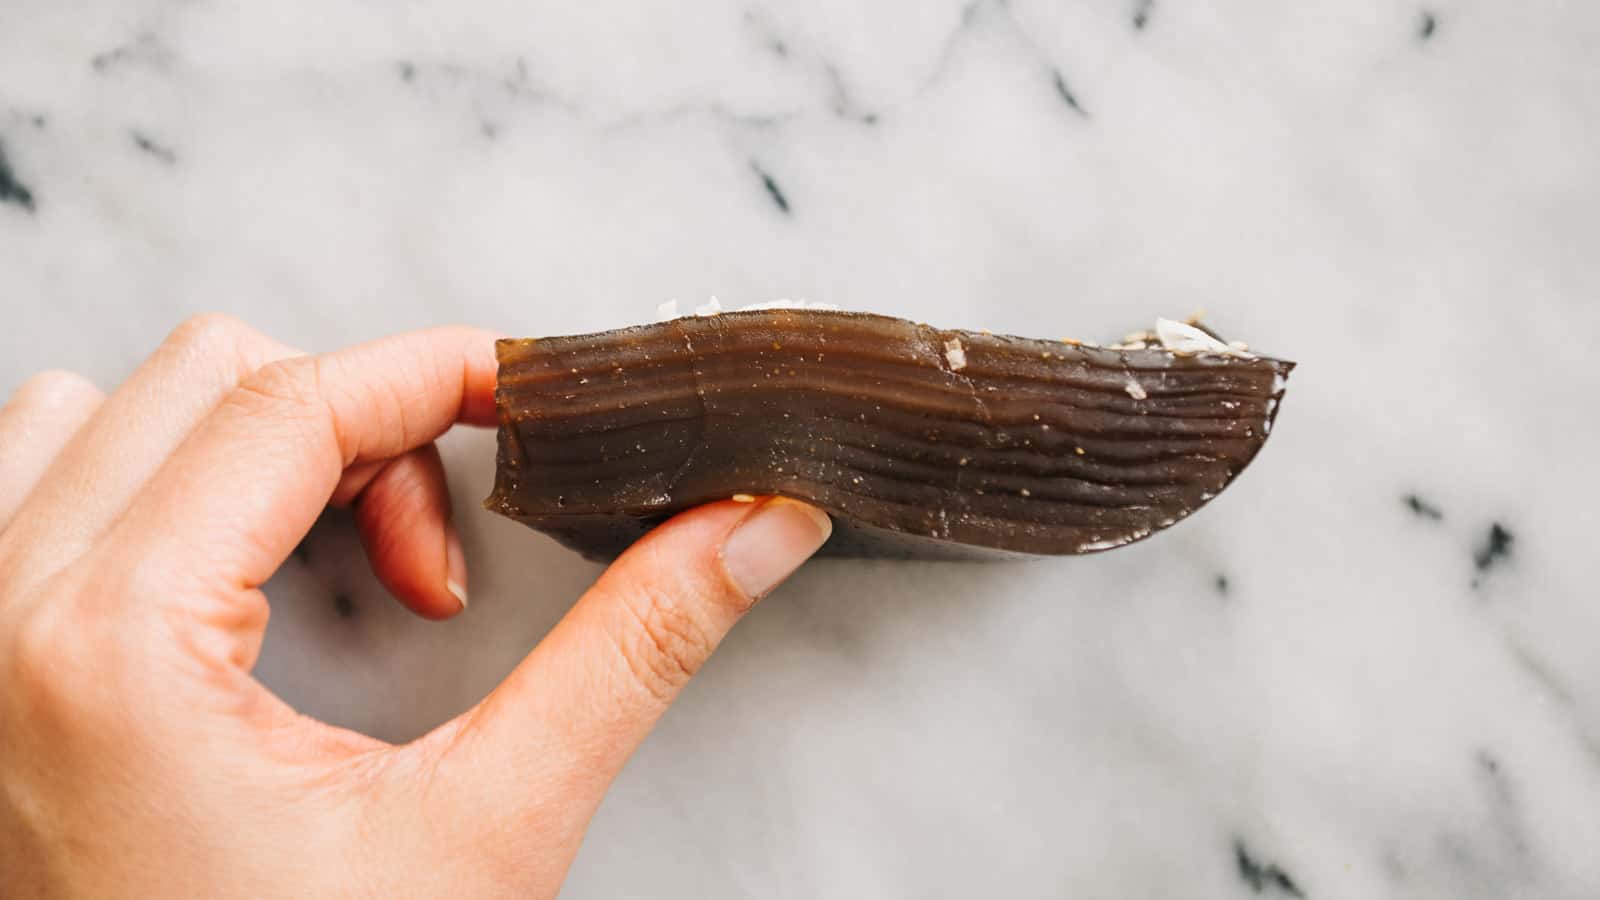
When I was recipe testing, I feared that the cake would seem too plain for the audience as the only flavoring comes from brown sugar. I tested versions of the cake with added ground ginger and vanilla bean paste. It became clear to me that my efforts were in vain as the additional flavorings made the cake taste off. I decided to stick to the recipe my mom gave me and to stop tweaking a recipe that was already good.
KANSUI (LYE WATER)
Mama Lin likes adding a teaspoon of kansui (鹼水) in the batter for two reasons: 1) it enhances the golden color of the cake; and 2) the kansui makes the cake less sticky as you’re eating it. You can find kansui in Asian supermarkets (typically Chinese or Southeast Asian markets). However, you can leave out the kansui if you can’t source it easily.
MAKE BATTER
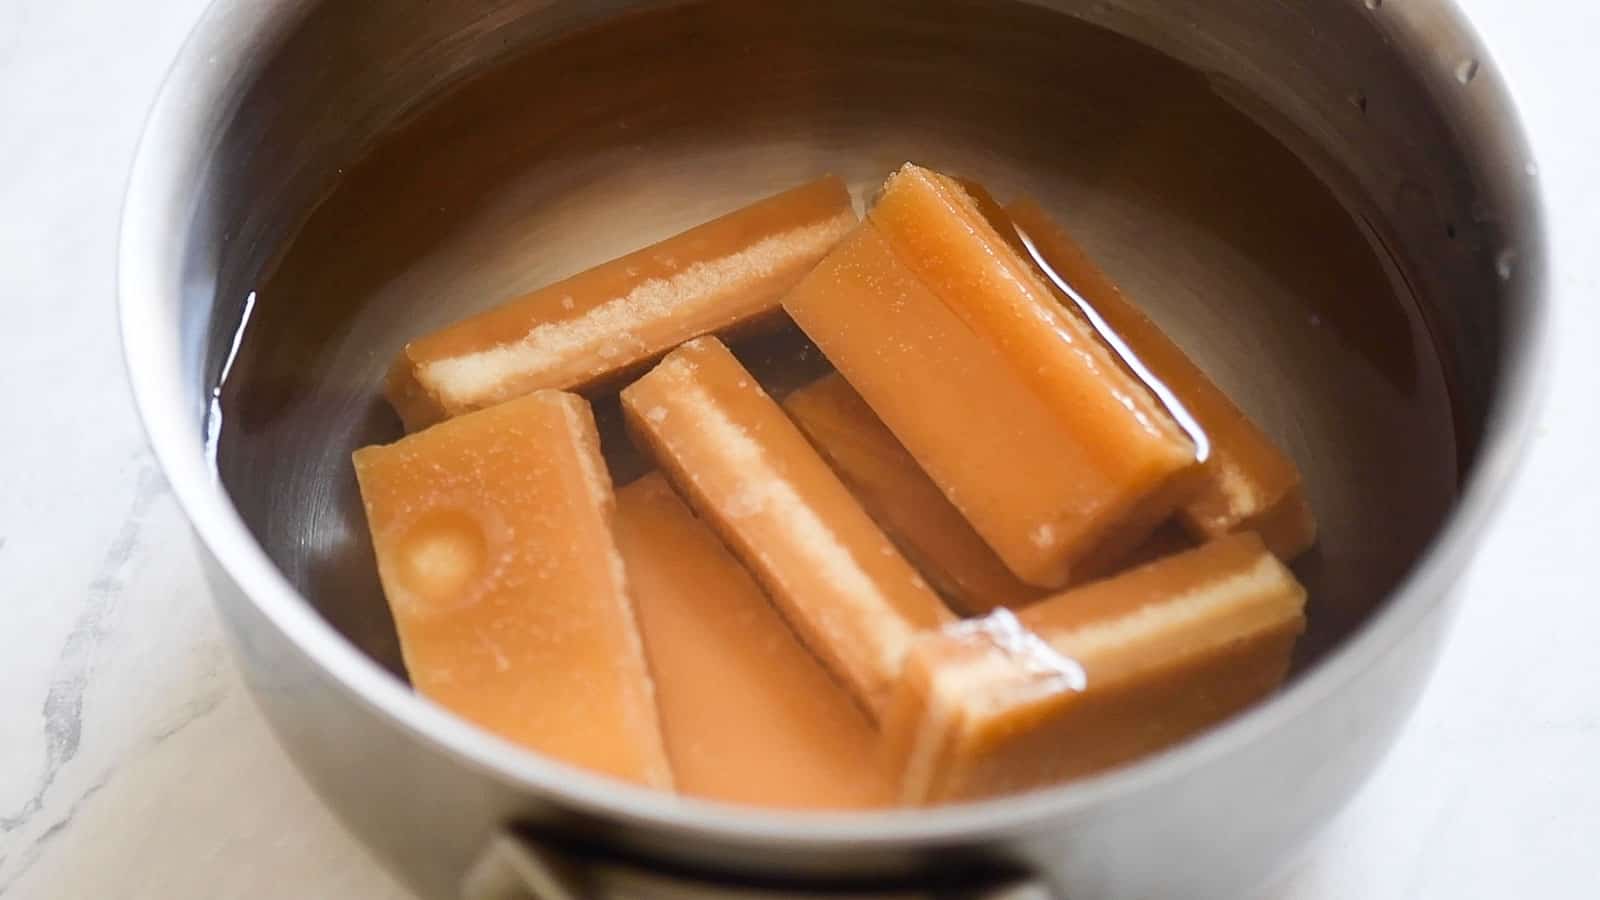
Snap the brown sugar slabs in half and add them to the saucepan, along with 2 1/2 cups of water. If you’re using light brown sugar, add the sugar and water to a saucepan. Bring the water to boil and simmer until the sugar dissolves completely. Light brown sugar usually dissolves as the water reaches the boiling point.
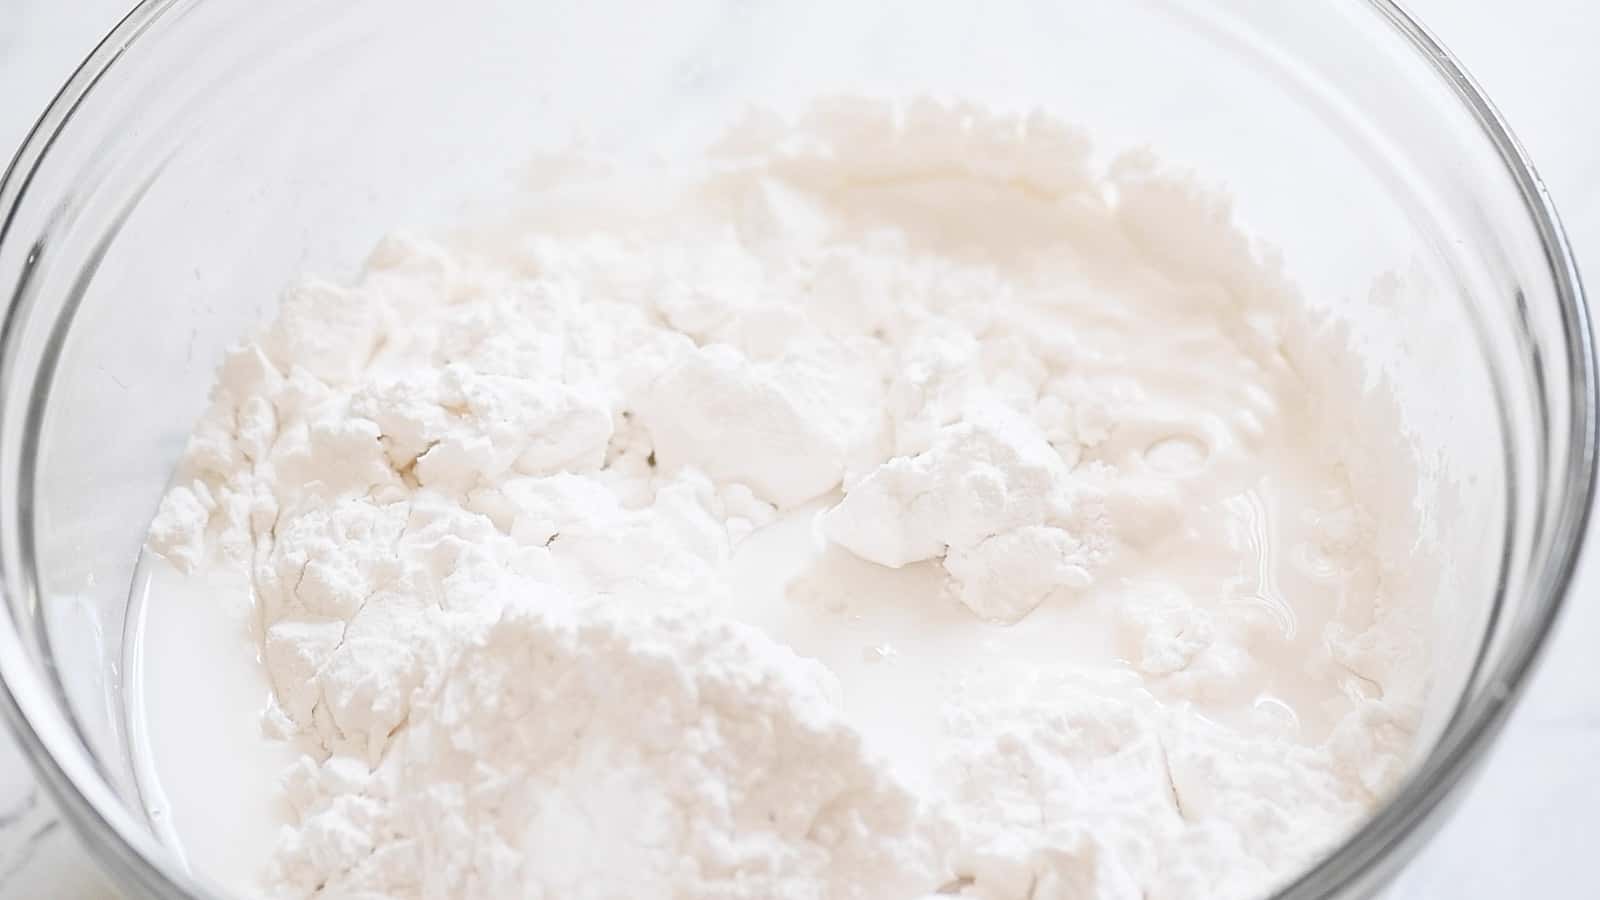
Add the tapioca flour and 1 1/2 cups of room temperature water to a mixing bowl. Try to stir the flour and water together. The flour at the bottom of the bowl will feel very stiff and that’s okay. Stop stirring if it feels like the flour is stuck.
Once the brown sugar has dissolved, turn off the heat. Pour 1/3 of the hot sugar liquid into the bowl with the tapioca flour slurry and mix. The batter should be much easier to stir now. Pour the remainder of the brown sugar liquid into the bowl and mix again. Make sure to use your wooden spoon or spatula to scrape the bottom of the mixing bowl to ensure that there are no clumps of flour stuck there.
By the way, the texture of the batter won’t be quite right if you use only room temperature or cold water to make it. You do need some hot liquid in there.

STEAMING SETUP
Add a steaming rack to a large wok. Fill the wok with water, until there’s about a 1/2-inch gap between the water level and the top of the steaming rack (see photo below). Cover the wok and bring the water to boil.

You’ll also need a pan that can fill 6 to 7 cups of liquid. I’m using a circular pan that my mom bought for me from a Chinese kitchen shop (see photo below). You can also use a square or rectangular pan, as long as it can fill 6 cups of liquid. If you don’t have a large enough pan, you can actually make smaller cakes with the pans you have. Lightly grease the pan with a neutral flavored oil (like vegetable oil) and set the pan aside.

STEAM TAPIOCA THOUSAND LAYER CAKE
Once the water in the wok boils, carefully place the greased pan over the steaming rack.
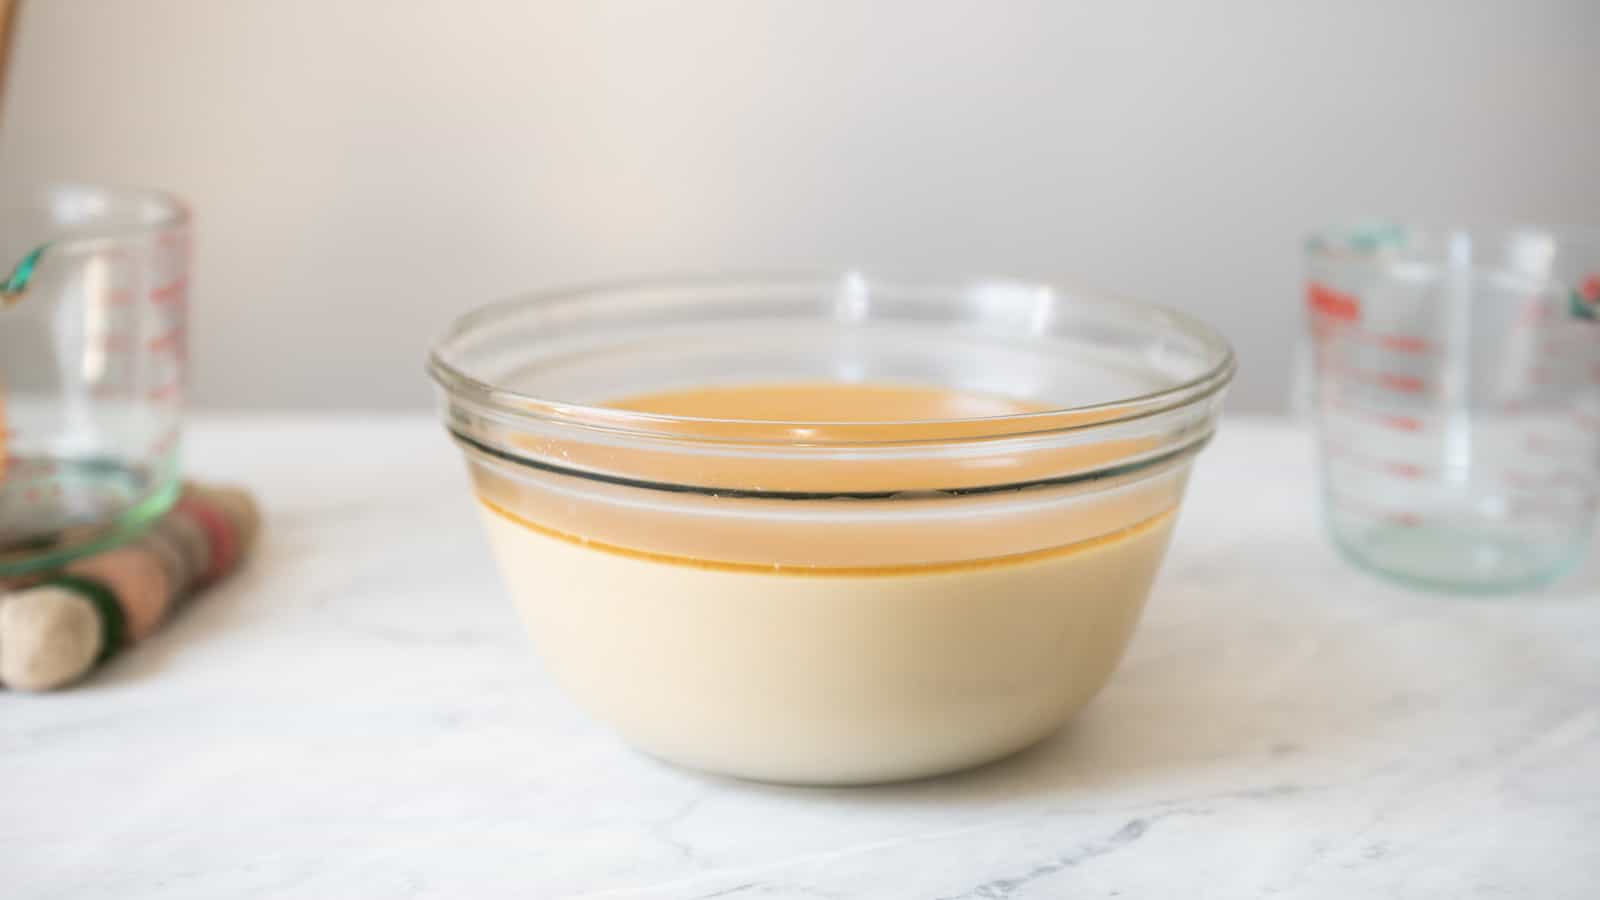
Give the cake batter a stir because the tapioca flour sinks to the bottom of the bowl, causing separation (see photo above). Pour 2/3 cup of batter into the pan. The batter should cover the bottom of the pan completely. If it doesn’t, pour more batter into the pan. Cover the wok with a lid and steam for 4 minutes over medium heat.

Uncover the pan. Make sure the layer is completely translucent and you can see the bottom of the pan. This is an indication that the batter is fully cooked. Tapioca starch, once it gelatinizes, turns translucent, which is why the layers of these cakes are see-through. Usually, the bottom layer cooks very easily. Pour another 2/3 cup of batter into the pan, cover the wok with a lid, and steam for another 4 minutes.
Continue steaming the cake layer by layer, giving the batter a stir before adding 2/3 cup of it into the pan. The batter should cover the entire surface of the pan. If it doesn’t, add more. In terms of the cooking time for each layer, the first 2 layers should take 4 minutes to steam. Layers 3 to 5 will take about 5 minutes to steam, and layers 7 to 9 will take about 6 minutes. As the cake gets thicker, the latter layers will take longer to turn translucent. Make sure to also replenish the water in the wok when you get to about layer 5, as the water evaporates.
TROUBLESHOOTING STEAMING PROCESS
WHEN A LAYER DOESN’T LOOK FULLY COOKED
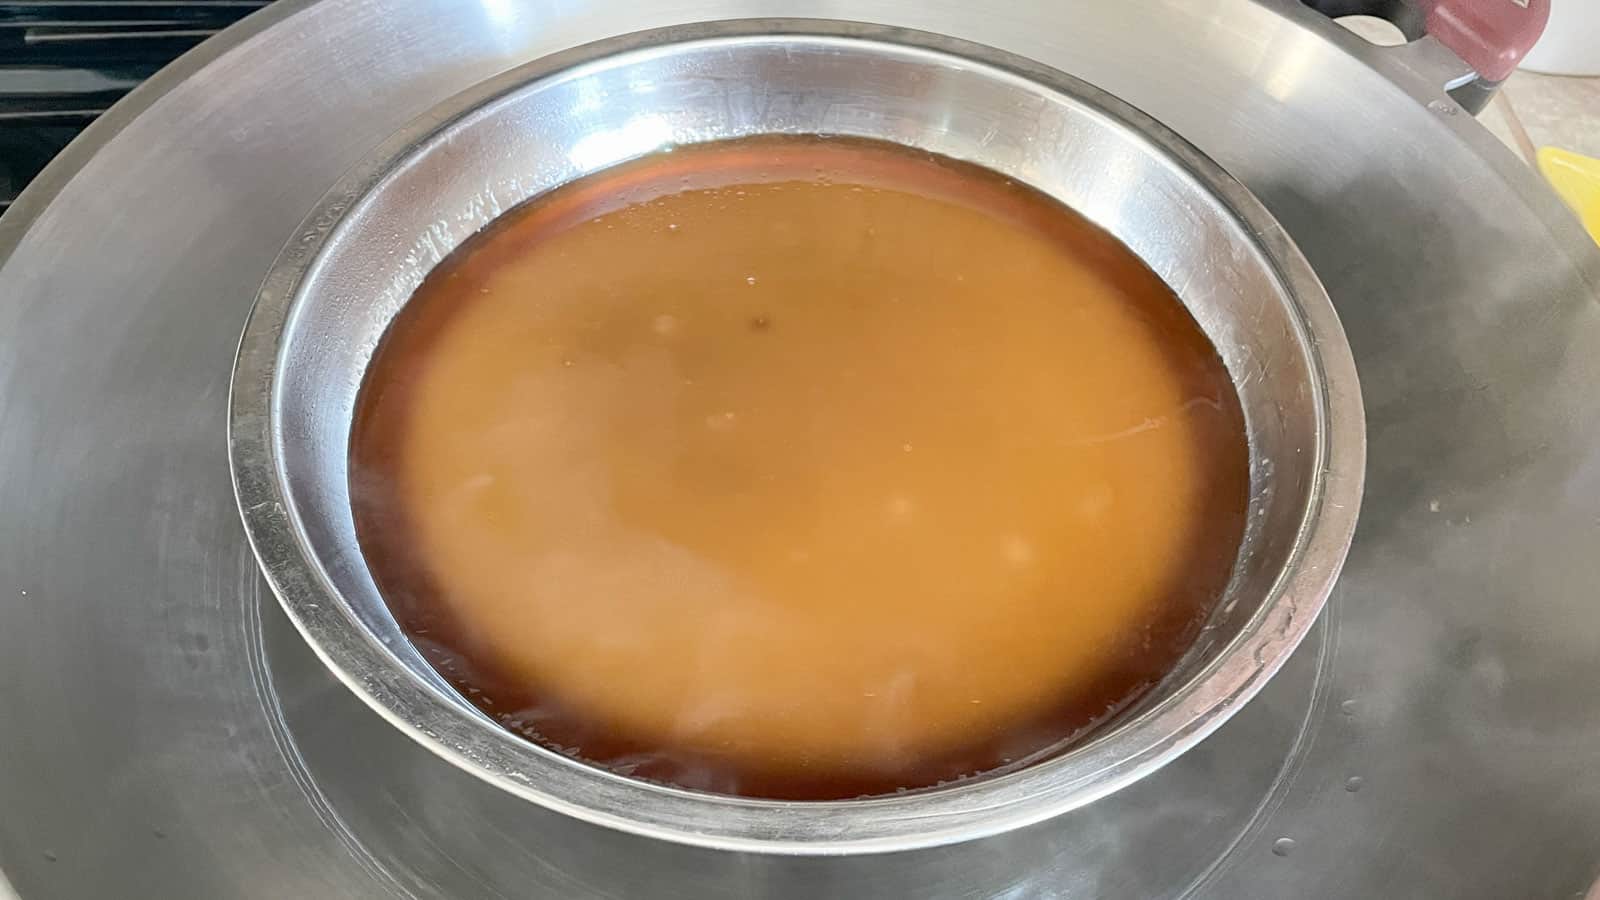
The photo illustrates what a layer looks like when it’s not cooked enough. Notice how the center of the cake looks opaque and light brown, but the outer ring looks translucent. If this happens to you, steam the cake for a few more minutes, until it turns translucent.
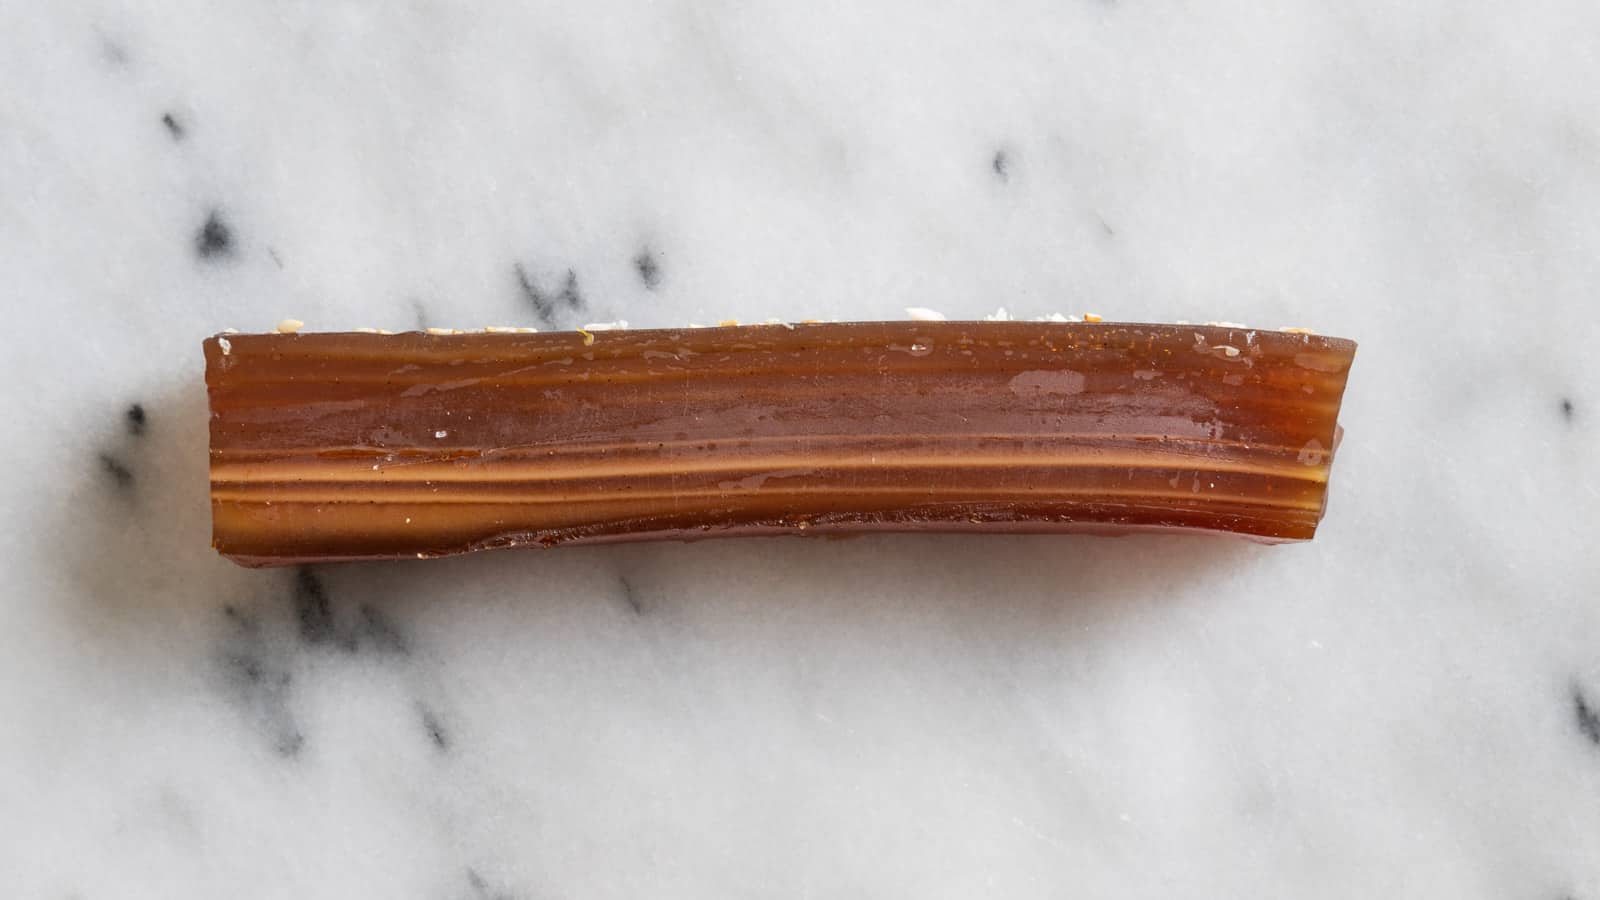
If you add more batter to the cake when a previous layer hasn’t turned translucent yet, that opaque layer will remain opaque no matter how long you cook the cake. In the photo above, I purposely undercooked the lower layers to illustrate what I mean. Notice how the bottom layers fail to turn translucent even though they’ve been steaming for longer than the top layers? The texture of the opaque layers will be stiffer than the translucent layers.
Let’s say you’ve already steamed the cake for 10 minutes and the layer still looks opaque in the center. In that case, increase the heat slightly. It could be that there isn’t enough hot steam in the wok. Another thing you can do is add more water to the bottom of the wok. When the water level is low, you can’t generate enough steam to cook the cake.
WHY DOES MY CAKE LOOK WRINKLED?
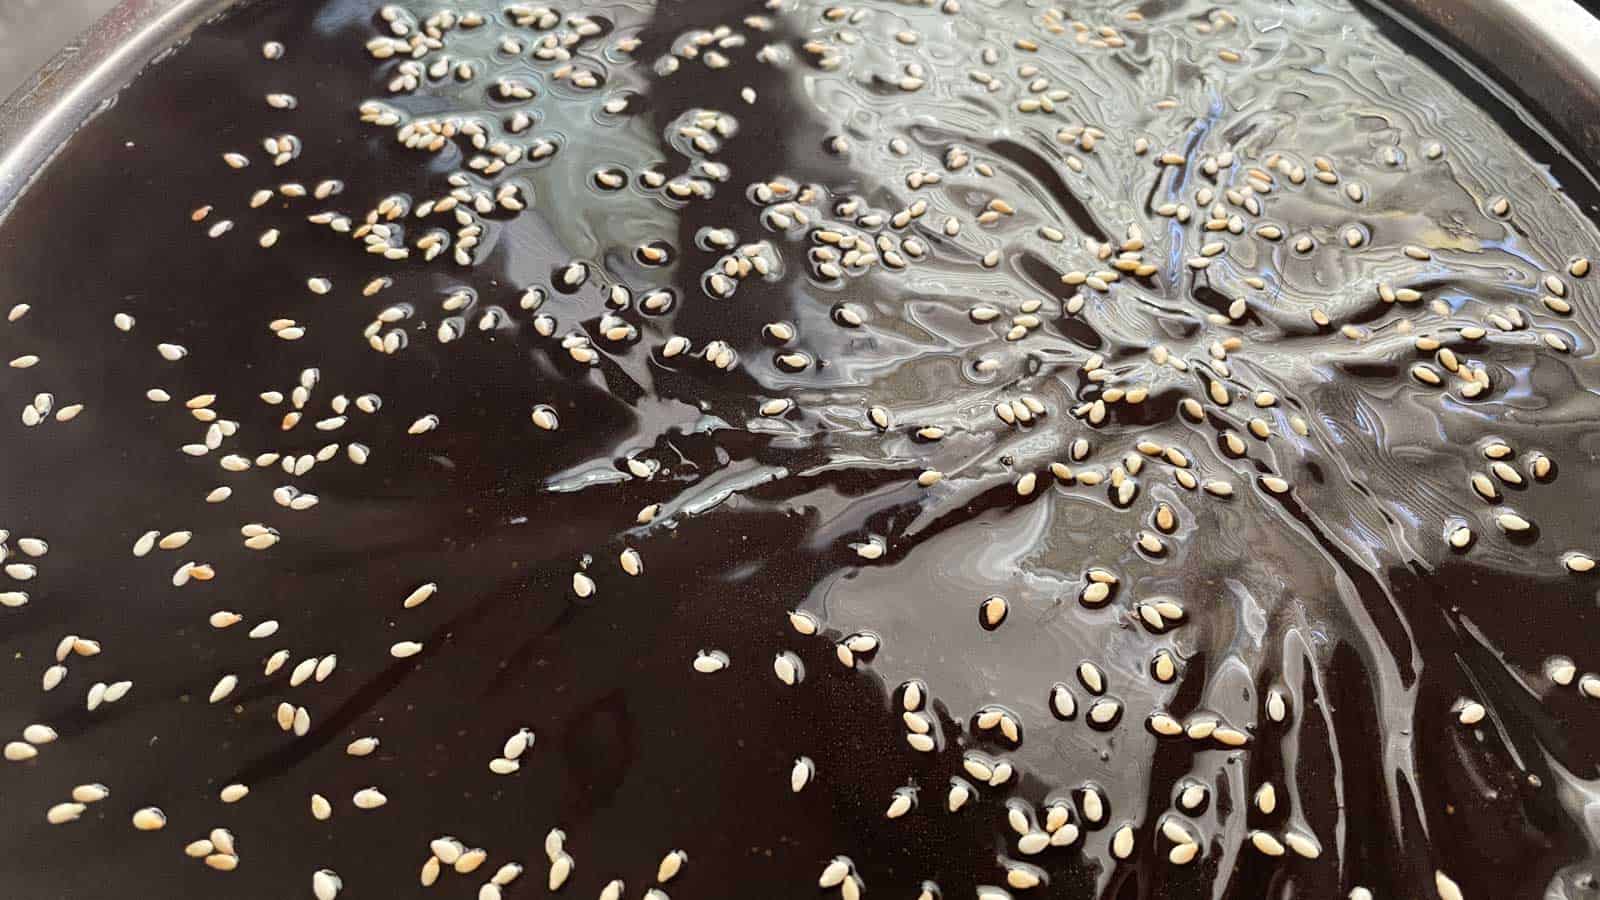
If the surface of your cake looks wrinkled, it generally means that heat generated from the steam inside the wok was too intense. Unfortunately, once a single layer wrinkles, all subsequent layers will be wrinkled as well.
That’s why I recommend cooking the cake on medium heat and leaving a half inch gap between the water level and the top of the steaming rack. The cake will crater if boiling water touches the bottom of the pan. I also noticed that my cakes tend to wrinkle when I cook them on the power burner, even on medium heat. My tapioca thousand layer cakes tend to look better when I cook them on a smaller burner.
The wrinkled top is really a cosmetic issue and the cake will taste fine. You can always cover up the wrinkles with coconut and sesame seeds.

FINISH THE CAKE
Once all the layers have been steamed, turn off the heat. I often find a lot of water over the top layer, which is due to the condensation that develops inside the wok. I usually hold onto the pan with oven mitts and carefully drain the water from the pan. Try not to tip the pan too much when you do this as the cake can slide.

Sprinkle some toasted sesame seeds and Bob’s Red Mill Shredded Coconut over the top of the cake for garnish. It’s better to sprinkle the toppings while the cake is still warm to ensure that they stick onto the cake. Moreover, don’t overload the cake with toppings.

For one of my test batches, I decided to toast a bunch of shredded coconut and spread it all over the top of the cake. I thought this would make the cake look visually appealing, but it turned out to be the wrong move again. The toasting was pointless because the moisture from the cake softened the coconut anyway. Moreover, I loaded so much coconut on the cake that most of it didn’t even stick on the top. As a result, the coconut kept spilling over everywhere as I was slicing into the cake.
Let the cake cool completely before slicing and serving.
SLICING THE CAKE
This cake is very squishy, so it can be difficult to cut the cake and get sharp edges but that’s okay. The easiest thing to do is to run a silicone spatula along the edge of the pan to loosen the cake. Then, use kitchen scissors to cut the cake into pieces.
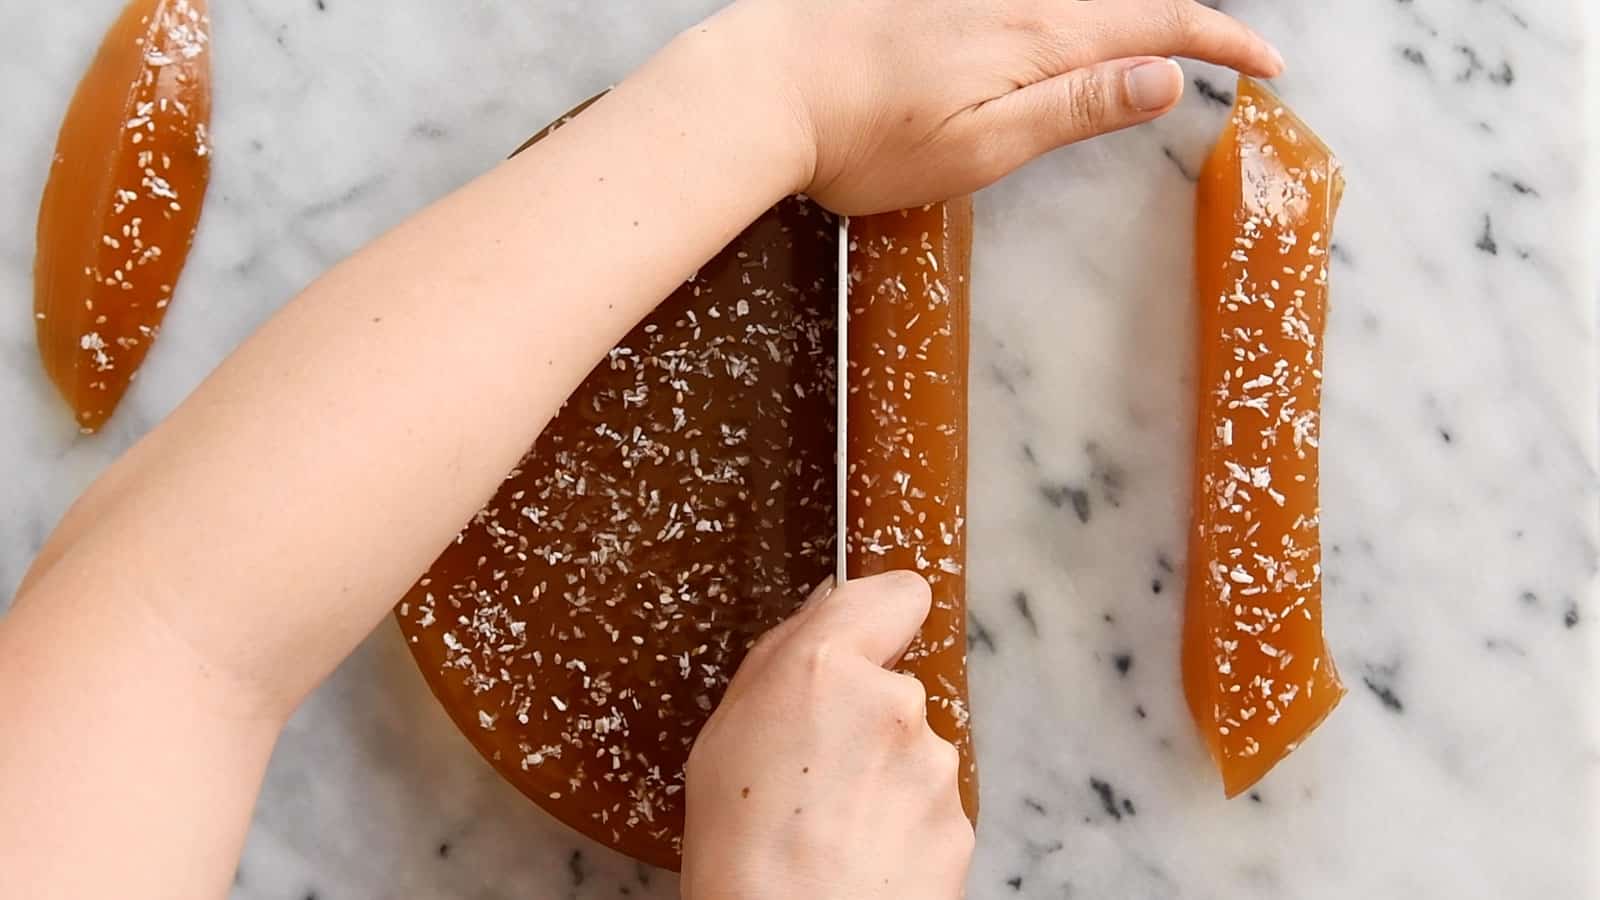
Alternatively, you can cut the cake on a chopping board. Don’t cut the cake over a wooden or bamboo board, as the cake will stick to the board and be difficult to pry off. I typically grease a marble slab and cut the cake over that. You can also use a greased silicone chopping mat. Make sure to grease the knife with oil frequently. Interestingly, I found that you don’t need to grease the kitchen scissors when cutting the cake.
STORING THE TAPIOCA THOUSAND LAYER CAKE
My mom usually leaves the cake out on the counter overnight, covered. The cake usually keeps well, provided that your kitchen isn’t hot and humid. If you’re storing it for more than a day, you’ll want to refrigerate the cake. You can reheat the cake again by steaming it for several minutes or microwaving it until the cake softens.
Eat the cake within 3 or 4 days because mold will start to form on the cake. You can freeze the cake for longer storage and steam the cake to reheat.
MORE RECIPES USING TAPIOCA FLOUR
- Gluten-Free Crystal Skin Dumplings
- Mushroom Cheung Fun
- Basic Cheung Fun (unfilled)
- Oat & Corn Flour Banana Chocolate Muffins
Tapioca Thousand Layer Cake (菱粉糍/千層糕)
Ingredients
- 370 grams brown sugar slabs, can sub with 340 grams/2 cups packed light brown sugar (see note 1)
- 4 cups (945ml) water, divided
- 390 grams tapioca flour, 3 1/4 cups measured with the spoon-and-sweep method
- 1 teaspoon kansui, optional
- toasted sesame seeds
- shredded unsweetened coconut
Steaming Equipment
- circular pan with a 6 to 7 cup capacity, can use a square or rectangular pan (see note 2)
- oil for greasing pan
- steaming rack
- large wok for steaming
Instructions
Make Batter
- Snap the brown sugar slabs in half and add them to a saucepan. Pour 2 1/2 cups of water over the sugar slabs and bring the water to boil. Continue simmering the liquid until the sugar slabs dissolve completely. If you’re using light brown sugar, add it to the saucepan, along with 2 1/2 cups of water. Bring the water to boil and turn off the heat. The sugar should dissolve once the water boils.
- Add the tapioca flour and 1 1/2 cups of room temperature water to a mixing bowl. Try to stir the flour and water together. The flour at the bottom of the bowl will feel very stiff and that’s okay. Stop stirring if it feels like the flour is stuck.
- Once the brown sugar has dissolved, turn off the heat. Pour 1/3 of the hot sugar liquid into the bowl with the tapioca flour slurry and stir. The batter should be much easier to mix now. Pour the remainder of the brown sugar liquid into the bowl and mix again. Make sure to use your wooden spoon or spatula to scrape the bottom of the mixing bowl to ensure that there are no clumps of flour stuck there.
Set Up Steaming Station
- Add a steaming rack into the center of a large wok. Fill the wok with water, until there’s about a 1/2-inch gap between the water level and the top of the steaming rack. Cover the wok and bring the water to boil.
- Lightly grease the pan with any neutral oil (such as vegetable oil). Once the water boils, carefully place the greased pan over the steaming rack. Reduce the heat to medium.
Steam Cake
- Give the batter a stir because the tapioca flour sinks to the bottom of the bowl within minutes. Pour 2/3 cup of batter into the pan. The batter should cover the bottom of the pan completely. If it doesn’t, pour more batter into the pan. Cover the wok with a lid and steam for 4 minutes over medium heat.
- Uncover the pan. Make sure the layer is completely translucent and you can see the bottom of the pan. This is an indication that the batter is fully cooked. Pour another 2/3 cup of batter into the pan, cover the wok with a lid, and steam for another 4 minutes.
- Continue steaming the cake layer by layer, giving the batter a stir before adding 2/3 cup of it into the pan. Again, the batter should cover the entire surface of the pan. If it doesn’t, add more. Layers 3 to 5 will take about 5 minutes to steam, and layers 7 to 9 will take about 6 minutes. As the cake gets thicker, the latter layers will take longer to turn translucent. If at any point, the cake looks opaque, do not add more batter to the pan. Make sure the layer turns translucent completely. Otherwise, the opaque layer will stay that way even if you continue steaming the cake. (See blog post for more in-depth explanation.) Replenish the water in the wok when you get to about layer 5, as the water evaporates over time.
Finish Cake
- Once all the layers have been steamed, turn off the heat. There will likely be a lot of water over the top layer, which is due to the condensation that develops inside the wok. Holding on to the pan with dry towels or oven mitts, carefully tip the pan and drain the water. Be careful because the cake can slide around.
- Sprinkle some toasted sesame seeds and coconut over the top of the cake for garnish. It’s better to sprinkle the toppings while the cake is still warm to ensure that they stick onto the cake.
- Let the cake cool completely before slicing and serving.
Slicing Cake
- There are several ways to cut into the cake. The easiest thing to do is to run a silicone spatula along the edge of the pan to loosen the cake. Then, use kitchen scissors to cut the cake into pieces.
- Alternatively, you can cut the cake on a chopping board. Don’t cut the cake over a wooden or bamboo board, as the cake will stick to the board and be difficult to pry off. I typically grease a marble slab and cut the cake over that. You can also use a grease silicone chopping mat. Make sure to grease the knife with oil frequently. Interestingly, you don’t need to grease the kitchen scissors when cutting the cake.
Storing Cake
- You can leave the cake on your counter, covered, overnight. The cake usually keeps well, provided that your kitchen isn’t hot and humid. If you’re storing it for more than a day, you’ll want to refrigerate the cake. You can reheat the cake again by steaming it for several minutes or microwaving it until the cake softens.
- Eat the cake within 3 or 4 days because mold will start to form on the cake. You can freeze the cake for longer storage and steam the cake to reheat.
Video
Notes
- I found light brown sugar to be sweeter than the brown sugar slabs, so that’s why I recommend using 340 grams/12 ounces of light brown sugar. Brown sugar slabs can be paler or darker brown, depending on which brand you buy. I prefer the paler one for this cake, but it doesn’t really matter too much. Don’t get the black brown sugar slabs for this recipe as the sugar is too hard.
- If you don’t have a large enough pan, you can make smaller cakes with the pans you have.
Nutrition
Disclosure: This post was sponsored by Bob’s Red Mill! To learn more about their products and to get more recipe inspiration, follow them on Instagram or Facebook.


Jo says
Thank you for sharing mama Lin’s recipe! I can’t wait to make it, reminds of my grandma who used to make this for us growing up. We would peel and eat it layer by layer.🤣
Lisa Lin says
Thanks, Jo! Let me know how it goes!!
JM says
Can I cook the cake with fewer layers that are thicker (or 1 layer)? I know it won’t look as pretty, but will the taste be close? Tending to the steamer every 5-7 min for almost an hour is a little long. Thanks!
Lisa Lin says
Absolutely! My mom actually prefers cooking fewer layers and makes them a little thicker.
Jane Chin says
Lisa,
I have been looking for this recipe for many, many years. Both my parents are from Toisan and this is a steamed cake that I always requested when we went to Chinatown. Now this is very difficult to find. Please thank your mom for sharing her recipe. I look forward to seeing more Toisan recipes. Sadly my mom passed away 2 years ago at the age of 99. It was difficult getting recipes from her because she would say a rice bowl of this and half a cup of that. As we all know, rice bowls come in different sizes and she used a cup she had at home not a measuring cup. Thanks again so very much for this much for this much sought after recipe.
Lisa Lin says
Jane, thank you for leaving this message! I completely understand the difficulty of cooking from parents’ recipes because my mom is very much the same way. She only started using measuring cups because I insisted that she do it for my recipe writing. Will be sharing more Toisan recipes!
Jane says
Lisa,
I made the Tapioca Thousand Layer Cake and it came out Perfect!!!!! It brought back so many fond memories of my childhood. I did forget to add the kansui but will add it in with the water measurements next time. Thank you so much for publishing this recipe and thank your mom again. This is my most treasured recipe.
Lisa Lin says
Thank you so much for making this, Jane!! Glad it worked out for you!
Dollface says
Question! I want 8 white layers and the top brown. This is how it is sold in Hawai’i. How do I change the recipe to fit this?
Lisa Lin says
I will write a recipe for that at some point soon, but it involves using white granulated sugar instead of brown sugar and splitting the batter in two.
Jaci says
I would like that white on the bottom, brown on the top recipe too! I have looking for years. I always thought it was some weird Hawaiian adaption no one wrote down so I’m glad to know it’s a real recipe. Thank you for the detailed explanation 🙂
Miki Darling says
Thank you for this recipe! I am a 3rd generation Chinese/Japanese American who grew up around my Chinese relatives and food but not enough to learn how to make many of the things we grew up eating. My sister and I were talking about foods we missed and this was one of them because we have never seen it sold anywhere. We made it while we were together for thanksgiving and thoroughly enjoyed resurrecting a favorite delicacy that we thought was lost forever!
Lisa Lin says
Hi, Miki! Thank you so much for writing such a sweet note. Thank you so much for trusting this recipe!!
Sandra says
Thank you for making the video and the recipe! Your video description is so thorough that I don’t think I can fail!
I am so happy because I haven’t had this since Feng Huang in San Francisco closed. I just wish someone in the owner’s family would have continued on or at least made a cookbook of all these things we cannot get anymore.
Lisa Lin says
Thanks for making this, Sandra!
Alice says
I stumbled upon your YouTube video on this cake. I will be trying it out since I remember eating it when I was a kid. I have been searching for a recipe to make 台山碗头糍 – steamed cup cake that is chewy but light. My mom used to make it with just rice flour, sugar and water. She wrote down the recipe but was not in a standardized measurements. So I have not been able to figure which “cup” or “bowl” she used and how full to fill it. Unfortunately, I never learned from her how to make it. I am now in my 60s and still searching for the right ratio and recipe. Do you think your mom might have a recipe for it? It would be great if she does because I really think it is different from how other region make these. Thank you in advance.
Kelly says
Thank you for sharing this recipe. I made it a few times and they were always a hit. Brings back many fond memories and I love playing with my food! 🙈
Can one freeze the finished product and reheat by steaming? Will the texture change after its been frozen?
Lisa Lin says
Hi, Kelly! Thank you for making it and I’m so glad people have enjoyed this! About the freezing, I think it can work but cracks likely will form on the cake during the freezing process (there’s a lot of water content in the cake). I don’t know how this will impact the overall look of the cake once it’s reheated but you may see some small cracks. Hope this helps! Texture-wise, I think it’ll be close to when the cake was freshly made, as tapioca starch is very forgiving.
Rachel says
Looks delicious I’ll have to give this a go. Can you use gula melaka sugar?
Lisa Lin says
I’ve never used that kind of sugar, so I can’t say if it’ll work. Sorry about that.
Phuong says
I want to make this recipe 🙂 . Where did you get your wok and silver plate from? Looking for something similar .
Lisa Lin says
Hi, Phuong! Admittedly, I got these plates from my mom, who bought them from a shop in Chinatown!
KC says
Success! I made the lan foon tay last night with the addition of the kansui. With fond memories of making this with my aunt and cousin 50+ years ago. I had been searching for this recipe for awhile. The flavors were spot on! Good heat, no wrinkles on the surface. Question, mine came out a tad squishy. What can I do next time for a firmer tay? More kansui?
Lisa Lin says
Hi, KC! I’m glad you enjoyed the taste! What you can do is reduce the amount of water slightly! Maybe reduce the water by a 1/4 or 1/3 cup?
Kc says
Thanks! I thought maybe to add a bit more tapioca flour since the recipe calls for 370g and a bag of Bob’s Red Mill contains 454g. Maybe just 14g (2T) more of tapioca flour.
Lisa Lin says
Sure, that could work too!