This Asian rice cakes recipe came from Mama Lin’s attempt to make Korean rice cakes, specifically the kind used in tteokbokki. Like in Korean cuisine, steamed rice cakes are prevalent in Chinese cooking (often times called nian gao, 年糕). Throughout the year, Mama Lin makes rice cakes for stir frying. My mom noticed how my sister-in-law was buying Korean rice cakes, tteok (떡), from the supermarket, so she decided to figure out how to create it at home.
Often times, tteok is made by pounding a rice flour dough to give the rice cakes its characteristic chewy texture. Although the shape of the rice cakes you see here looks a lot like garaetteok (cylindrical rice cakes), it is not derived from the traditional method of making tteok. That’s why I hesitate to call this a tteok or garaetteok recipe because it is my mom’s interpretation of a Korean-style rice cake. However, if you are interested in learning how to make tteok from scratch, check out this recipe from Maangchi.
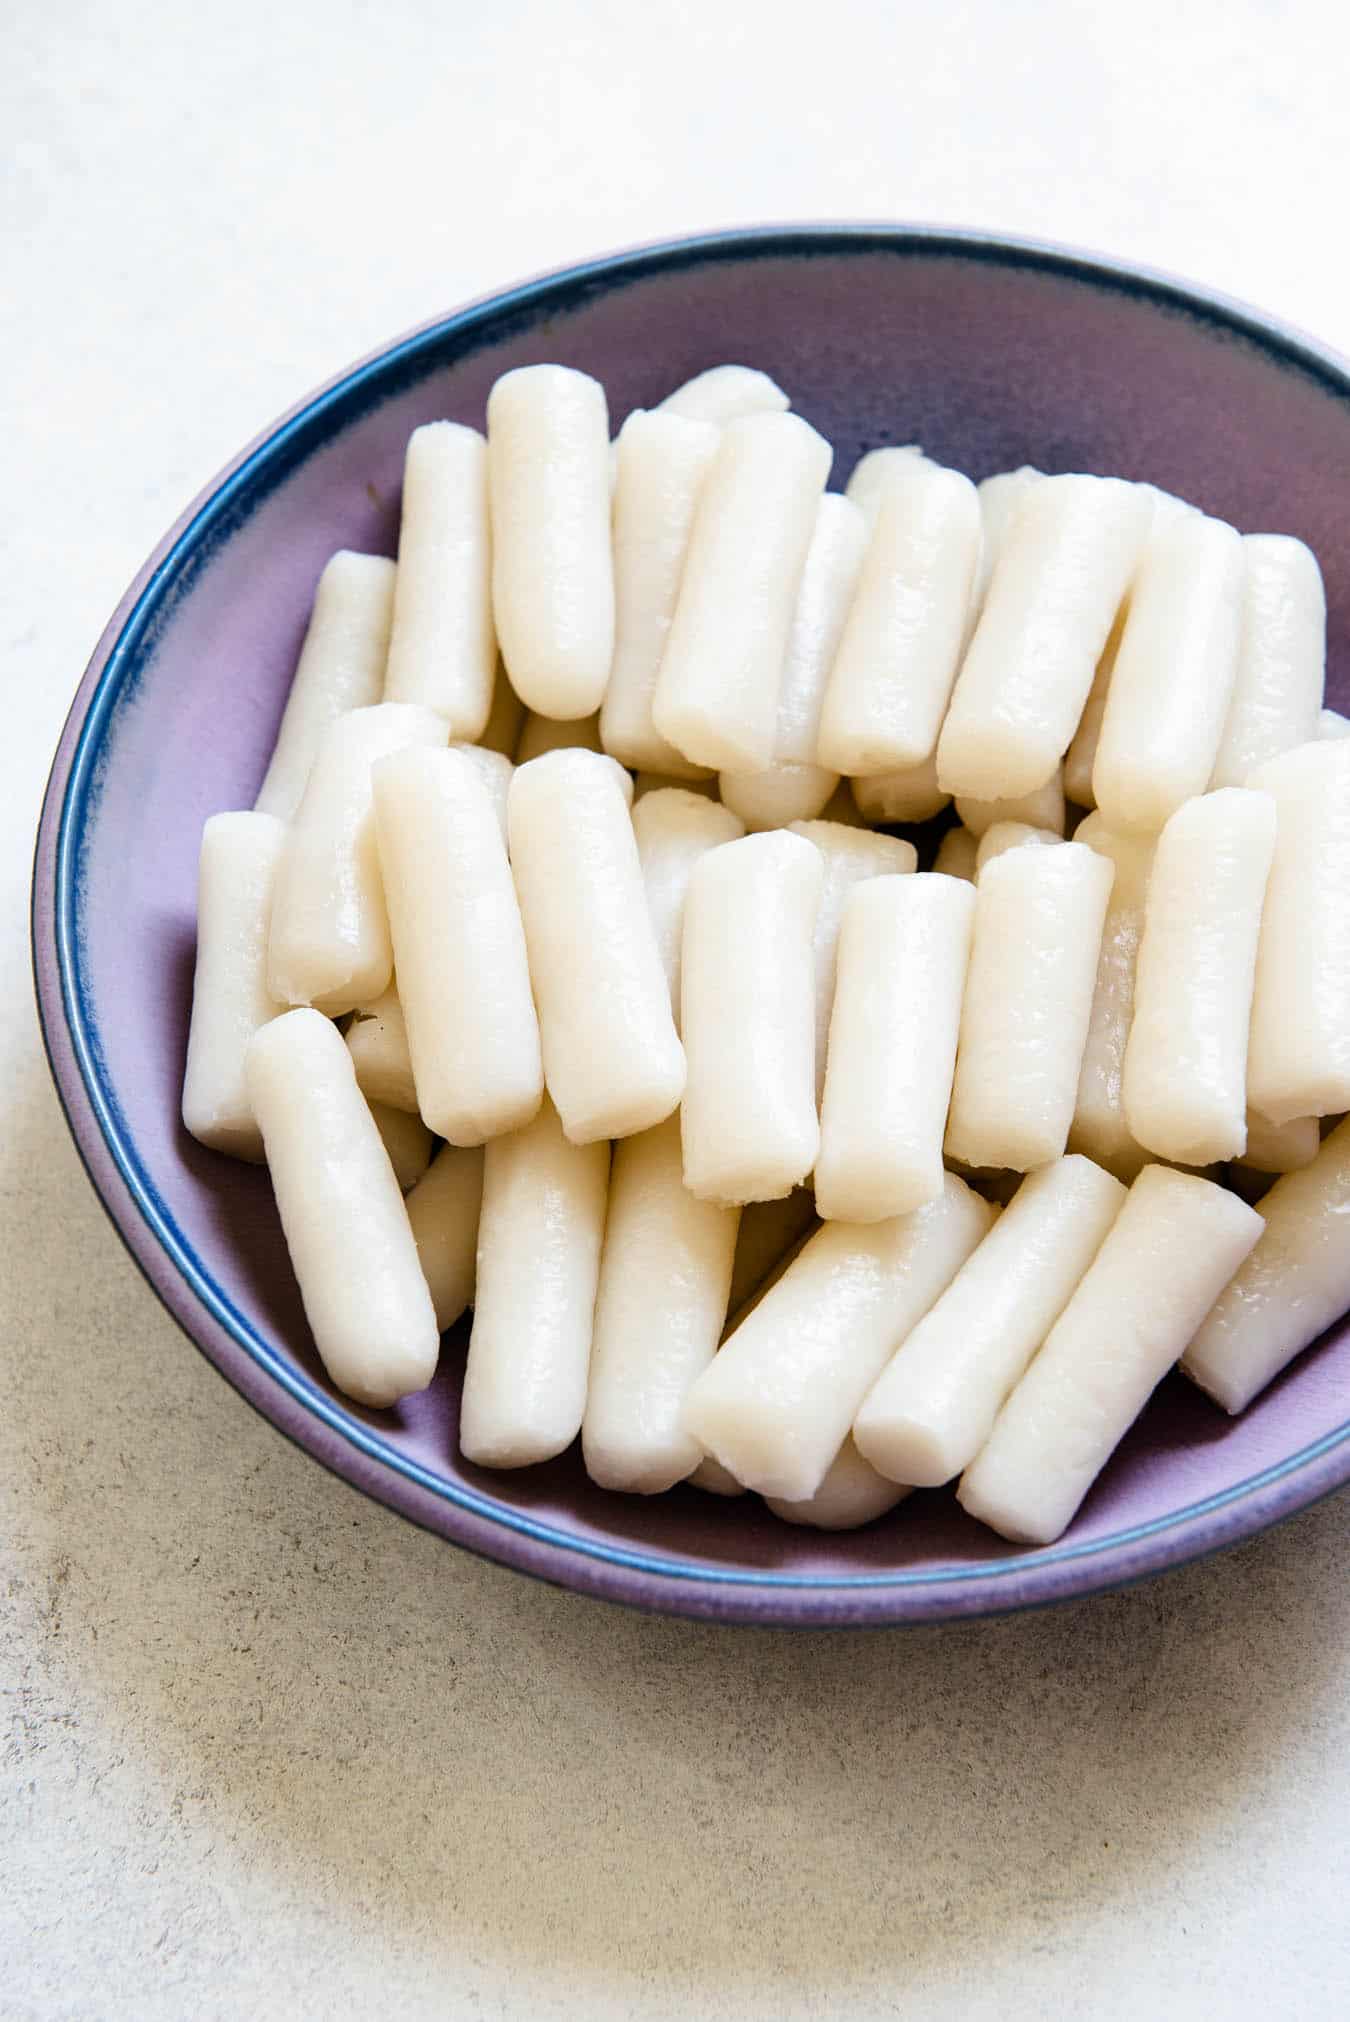
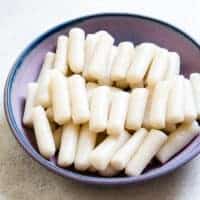
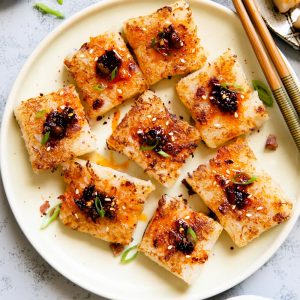
These steamed Asian rice cakes are a versatile ingredient that you can use to stir fry or stews.
HOW TO MAKE STEAMED ASIAN RICE CAKES
FLOUR BLEND
The rice cakes are made from a combination of rice flour and tapioca starch. The tapioca starch gives the rice cakes a chewier quality. If you only used rice flour, the rice cakes will be firmer and denser when you bite into them.
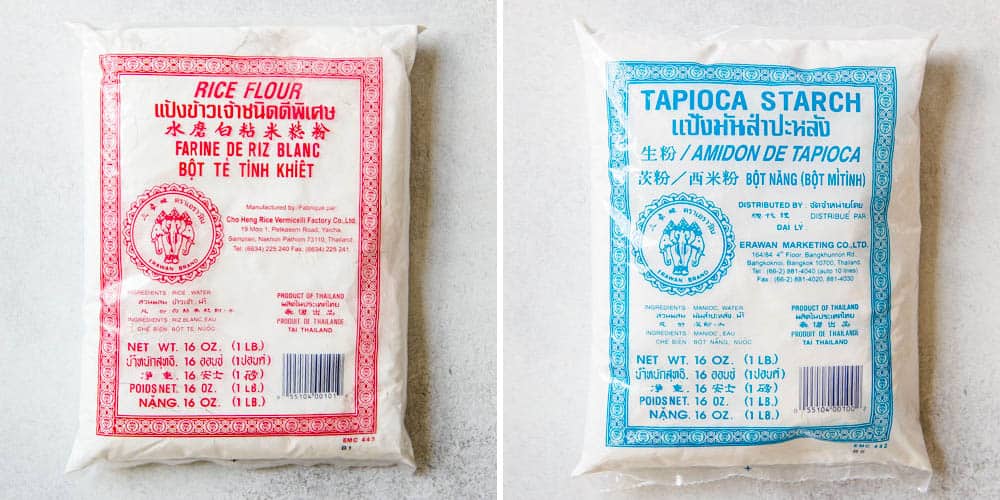
Typically, Mama Lin uses Thai rice flour (red label) and tapioca starch (blue label). These flours are relatively inexpensive in Asian supermarkets. You can also find them on Amazon (rice flour, tapioca starch) though they are much more expensive there.
In the recipe, I also add a small amount of sugar and salt to the dough to give the rice cakes a little flavor.
USING HOT WATER TO MAKE THE DOUGH
To start making the dough, you’ll mix the flours with boiling hot water. It is crucial to use hot water because the heat “cooks” the dough, making it flexible and pliable. In turn, this allows you to manipulate the dough into whatever shape you want.
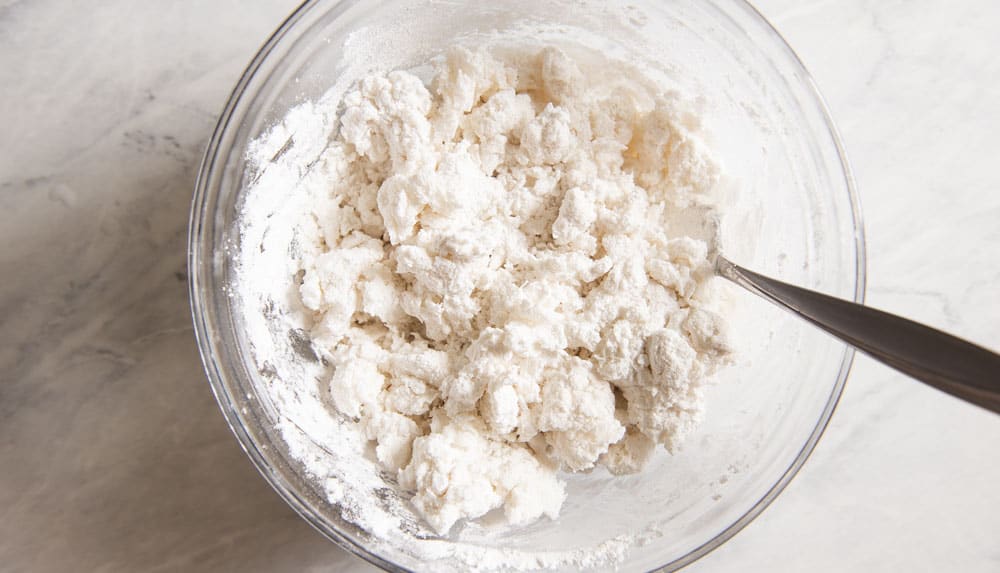
When adding water to the flour, I usually pour about half the water into the bowl with one hand, and use the other hand to stir everything simultaneously. Once all the water has absorbed, I’ll add the rest of the hot water. Stir the water and flour together for 30 seconds to 1 minute. If the dough is looking very dry, pour room temperature water over any loose flour on the bottom of the bowl, 1 to 2 tablespoons at a time.
KNEADING THE DOUGH
As you can imagine, the dough is very hot in the beginning. I usually let the dough cool for 2 to 3 minutes before kneading, stirring it frequently to release some steam from the dough. If you still find the dough to be very hot, stir the dough for for another 1 to 2 minutes before kneading.
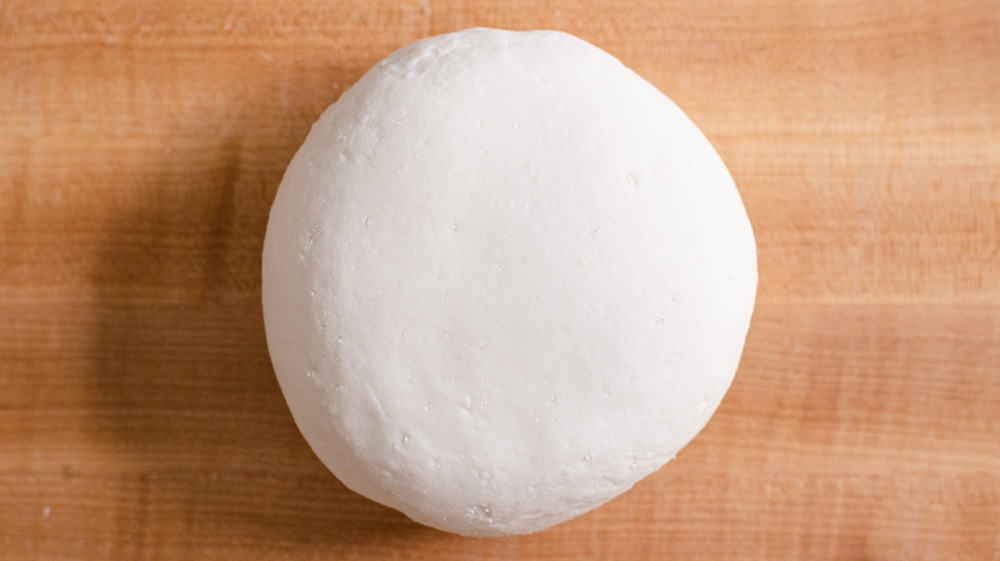
Knead the dough until you have nearly worked all the loose flour into the clump of dough. Then, turn the dough onto a work surface. Continue kneading it for about 2 to 3 minutes. The outside of the dough should be relatively smooth (see photo below). This dough is very forgiving, so it doesn’t matter if you have a few creases here or there. Most importantly, the dough should not feel dry.
It is very common for rice flour doughs made with hot water to be a little sticky when you knead it, especially in the beginning. As you continue to knead it, the dough will gradually feel less sticky. Towards the end of kneading, I found the dough to be a little tacky but not overly sticky. If the dough still feels very sticky after several minutes of kneading, add another tablespoon of rice flour and knead the dough again.
DIVIDE DOUGH AND SHAPE INTO LONG ROPES
This type of dough does not need any resting time. As a matter of fact, it’s better to work with it while the dough is still warm. If you let the dough sit for a long time, the outside of the dough will start to dry and form a crust.
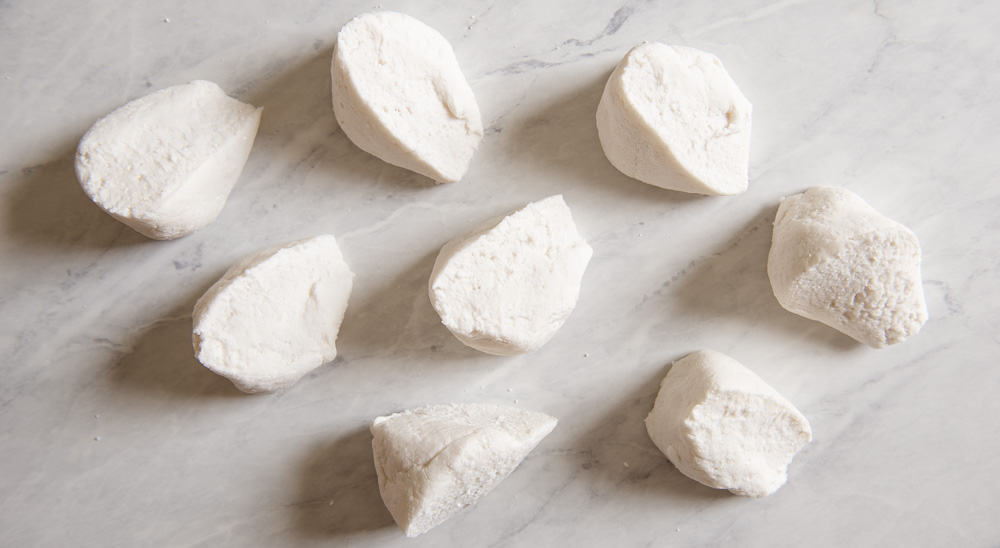
Shape the dough into a ball and divide it into 8 equal pieces. You don’t need to be too precise. For reference, my pieces of dough were somewhere between 95 to 100 grams.
Leave one piece of dough on the work surface for rolling out. Transfer the remaining 7 pieces of dough back into the bowl and cover with a towel.
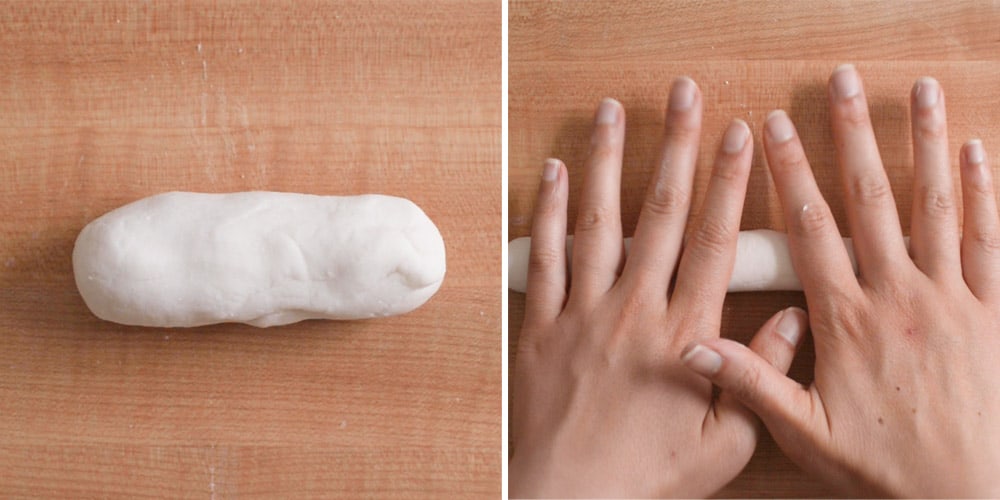
Shape the piece of dough into a short, thick log, and then place the log on the work surface. Starting from the middle, roll out the dough and gradually work your hands further apart. Eventually, you will get a long dough rope. It should be about 16 inches long and just over 1/2 inch in diameter. Roll the dough rope off to the side.
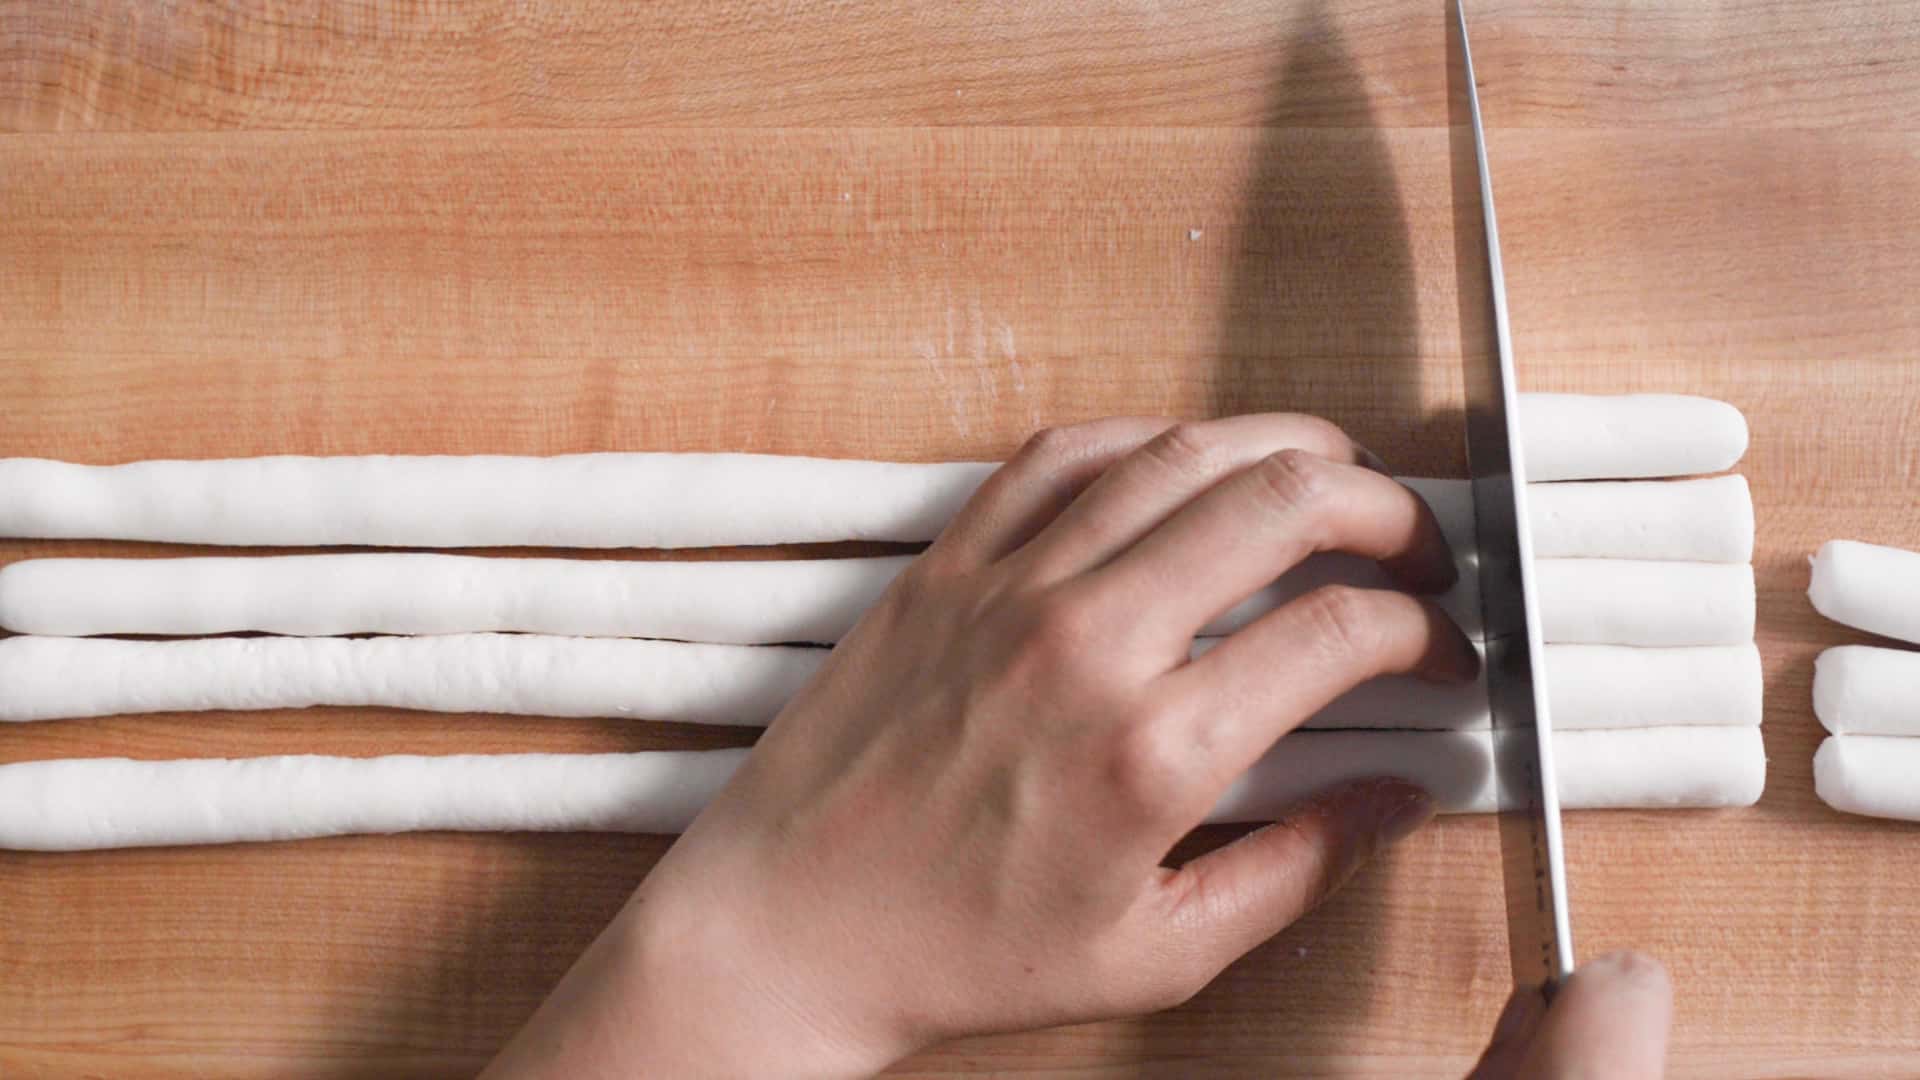
Roll out 3 more pieces of dough into long ropes. Then, line up the 4 ropes of dough and cut them up into 2-inch pieces. The dough will stick to your knife a little. You can lightly grease the sides of your knife with oil to prevent sticking, but I don’t usually bother with that.
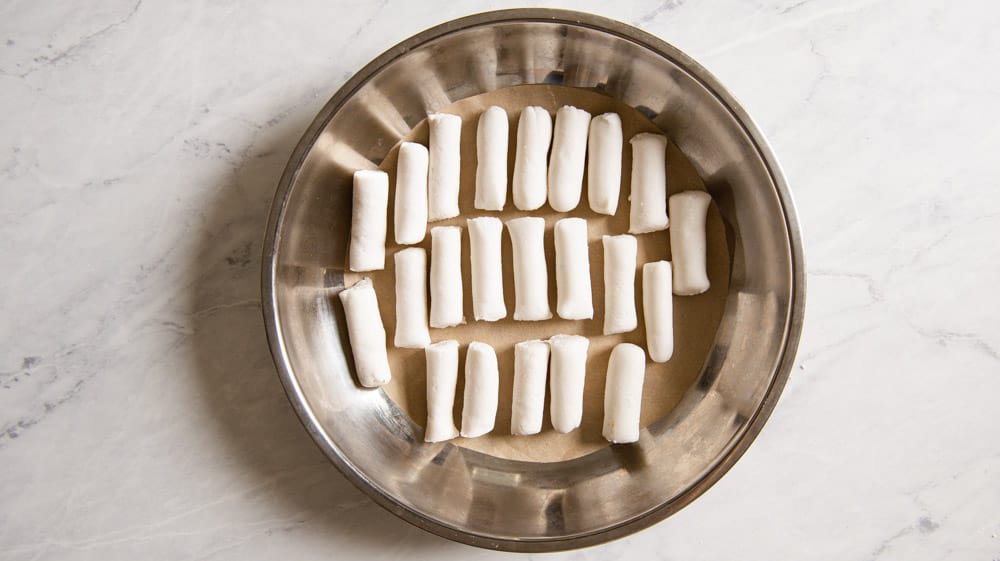
Transfer all the pieces of rice cake onto a large baking sheet and cover them with a towel while you finish shaping and cutting the remaining pieces of dough. If any of the last few pieces of dough have started to dry up and crust over, knead them again until they no longer feel dry. Then, roll out the dough into a rope.
EQUIPMENT TO STEAM ASIAN RICE CAKES
- 2 large plates or small pans
- parchment paper
- steaming rack
- large wok with lid
ALTERNATIVE STEAMING SETUP
You’ll want a wok that is large enough to comfortably fit the plates or pans holding the rice cakes. If you don’t have a large wok, you can also use a large sauté pan with deep sides. I would also recommend using a shorter steaming rack. Many sauté pan lids tend to be made of glass. Condensation develops easily on glass lids. Sometimes, the water might drip onto the rice cakes while they are cooking. To prevent that from happening, you can tie a towel to cover the bottom of the lid to catch the condensation.
You can also steam the cakes in bamboo baskets.
STEAM THE ASIAN RICE CAKES
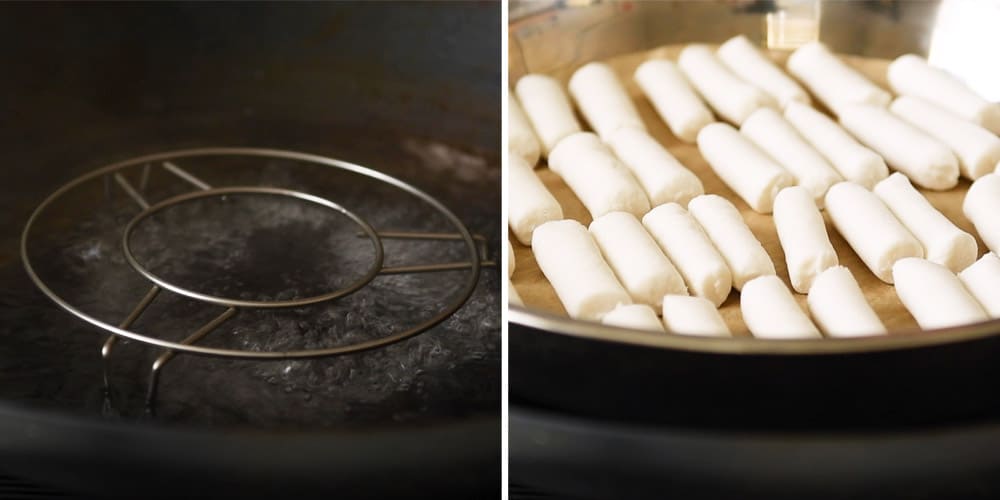
Line 2 plates (or small pans) with parchment paper to keep the rice cakes from sticking to the plates. Arrange the pieces of dough into rows on the parchment-lined plates. Keep the rice cakes covered with a dry cloth until they’re ready to be steamed.
Fill the wok with about 1 1/2 to 2 inches of water. Bring the water to boil. Then, carefully place the steaming rack in the center of the wok. Make sure that the water isn’t covering the rack completely. If that is the case, remove some water from the wok. Place one of the plates or pans of rice cakes onto the steaming rack. Finally, cover the wok with a lid and steam the rice cakes on high heat for 10 to 11 minutes.
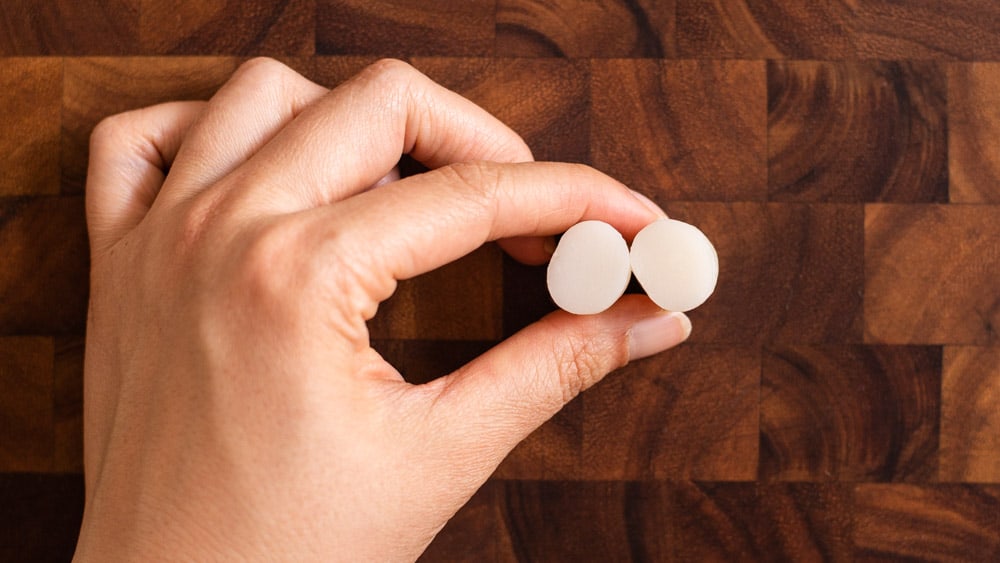
To check to see if the rice cakes are fully cooked, slice up a rice cake and check the center. The rice cakes are fully cooked if you don’t see any solid white spots in the center. Let the rice cakes cool on the counter while you steam the second batch of rice cakes. If the water level in the wok is looking low, add some water to the wok.
HOW TO STORE ASIAN RICE CAKES
Store the Asian rice cakes in a tupperware for up to a week. My preferred method to reheating rice cakes is to soak them in hot water for 2 minutes. I boil some water in a saucepan before turning off the heat. Then, I carefully lower the rice cakes into the hot water.
You can also freeze the rice in a freezer bag and they will keep for months. Reheat the rice cakes by soaking them in hot water for 5 minutes.
HOW TO EAT ASIAN RICE CAKES
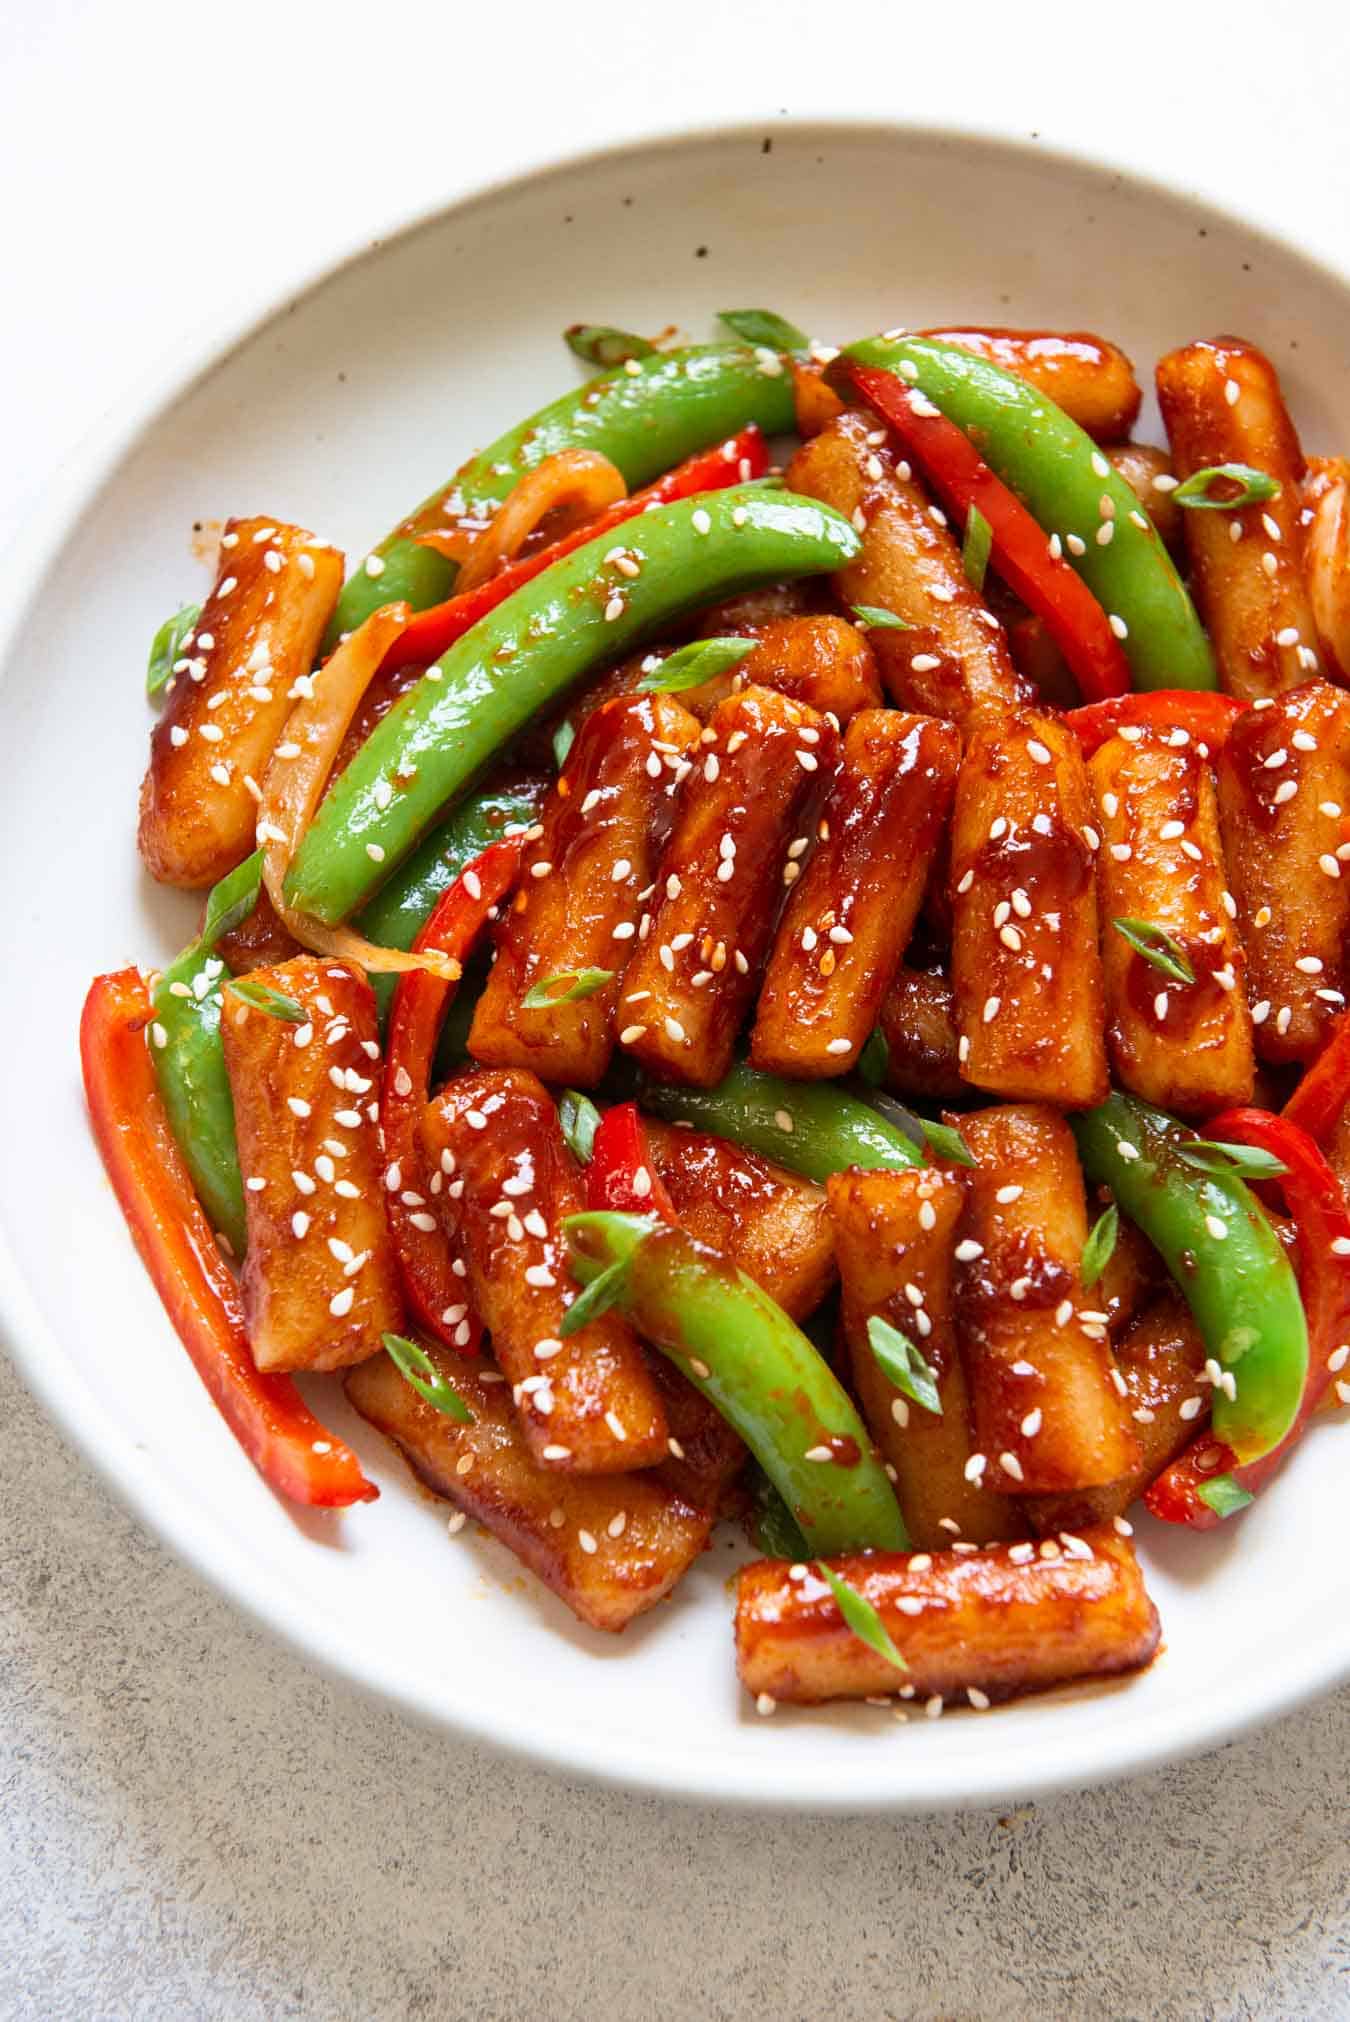
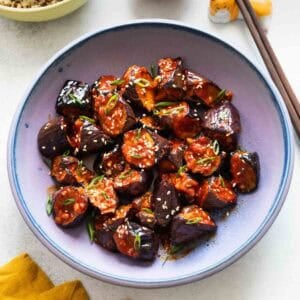
You can serve the rice cakes warm with sauces like my soy and vinegar dumpling sauce, chili oil, or peanut sauce. You can also stir fry the rice cakes (like in the photo above), add them to stews, or use them to make tteokbokki.
Asian Rice Cakes (Steamed Rice Cakes)
Ingredients
- 250 g rice flour, about 1 3/4 cups + 2 tablespoons, add more if necessary
- 115 g tapioca starch, about 3/4 cup + 2 tablespoons (see note 1)
- 2 teaspoons sugar
- 1/2 teaspoon kosher salt
- 400 g water, 1 3/4 cups, add more water if necessary
Equipment
- large tea towels
- large mixing bowl
- baking sheet
- large wok with lid
- 2 large plates or small pans
- parchment paper for lining plates
- steaming rack
Equipment
- Tapioca Starch
- Thai Rice Flour (red bag)
Instructions
Make the Dough
- In a large mixing bowl, whisk together the rice flour, tapioca starch, sugar, and salt. Set the bowl aside.
- Pour the water into a saucepan, and bring the water to boil, covered.
- Gradually pour about half of the hot boiling water into the bowl with the flours. Stir the flour and water with a large fork, chopsticks, or a wooden spoon as you pour the water into the bowl. Once the water absorbs into the flour, gradually mix in the remaining hot water. Continue stirring until the water is fully absorbed.
- If you are finding that there is still a lot of loose flour inside the bowl, drizzle some room temperature water into the bowl, about 1 or 2 tablespoons at a time and stir.
- Let the dough cool for about 2 to 3 minutes, stirring periodically to release some steam. Then, begin kneading the dough. If the dough is still too hot to touch, stir the dough for another 1 to 2 minutes to cool it off, or wear disposable gloves to knead the dough.
- Knead the dough until you’ve incorporated nearly all the flour into the clump of dough. Occasionally, wipe the dough along the sides of the bowl to catch any loose flour.
- When nearly all the loose flour has been incorporated into the dough, turn everything over the counter or a work surface and knead the dough for another 2 to 3 minutes. The dough will feel a little tacky and may stick to your fingers a little. However, it shouldn’t be overly sticky. If it is very sticky, add 1 to 2 tablespoons of rice flour and work it into the dough. Shape the dough into a disc. The dough should look relatively smooth.
Shape and Cut the Dough
- Divide the dough into 8 equal pieces (anywhere between 90 to 100 grams is fine). Leave one piece of dough out on the work surface. Transfer the remaining 7 pieces back into the bowl and cover the bowl with a towel.
- Shape the dough into a short, thick log and lay it lengthwise on the surface. Starting from the middle, roll out the dough and gradually work your hands further apart. Eventually, you will get a long dough rope. It should be about 16 inches long and just over 1/2 inch in diameter. Roll the dough rope off to the side.
- Roll out 3 more pieces of dough into long ropes. Then, line up the 4 ropes of dough and cut them up into 2-inch pieces. The dough will stick to your knife a little. You can lightly grease the sides of your knife with oil to prevent sticking, but I don’t usually bother with that.
- Transfer all the pieces of cut rice cake onto a large baking sheet and cover them with a towel while you finish shaping the remaining pieces of dough. If any of the last few pieces of dough have started to dry up and crust over, knead them again until they no longer feel dry. Then, roll out the dough into a rope.
- Line the plates (or small pans) with parchment paper. This will keep the rice cakes from sticking to the plates. Arrange the rice cakes in rows over the lined plates. Cover the plates with a towel until the rice cakes are ready to be steamed.
Steam the Cakes
- Fill the wok with about 1 1/2 inches of water and bring water to boil.
- Place the steaming rack in the center of the wok. Then, carefully lower one of the plates onto the steaming rack. Cover the wok with a lid and steam the rice cakes on high heat for 10 to 11 minutes (see note 2). Remove the plate from the pan and let the rice cakes cool on the counter. To check whether the rice cakes are done steaming, slice up a rice cake and check the center. If you don’t see any solid white spots, they are fully cooked.
- If the water level in the wok is looking dry, add some water. Lower the second batch of rice cakes over the steaming rack, cover the wok, and steam for another 10 to 11 minutes. Remove the rice cakes from the wok and let them cool.
- You can serve the rice cakes warm with sauces like my soy and vinegar dumpling sauce, chili oil, or peanut sauce. You can also stir fry the rice cakes, add them to stews, or use them to make tteokbokki.
Notes
- I have not tried this recipe with any other type of starch, so I’m not sure which ones are good substitutes for tapioca starch.
- Condensation develops easily on glass lids, causing water to drip onto the rice cakes. If your wok has a glass lid, you can tie a towel to cover the bottom of the lid to catch the condensation.
- *Following reader feedback, I have increased the amount of rice flour and decreased the amount of water so that the dough won’t be overly sticky.


Rachel says
Thanks so much for this post! These are one of my total favourites, they’re so difficult to find outside of London, and I never knew I could make them from scratch!
shelley says
can i use all tapioca starch instead of rice flour? i only have tapioca starch. should i substitute the rice flour with something else?
dale says
You can make rice flour by blasting in a blender till it becomes a flour just like grinding coffee beans.
Dee says
Hi I just made these according to your quantities using the exact same brand of rice flour and tapioca starch. I also followed your method step by step but by using the quantity of water (455g) and pouting it two batches and I ended up with a tapioca rice soup 🙁 I then had to add more flour and tapioca to make it a dough that was able to be rolled. It turned out fine as I was able to use logic and save it but I wanted to double check that the water quantity to flour ratio is correct. 455g of water ends up being over 2 cups liquid which you basically add to just over two cups of flour/starch. I can’t see by looking at the ratios that anything but soup will happen if you add equal amounts of flour to liquid. Just checking honestly if it was a misprint because I’d hate fir other people to waste time and ingredients trying a recipe that will fail. Thanks for the bones of the recipe. They were delicious with the tweaks I made to get it to work.
Lisa Lin says
Hi, Dee. Thank you for the note. I just checked the measurements and notes again, and I believe the numbers are correct. Did you boil all 2 cups of water at once? I boiled only 1 3/4 cups and saved 1/4 cup on the side to add later. And honestly, this type of recipe can vary from kitchen to kitchen. Your intuition to add more flour was absolutely correct.
Brandon says
I agree with it having way too much water. Almost added an additional 100g of rice flour.
Di says
Same here :/ I had to adjust by adding a lot of flour to make it into a dough;
Kat J says
same here! had to add heaps of rice flour, I think it ruined it..
Moon says
Same here! I got soup after only adding the 400g hot water the recipe suggested. I had to add so much rice flour to make it dough like.
Aisha says
Sorry is there a way to make the rice cakes without using tapioka?
Noreen says
i use a mixture of glutinous rice flour and non glutinous rice flour, roughly 50g rice flour to 120g glutinous rice flour
Jenny says
I substituted corn starch for tapioca since I didn’t have any of that I just used less corn starch than what was called for using tapioca. I also added a smidge more salt than what was called for. They turned out quite well. I wanted to make them and have them sit in the fridge overnight. I’m going to saute them with mushrooms and sweet and hit peppers for dinner tomorrow. I’m excited lol
Lisa Lin says
Thanks for these notes, Jenny!
Anna says
These are very hard to come by in the stores where I live in Brazil. Thank you for this super easy recipe.. They came out beautifully!!
I’m definitely going to make a huge batch and freeze it.😋😋
Karlla says
Anna, qual polvilho de mandioca vc usou? O doce ou o azedo?
Sky says
Hiii i just made this recipe but for some reason my rice cakes came out too floury? Like it taste like flour instead of having its chewy taste? What did i do wrong?
Lisa Lin says
Could be that your climate is drier and the flour wasn’t properly hydrated. Just add more hot boiling water next time.
Scott Armitage says
Would this work with a mixer/dough hook or is hand kneading the only option?
Lisa Lin says
I think you can use a stand mixer. I don’t think there’s enough moisture in this for the dough to come together complete with the paddle or dough hook, so you may need to use your hands to gather everything up.
Scott Armitage says
Thank you.
Vivian says
Hi,
Mine came put a bit more chewy than I would like.
Should I add more watwr or reduce the tapioca starch to make it a bit more soft?
Lisa Lin says
Yes, you can replace some of the tapioca starch to reduce the chewiness. The rice cakes won’t be more soft. If anything, more rice flour makes it more firm.
Nino says
is it fine to boil the rice cake instead of steam it?
Jackie says
Mine’s coming off a little grainy, is it the rice flour?
Lisa Lin says
It could be. Are you using the same brand of rice flour that I am?
Melissa says
Hello!
I just made this recipe and followed everything step by step, but I ended with rice cakes with weird mochi-like consistency….
I don’t have the same rice flour as you do (I live in France and made with what I found here) so maybe it comes from this? I’m so disappointed I wanted to make some tteokbokki but i can’t make anything with these :((( do you have any idea what happened?
Lisa Lin says
Hi, Melissa! I think you probably used a different kind of rice flour (sweet rice flour), which will yield a mochi-like consistency. The kind of rice flour that I use isn’t glutinous like that. If possible, I’d recommend trying to look for a rice four that is not sweet rice flour. Unfortunately, I don’t know what’s available in France, or I’d give you better guidance!
Roos says
I just made these and I was wondering if the increased riceflower and decreased water is only in the note, or also in the recipe already? I ended up using almost the entire bag of rice flour (400gr) before it was managable.
Besides that this recipe is so easy and it tasted soo good! I made many more than I needed so I was wondering how long the remaining rice cakes can be kept.
Cale Henituse Han says
Can I boil it instead of steaming??? Thank you in advance!!!
Chas says
Do you really have to steam the rice cakes before use it?
Lisa Lin says
If you are making it from scratch, yes, you do need to cook it. Technically, you can boil it too but the texture will be different.
ProxUrAimz says
Can I bake them too? Maybe a mixture of boiling and then baking a bit? Or the other way around? I’ve a short where someone baked them. I’m gonna try steaming them over a pan or pot on a mini oven rack, but I sus they’ll either fall or end up undercooked if I make them unfallable size 😅
Katrina J says
Mine still comes out chalky in the centre, even after 40 minutes of steaming.. what did I do wrong? And they look a bit yellow instead of white?
Lisa Lin says
I think your dough wasn’t hydrated enough when you shaped it. Also, did you make sure to use boiling hot water? That makes a huge difference. The yellowness is probably due to steaming them for too long. 40 minutes is a long time.
Peaches says
As other commenters have noted, the ingredient proportions are completely wrong for this recipe. They are TERRIBLY wrong–not just a little. I strongly suggest trying a different recipe. This one is a mess.
Mary Ann says
Is there a recipe that is not spicy at all? Please recommend I want to try to eat this craving for it since I always watching Korean drama but I cannot eat spicy food. Please give me recipe that is not spicy. Thanks;
Mary Ann
Karman Foods says
Awesome! This is definitely worth a try! I love the quality of the rice cakes. Thank you for sharing the recipe.
Vida says
Hi. I’m going to make this rice cake for the first time. I didn’t eat rice cake in my life but I wanted to make tteokbokki for my sister and myself as well. This is the first time we try a Korean food( except the noodles 😁). Thank you for your recipe 🙏🌹
Francisco says
Thanks for the recipe. I was looking for a something different to serve with a poke dish. I made them a little smaller and coated them in rice flour and fried them like little rice “tots”. They went over really well, thanks again!
Neemaarrhh22 says
I love it
Grainic says
Thankyou For Your delicious Recipe
pumpkinseedsforweightloss says
Thankyou❤💕 For Your delicious Recipe
Mohit Rawat says
Rice cake is crunchy, light and healthy and is made from puffed rice that has been shaped and condensed. You can try different toppings on it and make them more healthy and delicious. Rice cake helps you in losing weight and it can be your pre-workout snack. Puffed rice cakes come in different flavour and you can choose depending on your taste. They are a good source of fiber and protein and are loaded with low calories.
Alka Singh says
Awesome! This is certainly worth a shot! The rice cakes are of excellent quality. Thank you very much for sharing the recipe.
Contemporary art says
Fantastic! It might be wise to give this a shot. I adore how well-made the rice cakes are. I appreciate you sharing the recipe.
Cristina says
how much is 1 serving ? in grams? Thank you !
Lindsay says
My rice cakes fell. They became flat. And I went ahead to saute them hoping it would be ok. But as they cooked, it became a gelatinous mess. What did I do wrong? I followed the recipe and the only difference was I didn’t have a wok so I used my bamboo steamer. Please help
Lisa Lin says
When you added the hot water into the flours, did you measure the water into a separate bowl before pouring into the flours? I pour it directly into the flours, and it makes a big difference for the formation of the dough.
bgm rigntone says
Your recipe is appreciated. To accompany a poke dish, I was looking for a unique side dish. I reduced their size, dusted them with rice flour, and fried them to resemble miniature rice “tots.” They were well received; once again, thanks!
Media Tocks says
Excellent recipe. I really like your website and your recipes; this website was created for us.
360smsapp says
Very nice blog
360smsapp says
Thankyou for sharing your delicous recipes
360degree cloud says
Thanks for sharing this amazing blog.
sunrise hcm says
Thanks for sharing this amazing blog.
Runj says
Hi can you flavour the rice cakes
Lisa Lin says
Typically, the rice cakes don’t have flavor because they’re meant to be stir fried or added into soups. You can add some spices if you want.
Barbara says
Look forward to making these. I was intrigued with rice cakes when I found a recipe for stir-frying them, but it required store-bought rice cakes. I don’t live near an Asian market, but I found Bob’s Red Mill White Rice Flour locally, now I have to find some tapioca flour!
Nelly says
❄️ Hi Lisa,
I am new to your site and enjoying all of the recipes. Thank you so much,
for sharing with all of us,
your mothers and your wisdom
in the kitchen!
In the amazing Netflix series “my wiggly friends” it covers rice noodles and ground rice dishes in five parts.
in the fifth part it showcases taking rice and soaking it and pounding it and making it into a dough that becomes like rice ( I want to say clumps) but I can’t remember the word they used but they make them into little three or 4 inch patty-cakes and then they steam them.
they looked wonderful and they didn’t have anything but rice flour I believe.
I wondered if you could see part 5
and possibly put a recipe up that’s similar to those little rice pancakes they have in the fifth part in that series
By the way they said that these little rice patties pre-date Rice noodles in China.
Thank you so much,
❄️ Happy New Year !
~ Nelly
Backyard Revolution says
Amazing POST. Very Informative Post. I Realy Like This.
Kathie says
I used bob’s red mill GF flour, which is a mic of rice flour and tapioca flour. I just added the same amount of grams as the two combined in the recipe. These are sooo much easier and yummy then others I’ve attempted!!! I used my rice maker to steam them. Super fun.
Lisa Lin says
Oh, thanks for letting me know that their gf flour blend works for this!!
val says
Hi, I have two questions for this recipe: 1) usually these recipes require 5 minutes of pounding the dough. Is the kneading an alternative to getting that bouncy texture? 2) if I want to freeze the rice cakes for later use, do I still need to steam them or do I do that when I take them out of the freezer? thanks!
danielsimmons says
Never make it before send me a recipe to me at my email please
Jake says
This recipe seems a bit ridiculous. I too followed the recipe step by step and ended up with a soupy mass of tapioca rice pudding that was easier to throw out and start over than to save.
Looking back, the fact that this recipe would be more than a 100% hydration rate should’ve been first clue. Not sure what good measuring half of the water out to begin with will do if you end up putting it all in anyway.
Ro says
ratio is WAY off. I had to use 2x the rice flour, increased the tapioca and it was still on the sticky side. I would suggest no more than 200g water
Wendy says
Hola Lisa! Que tipo de harina de arroz ? Me interesa mucho. Gracias de antemano . Saludos
Wendy says
Hi Lisa! What kind of rice flour? I’m very interested. Thanks in advance. Best regards.
Wendy says
Lisa, I’ve already seen the FAQs, but I’m currently in Chile and Asian products aren’t easy to find; I have to order them from the capital, Santiago. So, am I referring to glutinous rice or the other kind? Those are the two I know. Thank you so much for your reply. Take good care. I’ve been subscribed to your blog for a while now. Hugs and kisses 🤗