
Thank you to Bob’s Red Mill for sponsoring this post!
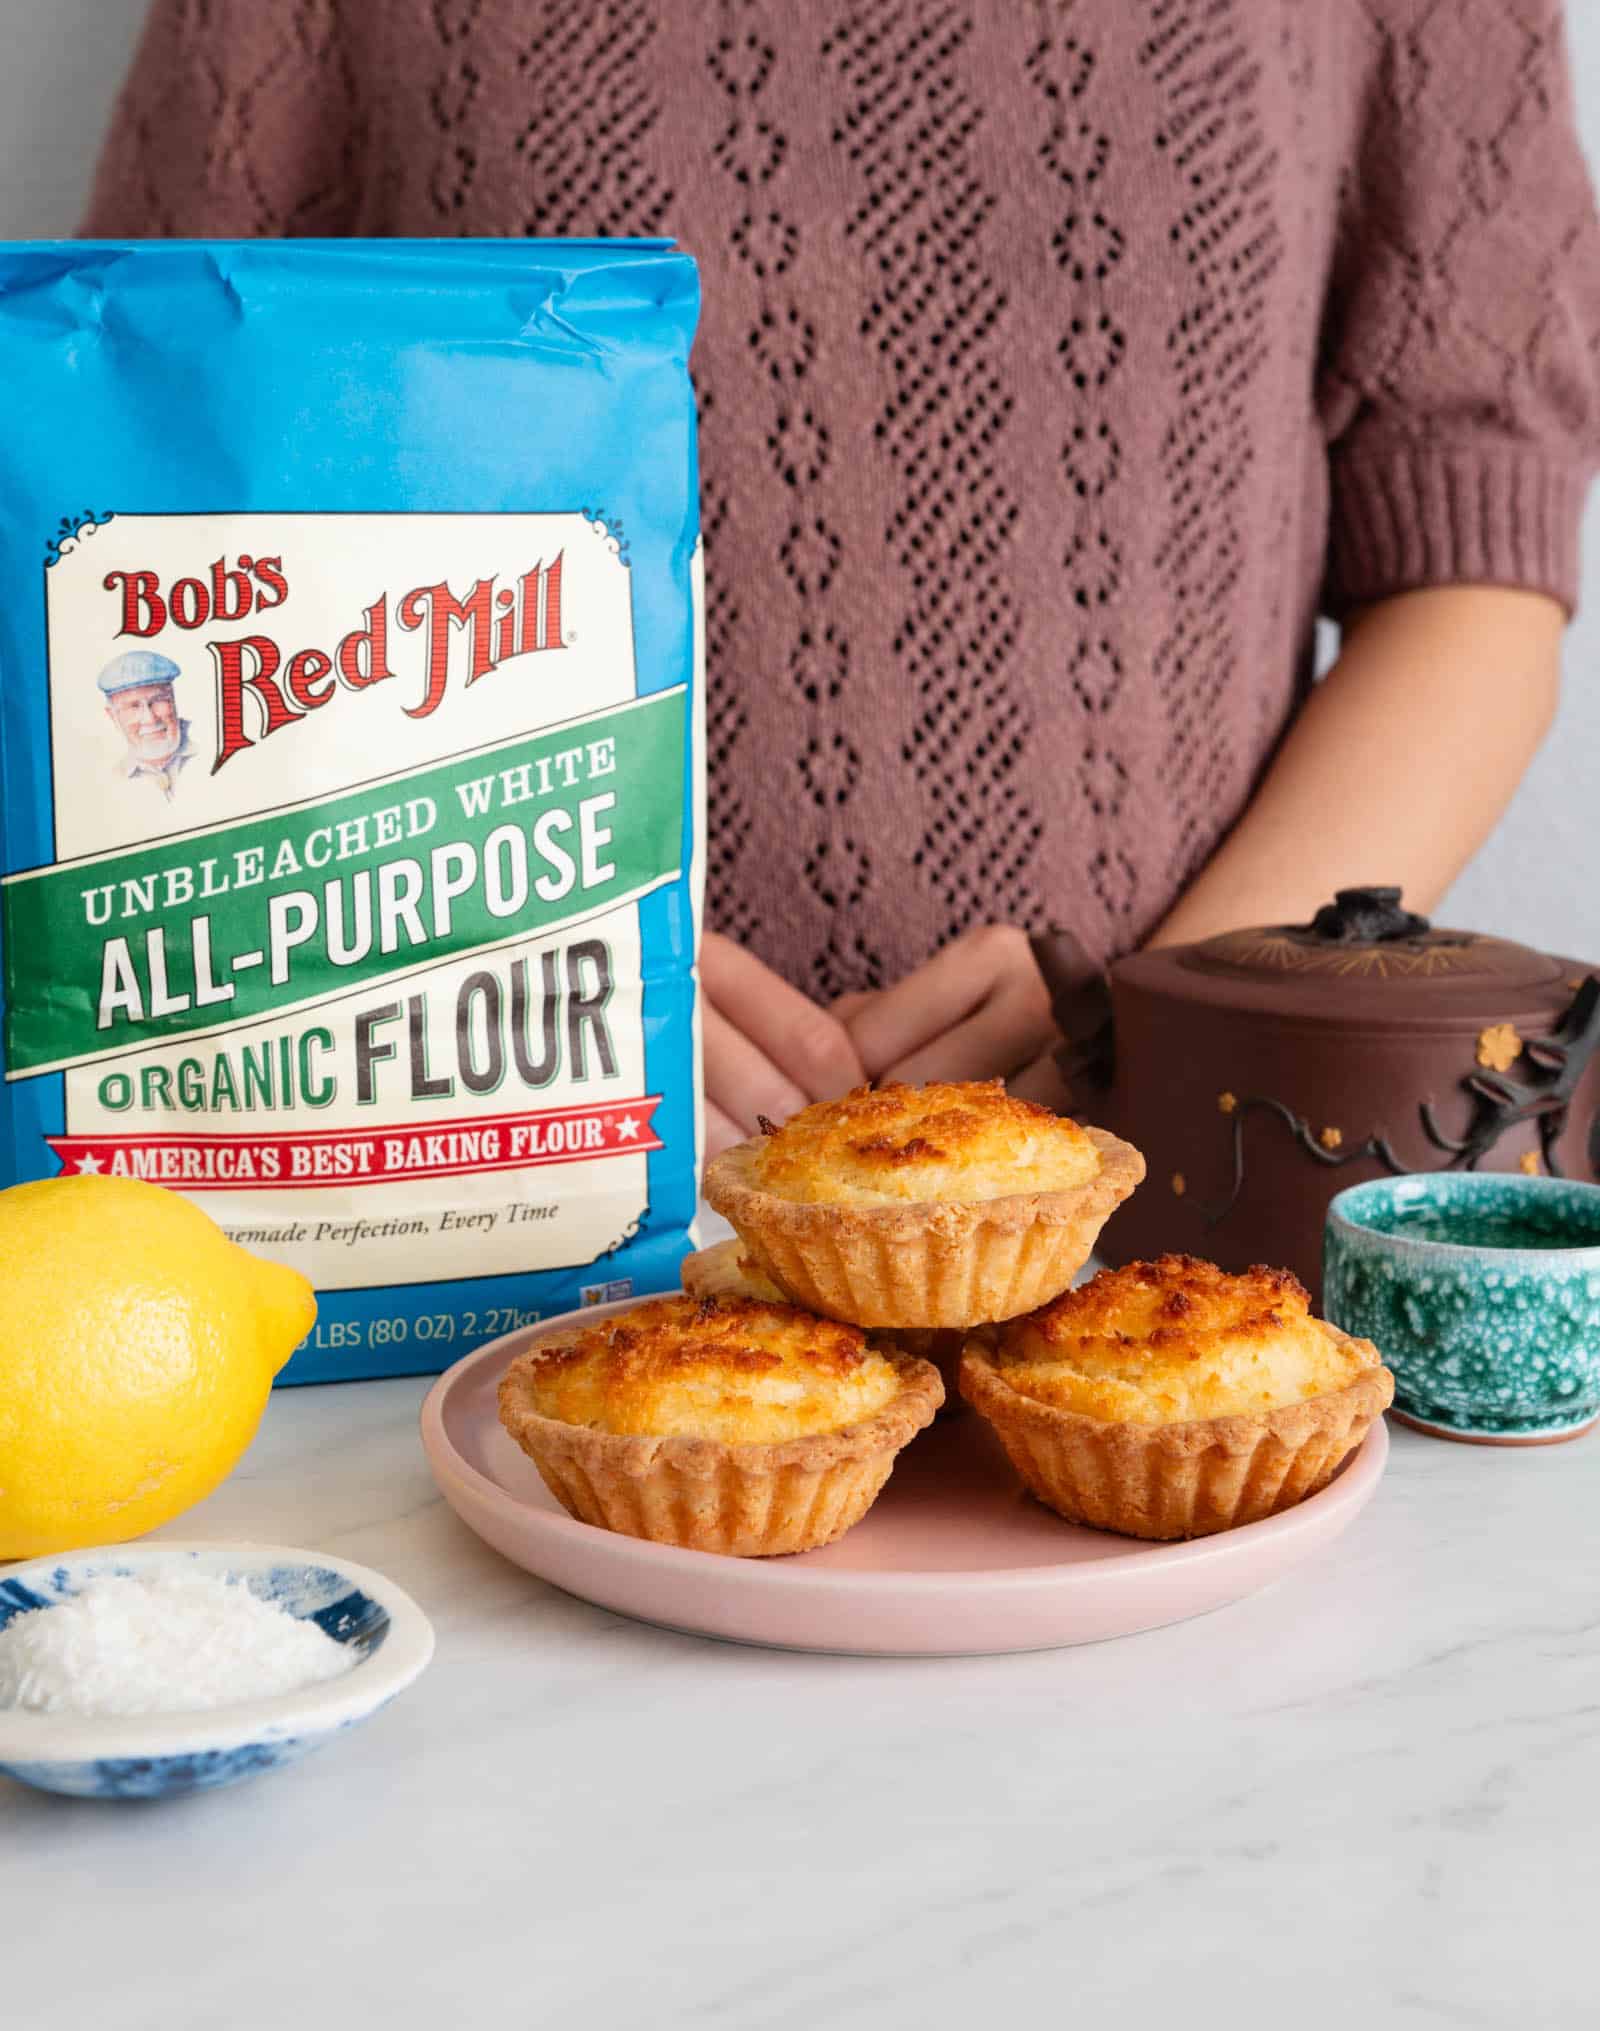
Hong Kong style coconut tarts (椰撻 or 椰子塔) are a Chinese bakery classic. Although they’re often outshined by their pastry cousins, the egg tart (蛋撻), coconut tarts also deserve their time in the spotlight. These delicate pastries are usually mini tarts with a not-too-sweet shredded coconut filling that sits atop a flaky shortcrust pastry.
When I visited my relatives in Portland this year, my aunt showed me how to make coconut tarts. My aunt is a fantastic cook and a very patient teacher. As I learned from my aunt, coconut tarts are not too difficult to make but they require time. The good news is that you can easily break up the work and make the pastry crust ahead of time.
I’ve taken the coconut tart recipe that my aunt gave me and made some modifications to simplify the list of ingredients and to make the crust even flakier. Another major change I made was to add lemon zest and extract to the coconut filling. Traditional Hong Kong style coconut tarts do not contain lemon, but I thought the lemon zest and extract beautifully complemented the coconut flavors. Hope you enjoy my take on this Chinese bakery classic that’s not too sweet!
COOKING NOTES FOR COCONUT TARTS
MAKING THE FLAKY CRUST
These coconut tarts have a beautiful flaky and crispy crust, made with all-purpose flour, instant milk powder, powdered sugar, cold butter, and whole milk. For this recipe, I used Bob’s Red Mill Organic Unbleached White All-Purpose Flour, my go-to flour for recipe development and general cooking. It is a versatile flour that’s good for a variety of my recipes, such as dumpling wrappers, milk bread, mooncakes, miso apple spice cake, and ginger and sesame cookies. Not only is it a quality flour that produces consistent results, it’s also very convenient to find.
I’ve made many tart and pie crusts in the past but had never come across a recipe that added milk powder. Of course, I’ve used milk powder in my baked goods before to add rich milky flavor (see my cinnamon rolls recipe). However, in developing this coconut tart recipe, I discovered how milk powder can help brown tart crusts.
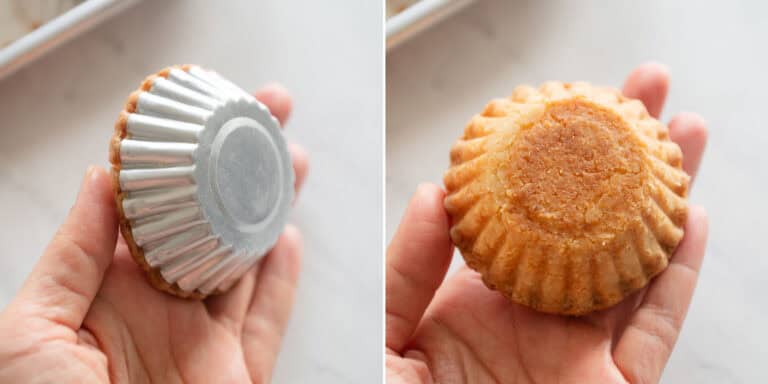
I conducted a test by comparing a batch of tart crust made with milk powder and one without the powder. Here’s how the tarts looked from the bottom:
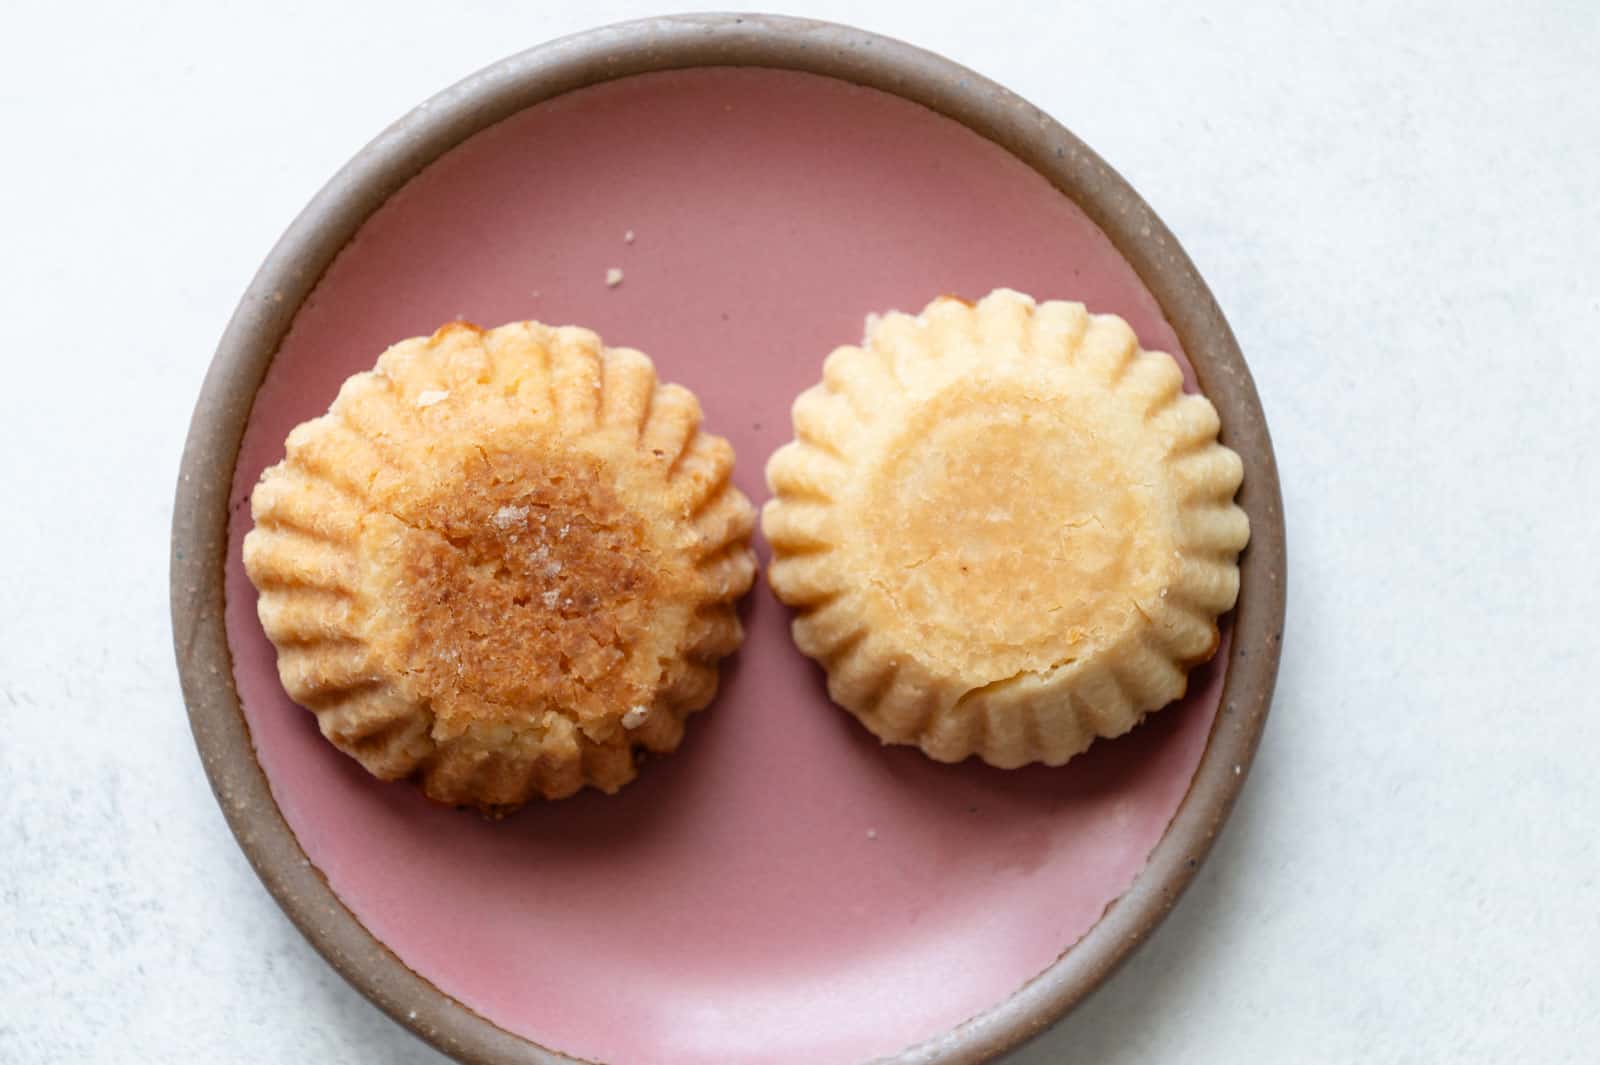
In the photo above, the tart on the left had milk powder in the crust, and the one on the right did not have milk powder. The baking times for both tarts were the same. As you can see, the crust made with milk powder browns much more. Furthermore, the texture of the crust made with milk powder had a crispier texture.
The downside of using the milk powder is that the crust is more delicate. You can easily chip off a piece of the crust simply by moving the tarts around. However, I think that’s a small price to pay for the lovely texture of the crust. Pro tip: when handling the tarts, do not grab ahold of the crust from the sides. Instead, hold the tart like a sandwich, with your fingers on the top and bottom of the tart.
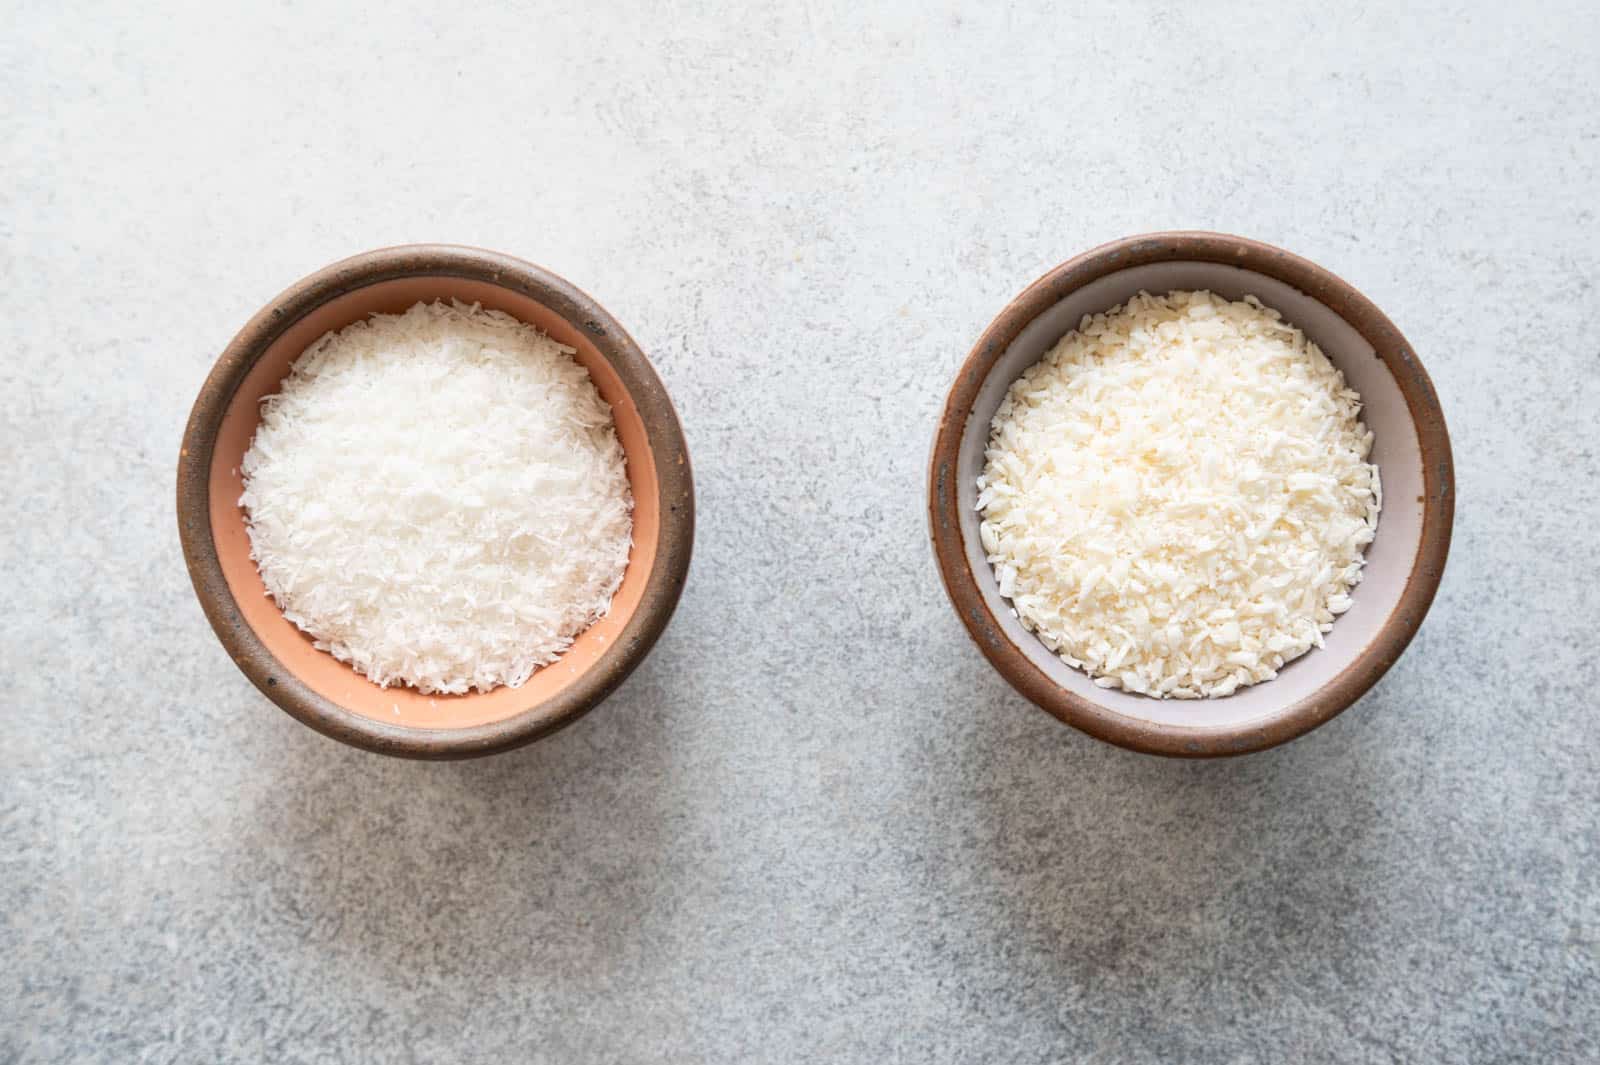
WHAT KIND OF COCONUT TO USE
For this recipe, I recommend using finely shredded coconut or shredded coconut (not larger coconut flakes). I have a slight preference for finely shredded coconut, as the coconut filling will be softer once the tarts are baked. However, finely shredded coconut is much more difficult to find.

WHY USE MILK POWDER IN THE FILLING?
Milk powder adds milky flavor to the filling. My aunt’s recipe used 3 times the amount of milk powder than I specified below. I wanted the flavor of the lemon zest to shine through, so I reduced the amount of milk powder in the filling.
MAKING THE DOUGH AHEAD
You can make the dough ahead several ways. One way is to shape the formed dough into a disc and wrap the disc in plastic. Refrigerate the dough for up to 3 days or freeze it. When you are ready to roll out the dough for the tart tins, let the refrigerated dough sit at room temperature for 30 minutes before using. If you froze the dough disc, let it defrost in the fridge overnight, then let the dough sit at room temperature for 30 minutes.
Another way to make the crust ahead is to roll the dough and line the tart tins before freezing. Once frozen, stack up the tins and transfer them to a freezer bag. When you are ready to bake, simply make the filling, add the filling to the frozen tart tins, and bake. There is no need to defrost the dough beforehand. However, you’ll likely need to increase the baking time by a few minutes, until the crust turns golden brown.

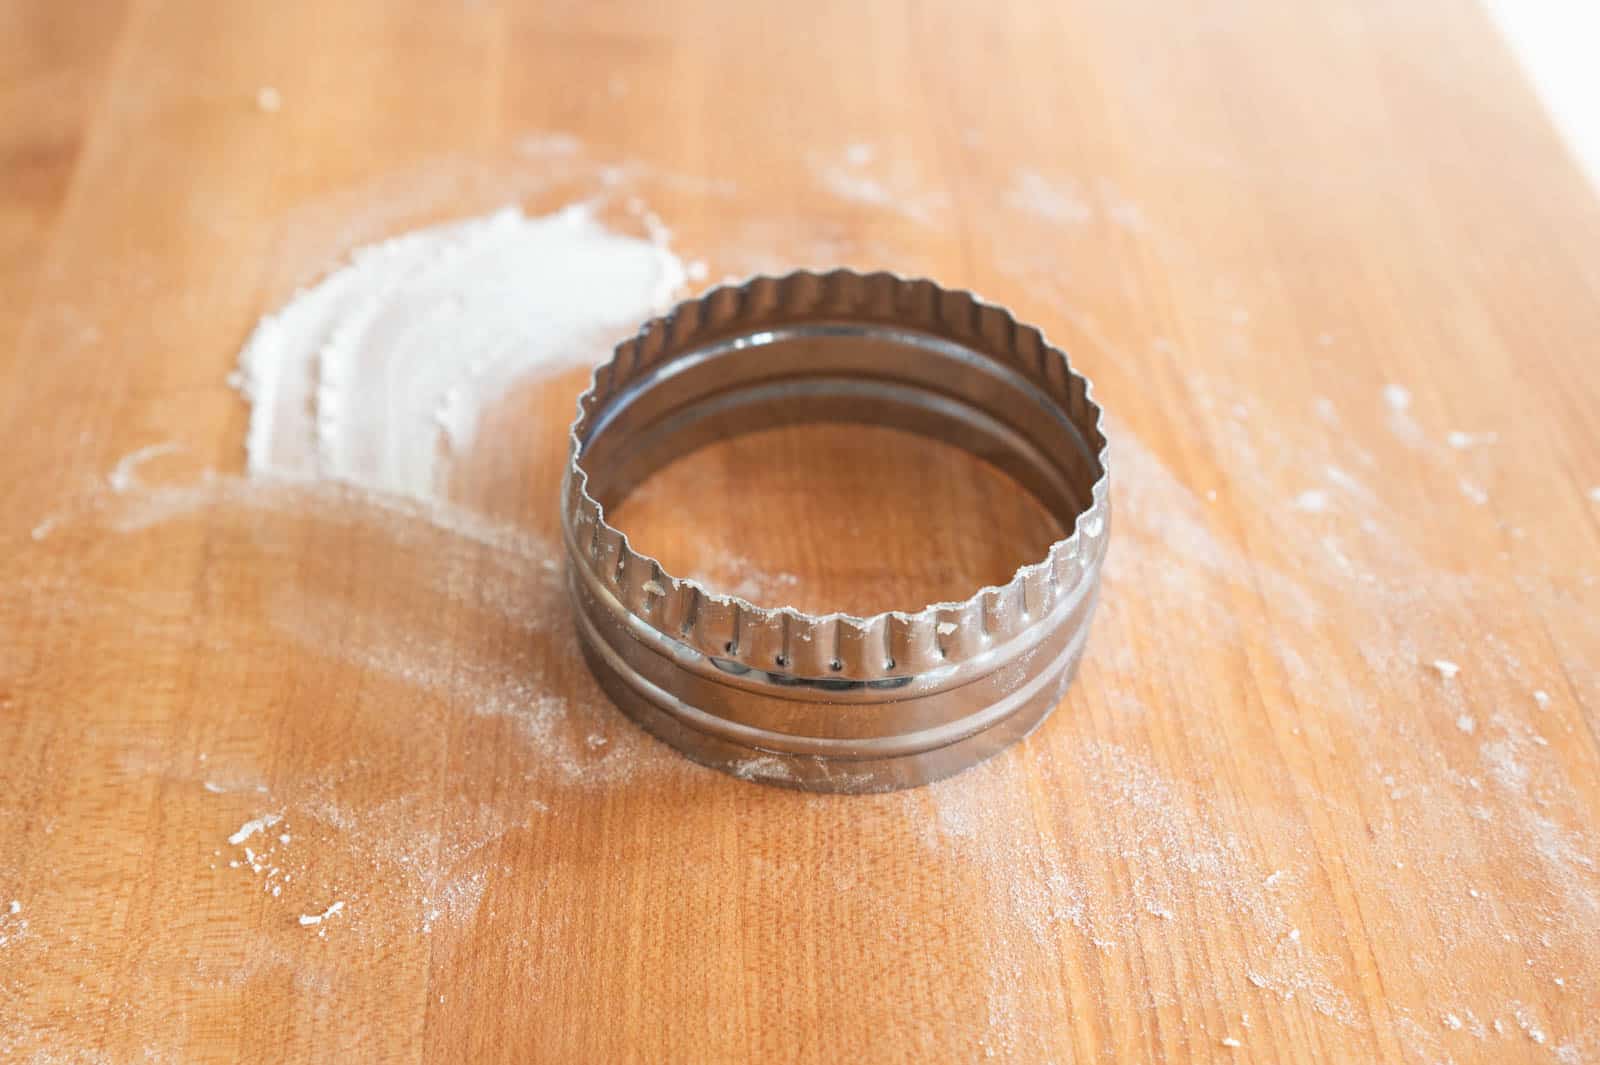
USING MINI TINS
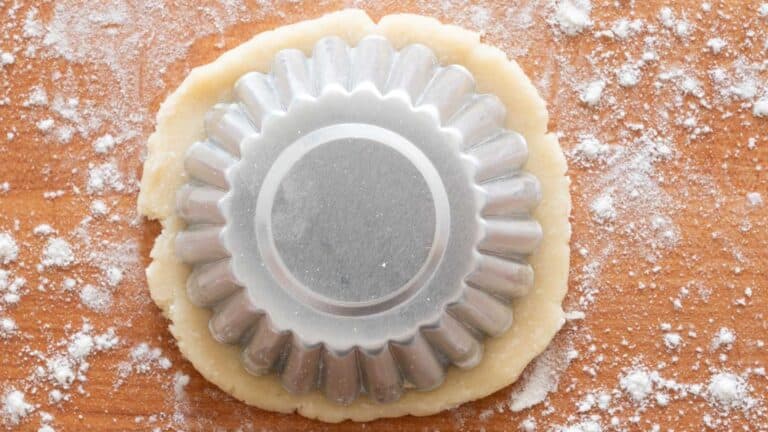
You can use either fluted or unfluted mini tart tins. If you have unfluted mini tins you can cut the cookie dough with a 3.5-inch fluted cookie cutter (see photo below) to give the crust a bit of flourish.
CAN I USE A MUFFIN PAN?
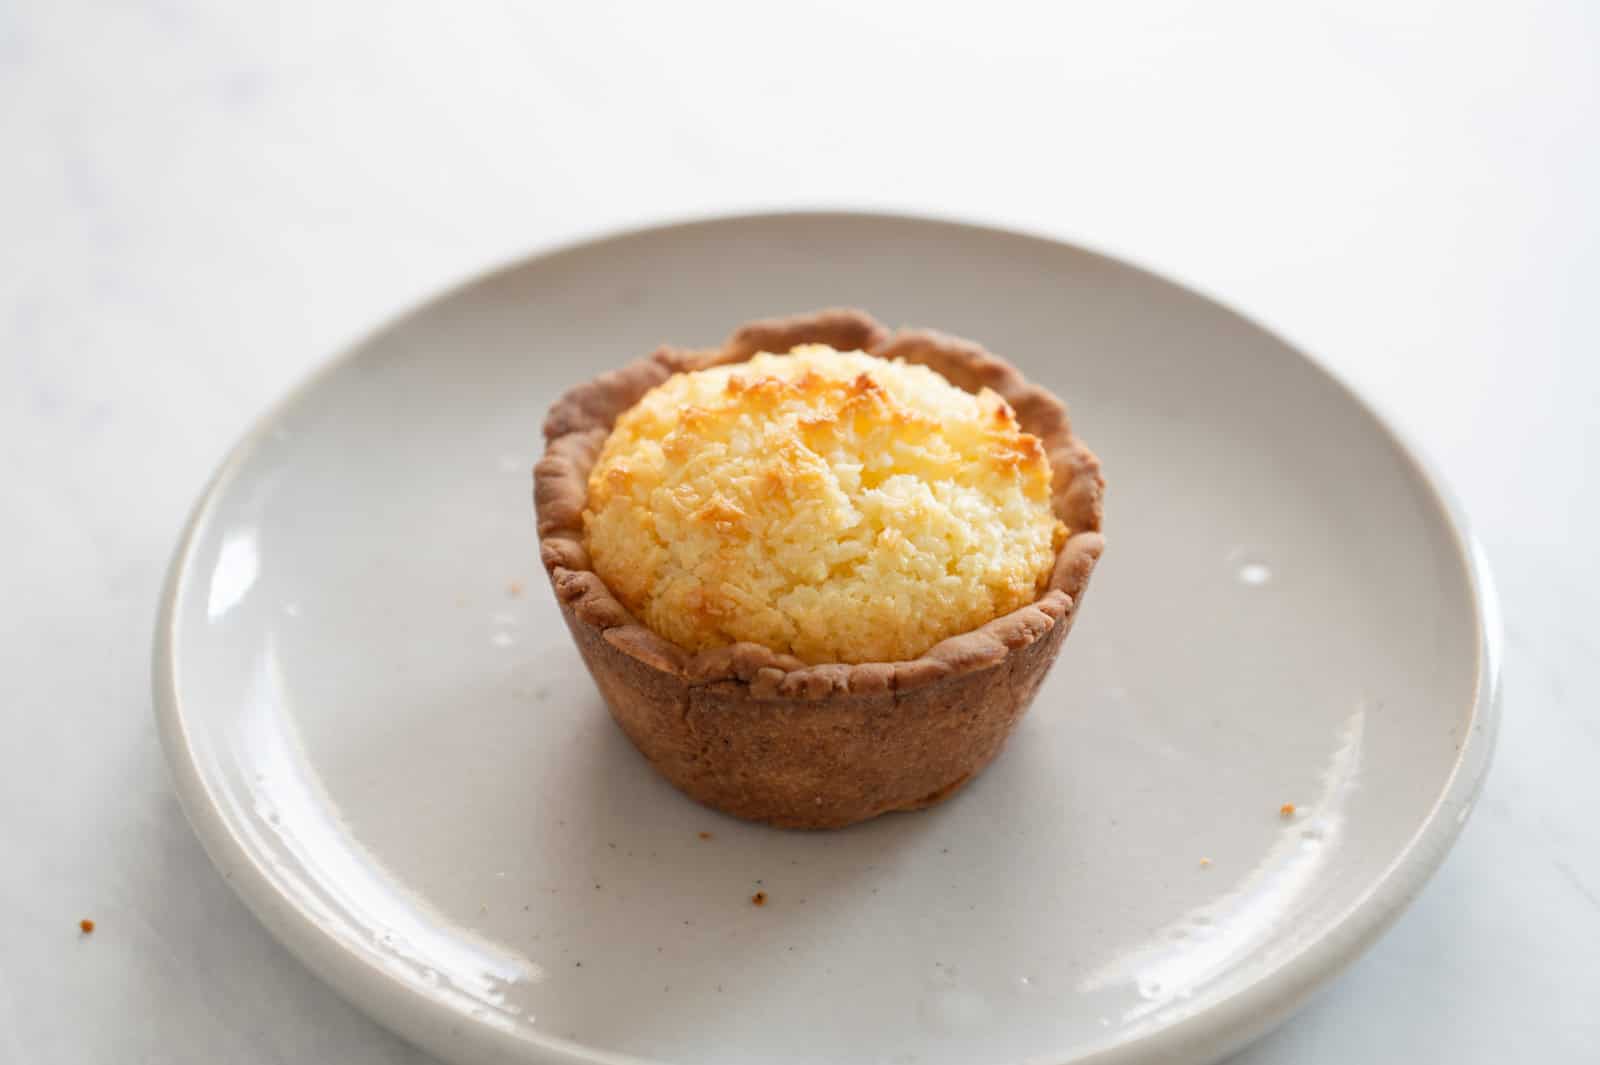
For this recipe, I recommend using 2.75 to 3-inch mini tart tins. You should be able to find them online easily. They’re about $10 for 25 to 32 tins (at time of publication), and they don’t take up much storage space.
I tried making a few tarts inside a muffin pan, and I didn’t quite like the results (see photo above). First of all, the crust browned way too much. Second, the well of a muffin pan is much deeper than a mini tart tin. As a result, you need to add more filling, which throws off the filling-to-crust ratio. Finally, I found unmolding the tarts from the muffin pan to be incredibly tricky.
MORE RECIPES USING BOB’S RED MILL ALL-PURPOSE FLOUR
- Miso Apple Spice Cake
- Thin Ginger & Sesame Cookies
- Chinese Chive Boxes
- Japanese Milk Bread (Shokupan)
- Homemade Noodles with Spicy Peanut Sauce


Hong Kong Style Coconut Tarts with Lemon
Ingredients
Crust
- 2 cups (240g) Bob’s Red Mill all-purpose flour
- 1/4 cup + 2 tablespoons (44g) powdered sugar
- 1/4 cup (20g) milk powder, (see note 2)
- 11 1/2 tablespoons (160g) unsalted butter, cut into cubes
- 3 tablespoons (45g) whole milk
Filling
- 2 3/4 cups (230g) finely shredded coconut, (see note 3)
- zest from 2 large lemons, about 7g to 8g
- 8 tablespoons (113g) unsalted butter
- 3/4 cup (180g/235ml) whole milk
- 1 1/4 cups + 2 tablespoons (165g) powdered sugar
- 1/4 cup (20g) milk powder
- 2 large eggs
- 1 teaspoon vanilla extract
- 1 teaspoon lemon extract, optional
- 3/4 teaspoon baking powder
- 1/2 teaspoon kosher salt, or 1/4 teaspoon sea salt
Equipment
- 18 2.75-inch to 3-inch mini tart pans, fluted or unfluted (see note 1)
Instructions
Make Dough
- Add the all-purpose flour, powdered sugar, milk powder, butter, and milk to a food processor. Pulse the ingredients in long pulses (about 2 seconds each), until the mixture comes together and small curds start to form (about 10 to 13 pulses). Test the mixture by grabbing a clump of the curds and squeezing them together into your hand. If the curds come together into a lump of dough, you’re done mixing. If it still feels dry and crumbly, add a tiny splash of milk and keep pulsing the mixture.
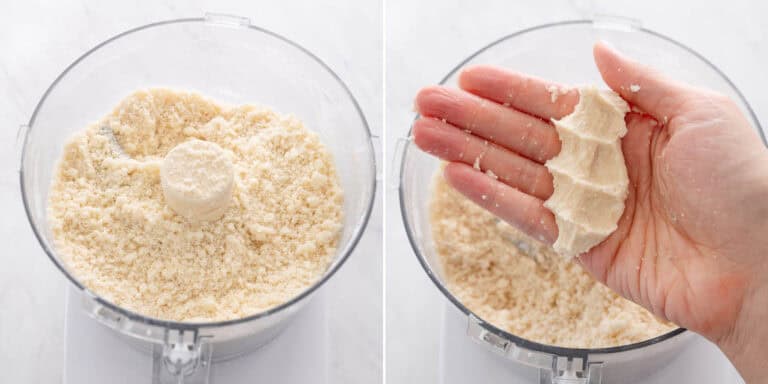
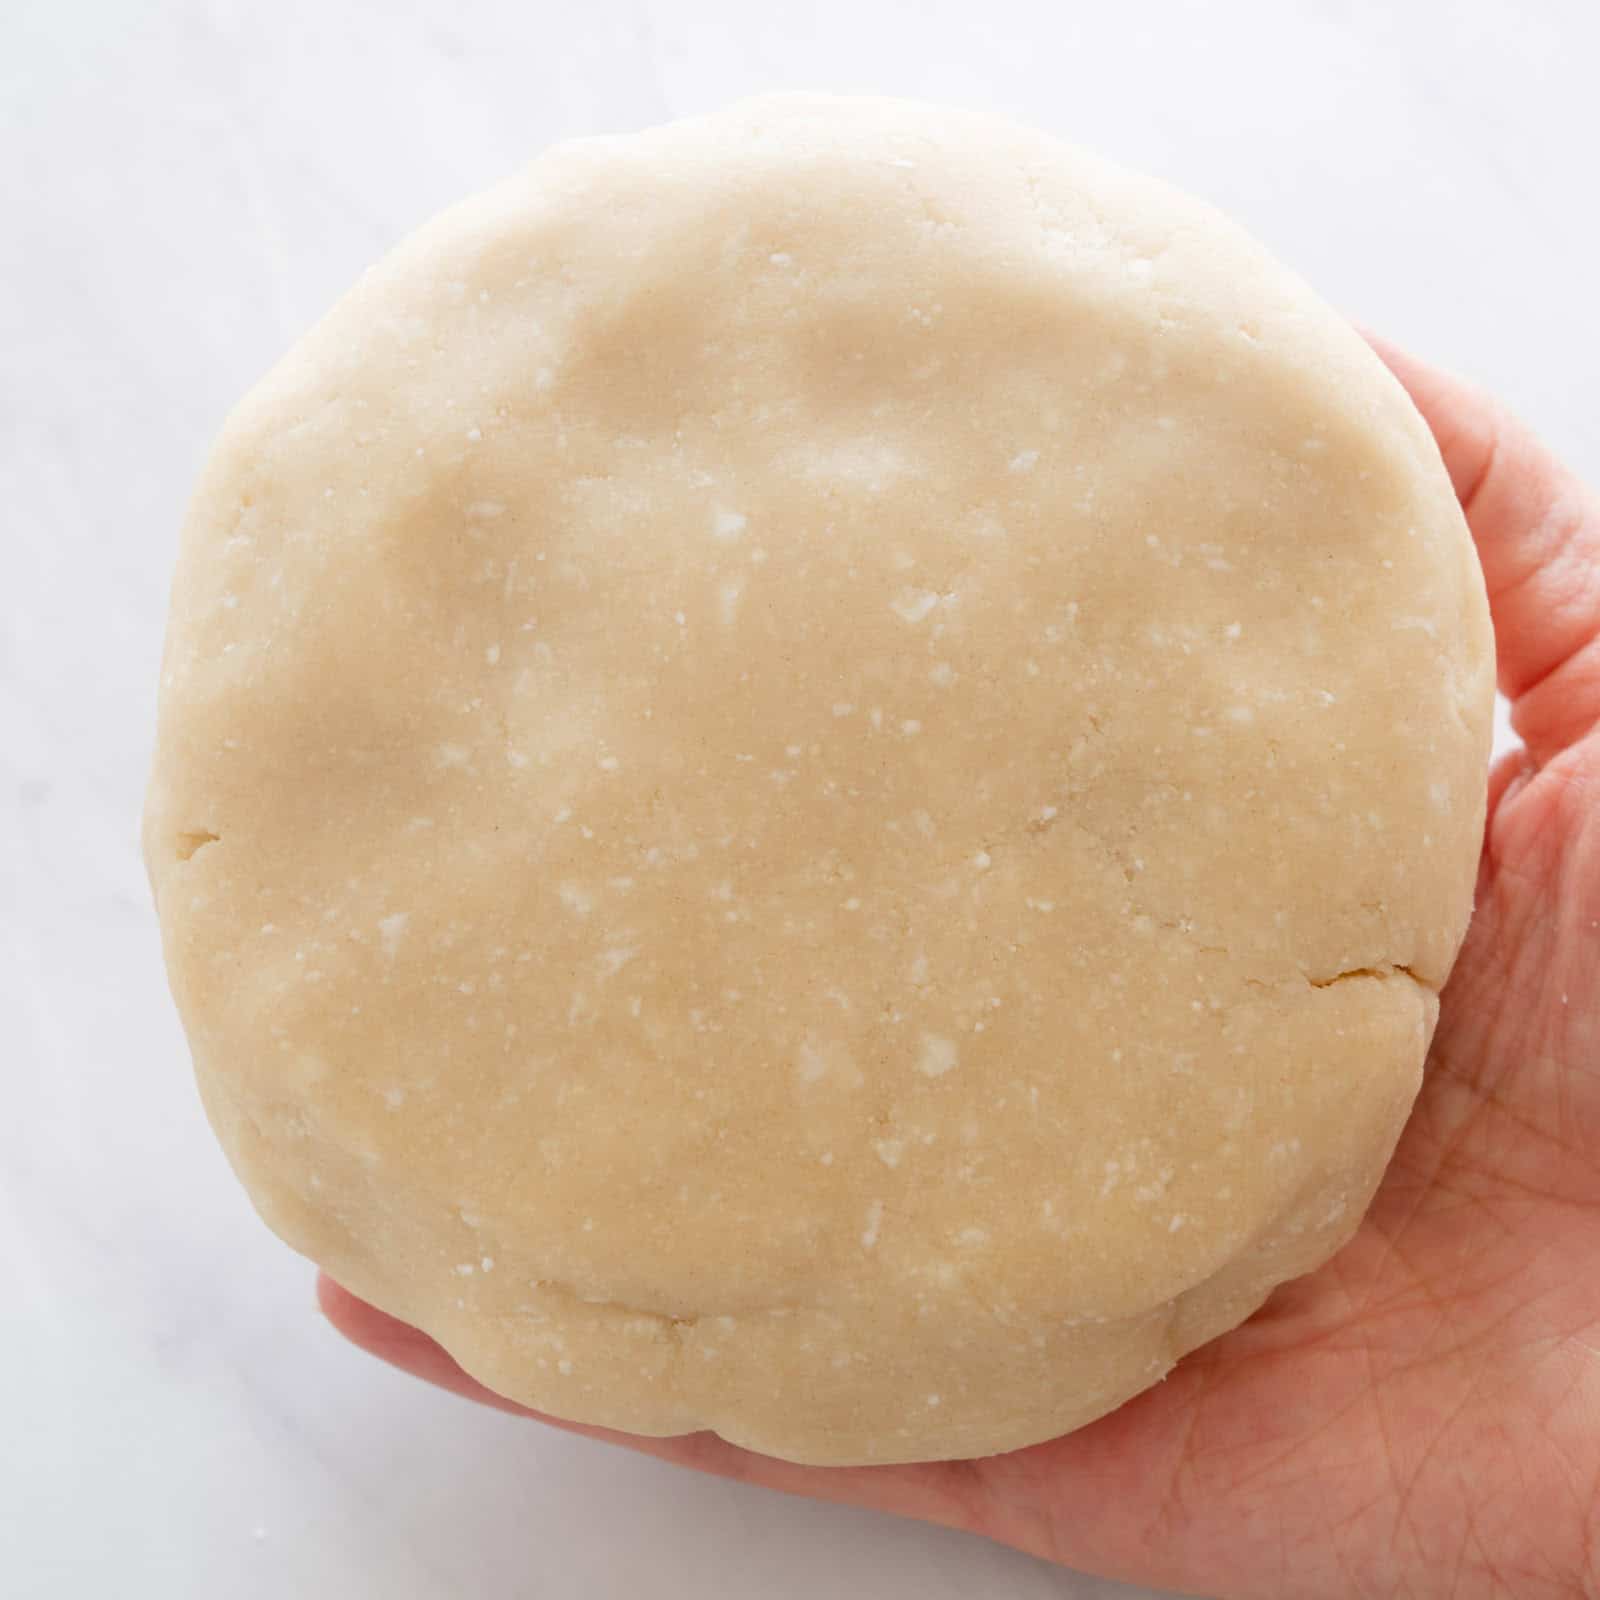
- Empty the dough curds into a mixing bowl. Gather the mixture together until you form a ball of dough. Shape the dough into a disc, and chill for 45 minutes. (See note 4 if you don’t plan to work with the dough until the next day).
Start Making Filling
- Right before you are about to divide and roll out the dough, start making the filling. Add the shredded coconut and lemon zest into a bowl. Rub everything together with your fingers, making sure to break up any clumps of lemon zest.
- Melt the butter in the saucepan. I like to brown the butter for more flavor, but that’s optional (see note 5 for directions).
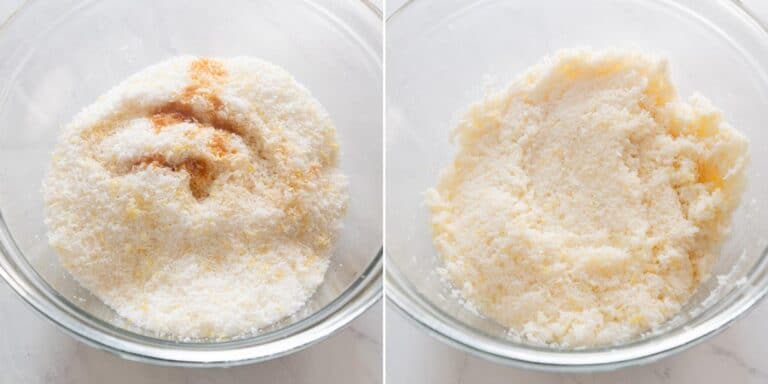
- Pour the melted butter and milk over the coconut and lemon zest. Mix everything together and set aside to let the coconut hydrate.
Preheat Oven
- Preheat the oven to 350ºF (175ºC) and position an oven rack to the center of the oven. Line 2 large half sheet baking pans with parchment paper (to catch any drippings from the tarts). Set the pans aside.
Roll Out Dough & Fit in Tart Tins
- Divide the dough into 18 pieces of about 27 to 28 grams each. Roll each piece into balls, about 1 inch in diameter.
- Lightly flour a work surface. Take one ball and flatten it slightly with the palm of your hand. Roll out the dough until you get a circle that’s about 3 1/4 to 3 1/2 inches wide. If you don’t have a ruler, you can invert one of the mini tart pins over the rolled out dough (so that the top of the tin is facing down). There should be about a 1/4-inch border of dough surrounding the tart tin. Add more flour to the work surface or the top of the dough if the dough is sticking.
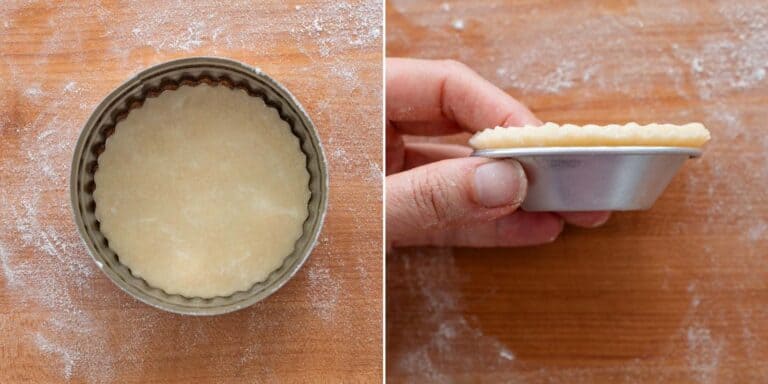
- Press the rolled out dough into the tart tin, making sure that the dough is flush with the tin and it reaches all the way to the top of the tin. If there’s more than a 1/4 inch of dough above the top of the tin, tuck in the excess dough.

- If you are using unfluted mini tart tins, you can cut the rolled out dough with a 3.5-inch fluted cookie cutter to give the crust a bit of flourish.
- After you finish rolling out the dough for 9 tins, transfer the crusts to a plate and refrigerate. Then, finish rolling out and shaping the remainder of the dough balls and chill the dough.
Finish Filling
- Add the powdered sugar, milk powder, egg, vanilla extract, lemon extract (if using), baking powder, and salt to the coconut mixture. Mix until well combined.
Bake Tarts
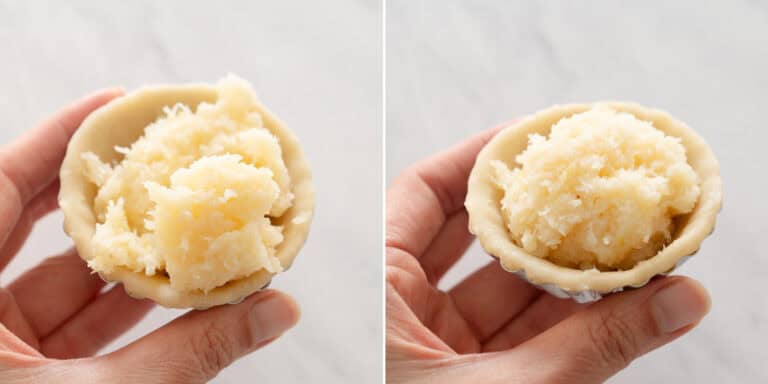
- I like to bake 9 tarts at a time to ensure that the crust and tops of the tarts bake evenly. Arrange the first batch of 9 chilled tart tins onto a baking sheet (I like to stagger them slightly. Scoop about 2 1/2 tablespoons of filling into each tin (about 44 to 45 grams). Use a mini spatula or spoon to tidy up the filling slightly and shape into a mound.
- Bake the tarts for 15 minutes. Then, rotate the pan and bake for another 10 to 13 minutes, until the crusts have a rich golden color and the tops of the tarts have started to turn golden brown. Remove the tarts and let them cool in the tins for 15 to 20 minutes, until they’re cool enough to handle. The crust of these tarts are very delicate, so it’s better to let them cool before unmolding.
- Bake the second batch of coconut tarts as specified above.
Removing Tarts
- Invert a tart over one hand and use your other hand to carefully lift and remove the tin off the tart. Transfer the tart to a cooling rack or plate and continue unmolding the remaining tarts.
- Serve the tarts slightly warm or completely cooled. Store the tarts at room temperature for 2 to 3 days or refrigerator for 5 to 6 days. See note 6 for reheating directions.
Notes
- Where to Find Mini Tins: I bought a set of 25 to 30 mini tart tins online for $10, and they take up very little space in my drawer. You can also use single-use aluminum mini-tart cups for this recipe. My aunt actually washes and reuses the aluminum tart cups. The cooking time might be a few minutes less when baking with disposable aluminum cups, as they can heat a little faster.
- Milk Powder: Milk powder browns and crisps up the pastry. It also gives the filling a milky flavor.
- Shredded Coconut: I have a slight preference for finely shredded coconut, but shredded coconut works too and is much easier to find. Large coconut flakes are a bit too big for this recipe.
- Making Dough Ahead: Method 1: If you’re planning to use the dough within 3 days, wrap the dough in plastic and refrigerate. Let the refrigerated dough sit at room temperature for 30 minutes before using so it’s easier to work with. Method 2: Divide and roll out the dough and line the tart tins before freezing. Once frozen, stack up the tins and transfer them to a freezer bag. When you are ready to bake, simply make the filling, add the filling to the frozen tart tins, and bake. There is no need to defrost the tins beforehand. However, you’ll likely need to increase the baking time by a few minutes, until the crust turns golden brown.
- Browning Butter: Melt the butter in a saucepan over medium heat. Once melted, continue heating the butter until it starts bubbling feverishly. Start stirring the butter frequently to keep it from burning. Gradually, the milk solids at the bottom and sides will start to brown. Once the solids turn golden or light brown, turn off the heat and immediately pour the melted butter over the shredded coconut mixture. It usually takes me about 2 to 3 minutes to brown the butter after it has melted.
- Reheating Directions: I highly recommend reheating the tarts in the oven, as it crisps up the tart crusts slightly. If you store the tarts at room temperature, reheat them at 350ºF (175ºC) for 6 to 8 minutes; reheat for 8 to 10 minutes for refrigerated tarts; reheat for 14 to 16 minutes for frozen tarts.
- Baking in a Muffin Pan: I tried to bake these in a muffin pan to see if it’ll work.
Nutrition
Disclosure: This post was sponsored by Bob’s Red Mill! To learn more about their products and to get more recipe inspiration, follow them on Instagram or Facebook.


Zoe says
it is coooooool!thanks
Jo says
Silly question – when do you add the second batch of powdered sugar? You’ve got 165g of powdered sugar in the ingredients list for the filling, but I can’t see where to include it. Is it in the “finish filling” section, or the “Start making filling” one?
Lisa Lin says
Hi Jo! Sorry this took me so long to respond! I totally missed that (and the milk powder in the filling). Sorry about that! I have now added it to the directions under the “finish filling” section.
Word Counter says
It looks delicious
Maria says
I really like the detail instructions and accuracy of your recipe. You include all the necessary items that is easy to follow. I cook a lot, but i don’t bake too often. Baking requires precision and you nailed it. Thank you do much. 👏🙏❤️
Lisa Lin says
Thank you, Maria!