Thank you to Lodge Cast Iron for sponsoring this scallion and pork floss rolls recipe!

Over the past year or so, I’ve been learning how to make my favorite breads from Chinese bakeries at home. These breads brought so much comfort to me during my childhood, and I always feel a sense of accomplishment when I’m able to recreate them. Plus, Mama Lin is usually impressed by the breads I bake, and you all know that impressing an Asian mother is no easy feat.
When I first embarked on this baking journey, I didn’t know where to begin because there aren’t many cookbooks about Chinese baking. But through a lot of trial and error in my kitchen, I feel like I’m beginning to understand some of the basics of Asian-style baking (see my pineapple bun and baked cha siu bao recipes).
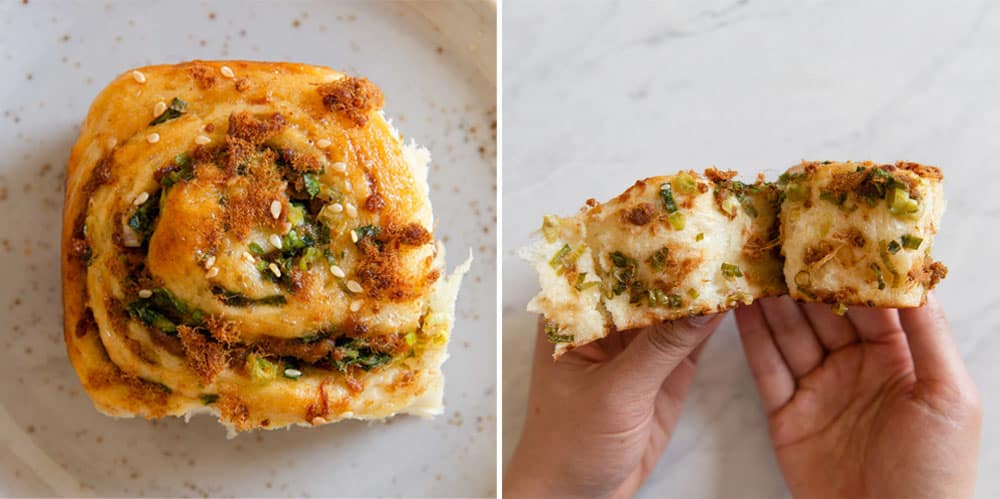
I am excited to partner with Lodge Cast Iron to show you how to make these scallion and pork floss rolls as part of their #BakeItTilYouMakeIt campaign. The #BakeItTilYouMakeIt campaign celebrates the process of learning new baking skills at home, and I think it embodies the spirit of our baking journeys over the past year. As I learned how to bake Chinese breads, you were learning alongside me as well by trying out my recipes and sharing your photos with me. I genuinely enjoy seeing them!
In this next baking venture, I drew inspiration from scallion buns (蔥油麵包) and pork floss buns (肉鬆包) from Chinese bakeries and reimagined them as tear-and-share rolls. For the recipe, I will be using the Lodge Cast Iron Casserole Pan, which is 9×13 inches. The Casserole Pan is durable and has great heat retention and heat distribution. All of Lodge’s cast iron bakeware is pre-seasoned. Before using it for the first time, rinse the pan quickly with water and wipe it down with a dry cloth. If you are planning to store the casserole pan for later use, rub the surface of the pan with a bit of oil.
HOW TO MAKE SCALLION AND PORK FLOSS ROLLS

INGREDIENTS
The ingredients in this recipe are quite straightforward. For the dough, you’ll need all-purpose flour, water, milk, yeast, sugar, butter, egg, sweetened condensed milk, and salt. The condensed milk gives the bread sweetness and milky flavor. If you don’t want to open a can of condensed milk, you can use 2 tablespoons of instant milk powder and 3 tablespoons of sugar instead. However, I prefer the flavor of the bread when it’s made with sweetened condensed milk.
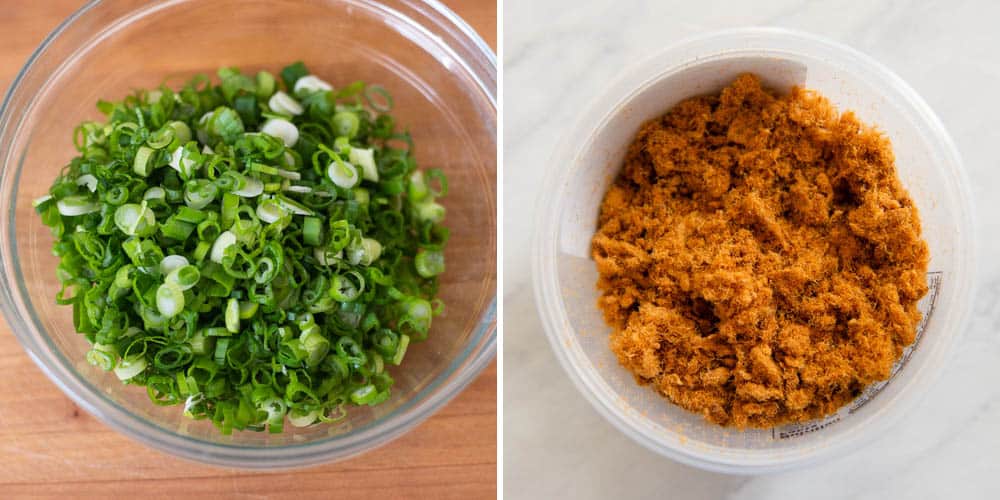
For the filling, you’ll need toasted sesame oil, scallions, pork floss, and salt. Pork floss is savory seasoned pork that is dehydrated and shredded (see above photo, right). The texture of pork floss is light and it melts in your mouth. Typically, pork floss is used as a topping for dishes, but it is hard not to snack on an entire tub in one sitting. You can usually find pork floss in an Asian supermarket near the sauce aisle.
By the way, you’ll need a lot of scallions for this recipe. If you’re buying relatively small bunches of scallions from the store, make sure to grab 2 or 3 bunches for the recipe.
MAKE THE TANGZHONG
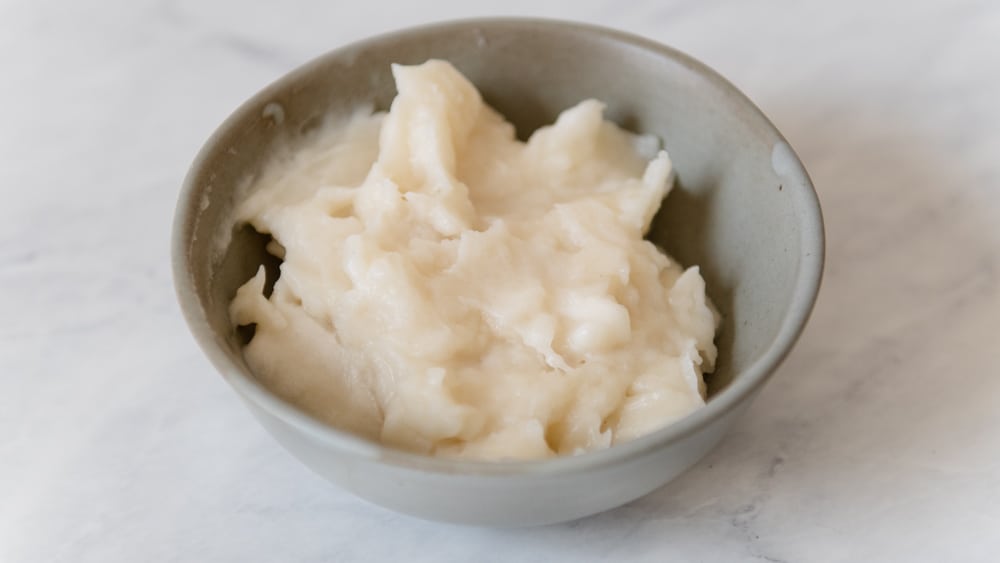
Those of you who are familiar with making my bread recipes know that I often use tangzhong (湯種), which is a paste made of flour and water heated together. When you incorporate tangzhong into the dough, it will give baked bread a light and airy texture.
It sounds complicated, but all you’re doing is heating some flour and water in a saucepan for about 1 to 2 minutes. Stir the ingredients in the saucepan frequently because the liquid thickens very quickly. Once a runny paste starts to form, turn off the heat. Then, transfer the tangzhong to a bowl to cool as you prepare the remaining ingredients for the dough.
MAKE THE DOUGH
Right after making the tangzhong, I usually activate the yeast next as this process takes a few minutes. Mix warmed milk (anywhere between 105 to 120ºF is fine), sugar, and active dry yeast. Then let the mixture sit for 5 to 8 minutes as the yeast blooms and a layer of foam appears at the top. The layer of foam is an indication that the yeast is active.
Next, add all the ingredients for the dough to the bowl of your stand mixer. Fit the mixer with the dough hook. Mix the ingredients on low until you don’t see much dry flour around the edges of the bowl. This should take about 30 seconds to 1 minute. Then, increase the speed to medium-low and mix the dough for 8 minutes. You may need to stop and scrape some dough off the sides of the bowl.
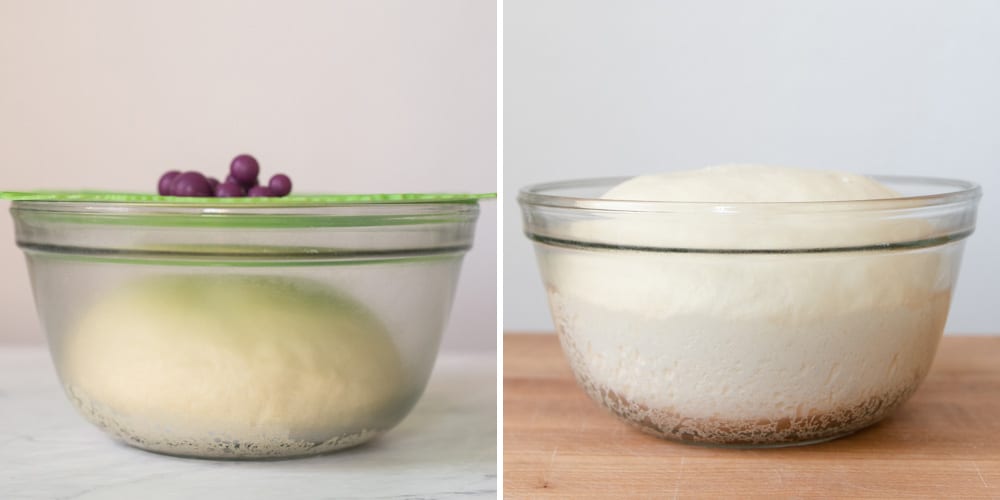
Take the dough out of the bowl and knead it a few times on a lightly floured surface. Then, transfer the dough to a lightly greased bowl, cover it with a silicone lid or damp towel, and let the dough rise for 1 hour.
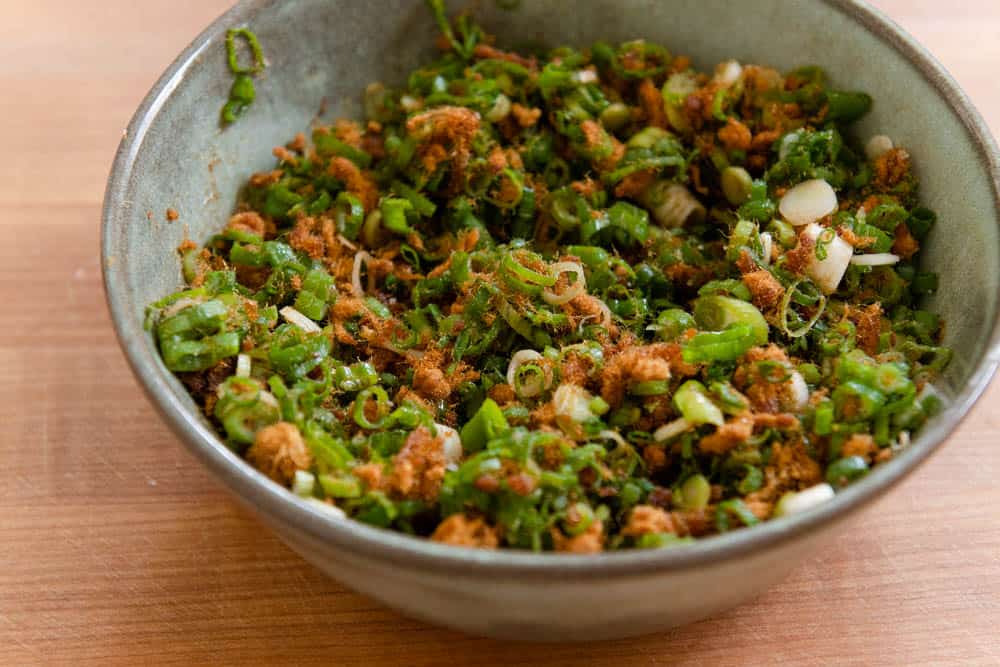
MAKE THE FILLING
About 15 minutes before you roll out the dough, prepare the filling. In a bowl, mix the scallions, pork floss, sesame oil, and salt. The sesame oil helps make the ingredients more fragrant and it hydrates the pork floss slightly. If you don’t have sesame oil around, you can use a neutral oil like canola, almond, or safflower oil. Set the filling aside.
SHAPE THE ROLLS
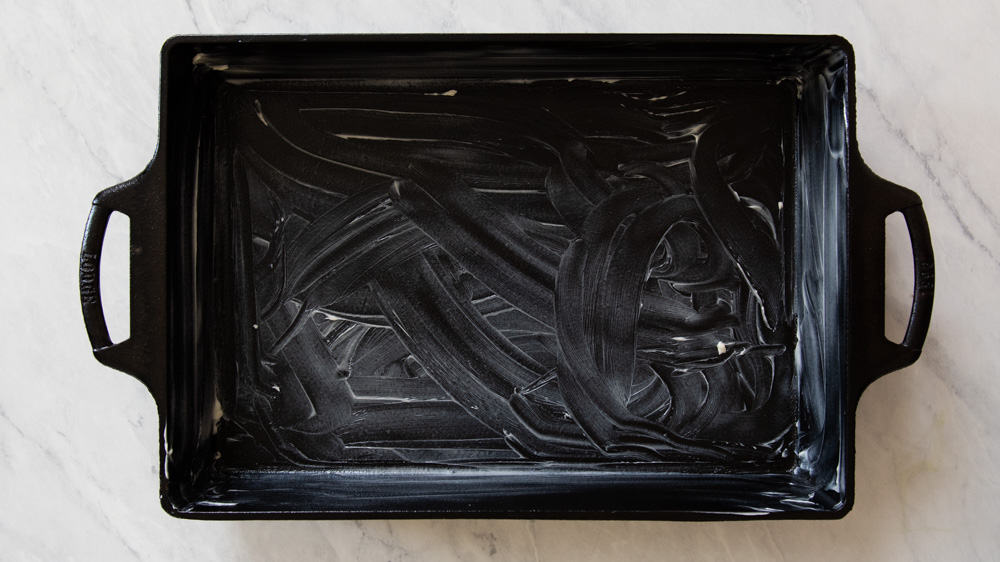
Before you shape the rolls, grease the Lodge Cast Iron Casserole Pan with unsalted butter. You want to grease it pretty well.
The dough should have doubled in size after the first rise. Punch down the excess air in the dough and turn the dough over to a lightly floured surface. Knead the dough a few times so that the bottom of the dough is smooth.
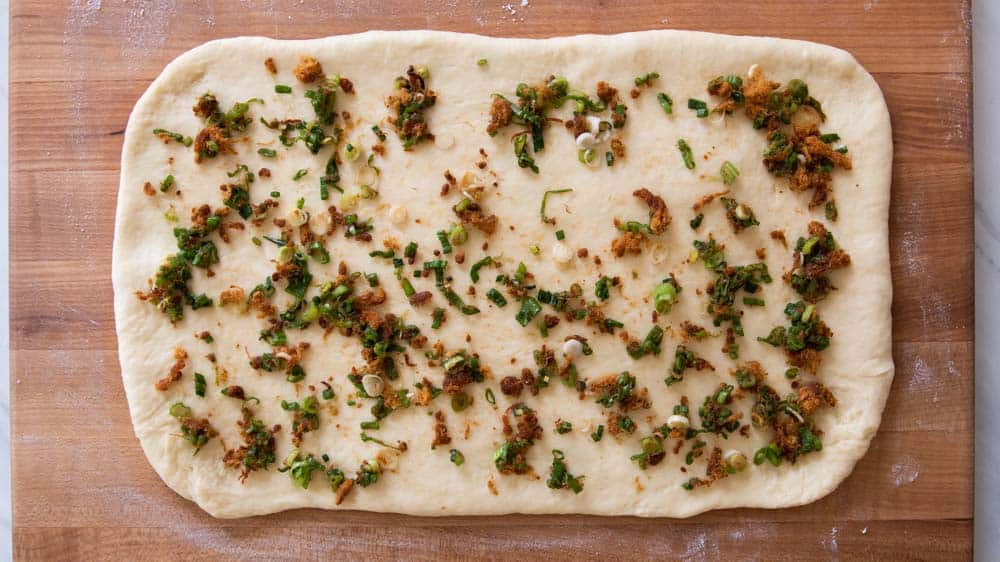
Next, you’ll incorporate the filling into the dough in 2 phases. In the first phase, roll out the dough into a 16×10-inch rectangle. Scoop out about 1/3 of the filling and spread it over the dough (see photo above). Using a spatula or your hands, gently press the filling down on the dough. This helps to keep the filling in place before the next step.
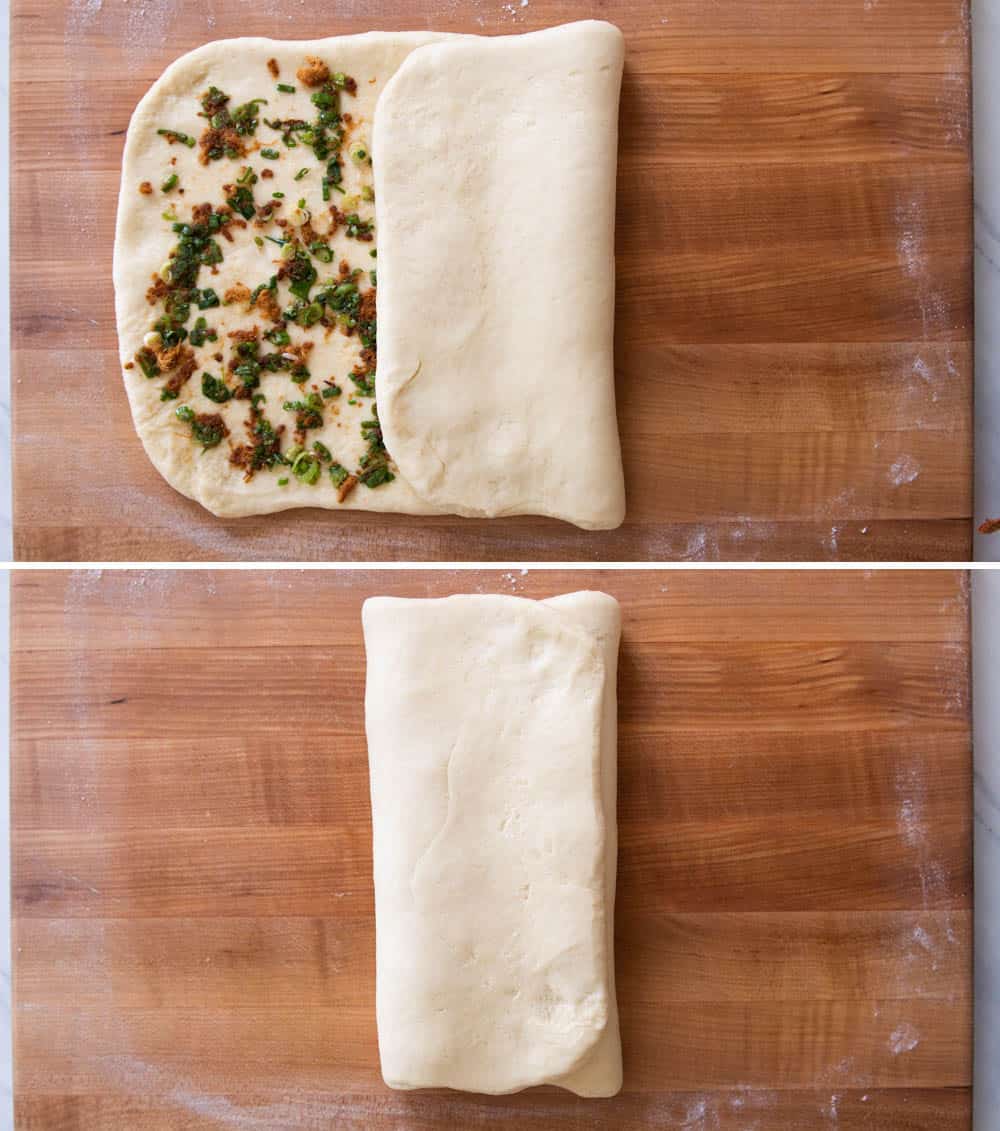
Make an envelope fold. Grab onto one short end of the rectangle and then fold a third of the dough towards the center (see photo above, top). Then, take the other short end, and fold it towards the center so that you now have 3 overlapping layers of dough (see photo above, bottom).
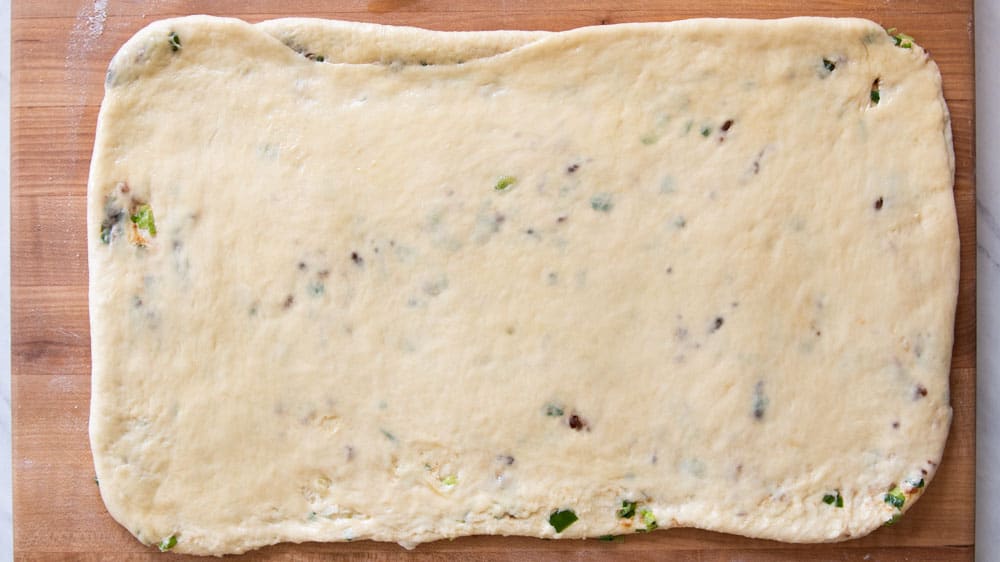
Turn the dough around 90 degrees. Then, roll out the folded dough until it’s a large rectangle of about 17 to 18 inches long and about 10 to 11 inches wide. This recipe is very forgiving, so if the dough tears a little bit during the rolling process like you see in the photo above, don’t worry. You’ll be rolling up the dough anyway and no one will notice the tears.

Spread 1 tablespoon of sesame oil over the dough and sprinkle 1/2 teaspoon kosher salt over the dough. Then, spread all the remaining filling over the dough.
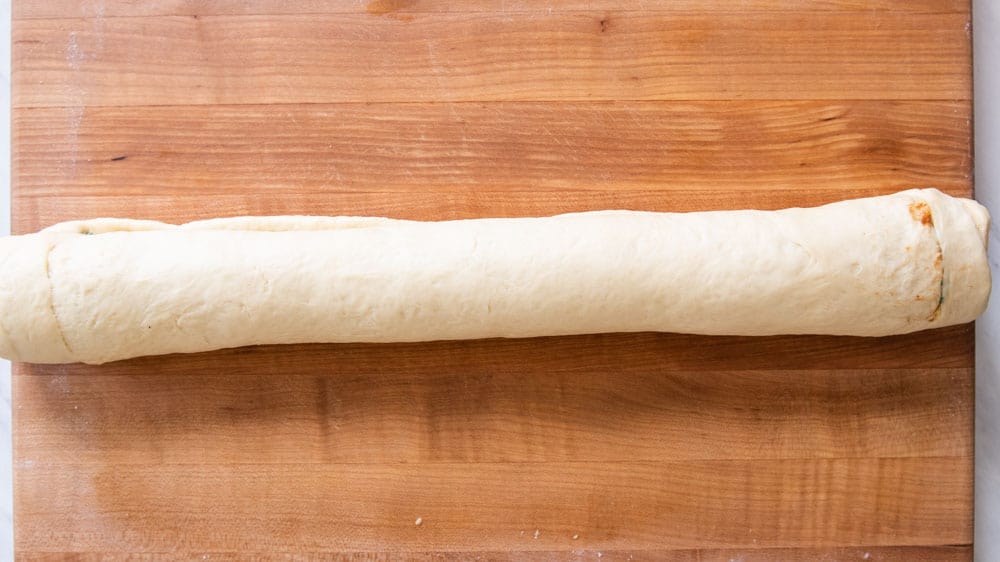
Now, take a long end of the dough, and roll everything up to a log. As you roll up the dough, make sure the sides are rolling up straight and not caving in. That helps to ensure that the rolled up dough is evenly thick throughout. You can always stretch the dough slightly on the ends to make sure they’re rolling up straight.
I must have rolled out the dough too aggressively for the photo shoot because there was a big tear along the outside of the dough log. If that happens to you, just use your fingers to squeeze the dough together to seal up the tear (see photo above).
Once rolled up the length of the dough log will be around 19 to 20 inches. Slice the log into 12 equal pieces. I like using a sharp serrated bread knife for this, but you can also use dental floss (see directions in my recipe notes).
Place the rolls, cut side down, into the greased Casserole Pan. Cover the rolls with a damp towel or plastic wrap, and let the rolls rise for 45 minutes to 1 hour, until they double in size.
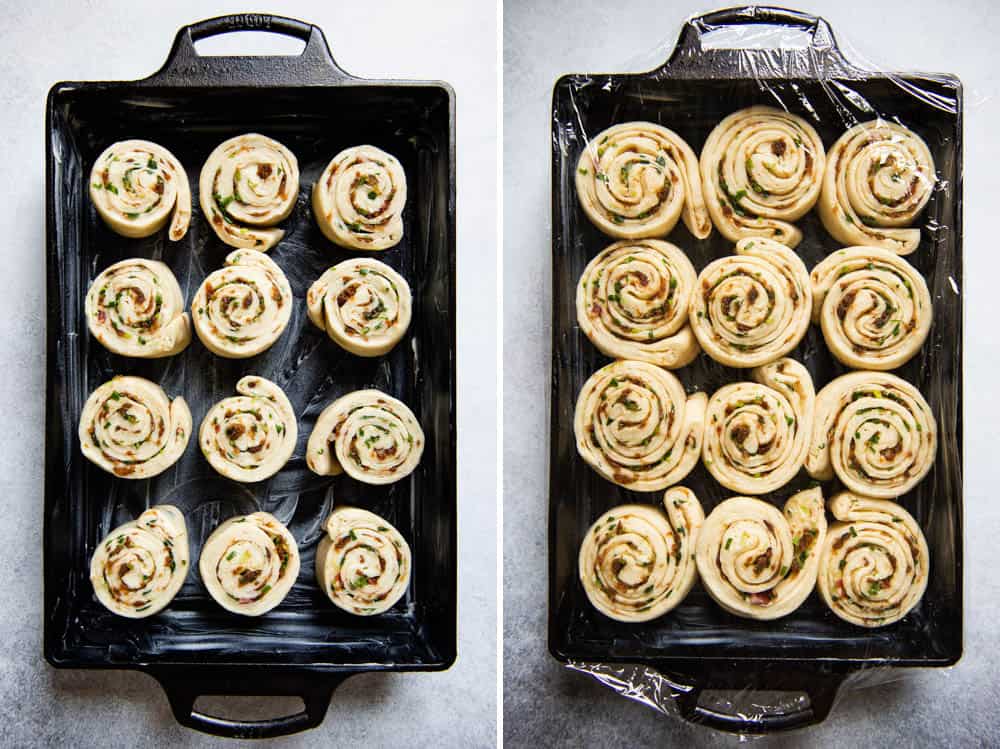
Preheat the oven to 375ºF and arrange an oven rack to the lower third position.
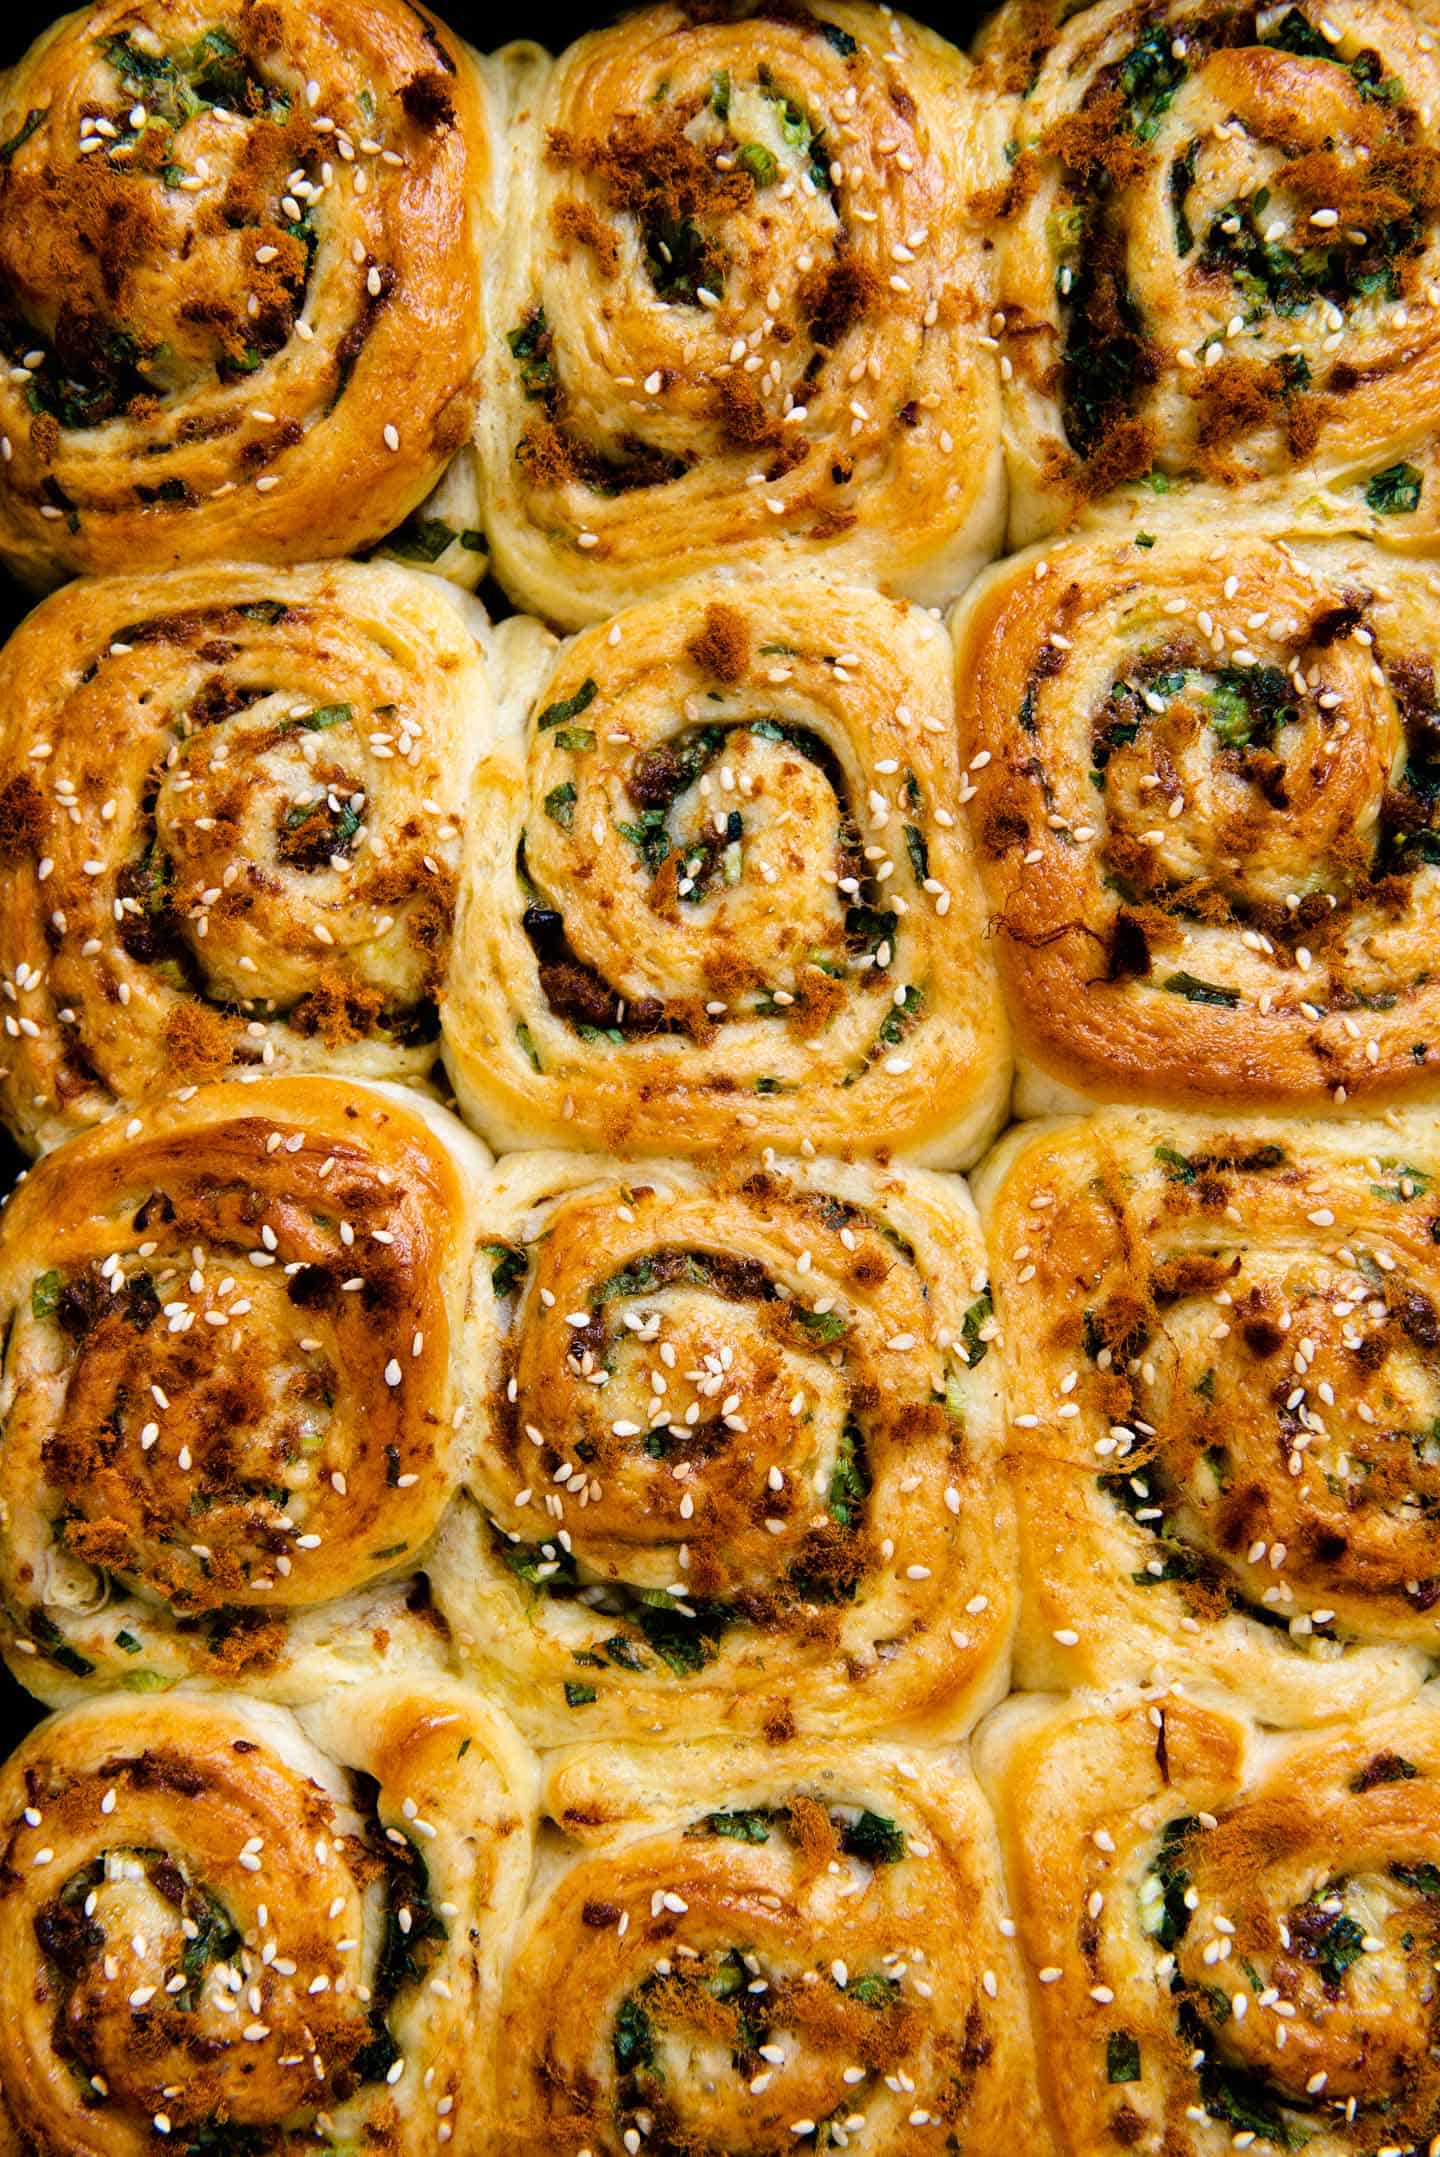
I like brushing some egg wash over the rolls to give them a nice golden color on the top. For the topping, sprinkle some sesame seeds and a bit of pork floss. I dotted the pork floss sparingly because I wanted to show off the spiral of the rolls. Feel free to add more if you like. Once baked, the pork floss becomes even more crisp.
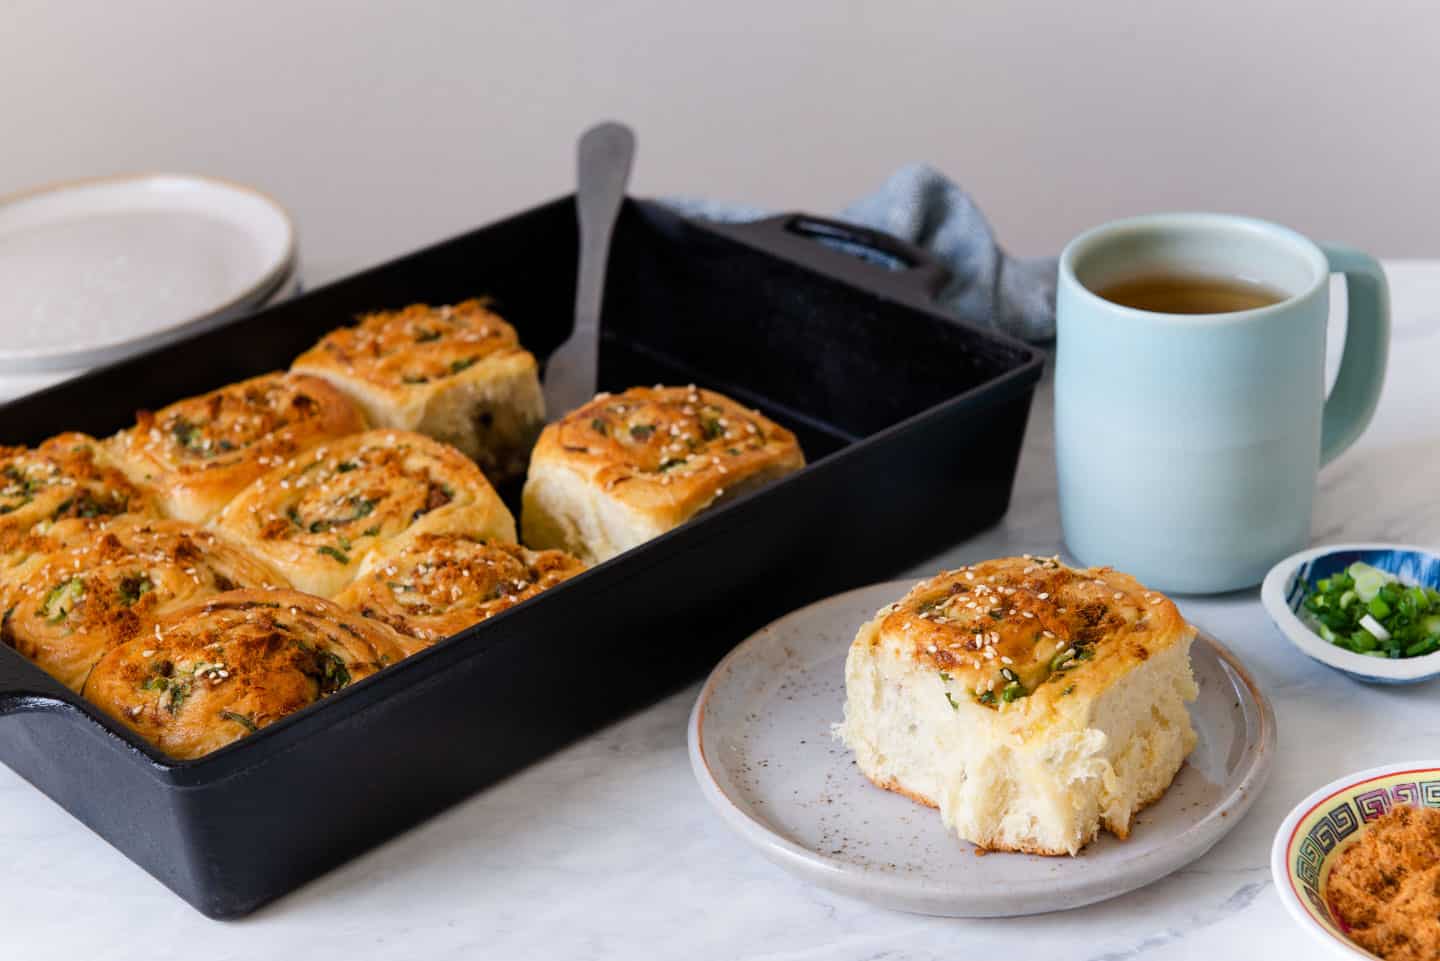
Bake the rolls for 27 to 30 minutes, until the rolls are lightly golden brown on top. Let the rolls cool in the pan for 10 to 15 minutes before serving or transferring them to a cooling rack.
CLEANING UP THE CAST IRON CASSEROLE PAN
Rinse the Casserole Pan in hot water. You can use a tiny bit of dish soap to clean the cast iron, if there are any stubborn stains. Then, dry the pan thoroughly with a lint-free towel. Finally, rub some oil over the entire surface of the pan with a paper towel. You can read more about Lodge’s cast iron cleaning tips here.
MORE ASIAN BREAD RECIPES
Scallion and Pork Floss Rolls
Ingredients
Tangzhong
- 30 grams all-purpose flour, (3 tablespoons + 1 teaspoon)
- 115 grams water, (1/2 cup)
Dough
- canola or vegetable oil for greasing bowl
- 150 grams whole milk, (2/3 cup)
- 1 tablespoon sugar
- 7 grams active dry yeast, (2 1/4 teaspoon, see note 1 if using instant yeast)
- 450 grams all-purpose flour, (3 3/4 cups, measured with spoon-and-sweep method)
- 1 teaspoon kosher salt, (3 grams)
- 70 grams unsalted butter, melted, (5 tablespoons)
- 80 grams sweetened condensed milk , (4 tablespoons, see note 2 for substitution)
- 1 large egg
Scallion & Pork Floss Filling
- 120 grams scallions, thinly sliced (1 1/2 cups sliced, see note 3)
- 50 grams pork floss, (3/4 cup, see note 4)
- 1 teaspoon kosher salt, divided
- 3 1/2 tablespoons toasted sesame oil, divided
Egg Wash
- 1 large egg
- 1 tablespoon water or whole milk
Topping
- toasted sesame seeds
- pork floss
Equipment
- small saucepan
- small mixing bowl to hold filling
- large mixing bowl to proof dough
- rolling pin
- Lodge Casserole Pan
- butter for greasing pan
Instructions
Make the Tanzhong
- In a saucepan, whisk the flour and water together until the flour dissolves.
- Place the saucepan over medium heat and stir the mixture frequently. In about 30 seconds to a minute, the flour will start to thicken. Stir constantly until the watery liquid absorbs into the paste. Turn off the heat and transfer the tangzhong to a bowl to cool. (See note 5 for microwave tangzhong directions.)
Prepare the Dough
- Lightly grease a large mixing bowl with oil. Set it aside.
- In a microwave-safe bowl, heat the milk in the microwave on high for about 30 to 40 seconds. Use a thermometer to check the temperature of the milk. It should be somewhere around 105ºF to 120ºF. If the milk isn’t hot enough yet, heat it again for 5 to 10 seconds. If the milk is too hot, quickly whisk the milk and let it cool for several minutes.
- Add the sugar and yeast to the milk. Stir to hydrate the yeast. Let it sit for 5 to 8 minutes while you prepare the other ingredients. After 5 to 8 minutes, you should see a layer of foam on the top at least 1/4 inch thick (an indication that the yeast is active).
- In the bowl of a stand mixer, combine the all-purpose flour and salt. Add the melted butter, condensed milk, egg, tangzhong, and foamy milk/yeast mixture.
- Fit the mixer with the dough hook. Mix the dough on low until you don’t see any loose flour on the sides of the bowl. This should take 30 seconds to 1 minute. Then, increase the speed to medium-low and work the dough for 8 minutes. The dough should wrap around the dough hook and the sides of the bowl clean. If you notice dough stuck to the sides of the bowl after a few minutes, turn off the mixer, scrape down the dough, and continue working the dough with the mixer.
- Scrape the dough out of the bowl onto a lightly floured surface and knead a few times. The dough likely will feel a little warm, and it should be soft and supple. If the dough is feeling tacky, lightly dust your hands with flour.
- Shape the dough into a ball and place inside the greased mixing bowl. Cover the bowl with a damp towel (or a silicone lid) and let it rise in a warm place for about 1 hour, until the dough doubles in size.
Make the Filling
- About 15 minutes before rolling out the dough, make the filling. Measure out 2 1/2 tablespoons of sesame oil. In a bowl, mix the oil, scallions, pork floss, and 1/2 teaspoon salt. Make sure you still have 1 tablespoon of sesame oil and 1/2 teaspoon of salt left for the dough later on. Set the filling aside.
Shape the Rolls
- Grease the Lodge Cast Iron Casserole Pan generously with butter. Set the pan aside.
- Punch down the dough to release excess air. Turn the dough over a lightly floured surface and knead the dough a few times so that the bottom is smooth.
- Roll out the dough to a 16×10-inch rectangle.
- Scoop out about 1/3 of the filling and spread it over the dough. Using a spatula or your hands, gently press the filling down on the dough. This helps to keep the filling in place for the next step.
- Make an envelope fold. Grab onto one short end of the rectangle and then fold a third of the dough towards the center. Then, take the other short end, and fold it towards the center so that you now have 3 overlapping layers of dough.
- Turn the dough over 90 degrees and roll out the dough until it is 17 to 18 inches long and 10 to 11 inches wide.
- Spread the remaining tablespoon of sesame oil over the dough and sprinkle 1/2 teaspoon salt over the dough. Then, spread all the remaining filling over the dough.
- Grab onto a long edge of the dough and roll up the dough into a log. As you roll up the dough, make sure the sides are rolling up straight and not caving in. That helps to ensure that the rolled up dough is evenly thick throughout. I like to stretch the dough on the sides gently to ensure that the dough log is rolling up straight. Once rolled up, the dough log will be between 19 to 20 inches long.
- Slice the log into 12 equal pieces. I like using a sharp serrated bread knife for this. You can also use something like dental floss to cut the dough (see note 6 for more info).
- Place the rolls cut side down inside the greased Casserole Pan. Cover the rolls with a damp towel or plastic wrap, and let the rolls rise for 45 minutes to 1 hour, until they double in size.
Bake the Rolls
- Preheat the oven to 375ºF and arrange an oven rack to the lower third position.
- Make the egg wash by whisking an egg with 1 tablespoon of water or milk. Brush a thin layer of egg wash over the rolls. Sprinkle several pinches of sesame seeds over the rolls. Then, sprinkle several pinches of pork floss over the rolls.
- Bake the rolls for 27 to 30 minutes, until the tops of the rolls are lightly golden brown. Let the scallion and pork floss rolls cool in the pan for 10 to 15 minutes before serving or transferring them to a cooling rack to cool some more.
- Store any remaining rolls in an airtight container at room temperature. They will keep for several days. To reheat, microwave the rolls on high heat for 15 seconds.
Notes
- If you are using instant yeast, you do not need to activate it. In other words, you do not need to stir the yeast with warmed milk. Simply add the instant yeast along with the other ingredients for the dough into the bowl of your stand mixer. That said, I still recommend warming up the milk in the microwave for 15 seconds so that the milk reaches room temperature. Then, start mixing and kneading the dough.
- You can substitute the condensed milk with 2 tablespoons of instant milk powder and 3 tablespoons of sugar. If you don’t have milk powder, just use the sugar only.
- Scallions come in bunches of various sizes. If you find only small bunches of scallions in the grocery store, grab 2 or 3 bunches for this recipe.
- You can find pork floss in Asian supermarkets. They’re usually somewhere near the aisle with sauces.
- Microwave tangzhong directions: If this is your first time making tangzhong, I recommend using the saucepan method to figure out how it should look and feel. You have a lot more control with the saucepan method. To make the tangzhong in the microwave, heat the flour and water mixture for 30 seconds on high. Take the bowl out of the microwave, stir everything and check the consistency of the mixture. If the tangzhong is still quite runny, microwave it for another 10 seconds and check the consistency. Then, heat the mixture at 5-second intervals, stirring in between, until you get a thick paste. If your tangzhong has already started to thicken after the initial 30 seconds of heat, heat the mixture at 5-second intervals and stir the mixture until you get a paste. Be patient and resist the urge to stick the tangzhong in the microwave and heat it for a longer period. The tangzhong can easily overheat, leaving you with a stiff block of steamed flour.
- Dental Floss Cutting Method: Cut a piece of dental floss of a decent length. You don’t want it to be too short. Slide the floss under the dough log. Then, use your right hand to grab onto the left side of the floss and use your left hand to grab onto the right side of the floss. Pull the floss inwards towards the log, in opposite directions, until you cut the dough with the floss. Repeat until you have cut all 12 pieces.
- Making the Dough Overnight: Right after you knead the dough in the stand mixer for 8 minutes, shape the dough into a ball. Then place the dough into a greased bowl. Cover the bowl with a layer of plastic and place it in the refrigerator overnight. You DO NOT need to let the dough rise before putting it in the refrigerator. When you are ready to shape the rolls the next day, take the dough out of the bowl and shape it right away. You DO NOT need to let the dough warm up to room temperature before rolling it out. Make sure to use the dough by the next day.
Nutrition
Disclosure: This post was sponsored by Lodge Cast Iron.


Lara says
My mother made a version of these growing up and this is the closest I have seen. Thanks for sharing. I was i in Italy intimidated by all the steeps but it is actually Very easy and so delicious!!
Lisa Lin says
Lara, thank you so much for trying this!!!
Danica says
I love pork floss so loved this idea and made them. The only thing I would tweak is the salt – it just seemed to salty to me. Otherwise, pretty happy with the result!
Rachel says
Hi! These buns look so delicious! I was wondering how would the buns turn out if I substituted all purpose flour for bread flour? Would the buns be fluffier?
Lisa Lin says
Hi, Rachel! You should be able to replace AP flour with bread flour one-for-one without much issues. I don’t think the higher protein content in bread flour will make them fluffier though.
sunriseNRG says
Amazing recipe! Delicious, pillowy soft, sweet and savory, and easy to make! Thanks so much for inspiring all of us in the kitchen and for sharing these Asian treasures. I used bread flour instead of AP flour 🙂
Lisa Lin says
Thank you!!!
Gale says
Made these this morning, they are fantastic! Highly recommend!
Lisa Lin says
Thank you, Gale!!
jacquie atkinson says
Hello, Do you think these buns would freeze very well? We are only 2 people so it would be nice to have some frozen.
Thank you
Julie Wong says
I have made these twice now. Delicious! The only modification I made was I used half the salt the second time which suited us better
Lisa Lin says
Thank you for this, note, Julie! I actually made these again recently and I agree. I think I should dial down the salt slightly!
Kerry says
Hi Lisa, is the 1 tsp salt (divided) in the filling the original or dialed down amount? Thanks!
Lisa Lin says
Hi Kerry, that is the dialed down amount! (Original was 1 1/2 tsp)
Olivia says
I can’t consume dairy, so I usually replace the milk/butter in bread recipes with non-dairy alternatives like oat or soy milk, and vegan butter. I’d love to make this, but given I can’t have condensed milk or milk powder, d’you think it’s possible to substitute with (non-dairy) milk + sugar? I understand the viscosity of condensed milk is thicker than milk, but I figured functionally they’re adding hydration (and sweetness) to the dough?
holly says
Not sure when this comment was posted, but I’ve seen condensed oat milk/coconut milk alternatives on amazon! Maybe you can try using one of those to substitute.
Sarah says
I just made these, and my family loved them! So soft and fluffy. I’ll add more pork floss next time since I love the flavor so much. It was a labor of love and totally worth it. Thank you for a great recipe.
Lisa Lin says
Thank you, Sarah!
Jessica says
When I visited Taiwan, I had the opportunity to try scallion and pork floss rolls. I love it, and I appreciate you sharing this detailed recipe; I’ll give it a try next week.
Marie says
Hi Lisa, I can’t tell you how many times i’ve made these buns. When i don’t have pork floss handy i’ve made them with ham & cheese. I’ve made them in a round bun filled with left-over roast chicken, cheese & a little tomato sauce. These are perfect lunches for the kids. They freeze very well too. Thanks for sharing this wonderful recipe with us. Marie
Lisa Lin says
Marie, thank you so much for making this recipe!! I love all these substitutions you’ve made!! I need to try it myself.
Shang says
27-30 minutes seems to be way too long with my oven. I ended up with half burnt buns at 26 minutes. Is my oven just bad or is the bake time for these too long?
Lisa Lin says
Hi, Shang! The reason why the cooking time was a little longer for this is because I used a cast-iron baking pan, which heats up slower than metal pans. If you are using a metal pan, feel free to reduce the time. I’ll add a note once I retest this.