I get a lot of messages from my followers asking me for a meat dumpling recipe, so here it is! These chicken potstickers are absolutely delicious. The best part is that they’re made with easy-to-find ingredients. For those of you who enjoy pork and cabbage potstickers, you can use my recipe here.
In case you are looking for vegetarian potsticker recipes, try my vegetable potstickers or red curry tofu dumplings recipe.
There are a lot of tips and steps to go through in the recipe, so let’s get to it!

FILLING FOR CHICKEN POTSTICKERS
One of the most common ingredients in potstickers is cabbage. Often times, you’ll see Napa cabbage in dumpling recipes because it is mild in flavor. I’m using Napa cabbage in this recipe, but I like using green cabbage as well. I also used savoy cabbage in this vegetable potsticker recipe.
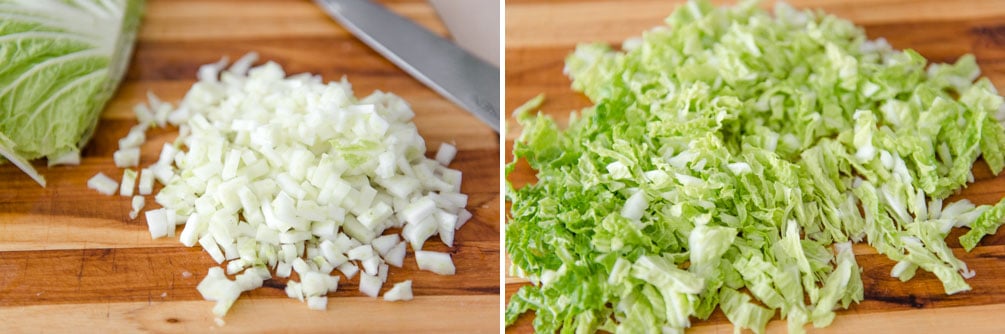
Because Napa cabbage leaves are large, you want to cut them up into small pieces before mixing them in with the rest of the filling. I usually separate the white from the green parts of the cabbage, and cut the white part into a small dice. For the green part, I slice the leaves into 1-inch strips, and then slice the strips into very thin pieces (see the photos below for reference).
Often times, recipe writers recommend salting Napa cabbage for about 10 minutes and then squeezing out the liquid from the cabbage. That’s because Napa cabbage contains a lot of moisture, particularly in the white parts. The excess liquid isn’t necessarily bad. The only issue (if you don’t squeeze out the liquid) is that you’ll find liquid inside your dumplings after you cook them. I actually quite like that liquid because it reminds me of biting into soup dumplings. However, that liquid will soften the base of the potstickers quicker, which means you’ll lose that crispy texture of the potstickers.
Because I’m only using 1 1/2 cups of Napa cabbage in my recipe, I’m not going to bother squeezing out the excess liquid. The excess liquid is really only an issue if you use more Napa cabbage. Note also that other types of cabbage don’t release as much liquid, so you may want to play around with the different varieties.
One final note about the filling: I like cooking the spices and vegetables a little because I think it releases the flavors of the spices and helps to wilt the vegetables. I think the filling tastes better than those recipes that don’t call for cooking the spices.
POTSTICKER WRAPPERS/DUMPLING SKINS
Another question I get often is, “What kind of wrappers do you use?” Let me put it out there that I use store bought potstickers 90% of the time. They’re convenient and easy to use. If I make fresh dumpling skins, that will easily add 1 to 2 hours to my cooking time, which I don’t always have.
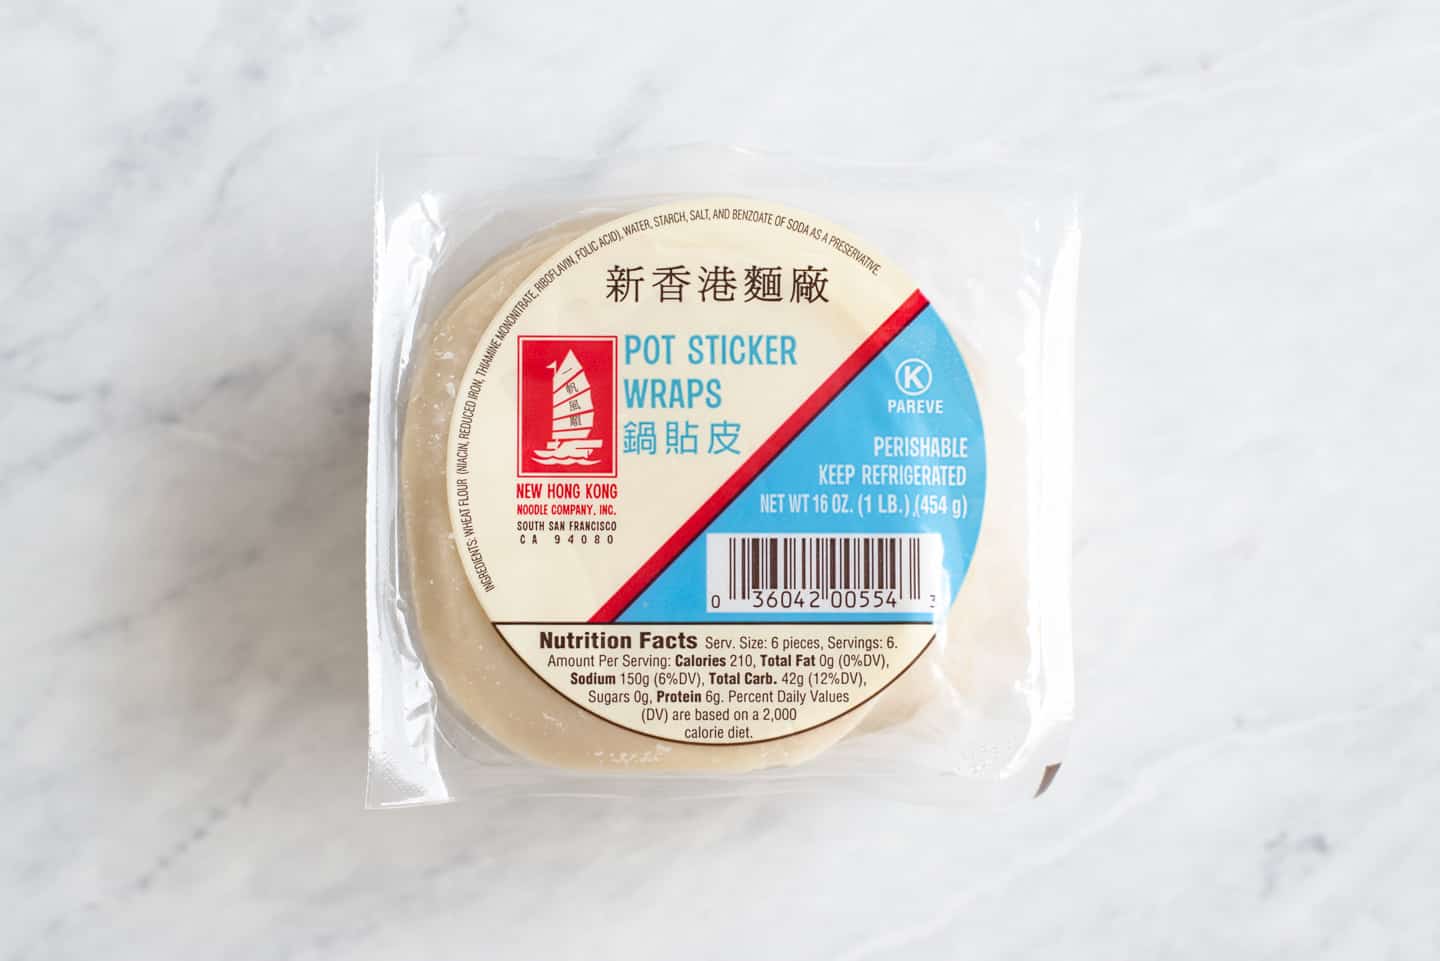
For potstickers, you want to buy thicker dumpling skins, if possible. The reason is that they need to withstand the heat from the pan frying. Thinner wrappers tend to rip apart easier.
One brand I use often is from the New Hong Kong Noodle Company. The skin is very pliable, which allows me to create a lot of pleats to my dumplings. The slight problem with this brand is that they don’t use much starch to dust the dumpling skin, which makes them stick together easily inside the package. Pulling the dumpling skins apart can stretch out their shape. Not the end of the world, but it is worth noting.
POTSTICKER PLEATING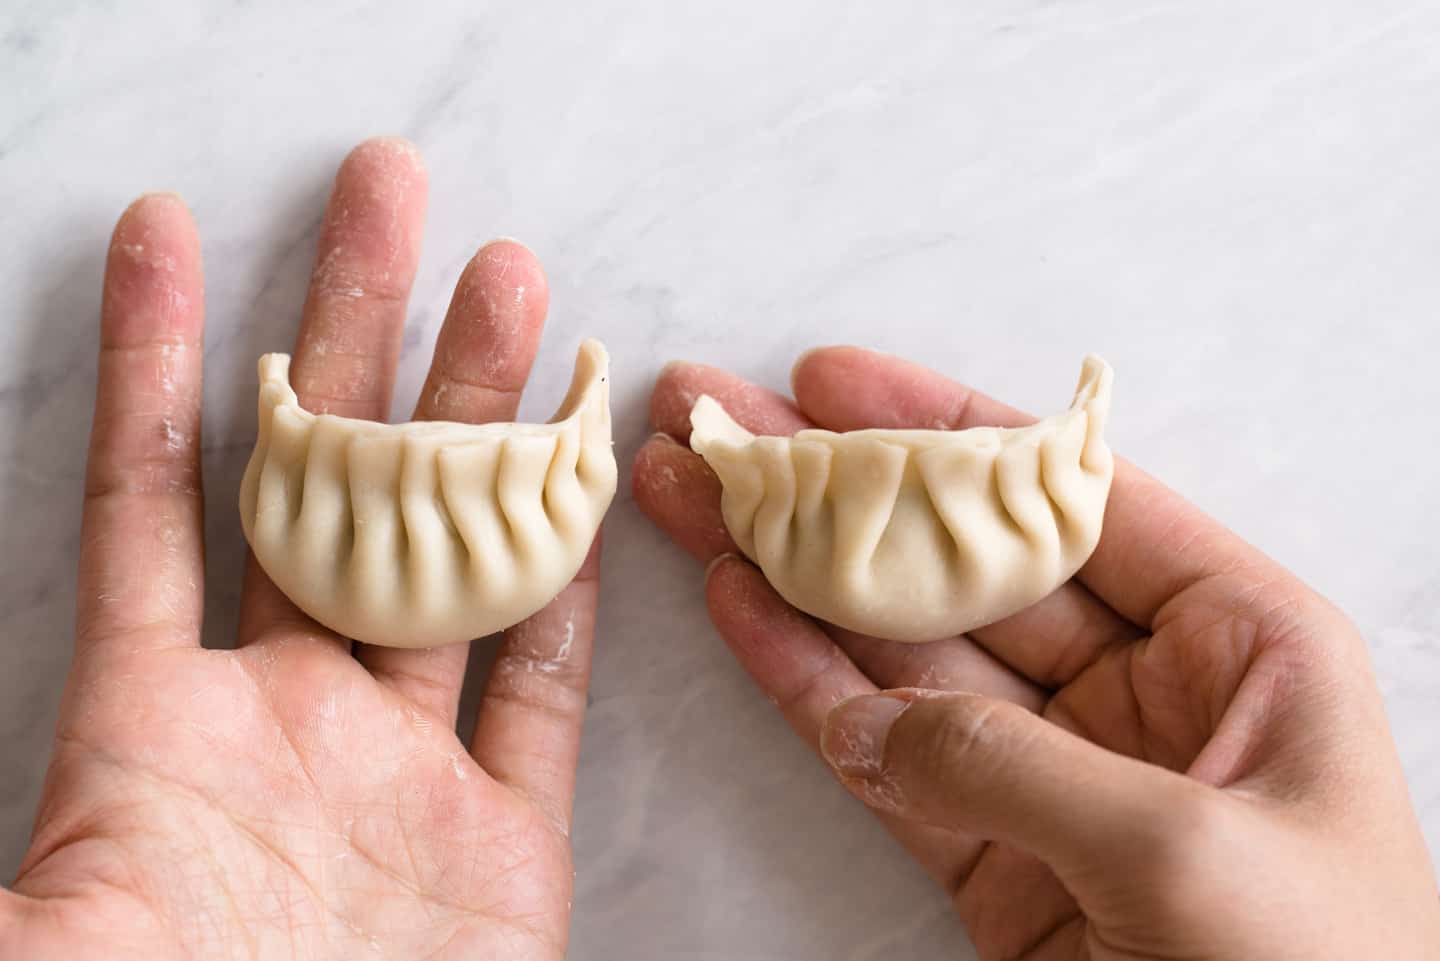
For these potstickers, I added about 1 tablespoon of filling in the center. The amount of filling you can fit into the dumplings depends on the size of your wrappers. I would start with adding about 2 teaspoons of filling in the center first and see if you can pleat the dumplings without the filling squishing out. If you can fit more, great!
I usually pleat potstickers with all the pleats going in one direction—towards the right. That’s how I learned pleating when I was a kid, and that’s what is natural to me.
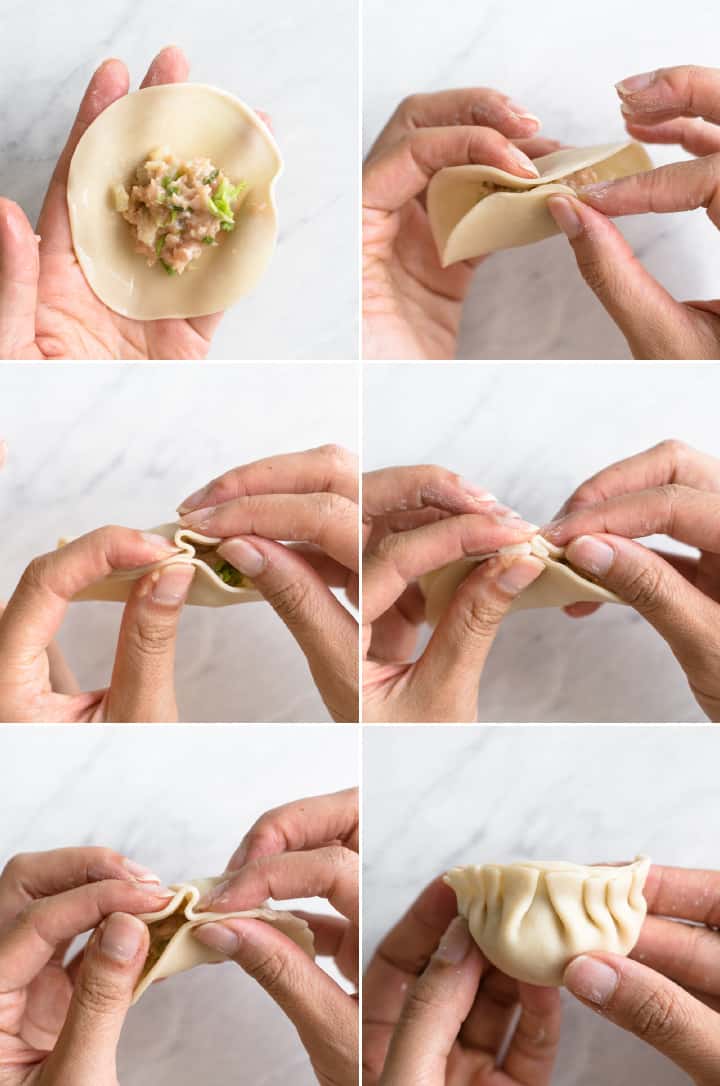
Another common way to pleat potstickers is to have pleats going towards the center. To do that, you start folding the dumpling like a taco and pinch the dumpling skin together, right at the center. For all the pleats at the right of the pinch point, you want to fold them going in the left direction. Then, for the pleats to the left of the pinch point, you’ll want to fold those pleats going in the right direction. I know this written explanation may sound confusing, so refer to the photos above.
As you can see from the photos, I use my index fingers to create the pleats and have them facing away from me. That feels natural to me. I’ve seen people fold dumplings with the pleats facing them, using their thumbs to create the pleats. There’s no right or wrong answer here, just do whatever is most comfortable to you.
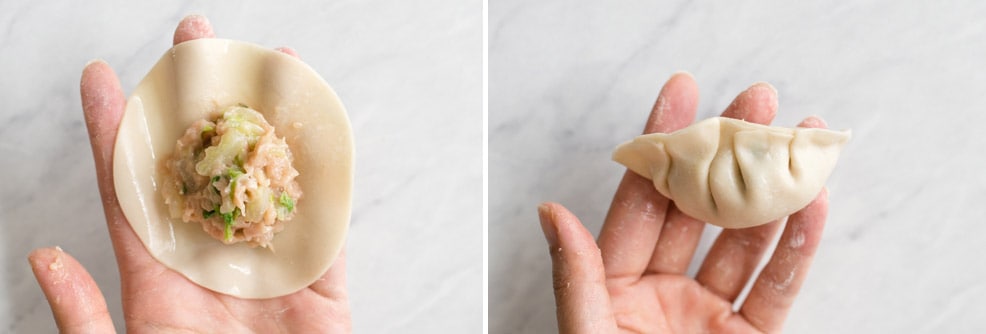
Mama Lin has a huge issue with the way I pleat my potstickers: she thinks I make far too many pleats. She prefers dumplings that have more filling. If you fill up your dumplings more, you won’t be able to make as many pleats. In the dumpling above, I managed to fit about 1 1/2 tablespoons of filling but was only to make 4 large pleats. Whether you make dumplings with more or less pleats is up to you!
ACHIEVING THE PERFECTLY CRISPY BOTTOM
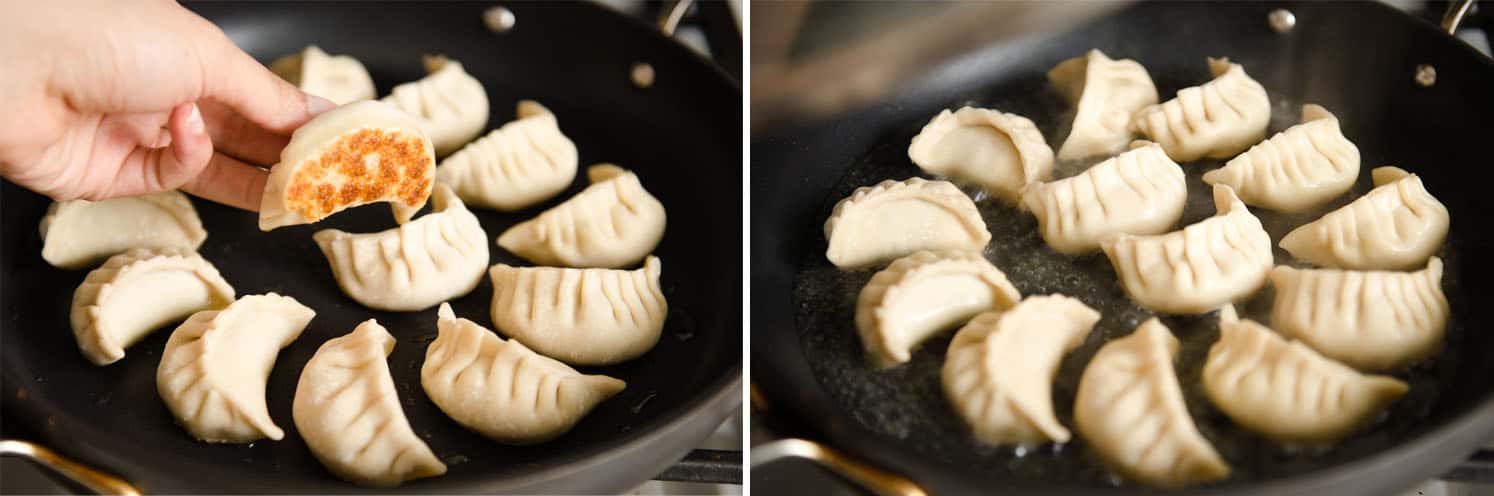
To cook potstickers, you need to pan fry and steam them at the same time. First, you pan fry the potstickers for a few minutes to get them brown on the bottom. Then, you pour water into the pan and cover it with a lid. This will help steam the dumplings so that the dumpling skin on top is fully cooked.
In order to get dumplings with extra crispy bottoms, the initial pan frying is crucial. I like to pan fry them on medium-high heat for about 2 to 3 minutes, until the dumplings are golden on the bottom. Then, I add the water. After cooking the dumplings for 6 to 7 minutes, I’ll remove the lid and pan fry the dumplings for another minute so that all the water evaporates.
You can also add a few teaspoons of flour to the water to create a dumpling lace (or dumpling skirt). This makes the bottoms of the dumplings even crispier. You can get the dumpling skirt recipe here.
MORE DUMPLING RECIPES
- Tofu Wontons with Yellow Curry Broth (a reader favorite!)
- Red Curry Tofu Dumplings (step-by-step photos of the braided pleat)
- Red Curry Wontons with Zucchini Noodles
- Curried Potato Fried Dumplings
- You can see all of my dumpling recipes here.
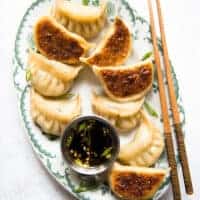
Chicken Potstickers
Ingredients
- 1 pound ground chicken
- 1 tablespoon canola or vegetable oil, plus more for frying dumplings
- 2 tablespoons minced ginger
- 2 tablespoons minced garlic
- 1 1/2 cups finely chopped Napa cabbage, white and green parts separated (see note)
- 1/3 cup chopped scallions
- 1/2 teaspoon kosher salt
- 2 tablespoons soy sauce
- 1 teaspoon sesame oil
- 32 to 40 round dumpling wrappers, around 3.5" diameter
- water for cooking the dumplings
Dipping Sauce
- 1/3 cup soy sauce
- 1/3 cup Zhenjiang vinegar, can sub with rice vinegar
- 1 stalk of scallions, sliced
- 1 clove garlic, sliced
- 1/2- inch piece of ginger, sliced
- 1/2 teaspoon sesame oil
Instructions
Prepare the Filling
- Add the ground chicken to a bowl and set it aside. Note that if you are buying 1 pound of ground chicken in a pre-packaged container, the meat doesn’t actually amount to 1 pound. The meat is usually only 14.5 to 15 ounces and the watery sac below the meat amounts to another pound. Don’t worry, that amount of meat will work just fine for the recipe.
- Heat 1 tablespoon of oil in a pan or skillet over medium heat. Add the ginger and garlic and cook for 15 to 30 seconds, stirring constantly. Add the chopped white portion of the cabbage and cook for 1 to 2 minutes minute. Add the green part of the cabbage, scallions, and salt and cook for another minute, until the greens star to wilt. Turn off the heat and let everything cool in the pan for about 5 to 8 minutes.
- Transfer the vegetables and spices to the bowl with the chicken. Add the soy sauce and sesame oil and stir to combine all the ingredients.
Prepare the Dumpling-Making Station
- Fill a small bowl with water for wrapping the dumplings. Grab a baking sheet for the finished dumplings and a towel to cover the dumplings to prevent them from drying out. Get a spoon for scooping the dumpling filling.
Make the Dumplings
- Dip the dumpling wrapper into the bowl of water. Rotate the wrapper so that 1/2 or 2/3 of the wrapper is wet, creating a wet border about 1/4 to 1/2-inch wide. If you are using fresh wrappers, you do not need to wet the border before using.
- Place the wrapper on your left hand, the wet side facing away from you. Place about 1 tablespoon of filling into the center of the wrapper (you may use more or less depending on the size of your dumpling wrapper).
- Pinch together the wrapper on the right. Using your index fingers, create a pleat. Seal the pleat towards the right. Continue creating and sealing the pleats to the right until you reach the end of the dumpling. Use the photos above or this video as a reference.
- If you want the dumpling pleats to go in two directions, towards the center, start folding the dumpling together like a taco. Pinch the wrapper together in the center (the left and right sides of the dumpling are not sealed. For the pleats to the right of this center pinch, you want to create pleats with your index fingers and seal them facing the left. For the pleats to the left of the center pinch, create and seal the pleats facing the right.
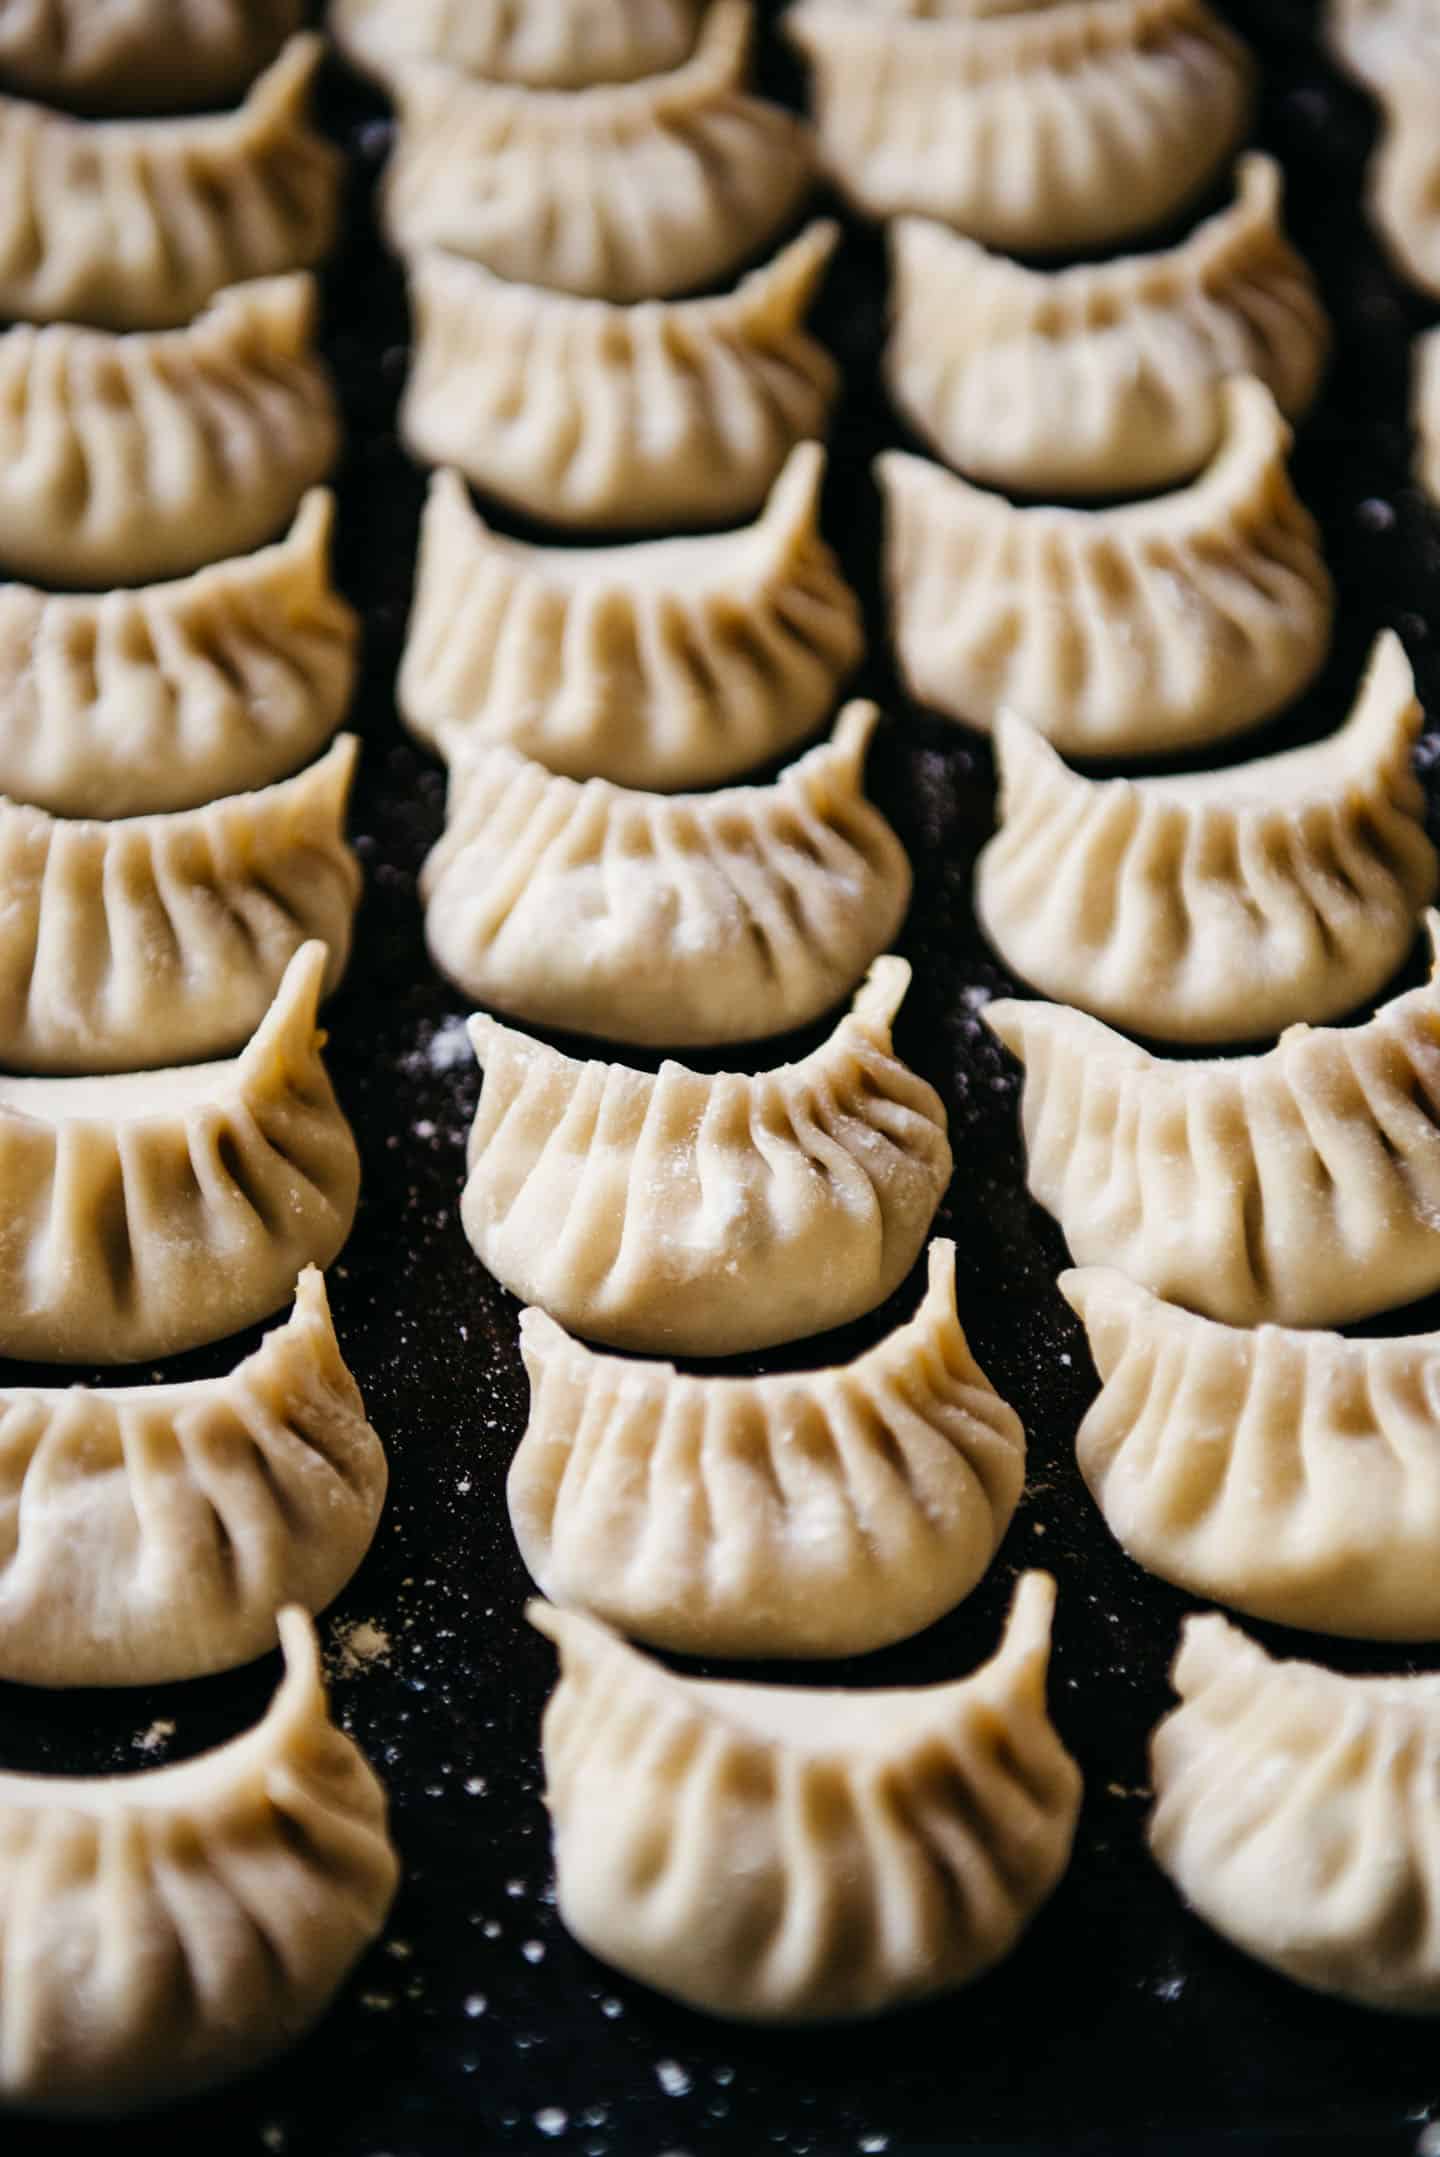
- Continue pleating dumplings until you are out of filling or dumpling skins. If you notice that the dumplings are starting to dry out, cover them with a dry towel.
Cook the Dumplings
- Heat a large nonstick pan with 1 1/2 tablespoons of oil over medium-high heat. I use a 12-inch nonstick pan. Arrange the dumplings over the pan. I usually cook about 15 to 17 dumplings at a time. Pan fry the dumplings for 2 to 3 minutes, until the bottoms are golden.
- Next, hold the pan lid with one hand and pour about 1/4 cup of water into the pan with your other hand. You want just enough to cover the bottom of the pan. When the water comes in contact with the hot oil, there will be a lot of splattering, so use the lid of the pan as a shield. Cover the pan, reduce the heat slightly to medium, and cook for 6 to 7 minutes.
- Uncover the pan and let the dumplings cook for another minute or two, until the water is evaporated. Transfer the cooked dumplings to a plate.
- Repeat this entire cooking process if you want to cook the remaining dumplings. If you want to cook the dumplings later, freeze them.
Serve the Dumplings
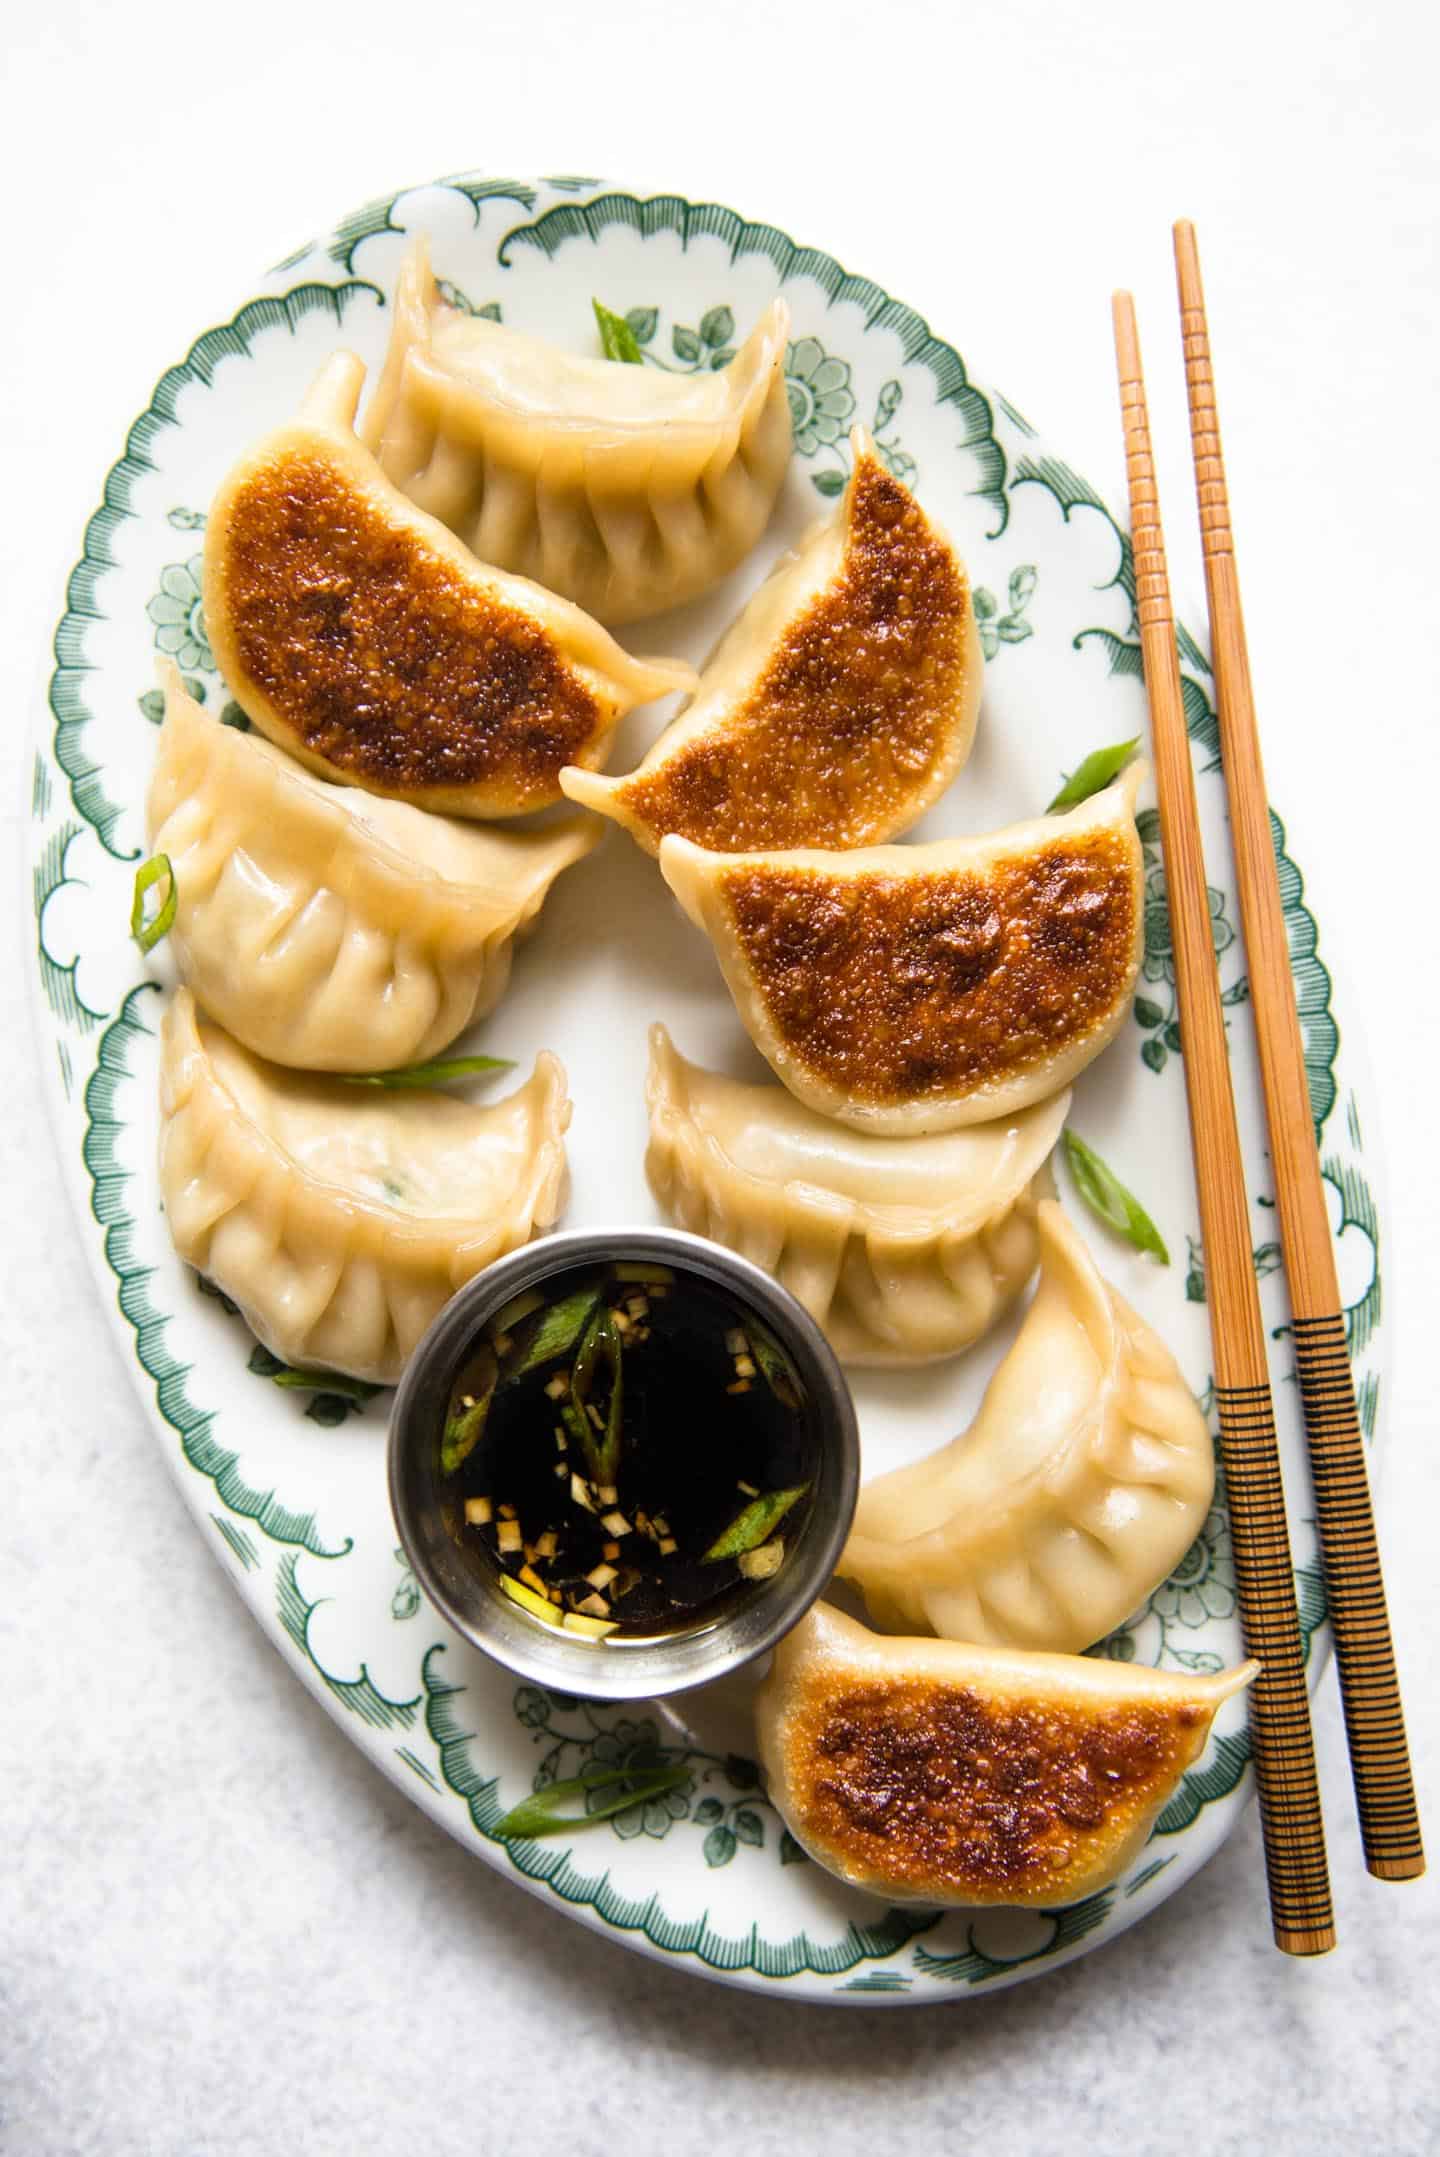
- Mix all the dipping sauce ingredients together. I like preparing the sauce 30 minutes before serving. This allows the sauce to fully absorb the herbs and spices in it.
- Serve the potstickers with the dipping sauce. These potstickers also go very well with my sweet chili sauce.


Nicole says
These look so good! Your post is so detailed already, but I have a small tip to add for anyone using stainless steel pans. After the pan fry and before I add water, I like to shift the dumplings around with a spatula. I’ve found this extra step completely prevents the dumplings from sticking to the stainless steel. Hope this helps!
Lisa Lin says
Nicole, thanks for adding this note!! I don’t usually pan fry them on stainless steel, so this is very helpful for me!
sheenam | thetwincookingproject.net says
we LOVE potstickers. These chicken potstickers look amazing.
Lisa Lin says
Thank you!
Twink says
Do I need to defrost the frozen dumpling before cooking or just cook them frozen as the the instructions for cooking fresh dumplings? Thank yiu
Lisa Lin says
Just cook them frozen! It will take an extra minute or two for the initial pan frying (before you pour water into the pan and cover it), but that’s it.
Elaine says
Love this recipe and the sauce!
Lisa Lin says
Thank you!
Saachi Kuwayama says
These look amazing! Quick question: where do you usually find the pot sticker wrappers? I went to two asian grocery stores yesterday and couldn’t find them!
Thanks! Looking forward to trying this recipe 🙂
Lisa Lin says
They are usually located in the refrigerated sections (often near the tofu). Sometimes, they’ll be in the frozen section, too. I also have a recipe for dumpling wrappers on my blog!
Viva says
I was making this kind of dumpling for the first time ever – so I was quite nervous about the pleating. It turned out better than expected, especially because the instructions are clear, watching the video on loop really helped. The filling is really tasty, the ginger makes all the difference and I think the cabbage is a nice touch. Really a super simple recipe, will be making these again for sure 🙂
Lisa Lin says
Viva, thank you so much for making this!! This is a good reminder that I need to make more YouTube videos so that people can use it as a reference for pleating.
Ethan Williamson says
Do you happen to have the nutritional values for these?
Madhavi Rajeev says
Hi, made these potstickers today. Used your recipe for the dumpling wrappers too. They turned out very well. Used your tips on freezing the dumplings too. Thank you for the detailed post. 🙂
Sabrina says
I really love dumplings and especially this recipe. It was very easy following the step by step instruction. I only replaced the cabbage with some shredded carrots. I will try more of her recipe.
Mika says
I just made these with ground turkey instead of chicken, so good! How should I store any leftover COOKED dumplings? Freeze or fridge?
Lisa Lin says
I usually store cooked dumplings in the fridge and I try to eat them within several days!
Jessica says
I made these tonight and they were soooo delicious! Best pot stickers recipe ever!
Lisa Lin says
Thank you, Jessica!
Sam says
Oh thank god! I used this recipe ages ago for my first ever batch of Potstickers (including making the wrappers from scratch) and I wanted to make them again but couldn’t find it! I’m so pleased I found your site again, and I will certainly be bookmarking it this time! Thanks for a great recipe x
Lisa Lin says
Sam, thank you so much for cooking my recipe again! Glad you found it!
Hillary says
I made these tonight and they were so good! I’m a complete newbie to dumpling making, but between the instructions and the video I was able to make delicious chicken potstickers that eventually started to look like the real thing as I worked through my wrappers (using the homemade wrapper recipe too!) I did run out of wrappers, but I added a little breadcrumbs to the meat mixture and we had chicken meatballs with the dumplings for dinner. And don’t forget the sauce! Just heavenly!
Emma says
What recipe did you use for the wrappers?
Cris says
I made these for the first time yesterday. The entire family loved them! Thank you for the recipe. Definitely making again in the future!
Jacob @ FlavorThyme says
The sear on those potstickers looks absolutely perfect. Plus, it looks so healthy and delicious.
Jill Rose says
Hello!! These look amazing and I would love to make then for my boyfriend. I have a question: If you wanted to simply steam them rather than pan sear them, would you be able to? And how long would you steam them for?
Aisha says
Hey! I tried your recipe for the wrappers and it turned out perfect. I only had one issue. I chose to steam them like dimsums. I applied oil to the steamer that I placed them on since it was a steel one. But after steamed and even cooled, the bottoms were tearing off. What could be the reason for this? Thank you for this recipe
Lisa Lin says
I think it’s because the oil added too much moisture. Next time, try using parchment paper or pieces of cabbage to line the steamer.
Cali says
I was wondering if you cook the chicken first, like the vegetables are cooked first, or put raw ground chicken inside the wrappers and then cook?
Lisa Lin says
This is made with raw chicken. Check out the photos in the post.
yam says
is it necessary to add water at the end of frying them
Lisa Lin says
No, it’s not.
Fiona says
Would you use breast or thigh for the minced chicken
Lisa Lin says
Thigh would be better.
Joann says
Can I freeze already cooked potstickers for about 2 weeks and then heat them up in the oven . I would like to serve these for thanksgiving as appetizers prior to sitting down for the meal. Too many thngs to do , if I then have to cook them. I just want to heat them up.
Lisa Lin says
I haven’t tried that before, and I’m not sure if the texture of the dough would be nice if they’re reheated in the oven. Do you have a steamer set-up? I think steamed dumplings might be better reheated. You don’t need to cook them in advance, just add a 2 minutes extra time to the steaming.
Jessica says
My family loves chicken dumplings. We make them twice a month if we have enough time, or once a month at the very least. Thank you for sharing this recipe; we’ll try it this weekend! I’ll keep you updated on the outcome.
Max says
My kids will definitely love this!
jenny says
my kids are in love with these dumplings that crunch on the outer side and yum filling inside made it irresistible
carol says
it took me so much time make dumplings but the taste of these are worth the effort
Erika English says
This was my first time making potstickers but your detailed step by step instructions and photos really helped to make the process easier. Thank you! They were delicous and my family loved them.
Nancy says
My chicken filling was a little dry. Any thoughts?
Lisa Lin says
Ground chicken can be a bit lean sometimes, so add some oil to the meat next time.
Curt Devoir says
Hi, a little confused. Are you putting the raw ground chicken in or cooking it first?
Lisa Lin says
Use raw ground chicken. DO NOT cook it first because your filling will be really dry.
Lia southon says
Do I need to fry the chicken first? Thank you
Lisa Lin says
No, do not cook the chicken. Otherwise, the filling will be too try when you cook the potstickers.
CHARLETNEWTON says
SUPER INSPIRATIONAL, FULL OF WORTHINESS, A GREAT WAY TO SHOW A PERSON THANKFULNESS, ONE INCREDIBLE RECIPE, I HAVE HAD SOME DELICIOUS CHICKEN POTSTICKERS BEFORE, BUT THIS RECIPE IS JUST A PIECE OF HEAVEN ON EARTH.
Josie M. Roper says
Maybe this is a dumb question but is the ground chicken cooked before you put it in the wrappers or raw?
Lisa Lin says
It is raw. Don’t cook the meat before wrapping, as it will be incredibly dry once cooked.
ACH says
This is an amazing recipe and was eaten by my son and husband and they asked for more.
I modified it. I used less ginger and garlic. I used another vegetable that looks like a spaceship rather than cabbage and onion rather than scallions.
I used a food processor to grind a couple chicken breasts. That worked better than a package ground meat from the store. I ground my vegetables I. A food processor too and directly put them into the frying pan to cook them.
It is important to let the wrapper dough rest or at least an hour and cover it with a damp cloth. That helps the dough be more pliable.
To boil dumplings:
Bring a pot of water to a boil. Add dumplings. Bring to a boil again. Add a cup of cold water. Bring to a boil a third time. When to dumplings float, they are cooked.
April says
Great flavor. Easy instructions. Well worth the effort. Glad we were two chefs stuffing. Thanks! I wanted to eat the whole batch.
Karla says
I really enjoyed making these dumplings and the recipe was so easy to follow and understand!This was my first time ever making dumplings and this recipe made it so easy to do! They came out delicious and froze so beautifully, will definitely be making more batches for the freezer for those lazy days. I couldn’t find Napa cabbage so I had to substitute with chopped coleslaw mix, and it still tasted really nice.
Lisa Lin says
Karla, thank you SO MUCH for making this and for leaving a review! So glad you enjoyed them!