Thank you to Bob’s Red Mill for sponsoring this post!
If you’ve ever ordered a noodle dish from a Chinese restaurant, chances are you will have eaten some type of Chinese egg noodle. Made of wheat and eggs, Chinese egg noodles come in several common cuts: (1) very thin and narrowly cut noodles that are used in Hong Kong or Cantonese-style wonton noodle soup; (2) slightly thicker and wider cut wonton noodles; and (3) an even thicker but narrowly cut noodle commonly used for chow mein or other stir-fried noodle dishes.
Unlike the plain noodles that are made of flour and water, egg noodles have a more springy texture when you chew them. It is the protein in the eggs that contribute to the springy texture. Moreover, egg noodles are good for stir fries as they don’t get mushy easily.
Mama Lin’s neighbor makes great Chinese-style egg noodles. Every few weeks, the neighbor will bring a batch of freshly made egg noodles to share with my mom. I got a chance to taste the egg noodles the last time I visited Mama Lin and I thought they were delicious. So I asked my mom if she could get the recipe from her neighbor to share with me.
In typical Asian mother fashion, the recipe was incredibly pared down: nothing more than a few sentences with the ingredients and how the dough was formed. After testing the recipe several times, I have developed a more streamlined recipe with detailed tips on how to make these Chinese egg noodles at home.
HOW TO MAKE CHINESE EGG NOODLES
INGREDIENTS
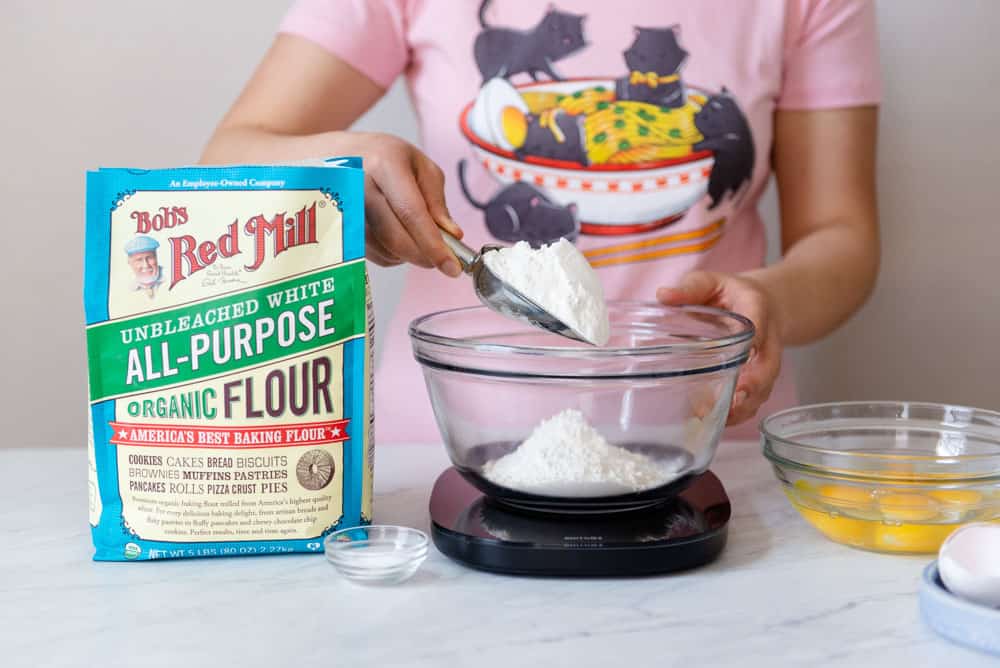
This Chinese egg noodles recipe uses 4 ingredients: all-purpose flour, eggs, salt, and water.
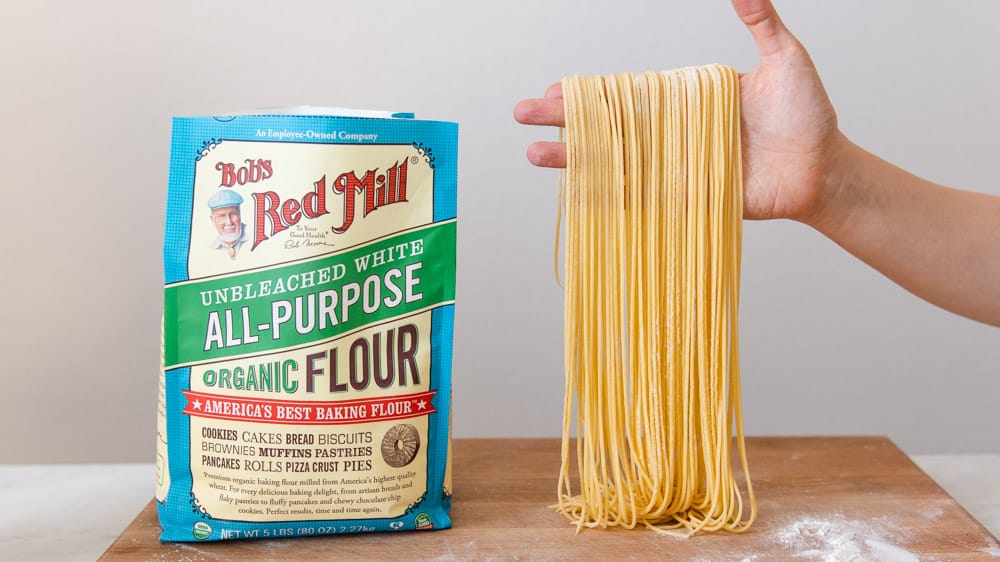
I am using Bob’s Red Mill’s Organic Unbleached White All-Purpose Flour for the noodles. I love using Bob’s Red Mill’s all-purpose flour because it’s incredibly versatile. I have used it to make Japanese milk bread, scallion pancakes, scallion bread, and dumpling wrappers. Because this recipe uses a lot of eggs, you don’t need flour with higher protein content (i.e., bread flour) to give the noodles its springy texture.
Based on the recipe that my mom sent me, her neighbor didn’t seem to add any water for the dough. However, when I was testing the recipe, I found the dough incredibly dry without the additional water. You don’t need much water for the recipe–just a splash will be sufficient. I’ll explain how to add the water in greater detail below.
MAKE THE DOUGH
You can mix the ingredients for the dough with a stand mixer or by hand. Even when I use the stand mixer, however, I like to finish kneading the dough by hand because it is on the dry side. As a result, the dough won’t come together as easily on its own in the stand mixer.
STAND MIXER METHOD
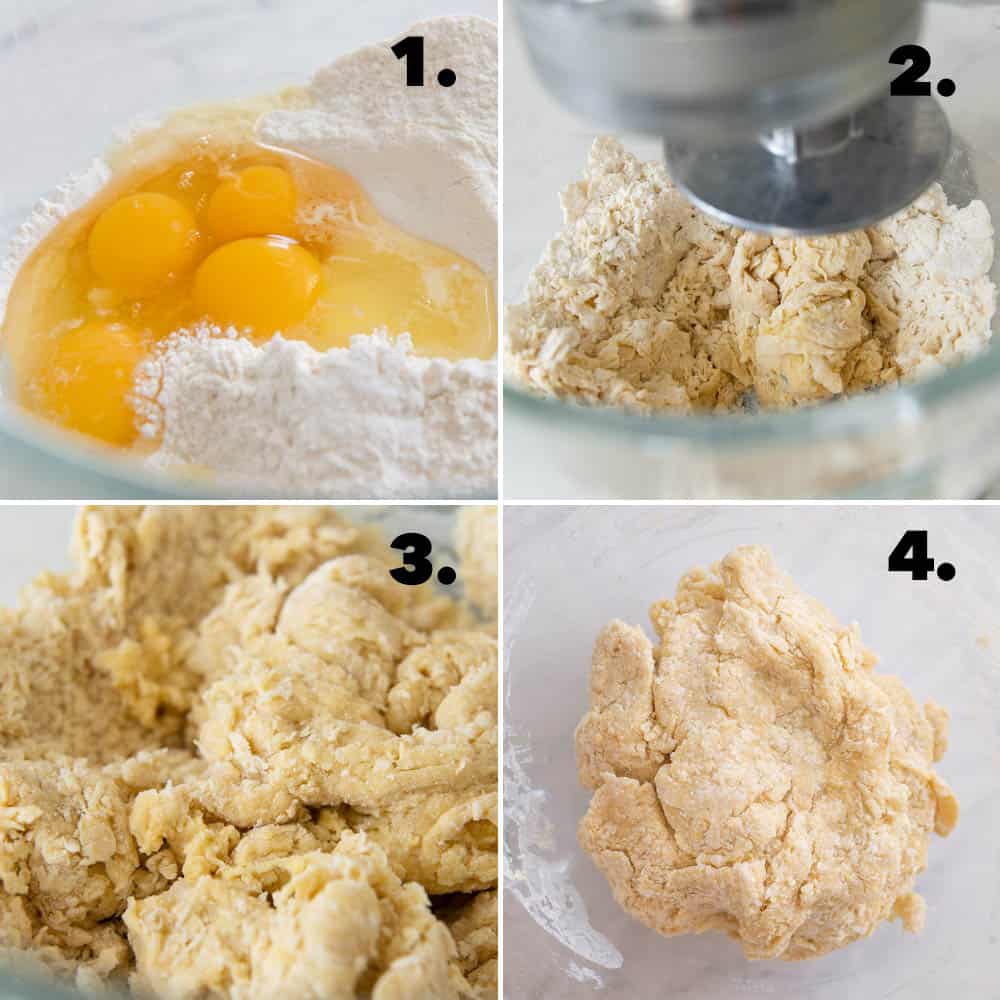
If you are using a stand mixer, add the flour, salt, and eggs to the bowl of the stand mixer. Fit the mixer with the dough hook and mix the ingredients together at low speed. You will need to scrape down the sides of the bowl occasionally as the flour likes to gather at the sides of the bowl. Once the eggs and flour are incorporated, the dough will still look pretty dry (see photo 2 in the collage above).
Drizzle water over the dry bits of dough and mix the dough again on low for another 1 to 2 minutes (photo 3 in the collage above depicts how the dough should look).
Using your hands, gather up and squeeze all the small bits of dough into a big lump. This may take 2 or 3 minutes. If possible, resist the urge to add more water. You don’t want the dough to be too hydrated because the dough will stretch out very easily after you cut the dough into noodles. If I were making Chinese-style hand-pulled noodles (la mian, 拉麵), the stretch quality would be a good thing. However, that’s not what we’re going for in this recipe.
If you still have a lot of dry clumps of flour after several minutes of gathering the dough together, add another teaspoon or so of water to the dry bits of flour and continue gathering the dough.
MIXING DOUGH BY HAND
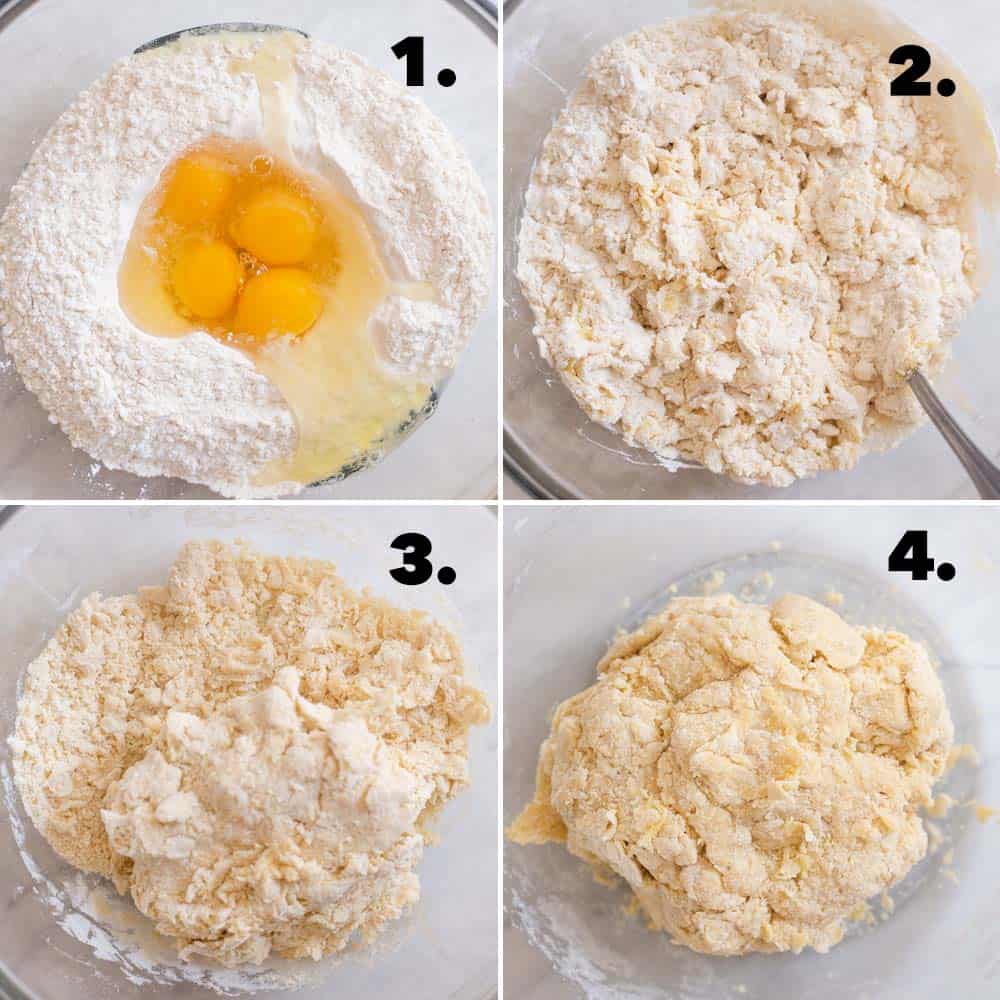
If you are making the dough by hand, add the flour and salt to a large mixing bowl. Using a fork, create a small well in the center of the bowl. Crack the eggs into the well and whisk the eggs together. Then, start using the fork to mix the flour with the eggs. Continue doing this for about 1 minute (see photo 2 above for reference).
Brush the large shaggy bits of dough on the top of the bowl aside until you uncover the dry bits of dough (see photo 3 above). Drizzle the water here and use your fork to mix the dough and water together.
Now, use your hands to gather and squeeze all the small bits of dough into a big lump (see photo 4 above). Like I mentioned above, this can take 2 or 3 minutes. Add a tiny drizzle of water only if there’s a lot of dry flour after a few minutes.
REST, KNEAD, REST
Whether you’ve formed the dough with a mixer or by hand, cover the bowl with a damp towel or silicone lid. Let the dough rest for 30 minutes. This will give time for the dough to hydrate more before you start kneading it.
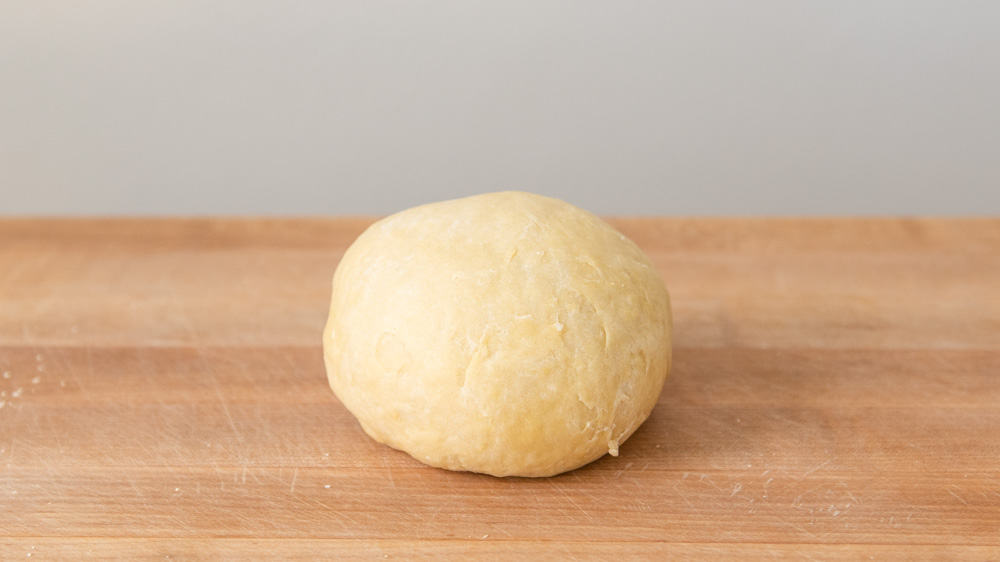
Take the ball of dough out of the bowl and knead it on a surface for 6 to 7 minutes. You shouldn’t need to flour a work surface for this as the dough is pretty dry. After you knead the dough, the surface should feel much smoother than when you began.
Place the ball of dough back into the bowl, cover it, and let it rest for another 15 to 20 minutes. This will allow the gluten to relax before you make the noodles.
CUT DOUGH INTO NOODLES
I highly recommend using a pasta machine or a pasta attachment with a stand mixer to cut the noodles. Because the dough is so stiff, it is difficult to roll out the dough into a thin sheet. I tried to do that during my test batches, and I couldn’t get the dough to be any thinner than about 1/8-inch thick.
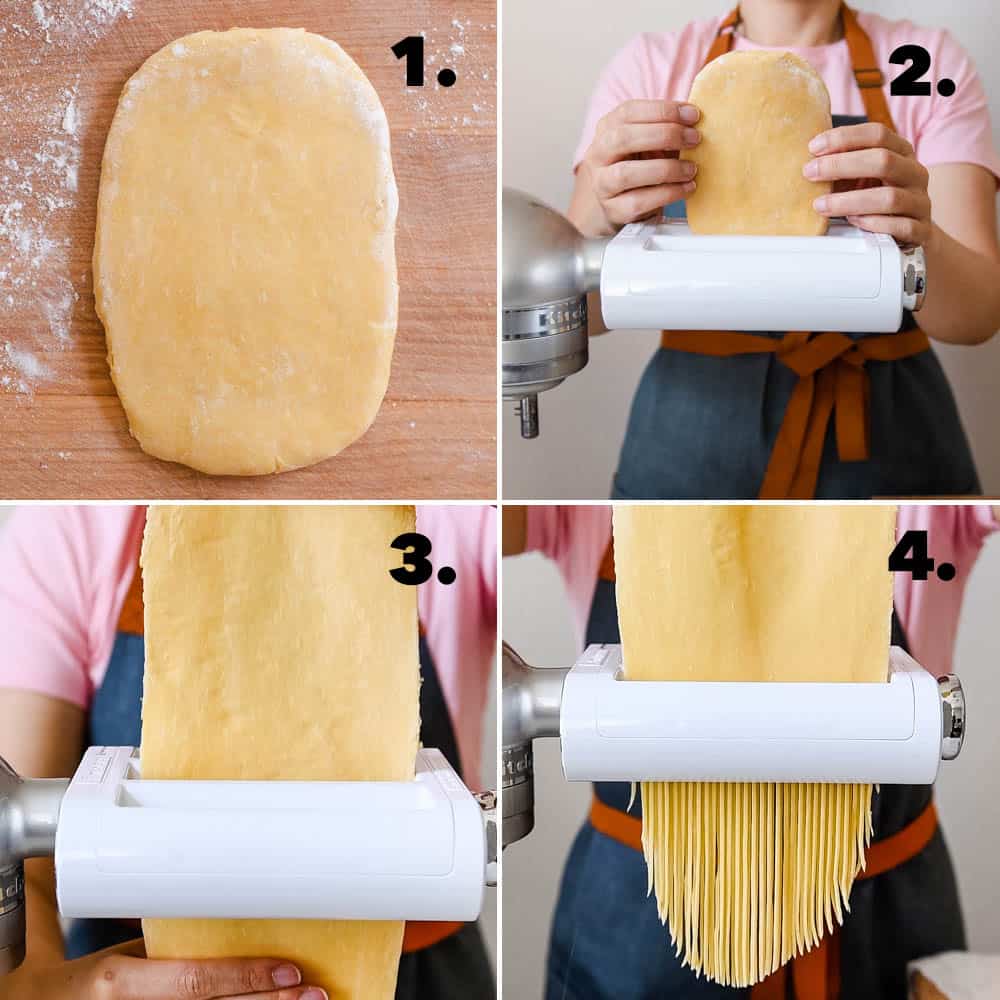
Divide the dough into 4 equal pieces. Lightly flour your work surface. Shape each piece of dough into an oval shape and roll them into an oval disc of about 1/4 to 1/2 inch thick.
Turn your pasta machine to the thickest setting and feed the dough through the pasta machine twice. Then, turn the dial on the pasta machine to the next setting (which should be thinner) and roll out the pasta once. Continue turning the dial to the next setting and rolling out the sheet of noodle until you get a pretty thin sheet of dough. If you hold the sheet of pasta to the light, you can start to see light going through it. I usually roll the dough out to the 6 or 7 setting in my pasta machine.
Depending on your preference, cut the sheet of noodles with the thin or thick pasta cutter.
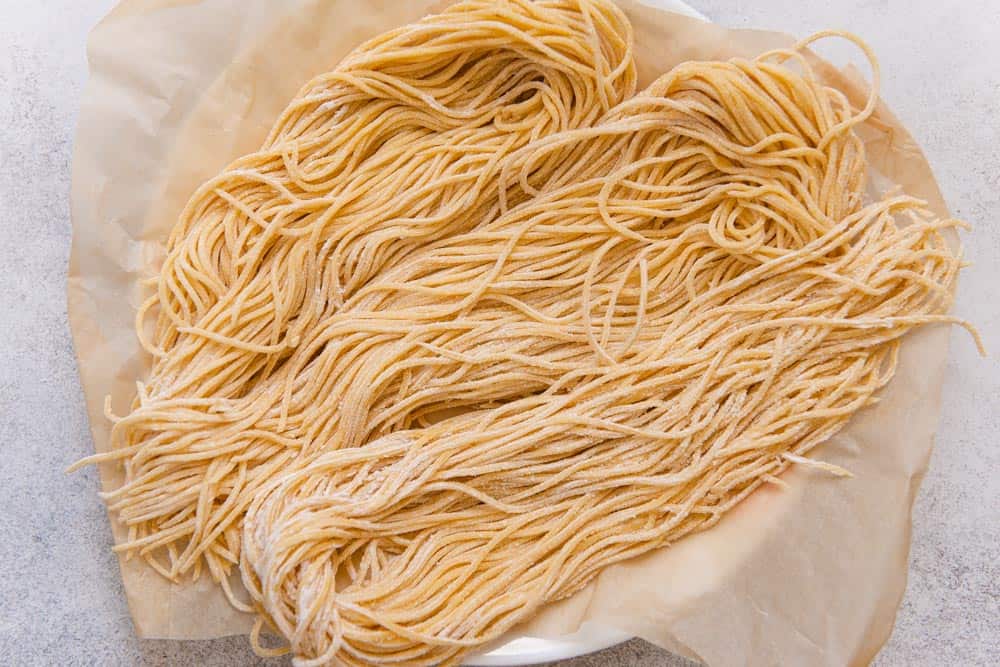
Transfer the noodles to your work surface and generously sprinkle flour or starch (like the potato starch photographed above) over the noodles. This will keep the noodles from sticking together. Plain flour will work but starch will be even better. Because the noodles aren’t made with starch, the starch won’t get absorbed into the noodles as easily.
COOK THE EGG NOODLES
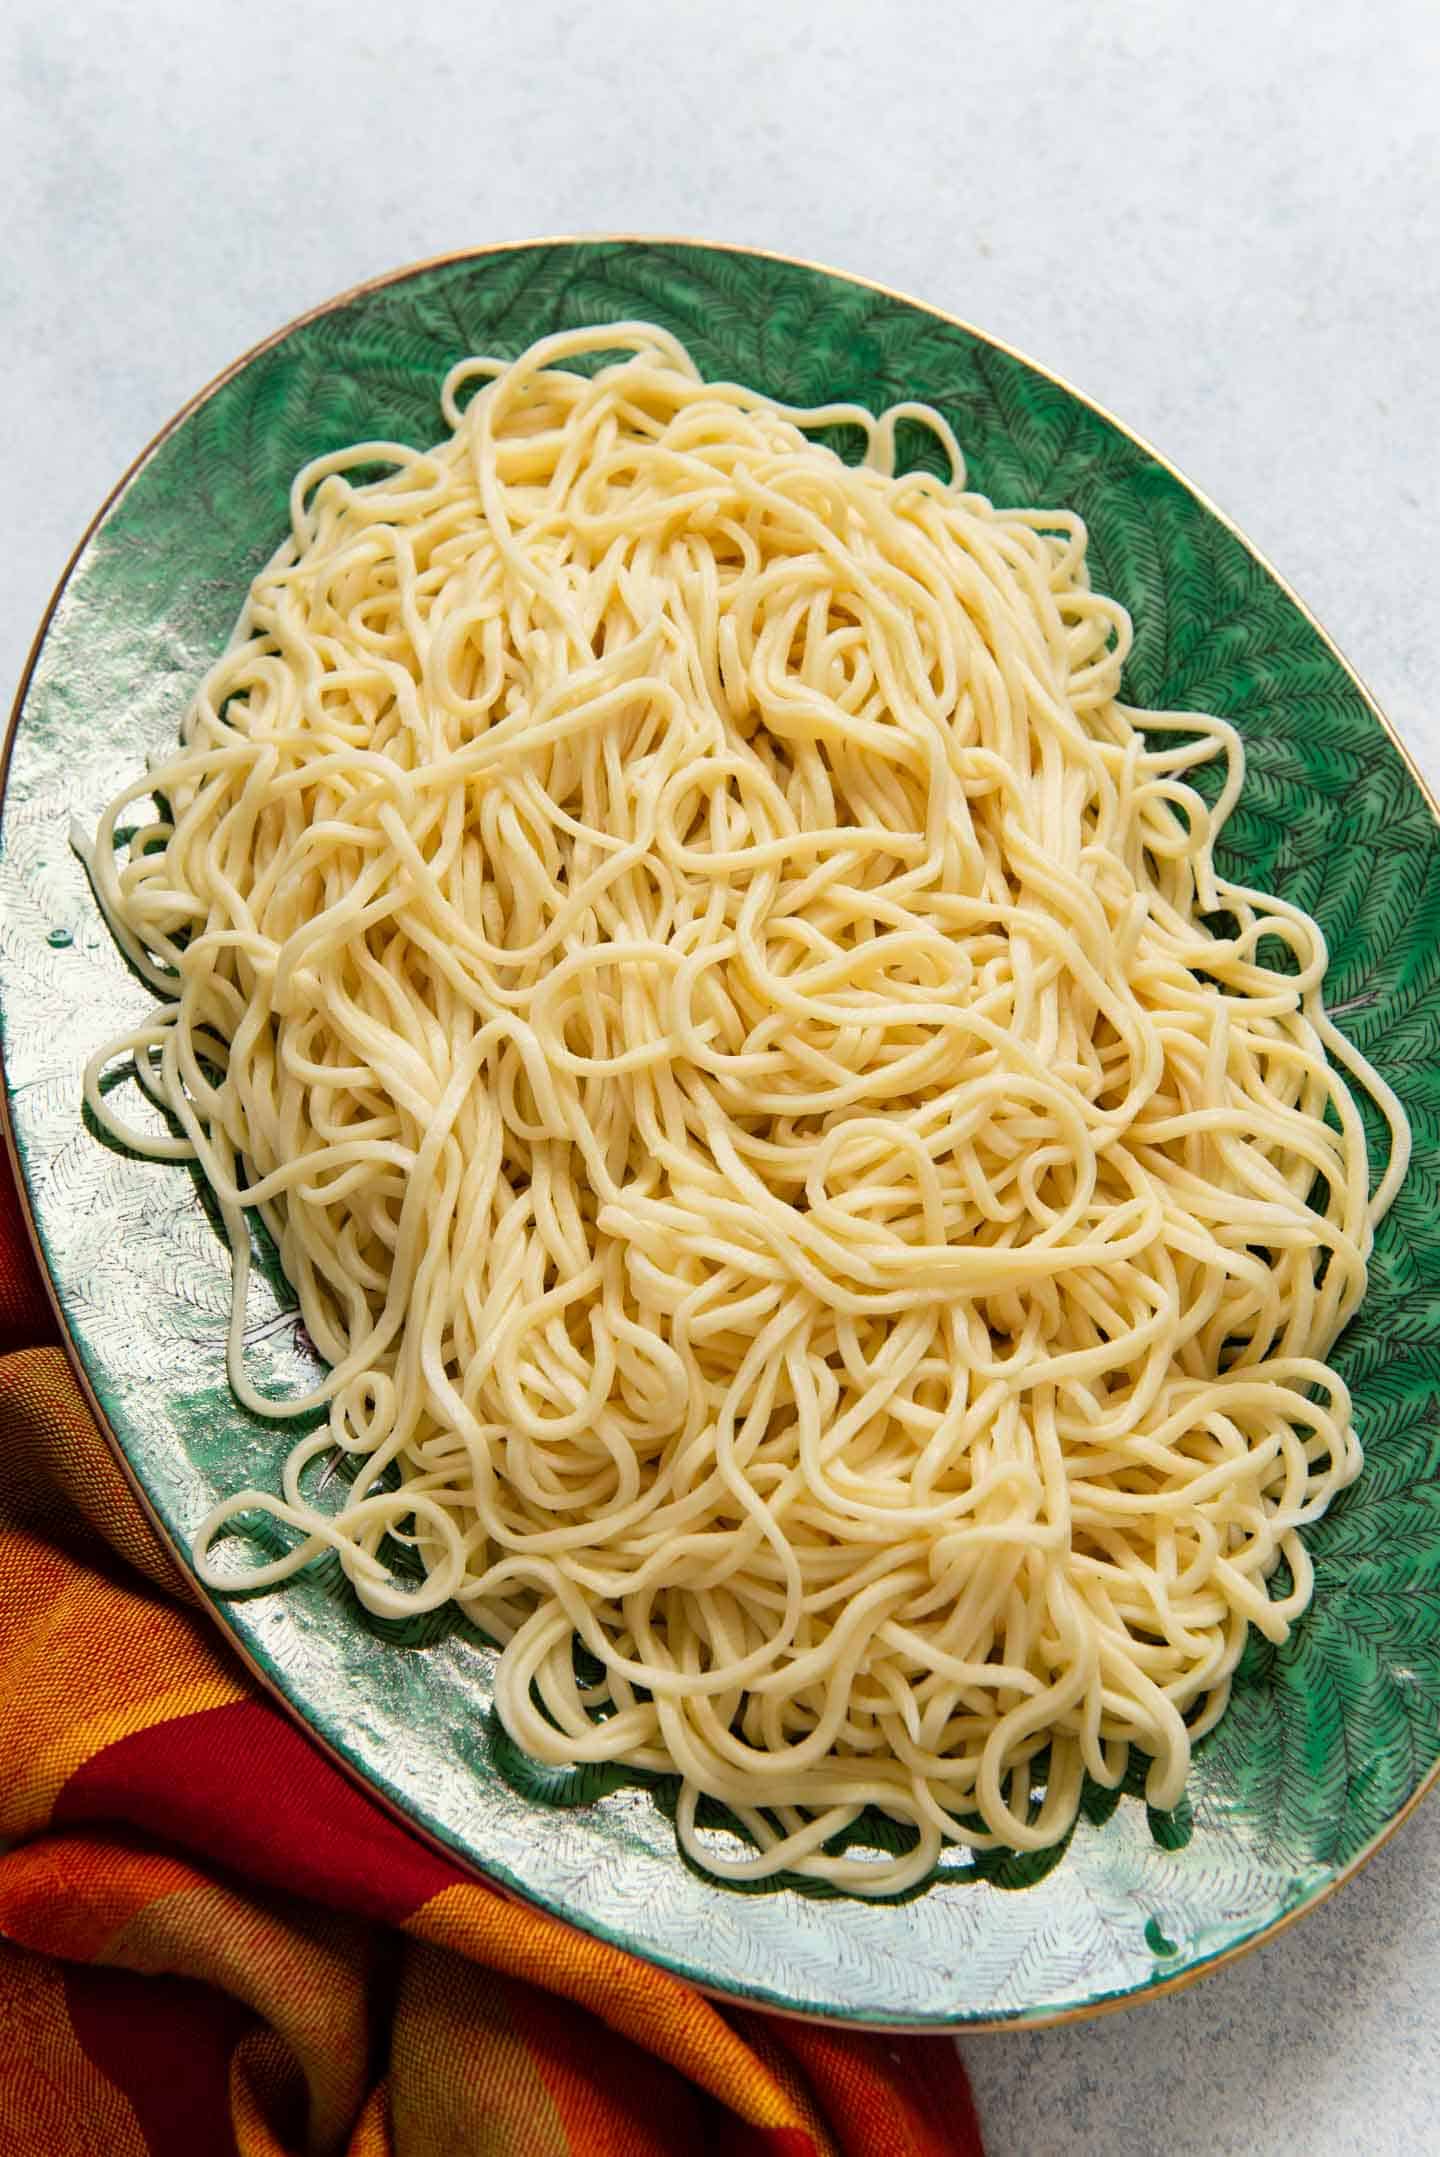
Bring a small pot of water to boil. Add half of the noodles to the boiling water. Use a wooden spoon or large chopsticks to stir the noodles for about 15 to 30 seconds to keep the noodles from sticking together. Then, cook for 2 to 3 minutes, until the water is at a rolling boil again and the noodles are floating at the top. Drain the noodles. If you are not using the noodles immediately, rinse them with cold water and drain them.
The cooking time for the noodles depends on the thickness of the noodles and the amount of noodles you’re trying to cook at once. If you are cooking thicker or wider noodles, you’ll probably need an extra 1 to 2 minutes of cooking time. If you are cooking only one bundle of thinly cut noodles at a time, they’ll likely only need 2 minutes of cooking.
CAN YOU MAKE THE DOUGH OR EGG NOODLES AHEAD?
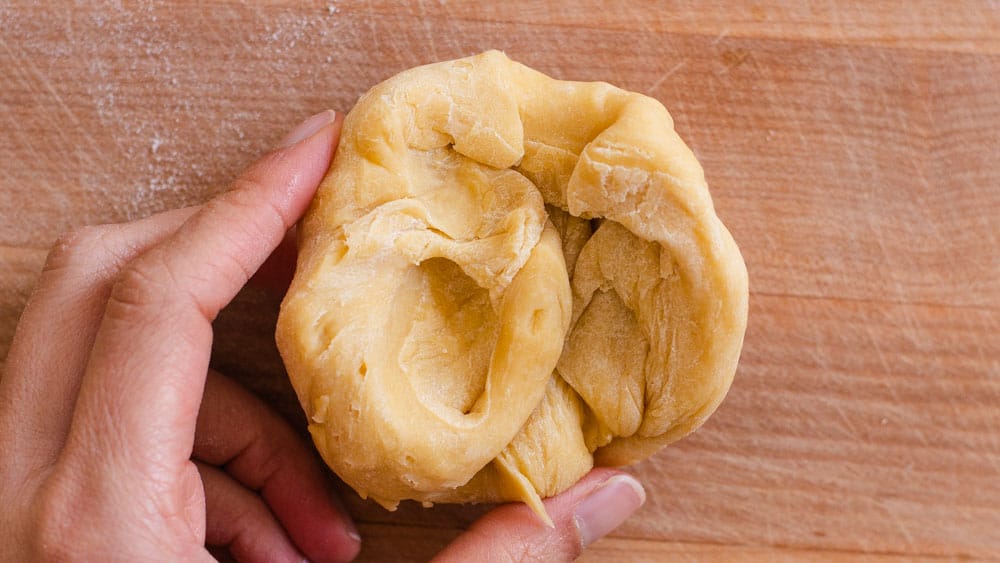
Yes! If you want to refrigerate the dough overnight to roll out the noodles the next day, wrap the ball of dough in plastic before transferring it to a container to refrigerate. The next day, divide the dough into 4 pieces and roll them out like you would with fresh dough. If the edges of the smaller pieces of dough are feeling crusty, massage the dough with your fingers, and work the crusty bits into the center of the piece before shaping it into an oval and rolling it out (see photo below).
You can also refrigerate the cut noodles overnight. Make sure to flour the noodles generously before transferring them to a container to refrigerate. Use the noodles by the next day as they’ll start to change color after that.
CAN YOU FREEZE THE EGG NOODLES?
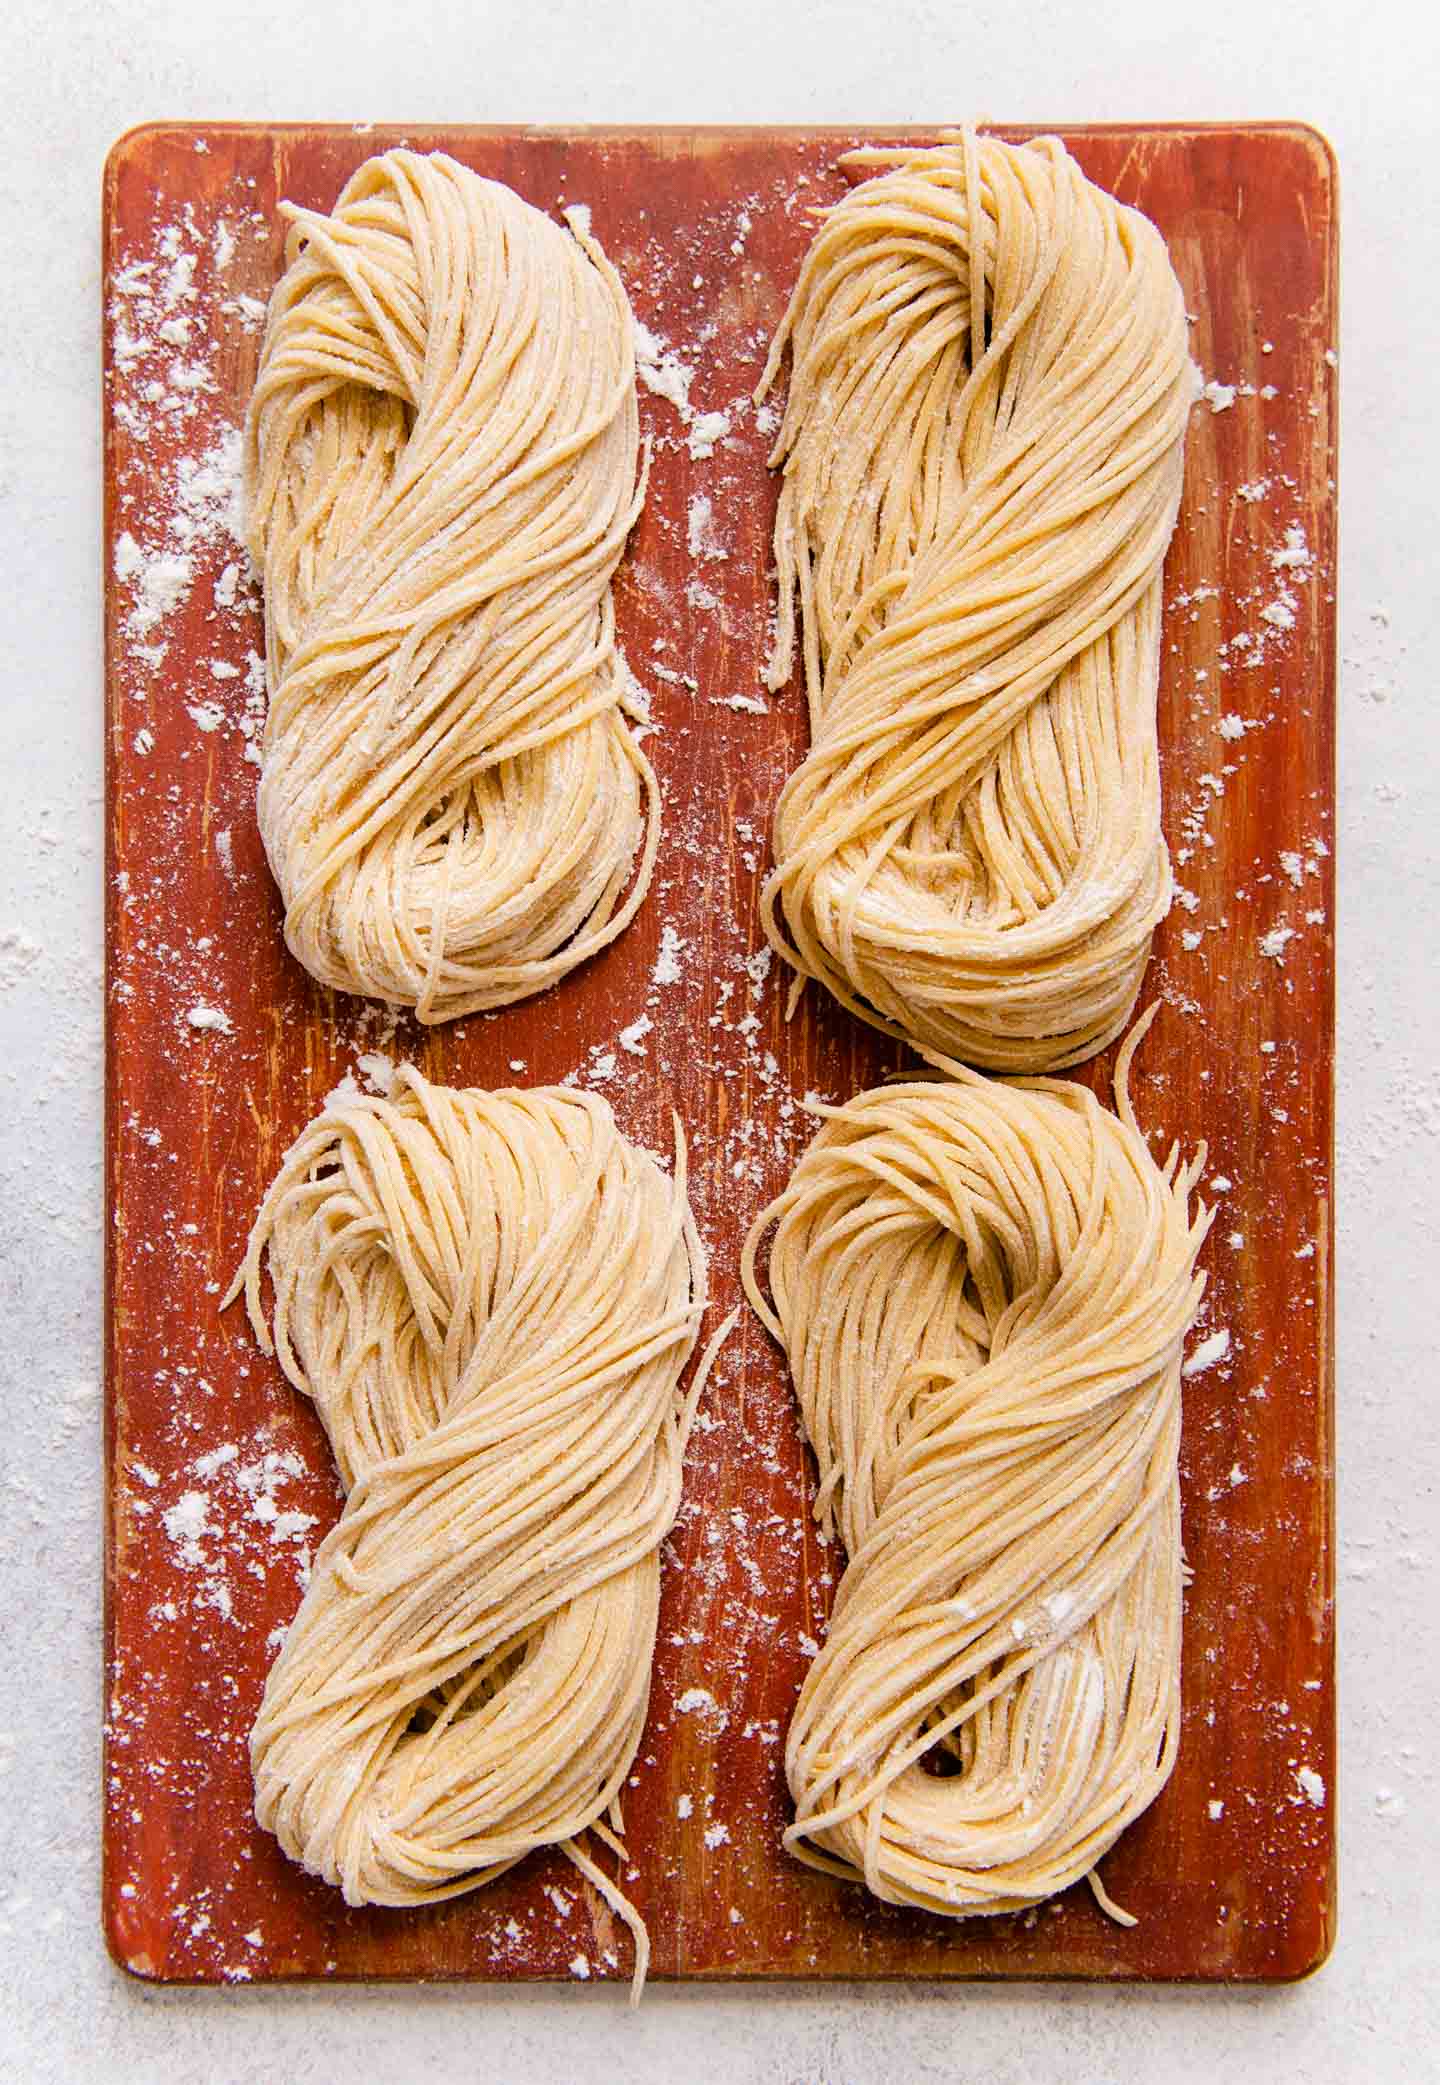
Yes! Line a large plate or small baking sheet with parchment paper. Dust the noodles generously with flour or starch and place the noodles on the lined plate or baking sheet. When freezing my noodles, I like shaping the noodles in fairly loose bundles like you see in the photo above. The noodles will be easier to cook like this.
When you are ready to cook the noodles, bring a pot of water to boil and add the frozen noodles to the pot. Cook until the noodles float to the top of the pot with rolling boiling water. This should be 30 seconds to 90 seconds longer than when you cook with fresh noodles.
RECIPES TO USE WITH EGG NOODLES
- Chicken Wonton Noodles
- Vegetable Chow Mein
- Spicy Sambal Noodles (The original recipe uses rice noodles, but these egg noodles will work well too.)
- 30-Minute Chicken Chow Mein
Simple Chinese Egg Noodles
Ingredients
- 400 g all-purpose flour, 3 1/3 cups using the spoon and sweep method
- 1 teaspoon kosher salt, 3/4 teaspoon table salt
- 4 large eggs
- 4 teaspoons water
- flour or potato starch for dusting
Instructions
Make Dough – Stand Mixer Method
- Add the flour, salt, and eggs to the bowl of the stand mixer. Fit the mixer with the dough hook and mix the ingredients on low for about 30 seconds to 1 minute. Turn off the mixer. At this point, you’ll probably see a lot of flour along the edge of the bowl that’s not getting mixed into the eggs. Using a spatula or scraper, loosen the flour along the sides of the bowl.
- Mix the dough on low again, until the eggs have been incorporated into the flour. At this point, your dough will look very crumbly with a lot of tiny, dry clumps of dough around the edges and the bottom of the bowl. Drizzle the water over the dry clumps. Mix the dough on low speed for another 2 minutes and turn off the mixer.
- Using your hands, gather up and squeeze all the small bits of dough into a big lump. This may take 2 or 3 minutes. If possible resist the urge to add more water. If you still have a lot of dry clumps of flour after several minutes of gathering the dough together, add another teaspoon of water to the dough. Work the water into the dough.
Making Dough By Hand
- In a large mixing bowl, add the flour and salt. Using a fork, create a small well in the center of the bowl. Crack 4 eggs into the well and whisk the eggs together. Then, use the fork to mix the flour with the eggs. Continue doing this for about 1 minute, until all the egg has been incorporated into the flour.
- Brush the shaggy bits of dough on the top of the bowl aside. You’ll probably see loose flour or tiny bits of dough at the bottom of the bowl. Drizzle the water here and use your fork to mix the dough and water together.
- Now, use your hands to gather all the small bits of dough into a big lump. This may take 2 or 3 minutes. Add a tiny drizzle of water only if there’s a lot of dry flour after a few minutes of gathering the dough.
Rest and Knead the Dough
- Cover the bowl with a damp towel or silicone lid, and let the dough rest for 30 minutes. This will give time for the dough to hydrate more before you start kneading it.
- Take the lump of dough out of the bowl and knead it on a surface for 6 to 7 minutes. You shouldn’t need to flour the work surface for this as the dough is pretty dry. The dough will feel pretty stiff, and that’s okay. Once you finish kneading, the ball of dough should feel much smoother than when you first started kneading the dough.
- Place the ball of dough back into the bowl, cover it, and let it rest for another 15 to 20 minutes. This will allow the gluten to relax before you make the noodles.
Cut Dough Into Noodles
- I highly recommend using a pasta machine or a pasta attachment with a stand mixer to cut the noodles. Because the dough is so stiff, it is difficult to roll out the dough into a thin sheet.
- Divide the dough into 4 equal pieces, about 150 to 155 grams each. Flour your work surface. Shape each piece of dough into an oval shape. Then, roll them out into oval discs of about 4 inches by 6 inches, and 1/4 to 1/2 inch thick. Dust both sides of these discs with flour.
- Turn your pasta machine to the thickest setting and feed the dough through the pasta machine twice. Then, turn the dial on the pasta machine to the next setting (which should be thinner) and roll out the pasta once. Continue turning the dial to the next setting and rolling out the sheet of noodle until you get a pretty thin sheet. If you hold the sheet of pasta to the light, you can start to see light going through it. I usually roll them dough out to the 6 or 7 setting in my pasta machine.
- Depending on your preference, cut out the sheet of dough with the narrow or wide pasta cutter.
- Transfer the noodles to your work surface and sprinkle the noodles generously with flour or starch (see note 1). Shape the noodles into a loose bundle, cover it with a dry towel, and continue rolling out the remaining pieces of dough.
Cook Noodles
- Bring a small pot of water to boil. In general, you don’t salt the water when cooking Chinese noodles. Add half of the noodles to the boiling water. Use a wooden spoon or large chopsticks to stir the noodles for about 15 to 30 seconds to keep the noodles from sticking together. If you are cooking thinly cut noodles like mine in the photos, cook them for 2 to 3 minutes, until the water is at a rolling boil again and the noodles are floating at the top. If you are cooking thicker noodles you may need a few more minutes. (See note 2)
- Drain the noodles. If you are not using the noodles immediately, rinse them with cold water and drain them.
- Cook the remaining noodles in the boiling water. Alternatively, refer to the notes below for more information on how to freeze or store the noodles in the refrigerator.
- You can use the noodles for wonton noodle soup or chow mein. Alternatively, you can toss the noodles with a sauce like the one in this recipe.
Notes
- Plain flour will work but starch will be even better. Because the noodles aren’t made with starch, the starch won’t get absorbed into the noodles as easily.
- The cooking time also depends on how much noodles you’re cooking at once. If you’re cooking 1 bunch of noodles at a time, 2 minutes should be sufficient. If you’re trying to cook all the noodles at once, you’ll need a larger pot of water, and you’ll likely need 1 or 2 more minutes of cooking.
- Making the dough ahead: Wrap the ball of dough in plastic before transferring it to a container to refrigerate. The next day, divide the dough into 4 pieces and roll them out like you would with fresh dough. If the edges of the smaller pieces of dough are feeling crusty, massage the dough with your fingers, and work the crusty bits into the center of the piece before shaping it into an oval and rolling it out.
- Making the noodles ahead: Flour the noodles generously before transferring them to a container to refrigerate. Use the noodles by the next day as they’ll start to change color after that.
- Freezing the noodles: Line a large plate or small baking sheet with parchment paper. Dust the noodles generously with flour or starch and place the noodles on the lined plate or baking sheet. When freezing my noodles, I like shaping the noodles in fairly loose bundles. The noodles will be easier to cook like this. When you are ready to cook the noodles, bring a pot of water to boil and add the frozen noodles to the pot. Cook until the noodles float to the top of the pot with rolling boiling water. This should be 30 seconds to 90 seconds longer than when you cook with fresh noodles.
Nutrition
Disclosure: This post was sponsored by Bob’s Red Mill! To learn more about their products and to get more recipe inspiration, follow them on Instagram or Facebook.


Ramesh says
I love the egg dishes and specially egg noodles.
Love it.
fall guys says
Really a great addition. I have read this great article. Thanks for sharing information about it. I really like that.
bubble shooter says
I am grateful that you uploaded this content. I am a test user for gaming websites in order to ensure that those gaming websites are secure. In the course of my testing, I came across a game that is popular among students and is perfectly safe for everyone to play. The bubble shooter game is a fun game that combines excellent ball shooting with intense feelings. Because of its widespread appeal, players of all ages and genders can be found participating in this game.
Angie says
This recipe doesn’t work. The dough was so crumbly and dry, I added the needed amount of water it was still not binding. I added about half a cup of water plus 1 tablespoon of oil and it was still not rolling into a ball.
moto x3m says
There are so many steps, I think I’ll go to the supermarket and buy it quickly
Uno Online says
This is the best tutorial I have ever seen.
Thank you for the detail instructions.